00198599-02_AI_Vacuumpump_X-Series-S-from-Hxxxx_DE_EN.pdf - 第186页
7 Appendix 7.4 Excerpts from the service manual 186 Assembly Instructions / Montageanleitung SIPLACE X-Series S (from/ab Hxxxx) Option Vacuum Pump 02/2021 7.4 Excerpts from the service manual The following chapters are e…
7 Appendix
7.3 Error message: 30356 Vacuum in holding circuit too low
Assembly Instructions / Montageanleitung SIPLACE X-Series S (from/ab Hxxxx) Option Vacuum Pump 02/2021 185
Procedure
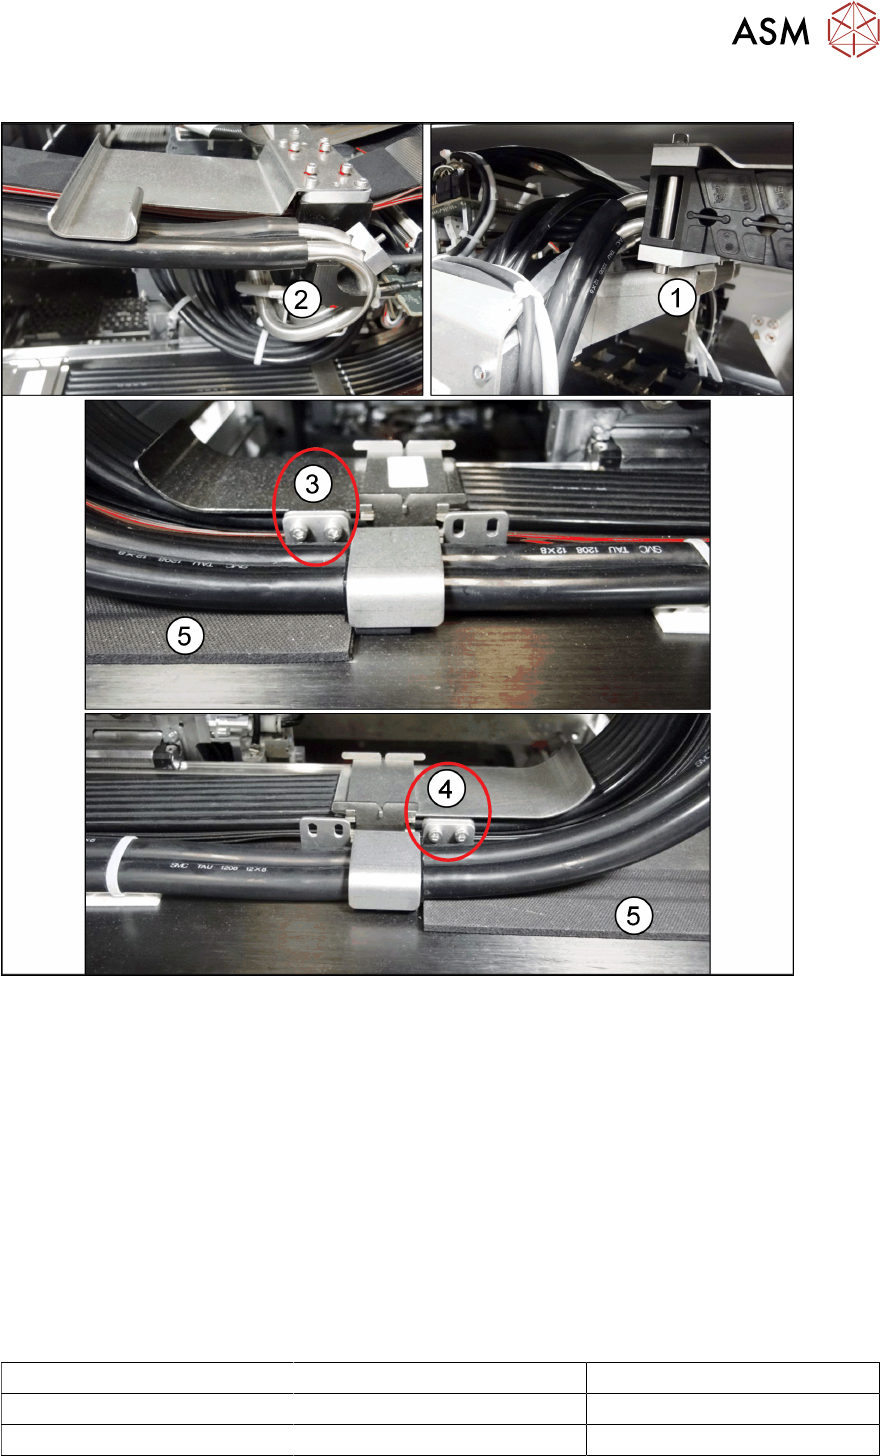
Fig.91: Assembly
► Remove the old tube set between Y trailing cable and connection tube vacuum distributor X
axis. Remove the holder at the X trailing cable.
► The duo tube is fixed with an adhesive tape in the center. Plug the 500mm side of the duo
tube(B)
into the tube(2) for the head vacuum distributor.
► Fix the duo tube at the X trailing cable using the stabilizer. Depending on the gantry, there are
two assembly positions.
At gantries 2 and 4 on SIPLACE X4iS machines, the stabilizer is mounted as shown in fig-
ure(4)
, at all other gantries of the X4S, it is mounted as shown in figure(3).
The adhesive tape is located in the center below the stabilizer.
► Glue the foam rubber(5) to the gantry as shown in figures(3) and (4) so that the duo tube can
roll on it when the X-axis is moving.
► The side(A) is 630mm long and must be adapted to the gantry, if required. Use the snipe
nose pliers for this if possible.
Gantry 1 + 3 Gantry 2 + 4
X4S 540 630
X4iS 540 530
► Plug the "shortened" side of the tube(A) into the tube connection of the Y trailing cable(1).
Use cable ties to fix the tube at the gantry.
7 Appendix
7.4 Excerpts from the service manual
186 Assembly Instructions / Montageanleitung SIPLACE X-Series S (from/ab Hxxxx) Option Vacuum Pump 02/2021
7.4 Excerpts from the service manual
The following chapters are excerpts from the service manual. For more information, refer to the full
service manual for your machine.
7.4.1 Replacing the proportional controller (pressure control valve) (location 4)
Parts
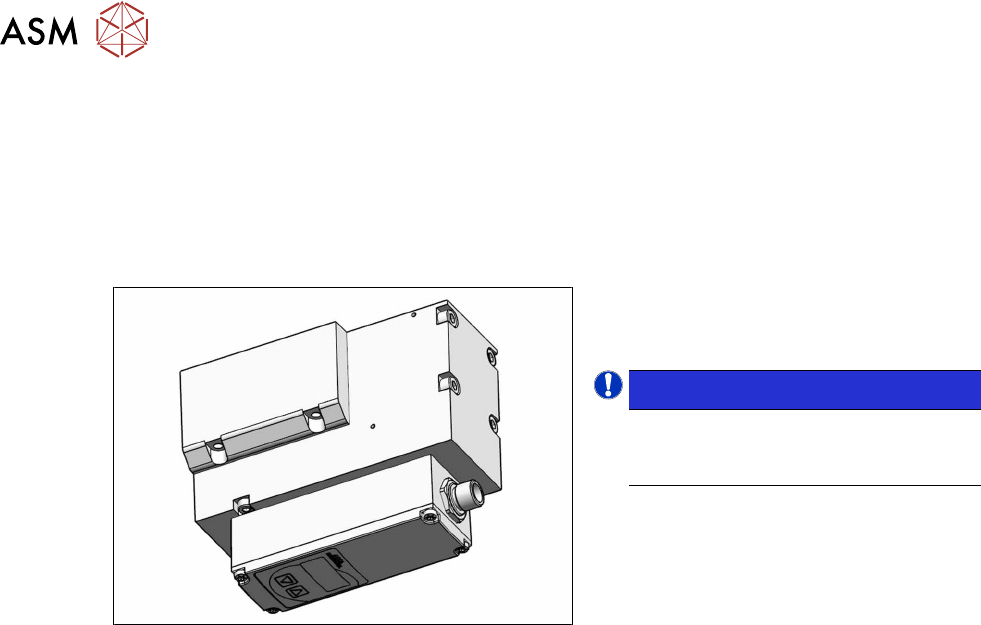
Fig.92: Proportional controller [03152704‑xx] (version2)
●
Proportional controller Sentronic-LP
[03152704Sxx] (replaces
[03065425‑xx])
NOTICE!
The proportional controller is supplied
with the latest parameters preset. Sub-
sequent programming is not possible.
.
●
Adapter plate, top [03136076‑xx]
●
Adapter plate bottom [03138952‑xx]
●
In vacuum mode, when only one proportional controller is fitted:
Sealing plate for prop. valve (with O-rings) [03113039-xx]
●
3x ISO4762-M4x55-A2–70 [03147182‑xx] (contained in [03152704Sxx])
(replaces 3x ISO4762-M4x70-A2-70 [03082432-xx] for the old proportional controller
[03065425‑xx])
Equipment and tools
●
Isoflex Topas NCA 52, can 1kg [00328369‑xx]
or
Isoflex Topas NCA 52, tube 50 g [00330850‑xx]
●
Loctite 241 [02101037‑xx]
You might require additional documents:
●
Assembly instructions "Option Vacuum Pump SIPLACE X-Series S from Hxxxx " [DEEN:
00198599‑xx]
7 Appendix
7.4 Excerpts from the service manual
Assembly Instructions / Montageanleitung SIPLACE X-Series S (from/ab Hxxxx) Option Vacuum Pump 02/2021 187
Overview
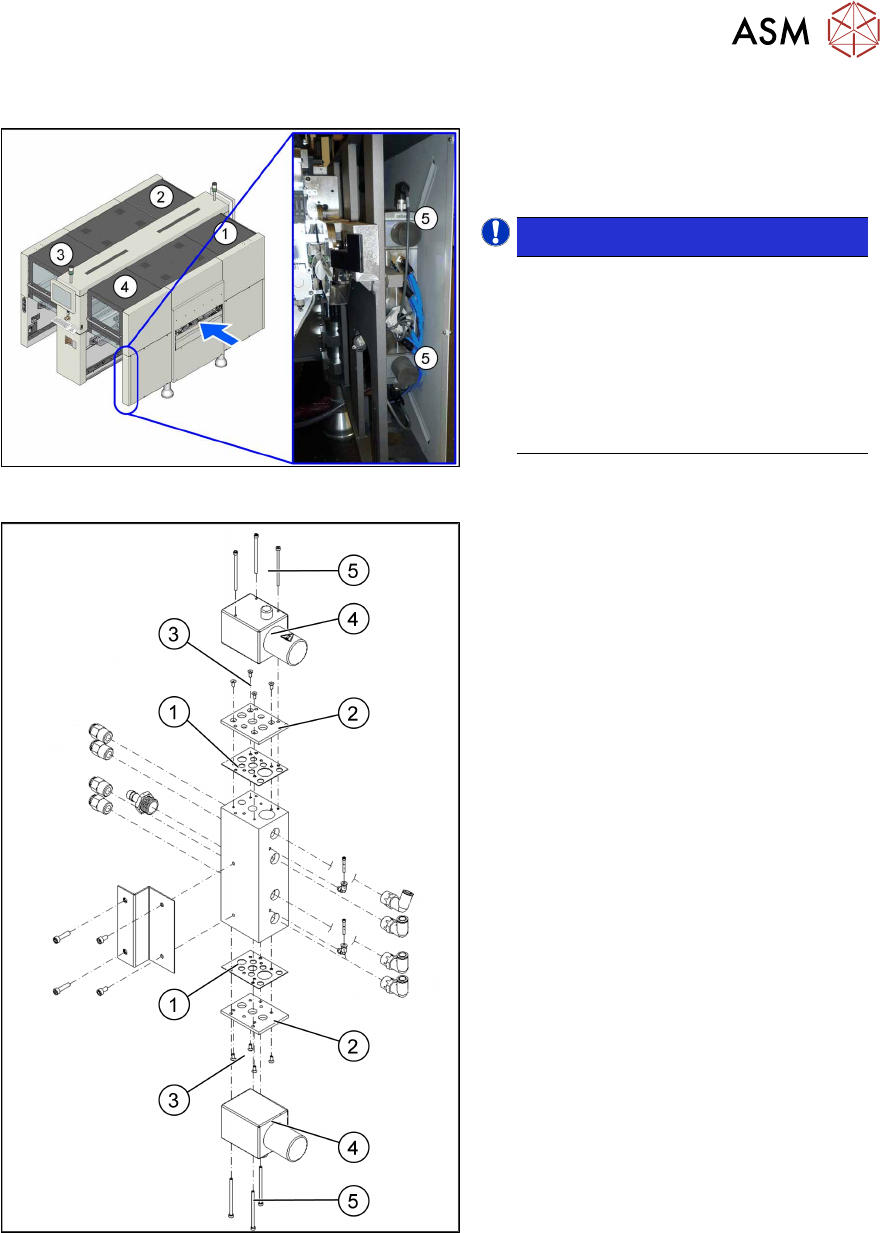
Fig.93: Overview proportional controller (version 1)
1. to 4.: Location 1 to 4
5.: Proportional controller top and bottom
NOTICE!
Only one proportional controller is fit-
ted for vacuum pump mode (all
heads).
When converting to compressed air
mode (Twin and CPP), you need to fit
a second proportional controller.
Also read the assembly instructions for
the vacuum pump.
.
Fig.94: Overview proportional controller (version1)
Version 1:
1. Sealing adapter plate proportional con-
troller [03083211‑xx]
2. Adapter plate proportional controller
3. Fastening screws for adapter plate
Torque: 2.5 – 3.0Nm
4. Proportional controller
5. Fastening screws for proportional con-
troller
Torque: 2.0 – 2.5Nm