00198599-02_AI_Vacuumpump_X-Series-S-from-Hxxxx_DE_EN.pdf - 第195页
7 Appendix 7.4 Excerpts from the service manual Assembly Instructions / Montageanleitung SIPLACE X-Series S (from/ab Hxxxx) Option Vacuum Pump 02/2021 195 Fig.107: Hold circuit 1 Hold circuit (Holding circuit vacuum uni…
7 Appendix
7.4 Excerpts from the service manual
194 Assembly Instructions / Montageanleitung SIPLACE X-Series S (from/ab Hxxxx) Option Vacuum Pump 02/2021
7.4.6 SIPLACE C&P20 A/M/P
7.4.6.1 Replacing the holding circuit/aperture ring
NOTICE
Description example
The replacement of the holding circuit (Venturi mode) and aperture ring (vacuum pump
mode) is identical. The following section describes the replacement, using the example of
the aperture ring. Any relevant differences will be mentioned explicitly.
Parts
●
Holding circuit vacuum unit [03005123Sxx]
or
Orifice plate complete for SIPLACE C&P20P [03116883Sxx] (replaces:[03108716‑xx])
●
O-ring, if needed:
Vacuum mode (aperture ring): O-ring 40x1.5 [03006234-xx]
Compressed air mode (holding circuit): O-ring 50x1.5 [03046689-xx]
Overview
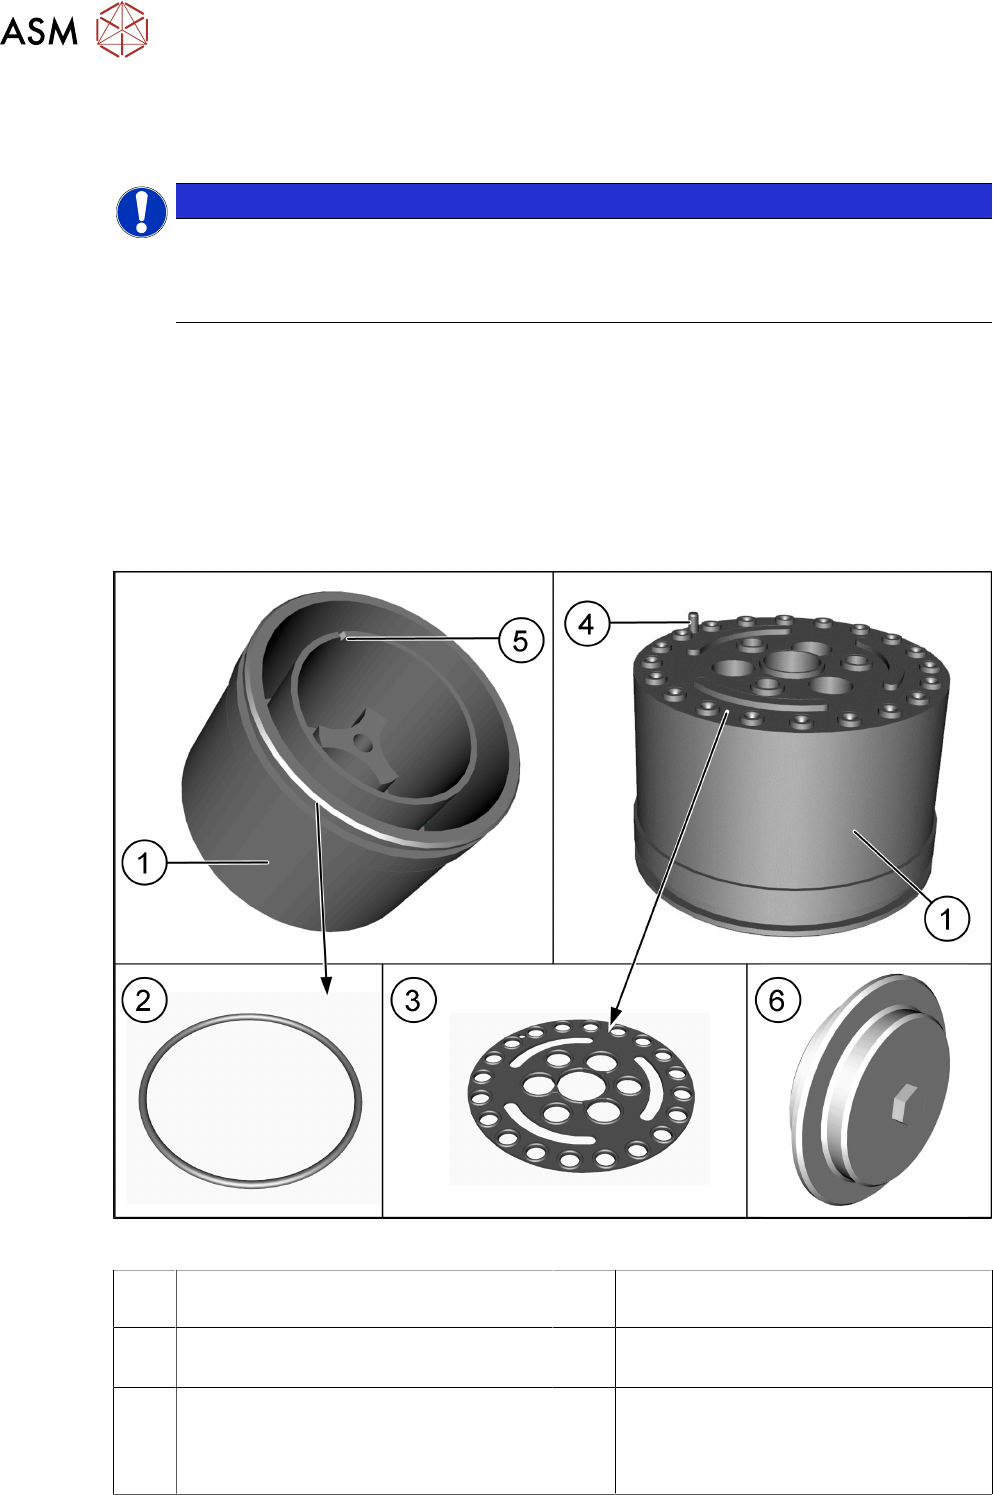
Fig.106: Aperture ring
1 Orifice plate, preassembled for
SIPLACE C&P20P [03116952‑xx])
2 O-ring [03006234-xx]
3 Sealing disc for SIPLACE C&P20P
[03105638-xx]
4 Pins
The pin is located at segment 16
5 Groove – this groove shows the position
of the pin (4)
for easier installation.
6 Cover assembly for SIPLACE C&P20P
[03116882‑xx]
Not shown: sealing gasket U - M4 (for
cover) [03110132‑xx]
7 Appendix
7.4 Excerpts from the service manual
Assembly Instructions / Montageanleitung SIPLACE X-Series S (from/ab Hxxxx) Option Vacuum Pump 02/2021 195
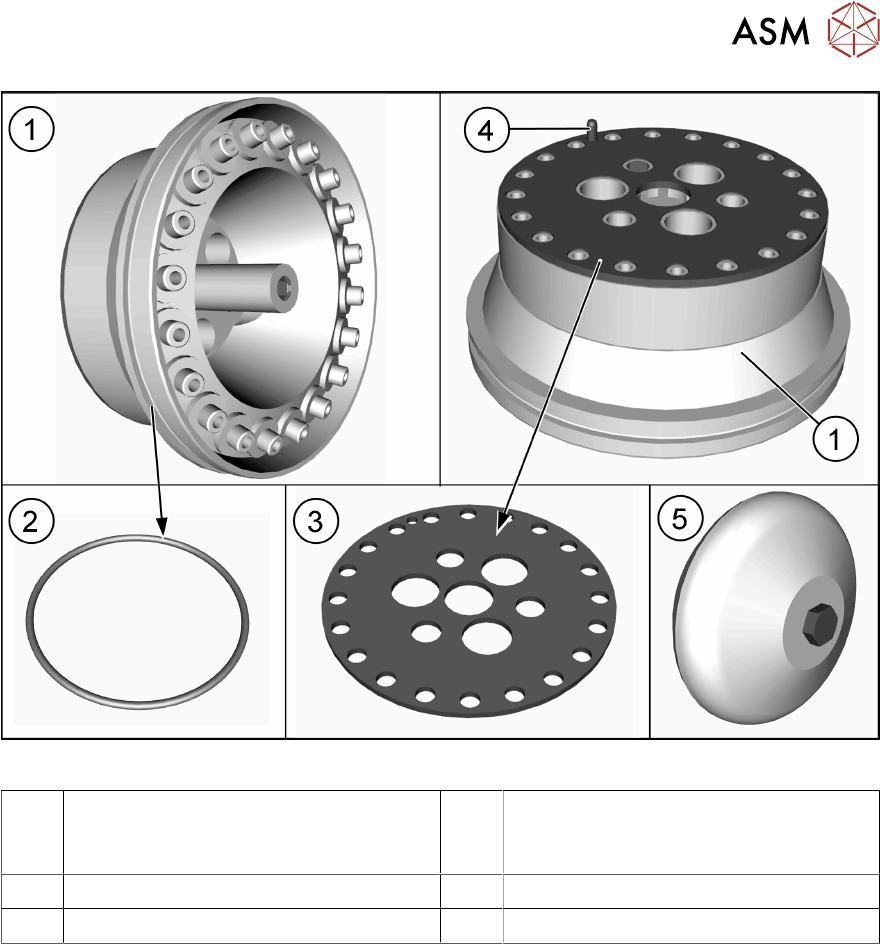
Fig.107: Hold circuit
1 Hold circuit
(Holding circuit vacuum unit
[03005123Sxx])
2 O-Ring [03046689‑xx]
3 Sealing disc [03005120-xx] 4 Pins
5 Silencer
7 Appendix
7.4 Excerpts from the service manual
196 Assembly Instructions / Montageanleitung SIPLACE X-Series S (from/ab Hxxxx) Option Vacuum Pump 02/2021
Torques in vacuum pump operation
Fig.108: Cover and aperture ring
1 Cover
Fastening screw M3x14 (Allen key2.5)
Torque: hand-tight
2 Aperture ring
Three fastening screws M3x10
Torque: 1.3Nm
Torques in Venturi operation
Silencer
Special screw M3 (SW10)
Torque: hand-tight
Holding circuit
Three fastening screws M3x10 (Allen
key2.5)
Torque: 0.25Nm
Preparation
► Remove the head from the machine. For details about removing and fitting the placement
head, refer to the service manual for your machine.
Fit the head on the head mount [03056231‑xx].
► Make sure that the component sensor protective cap is fitted.
Removal
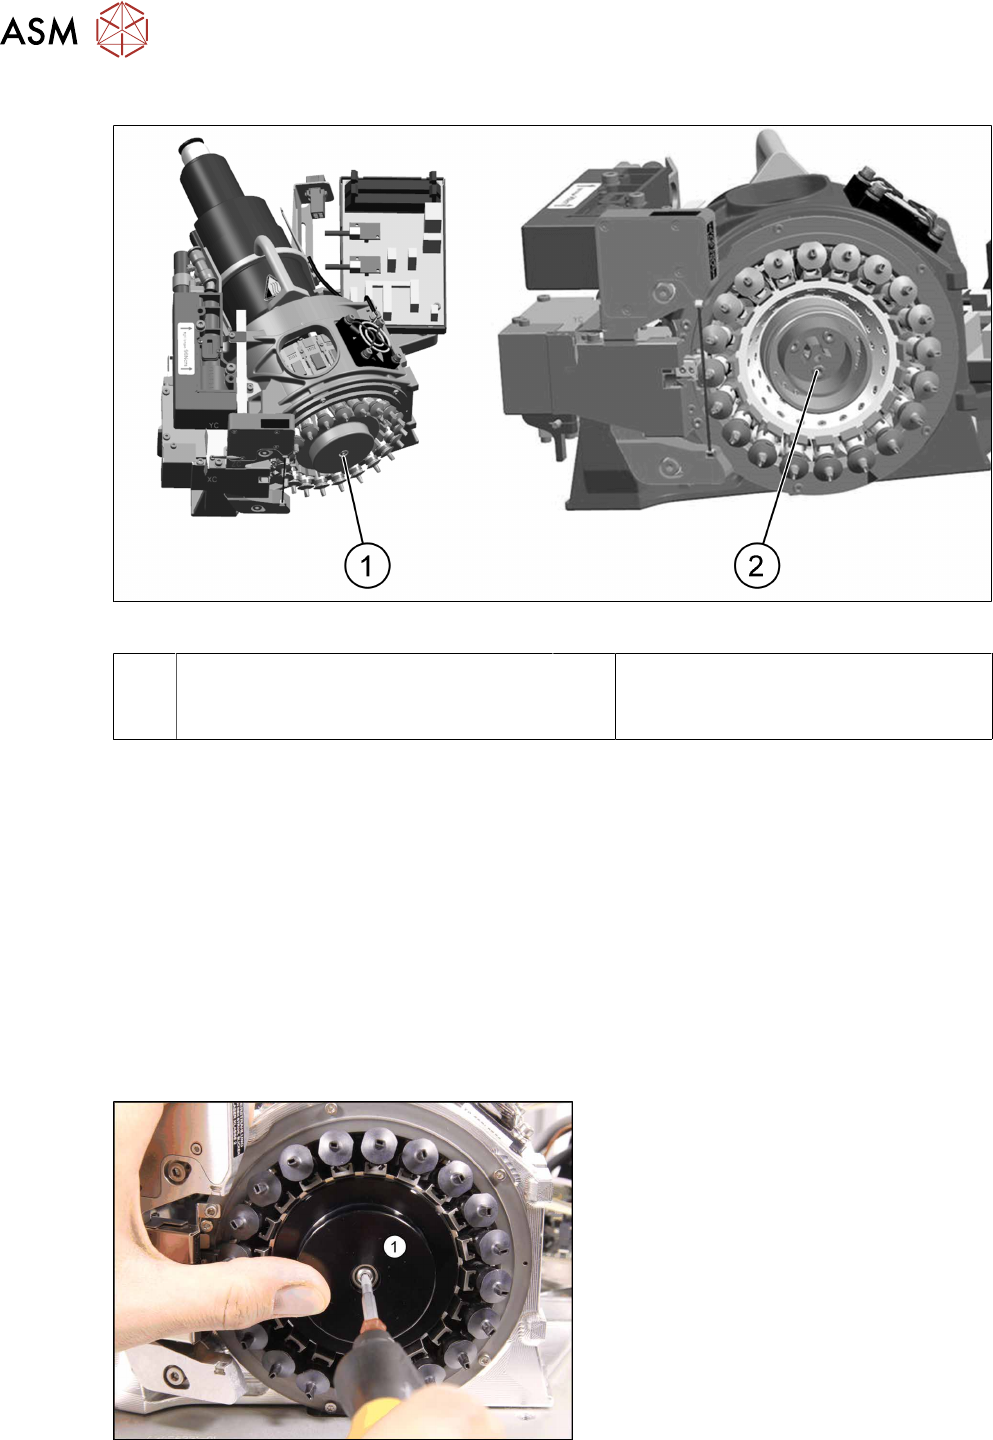
Fig.109: Dismantling the cover
► Remove the screw fastening the
cover(1)
and then take the cover off.