00198599-02_AI_Vacuumpump_X-Series-S-from-Hxxxx_DE_EN.pdf - 第158页
3 Installation 3.5 Installing the vacuum pump 158 Assembly Instructions / Montageanleitung SIPLACE X-Series S (from/ab Hxxxx) Option Vacuum Pump 02/2021 Fig.55: Fixing the vacuum pump in place ► Fix the vacuum pump with…
3 Installation
3.5 Installing the vacuum pump
Assembly Instructions / Montageanleitung SIPLACE X-Series S (from/ab Hxxxx) Option Vacuum Pump 02/2021 157
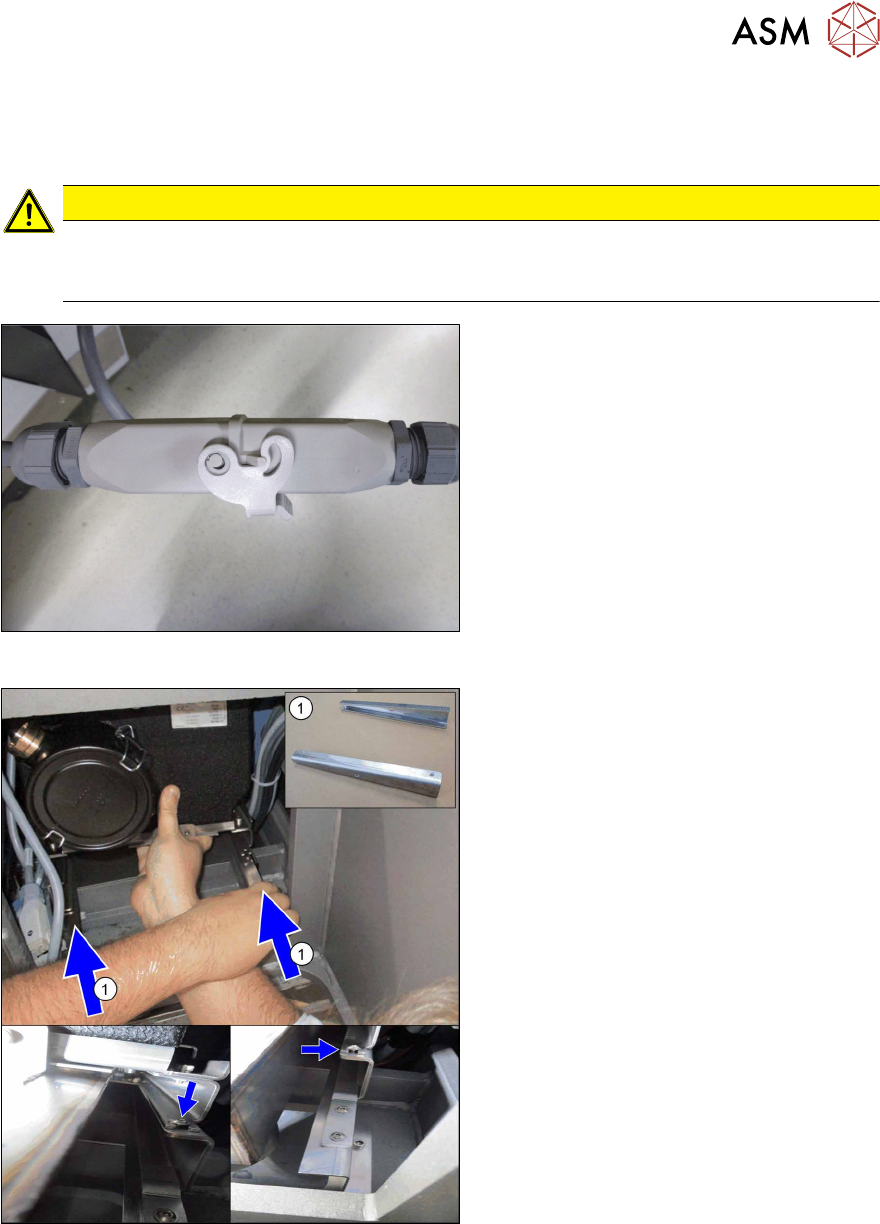
► Fix the cables or tubes to the machine base, above the place where the vacuum pump is to
be fitted.
► Connect the cables and tubes.
CAUTION
Do not bend or trap the cables and tubes
The vacuum pump is pushed so far into the machine that cables could be damaged. Take
care that there are therefore no cables behind the vacuum pump.
Fig.53: Connection to the power supply
► Connect the vacuum pump cable to the
corresponding connection in the
machine (see also 7.2.3.3
"Vacuum
pump connection (old)" [}178]).
Fig.54: Pushing the vacuum pump into the machine
► Push the vacuum pump into the
machine.
► Push the two wedges(1) under the
vacuum pump, on the left
[03217729‑xx] and right [03217729‑xx]
and then fix these into place with two
screws [03028934‑xx] (M4x10).
3 Installation
3.5 Installing the vacuum pump
158 Assembly Instructions / Montageanleitung SIPLACE X-Series S (from/ab Hxxxx) Option Vacuum Pump 02/2021
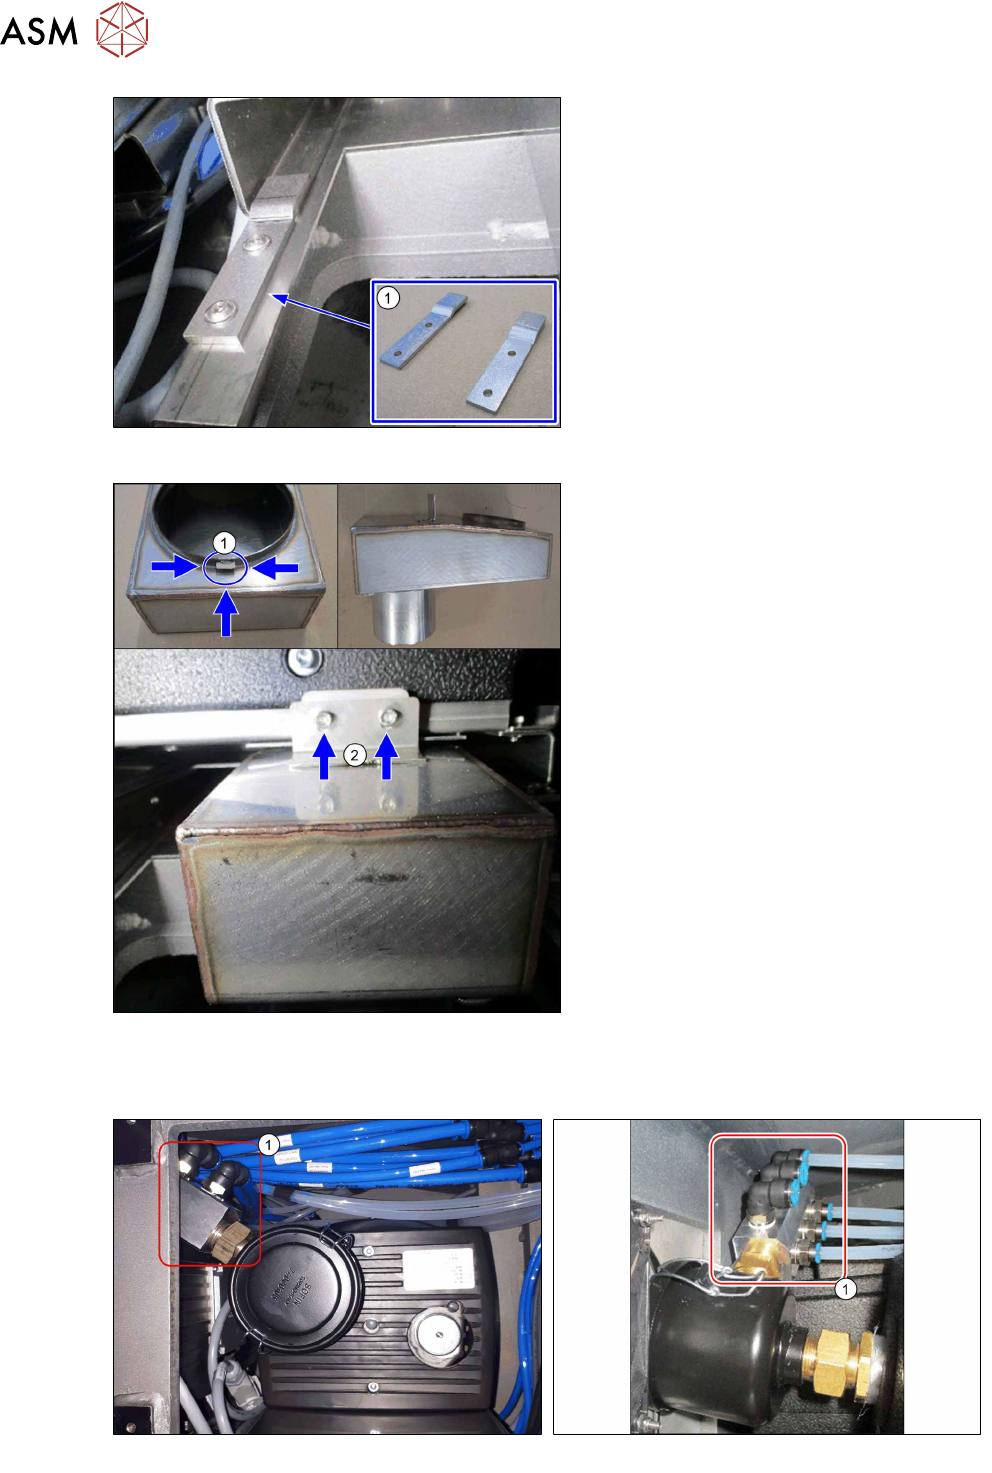
Fig.55: Fixing the vacuum pump in place
► Fix the vacuum pump with the two
fastenings(1)
[03224407‑xx].
Fig.56: Fixing the exhaust duct into place
► Hook(1) the exhaust duct [03223353‑xx]
into place and fix this with two screws(2)
(M5x8).
► Make sure that the vacuum pump is reli-
ably fixed into place. Make sure that the
vacuum pump does not vibrate.
3.5.7 Connecting the vacuum distributor to the pump
Fig.57: Vacuum distributor (old vacuum pump)
Fig.58: Vacuum distributor (new vacuum pump)
► Screw the vacuum distributor (1) to the vacuum pump filter (size 36 fork wrench).
3 Installation
3.5 Installing the vacuum pump
Assembly Instructions / Montageanleitung SIPLACE X-Series S (from/ab Hxxxx) Option Vacuum Pump 02/2021 159
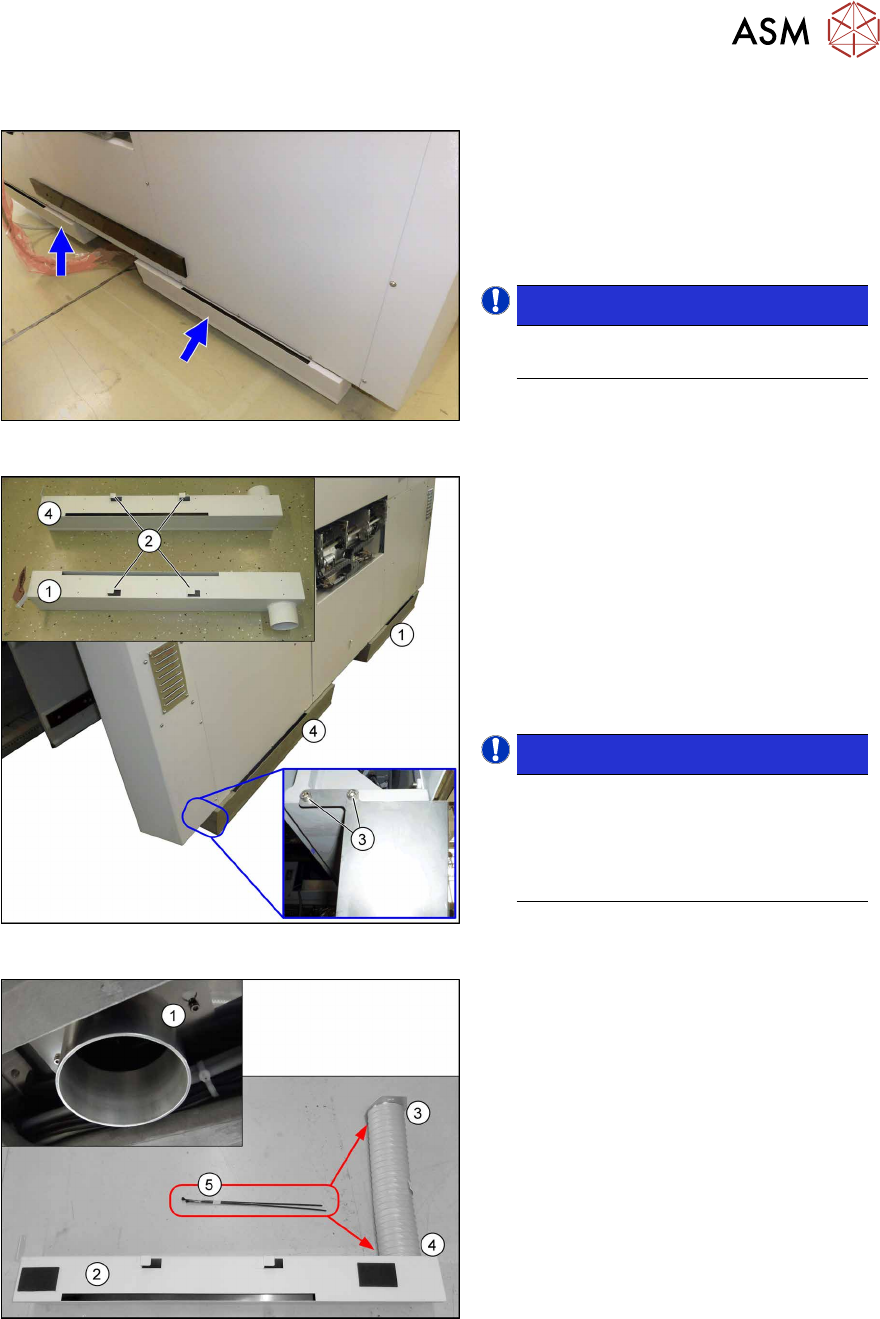
3.5.8 Installing the air box with exhaust air duct
Fig.59: Air box with duct
The "air box with felt left" and "air box with
felt right" are fitted to the bottom of the
machine and exhaust air hoses connect
them to the exhaust ducts of the vacuum
pumps.
One air box is installed per vacuum pump.
NOTICE!
The installation at location 1 and 4 is
identical.
.
Fig.60: Air box installation
1. Air box location 1
2. Hooks at the air boxes
3. Fastening screws
4. Air box location 4
► Hook the air box (using the hooks
provided) to the machine frame and fix
it in place with the two fastening
screws.
NOTICE!
Assignment of hoses
The short tube belongs to location4,
the long tube belongs to location1.
Use cable ties to fasten the tube to the
air box and the flange.
.
Fig.61: Exhaust air duct installation
1. Exhaust duct for vacuum pump
2. Air box
3. Tube end with flange, pre-assembled
with tube clamp – to the vacuum pump
4. Tube end without flange – to the air box
5. Cable ties W=4.8mm L=360mm
TYB-28M
► Fix the tube end with flange at the exhaust duct for the vacuum pump from below.
► Fix the tube end without flange at the air box.