00198599-02_AI_Vacuumpump_X-Series-S-from-Hxxxx_DE_EN.pdf - 第138页
3 Installation 3.4 Converting the SIPLACE C&P20x 138 Assembly Instructions / Montageanleitung SIPLACE X-Series S (from/ab Hxxxx) Option Vacuum Pump 02/2021 3.4.3 Fitting the aperture ring and the vacuum cover Select …
3 Installation
3.4 Converting the SIPLACE C&P20x
Assembly Instructions / Montageanleitung SIPLACE X-Series S (from/ab Hxxxx) Option Vacuum Pump 02/2021 137
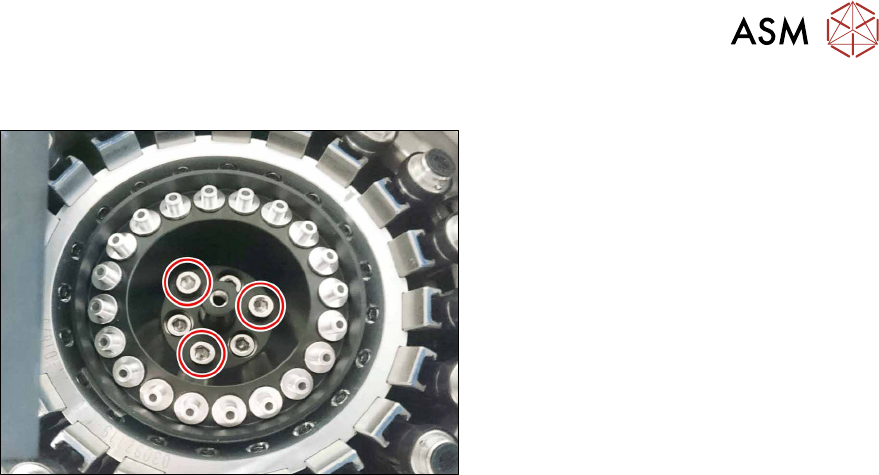
3.4.2 Removing the holding circuit
Fig.15: Holding circuit (example of SIPLACE C&P20P shown)
► Unscrew the three screws and remove
the holding circuit.
See also
2 7.4.7.1 "Replacing the aperture ring/holding circuit/sealing disc" [}201]
2 7.4.6.1 "Replacing the holding circuit/aperture ring" [}194]
3 Installation
3.4 Converting the SIPLACE C&P20x
138 Assembly Instructions / Montageanleitung SIPLACE X-Series S (from/ab Hxxxx) Option Vacuum Pump 02/2021
3.4.3 Fitting the aperture ring and the vacuum cover
Select the relevant section:
●
SIPLACE C&P20 A/M/P/M2:
3.4.3.1 "Fitting the aperture ring and vacuum cover (SIPLACE C&P20A/M/P/M2)" [}138]
●
SIPLACE C&P20 P2:
3.4.3.2 "Fitting the aperture ring and vacuum cover (SIPLACE C&P20 P2)" [}140]
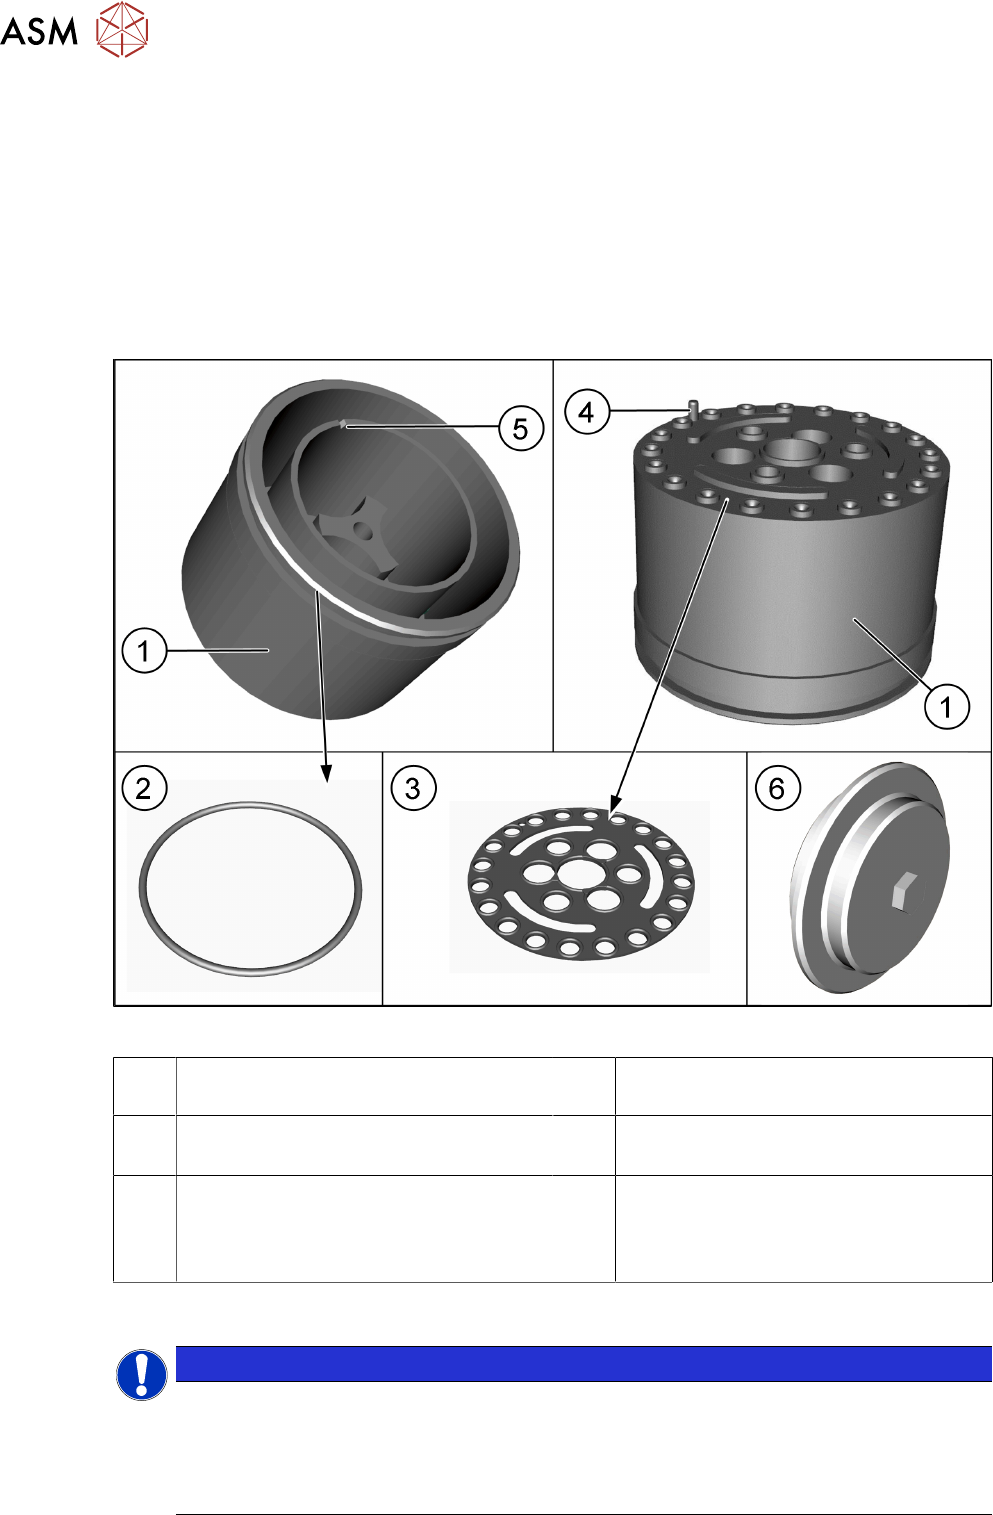
3.4.3.1 Fitting the aperture ring and vacuum cover (SIPLACE C&P20A/M/P/M2)
Overview
Fig.16: Aperture ring
1 Aperture ring, preassembled for
SIPLACE C&P20P [03116952‑xx])
2 O-ring [03006234-xx]
3 Sealing disc for SIPLACE C&P20P
[03105638-xx]
4 Pins
The pin is located at segment 16
5 Groove – this groove shows the position
of the pin (4)
for easier installation.
6 Cover assembly for SIPLACE C&P20P
[03116882‑xx]
Not shown: sealing gasket U - M4 (for
cover) [03110132‑xx]
Installation
NOTICE
Aperture ring
Before inserting the aperture ring, make sure that the sealing disk [03046345-xx] has been
positioned correctly (orientation) on the aperture ring [03046344-xx].
When inserting the new aperture ring, make sure that the pin engages in the relevant hole
on the star carrier. The aperture ring should remain fixed from alone.
3 Installation
3.4 Converting the SIPLACE C&P20x
Assembly Instructions / Montageanleitung SIPLACE X-Series S (from/ab Hxxxx) Option Vacuum Pump 02/2021 139
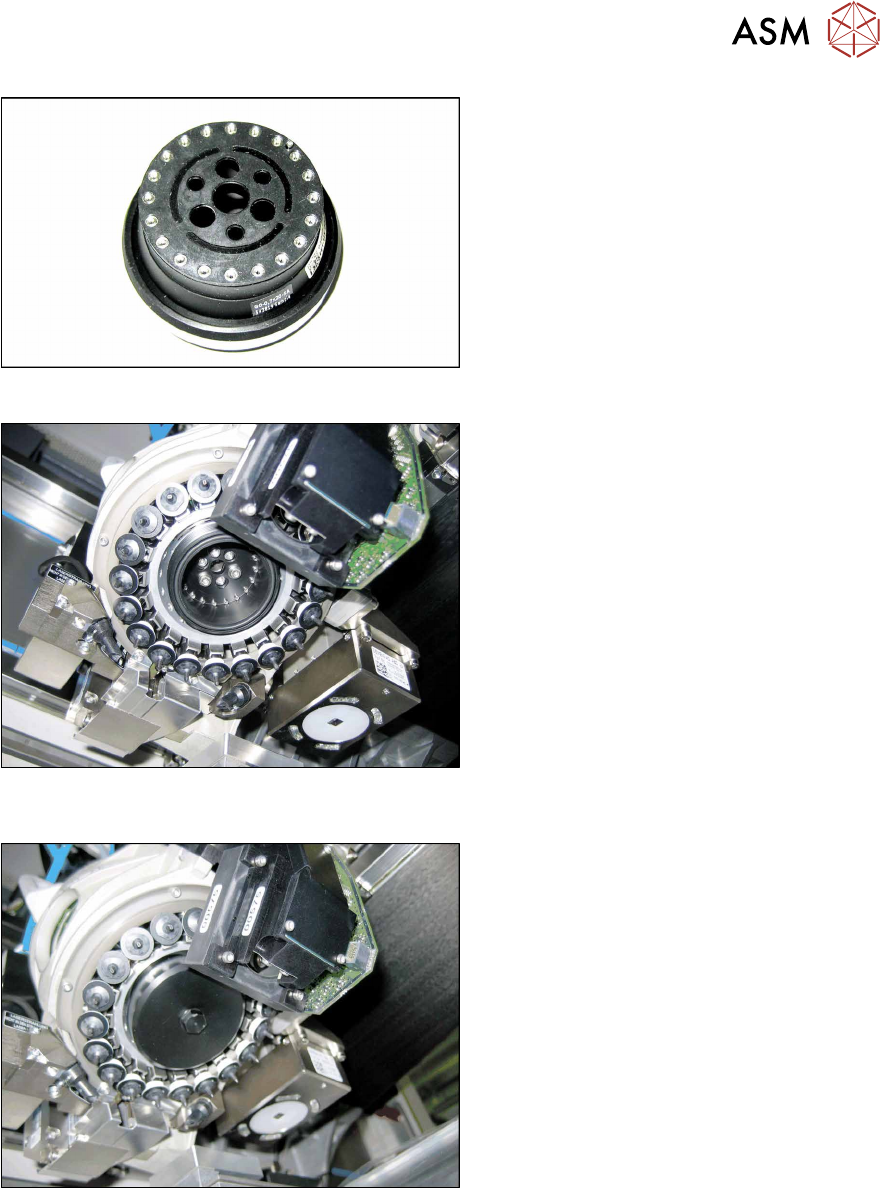
Fig.17: Aperture ring with sealing disk
► When tightening the screws, carefully
take hold of the star near the segment
guidances and hold it on the star car-
rier.
► Make sure you do not damage the anti-
glare shield or the nozzles.
Fig.18: Aperture ring [03046344‑xx] (example of SIPLACE
C&P20A shown)
► Screw the aperture ring tight using the
DIN912-M3x10 screws. Make sure that
it is not distorted.
► Tighten the screws.
Torque:
SIPLACE C&P20A/M: 0.25Nm
SIPLACE C&P20P 1.3Nm
► Check whether the O-ring 42x2 NBR70
has been properly placed into the
groove on the aperture ring.
Fig.19: Cover [03046347‑xx] (example of SIPLACE
C&P20A shown)
► Screw the cover [03046347‑xx] hand-
tight onto the aperture ring.
See also
2 7.4.6.1 "Replacing the holding circuit/aperture ring" [}194]