00198599-02_AI_Vacuumpump_X-Series-S-from-Hxxxx_DE_EN.pdf - 第191页
7 Appendix 7.4 Excerpts from the service manual Assembly Instructions / Montageanleitung SIPLACE X-Series S (from/ab Hxxxx) Option Vacuum Pump 02/2021 191 Removal ► Switch off the machine, disconnect it from the power su…

7 Appendix
7.4 Excerpts from the service manual
190 Assembly Instructions / Montageanleitung SIPLACE X-Series S (from/ab Hxxxx) Option Vacuum Pump 02/2021
7.4.2 Replacing the pressure sensor [03108303-xx]
Parts, equipment and tools
●
Upgrade kit pressure sensor for vacuum C&P20P [03108457‑xx]
Overview
Fig.98: Pressure sensor
NOTICE!
The pressure sensor is only needed
when a vacuum pump and CPx heads
are installed.
In this case, the pressure sensor is es-
sential for operation of the placement
machine.
.
Fig.99: Pressure sensor on the gantry
1. Pressure sensor
2. Base adapter
The pressure sensor is located on the
vacuum distributor of the gantry and is con-
nected to the base (X8) adapter.
7 Appendix
7.4 Excerpts from the service manual
Assembly Instructions / Montageanleitung SIPLACE X-Series S (from/ab Hxxxx) Option Vacuum Pump 02/2021 191
Removal
► Switch off the machine, disconnect it from the power supply and secure it to prevent
unauthorized reactivation. Observe the instructions in section 1.2
"Preparatory work..." [}115].
CAUTION
Switch off the compressed air supply
The compressed air supply must always be switched off for all work on the pneumatic sys-
tem.
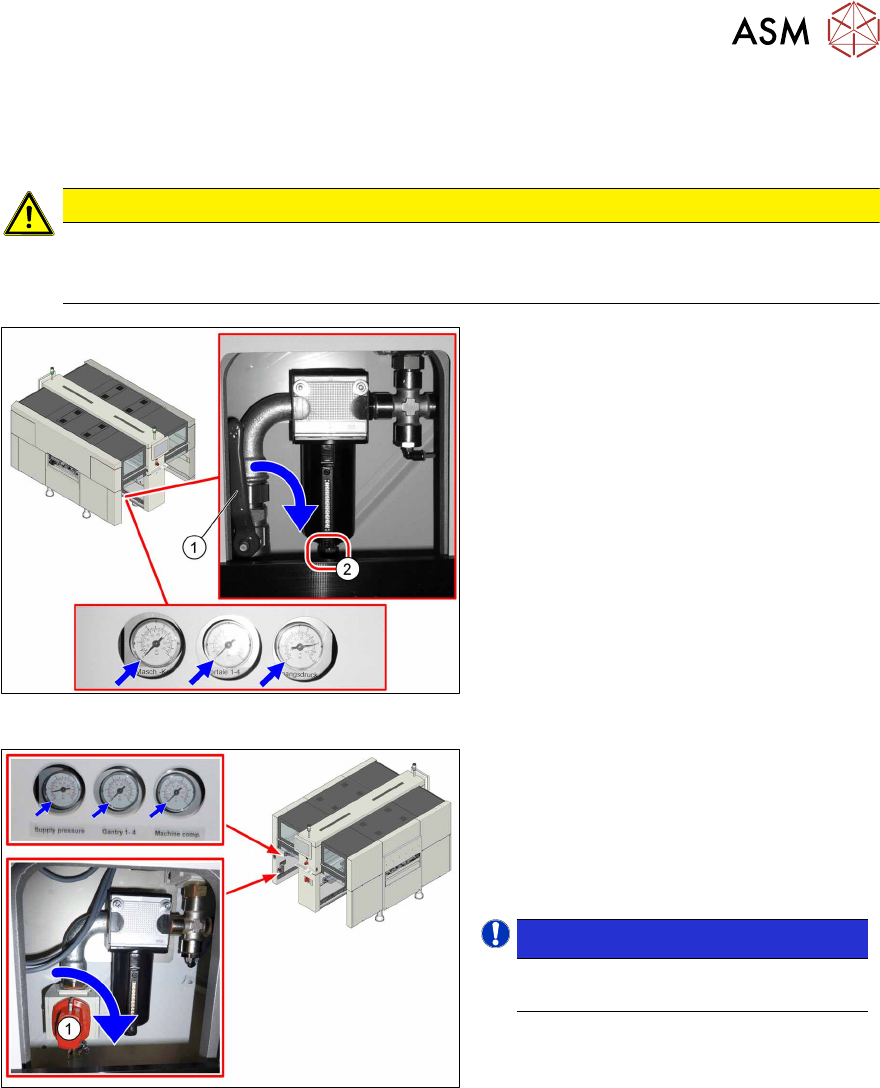
Fig.100: Disabling the compressed air supply (version 1)
Version 1:
► Push the lever (1) for the compressed
air supply down until it is positioned ho-
rizontally.
► Open the screw (2) on the inlet filter to
vent the system. Hold a cloth under-
neath to capture any escaping liquid.
Fig.101: Shutting off the compressed air supply (version 2)
Version 2:
► Push the switch (1) for the compressed
air supply by 90 degrees, until it is posi-
tioned horizontally.
► All pressure gauges must be set to
zero.
NOTICE!
Venting is performed automatically
in this version.
.
► Disconnect the pressure sensor from the vacuum distributor on the gantry.
Installation
► Follow the removal instructions in reverse order for installation.
7 Appendix
7.4 Excerpts from the service manual
192 Assembly Instructions / Montageanleitung SIPLACE X-Series S (from/ab Hxxxx) Option Vacuum Pump 02/2021
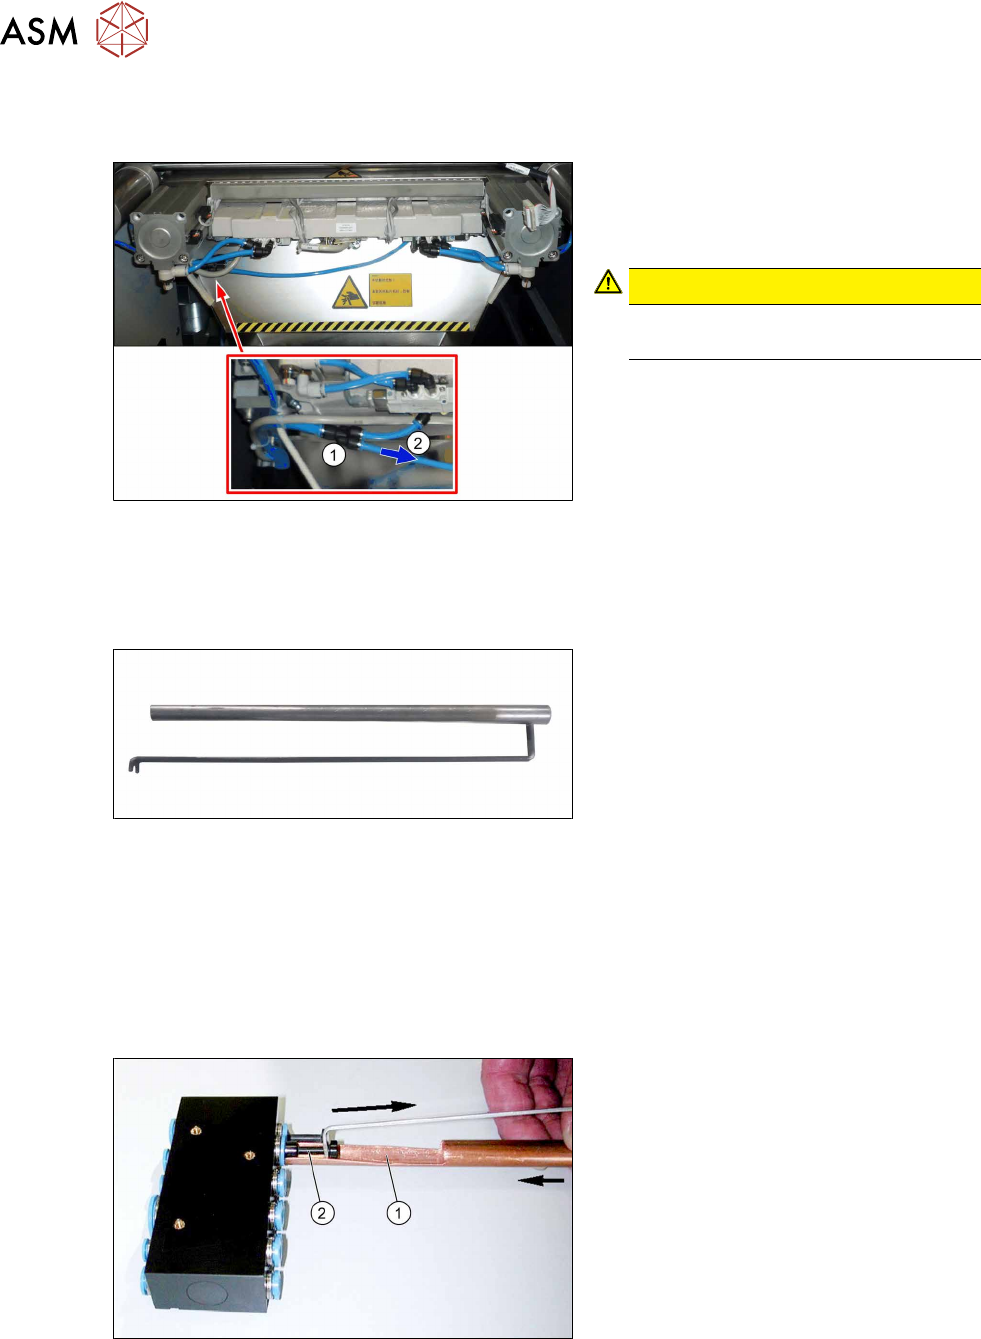
7.4.3 Venting compressed air at the cutter
► Switch off the compressed air supply
Fig.102: Disconnecting the hose
► Carefully pull one of the two small
hoses(2)
of the Y-piece(1).
This enables any compressed air still
present in the system to be released.
CAUTION!
Risk of injury
The hoses could still be pressurized.
.
7.4.4 Handling the hose unlocking tool
Equipment and tools
Fig.103: Unlocking tool
●
Tool set vacuum connection X-Series
(unlocking tool) [03051867‑xx]
Consists of:
– Hose unlocking tool [03047090-xx]
– Unlocking tool for QSC-10H
[03051853-xx]
Usage
► Switch off the compressed air supply
Due to the poor access to the pneumatic distributor, we recommend using the unlocking tool.
With the help of the hose unlocking tool, you can open the unlocking ring for the compressed air
connection. This enables you to remove both the hoses and the blanking plugs (additional tool "Un-
locking tool for QSC-10H" [03051853-xx]).
Fig.104: Handling the unlocking tool
► Use the pipe-shaped tool (1) to open
the unlocking ring (blue here).
► Carefully pull the hose or the blanking
plug(2)
out of the compressed air con-
nection.