00198599-02_AI_Vacuumpump_X-Series-S-from-Hxxxx_DE_EN.pdf - 第168页
4 Replacement 4.2 Replacement of old vacuum pump with new one 168 Assembly Instructions / Montageanleitung SIPLACE X-Series S (from/ab Hxxxx) Option Vacuum Pump 02/2021 4.2.2 Removal/installation Also observe the relevan…
4 Replacement
4.1 Spare parts
Assembly Instructions / Montageanleitung SIPLACE X-Series S (from/ab Hxxxx) Option Vacuum Pump 02/2021 167
4 Replacement
4.1 Spare parts
Replacement of spare parts follows the same procedure as that for fitting these parts.
Also observe the relevant chapter in section . 3 "Installation" [}131].
Some of the spare parts available are listed here:
Designation Item no.
Becker VX 4.25 IE3 vacuum pump with cable 03212135Sxx
Power circuit breaker 3RV20 3-pin 2.2-3.2A 03158435-xx
Cover fan, one part 03052317-xx
For information about other spare parts, please refer to the catalog of parts.
See also
2 6 "Maintenance and service" [}171]
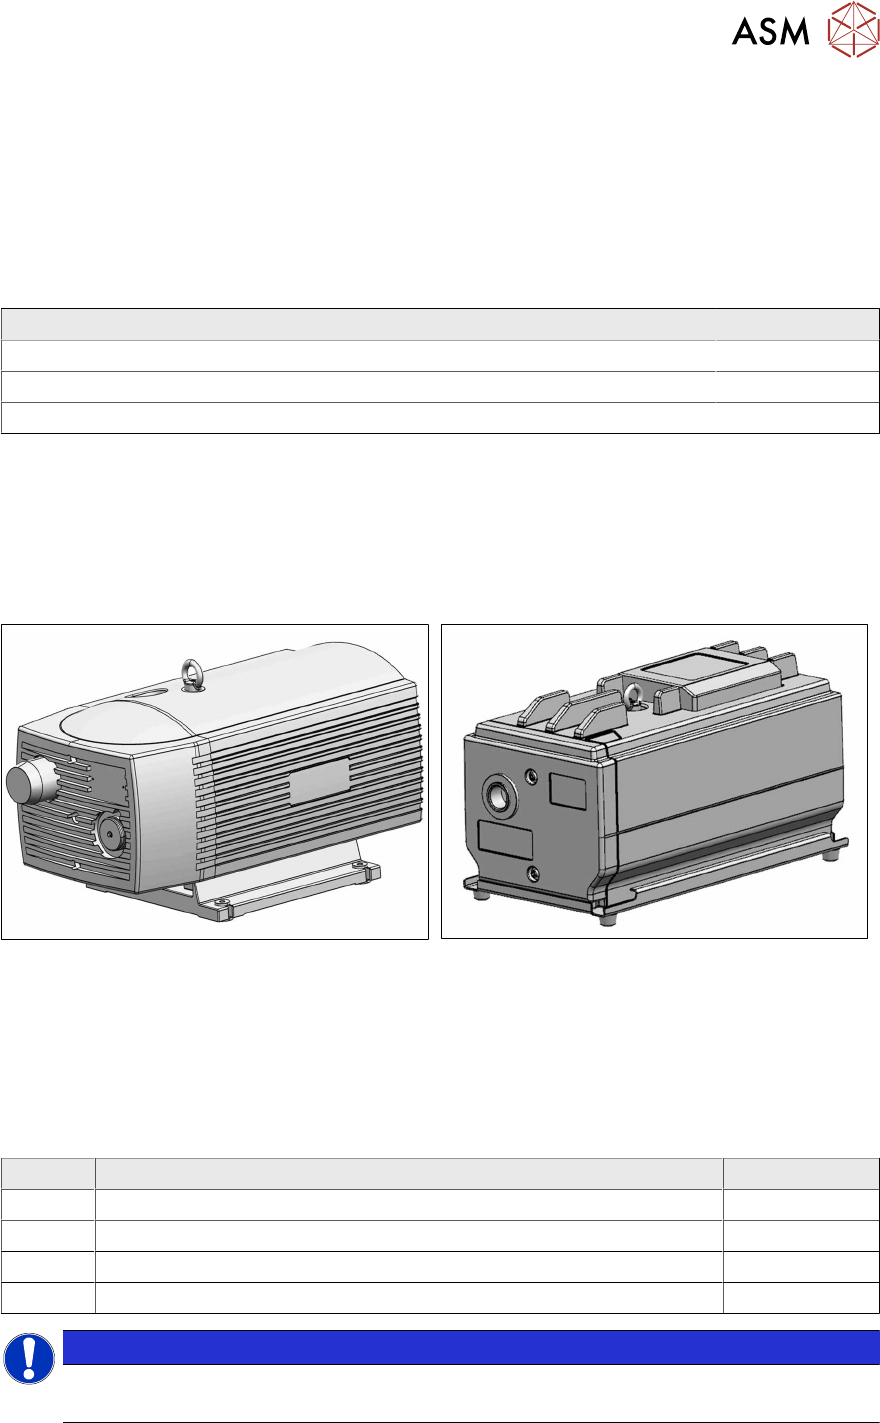
4.2 Replacement of old vacuum pump with new one
Fig.74: Old vacuum pump VX 4.25
Fig.75: New vacuum pump VX 4.25 IE3
When replacing an old vacuum pump [03128463‑xx] with a new one [03212135‑xx], observe the
instructions in the following chapters.
4.2.1 Parts required
Also observe section 2.1 "Scope of delivery" [}122].
To replace an old vacuum pump with a new one, you require the following parts:
Quantity Designation Item no.
Vacuum pump control SMPS 03218396Sxx
Vacuum pump IE3 1 X-Series S V2 03224400-xx
Vacuum pump IE3 2 X-Series S V2 03224402-xx
Conversion kit 110V for vacuum pump IE3 03224408Sxx
NOTICE
Replacing both pumps
If two old pumps are fitted, you will need to replace ´both when converting "old for new".
4 Replacement
4.2 Replacement of old vacuum pump with new one
168 Assembly Instructions / Montageanleitung SIPLACE X-Series S (from/ab Hxxxx) Option Vacuum Pump 02/2021
4.2.2 Removal/installation
Also observe the relevant chapter in section 3 "Installation" [}131].
► Remove the old vacuum pump, including all metal parts attached to it.
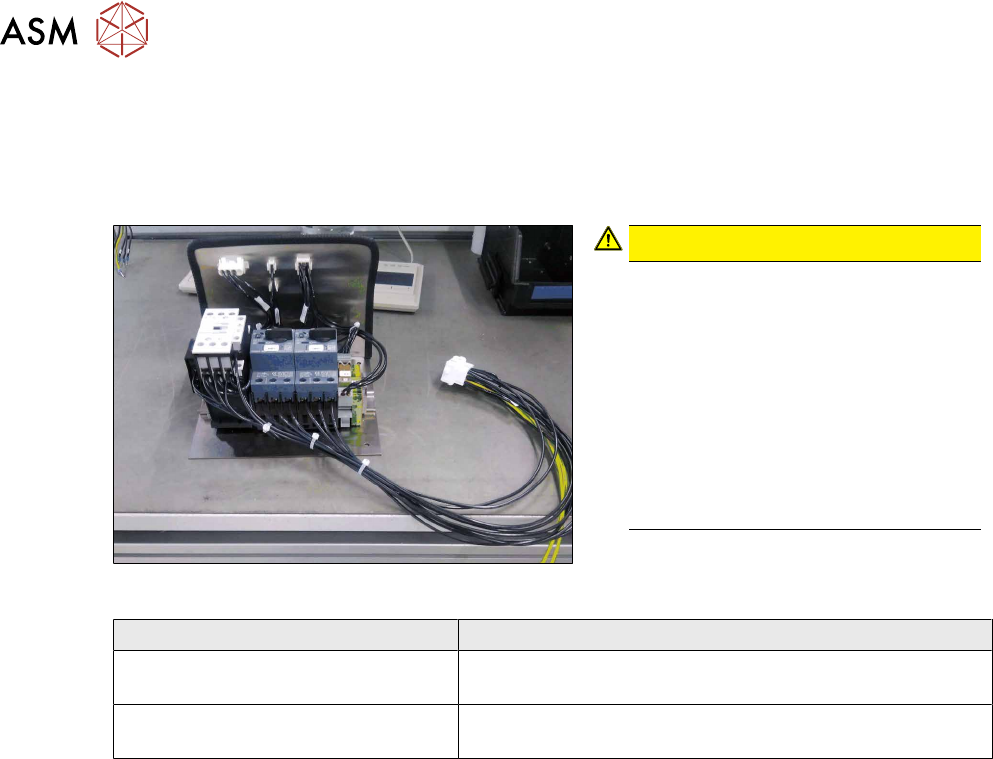
► Dismantle the old "vacuum pump control SMPS X-SeriesS" [03121065‑xx].
Fig.76: Vacuum pump control SMPS
CAUTION!
Do not replace!
The vacuum pump controls for the old
and new vacuum pump look very sim-
ilar.
Make sure that you use the version de-
signed for the vacuum pump you are
using.
When replacing an old vacuum pump
with a new one, make sure that you al-
ways replace the vacuum pump con-
trol as well!
.
Vacuum pump Correct version of the QM1 assembly
Old Becker VX 4.25 vacuum pump
with cable [03128463‑xx]
Vacuum pump control SMPS X-Series S [03121065‑xx]
New Becker VX 4.25 IE3 vacuum
pump with cable [03212135‑xx]
Vacuum pump control SMPS [03218396‑xx]
► Fit the new "vacuum pump control SMPS" [03218396‑xx].
► Fit the "conversion kit for 110V vacuum pump IE3" [03224408-xx].
► Fit the new vacuum pump.

5 Converting to compressed air supply
Assembly Instructions / Montageanleitung SIPLACE X-Series S (from/ab Hxxxx) Option Vacuum Pump 02/2021 169
5 Converting to compressed air supply
Perform the following steps for a conversion from vacuum operation to compressed air operation.
For details, read the relevant installation chapters in this manual.
●
Converting the SIPLACE C&P20x
●
Dismantling the used tape chute
●
Removing the connector unit box
●
Replacing the cooling plate
●
Removing the exhaust air disposal
●
Removing the cap if required
●
Removing the exhaust duct
●
Removing the vacuum pump
●
Removing the supply cables
●
Rewiring the I/O distributor
●
Converting the hoses, installing the proportional controller, if required
●
Converting the gantries
●
Installing the used tape chute