00198599-02_AI_Vacuumpump_X-Series-S-from-Hxxxx_DE_EN.pdf - 第146页
3 Installation 3.5 Installing the vacuum pump 146 Assembly Instructions / Montageanleitung SIPLACE X-Series S (from/ab Hxxxx) Option Vacuum Pump 02/2021 3.5.1.2 Preparing the vacuum pump (new) Fig.32: Condition upon del…
3 Installation
3.5 Installing the vacuum pump
Assembly Instructions / Montageanleitung SIPLACE X-Series S (from/ab Hxxxx) Option Vacuum Pump 02/2021 145
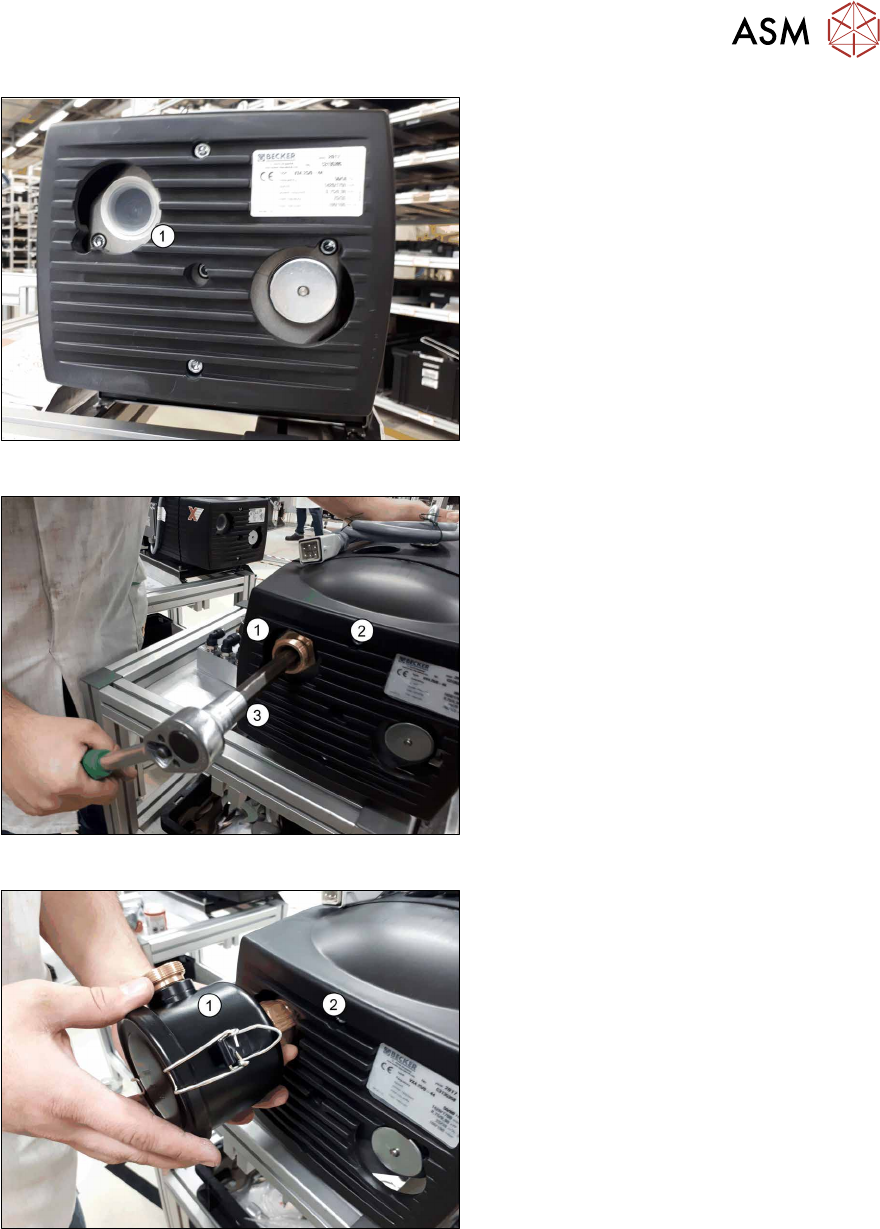
Fig.29: Vacuum pump without double nipple
► Insert the double nipple into the
vacuum pump (1)
.
Fig.30: Screwing the double nipple into place
► Screw the double nipple(1) to the
vacuum pump(2)
using the ratchet(3).
Fig.31: Screwing the filter into place
► Screw the filter(1) to the double
nipple(2)
. Make sure that the connec-
tion of the filter points towards the top
left in a slanted direction.
3 Installation
3.5 Installing the vacuum pump
146 Assembly Instructions / Montageanleitung SIPLACE X-Series S (from/ab Hxxxx) Option Vacuum Pump 02/2021
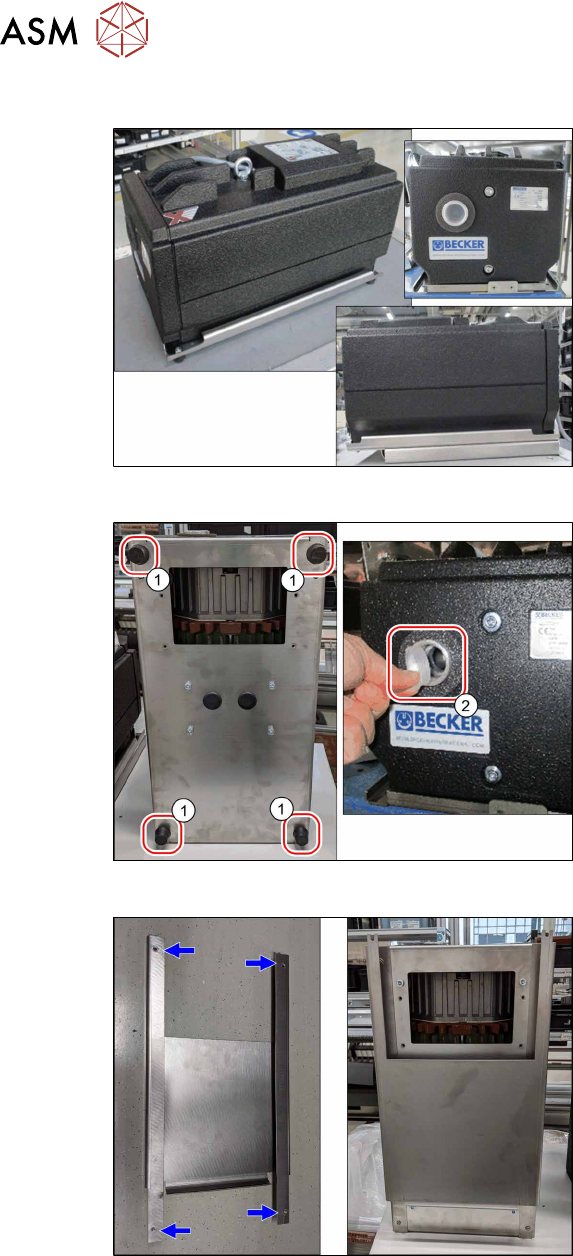
3.5.1.2 Preparing the vacuum pump (new)
Fig.32: Condition upon delivery
Vacuum pump as delivered
Fig.33: Rubber feet and protective cap
► Dismantle the four rubber feet(1).
► Remove the protective cap(2).
Fig.34: Support plate
► Fit the "support plate for vacuum pump
" [03217727‑xx].
To fix it, use:
4x screws M5x10 [03042560‑xx]
4x washers M5 [03064970‑xx].
3 Installation
3.5 Installing the vacuum pump
Assembly Instructions / Montageanleitung SIPLACE X-Series S (from/ab Hxxxx) Option Vacuum Pump 02/2021 147
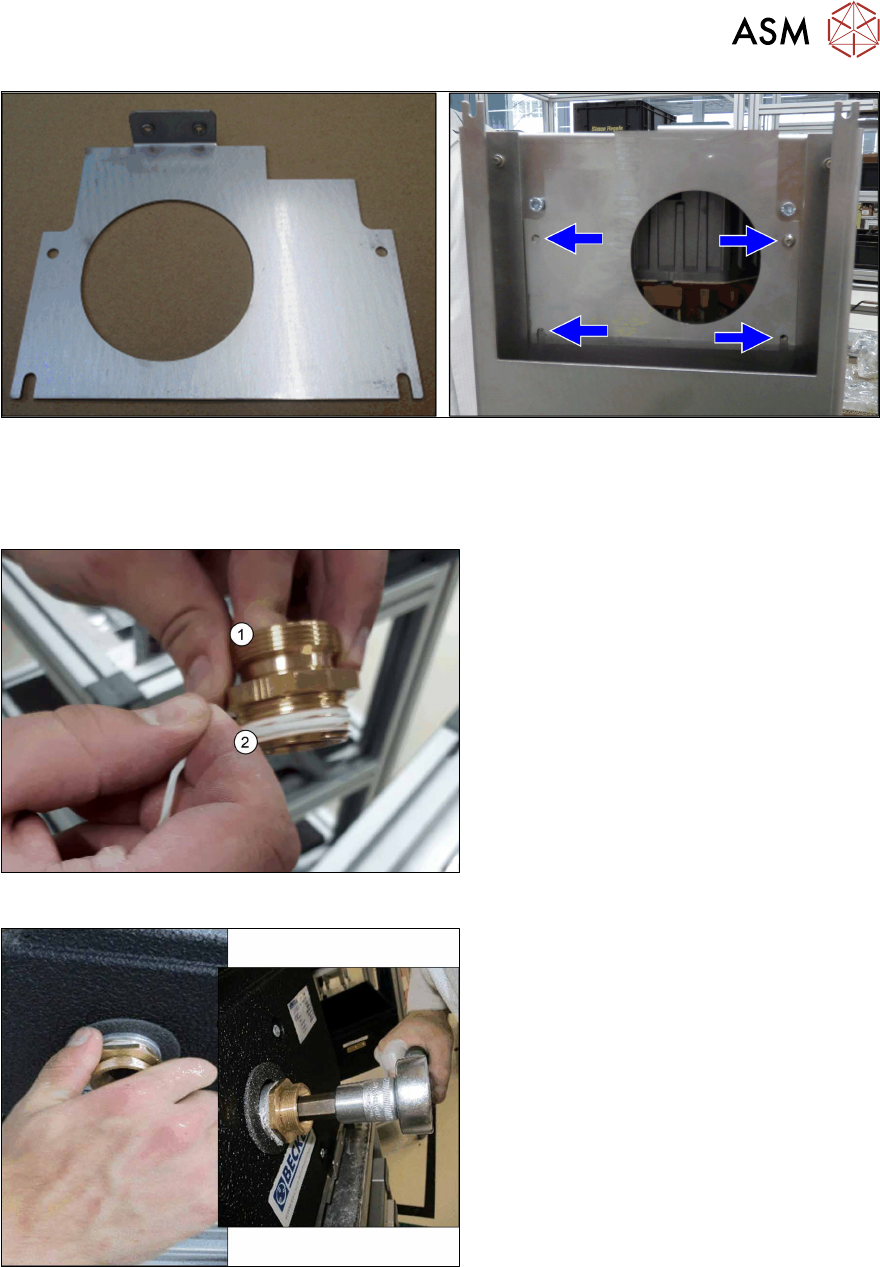
Fig.35: Interface plate
► Fit the "interface plate for vacuum pump" [03223382‑xx] and fix with four screws M5x10
[03042560‑xx].
Fig.36: Double nipple with Teflon tape
► Seal the double threaded nipple(1)
with Teflon tape Loctite 55(2).
Fig.37: Double threaded nipple
► Rotate the double threaded nipple in
the vacuum pump and then tighten this.