00197471-03_Service Manual Internal WPC5_6, EN_01-2019.pdf - 第112页
Service Manual In ternal WPC5 / WPC6 Page 3-112 Removal / Install ation The se nsor for th e saf ety fla p whe n open is loca ted o n the unders ide o f the base p late . See also … . @ 3.5 .1. 4 Loosen the T ension of…
Service Manual Internal WPC5 / WPC6
Page 3-111
3.7.18 Sensor 16 NSM module (WPC6) – Safety Sensor for the Hand Guard
Spare Part
• Safety sensor hand guard [03056990-xx]
Preparations
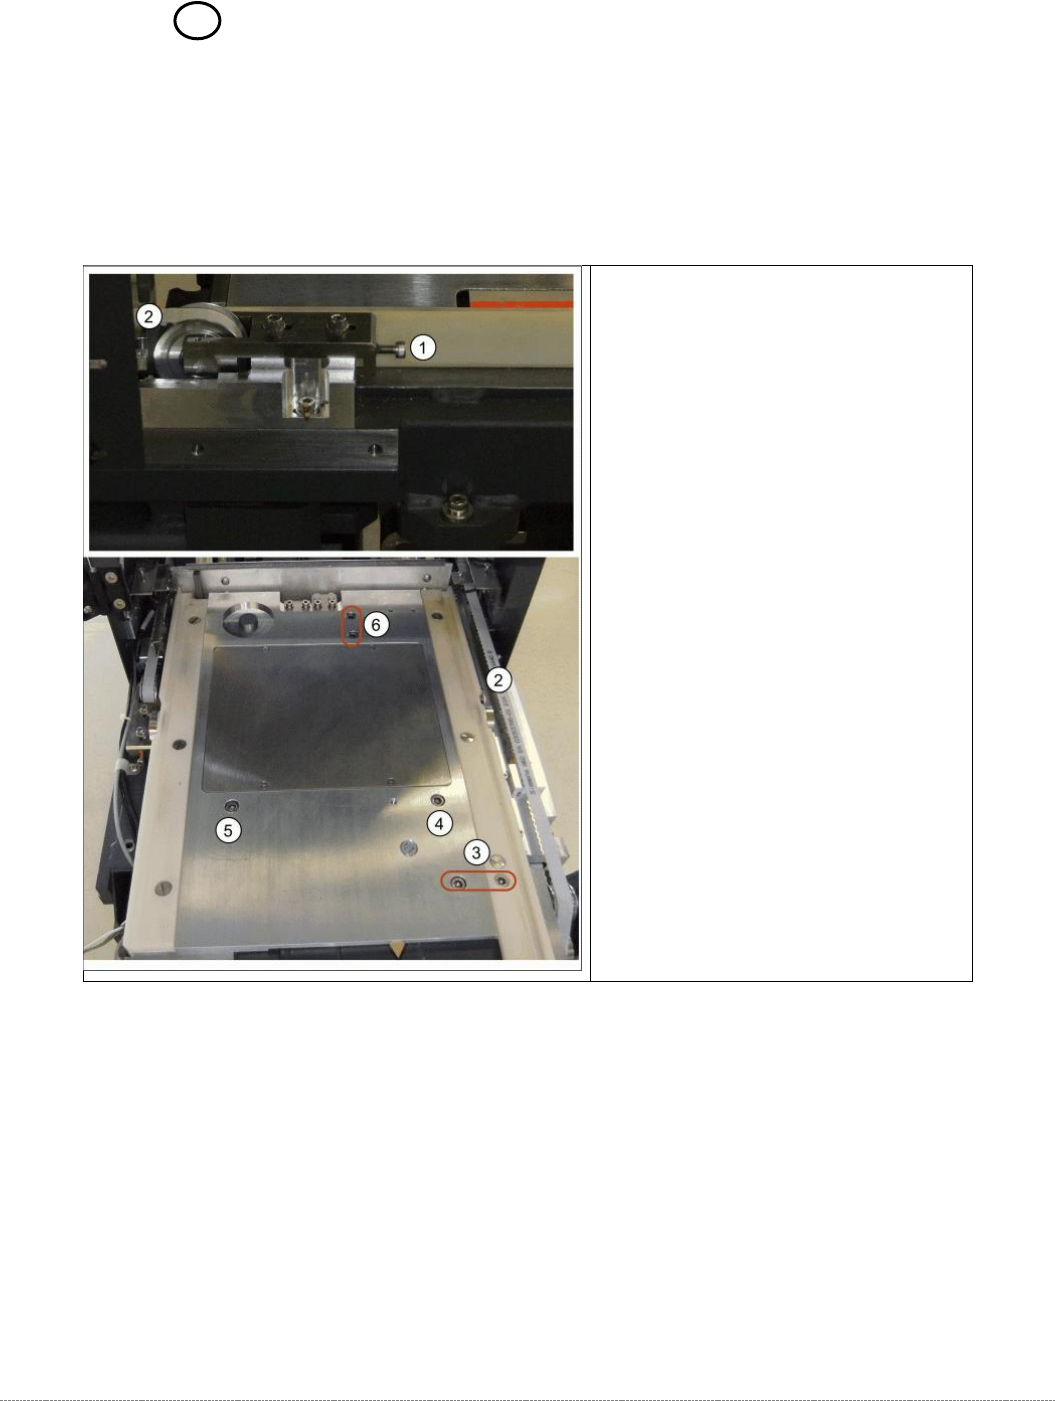
Loosening the belt tension
➢ Loosen the tension of the load axis
drive belt (2) at the tensioning
screw behind the tower (1).
Removing the base plate
➢ Loosen the screws fixing the motor
to the base plate at (3).
➢ Lift off the base plate and turn it
over.
Service Manual Internal WPC5 / WPC6
Page 3-112
Removal / Installation
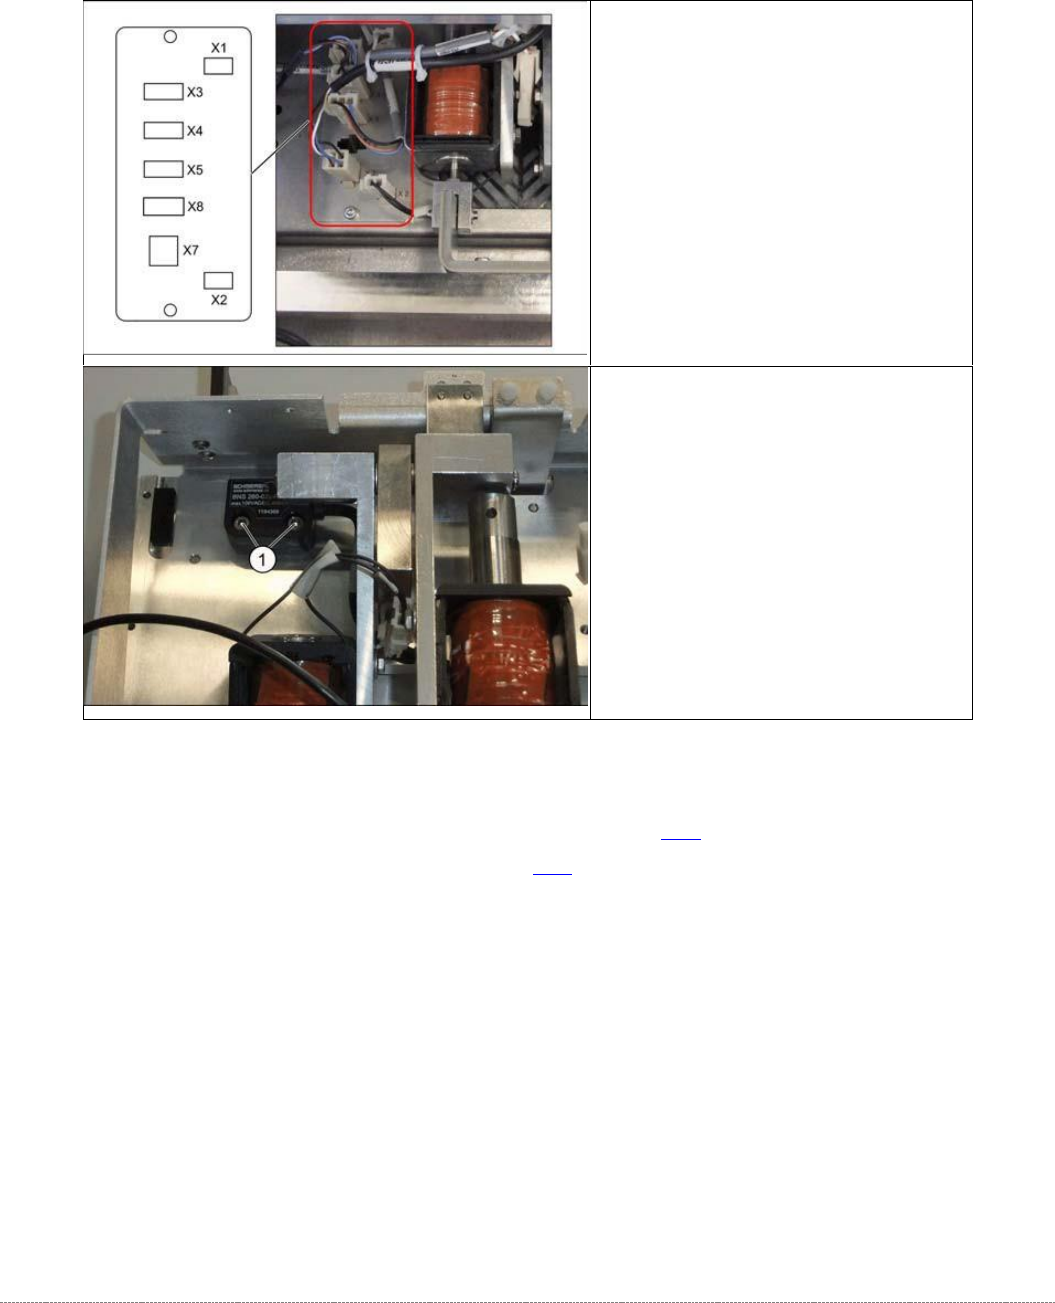
The sensor for the safety flap when open is located on the underside of the base plate.
See also….
@
3.5.1.4
Loosen the Tension of the Load Axis Drive Belt [➙ 3-34]
@
3.5.6
Setting the Load Axis Belt Tension [
➙
3-44]
➢ Disconnect connector X7 for the
safety flap when open from the
circuit board.
➢ Remove the two screws fastening
the sensor (1).
➢ Insert the new sensor and fix into
place with the two screws.
➢ Reconnect connector X7 to the
circuit board.

Service Manual Internal WPC5 / WPC6
Page 3-113
3.7.19 Loading flap close magnet
Spare Parts
• Lading flap close magnet [03083123-xx]
Removal / Installation
The holding magnet is mounted on a pedestal (1) in the NSM panel with 3 "NB602 M4x8"
screws [03005643].
The 3 screws can be accessed from the outside through a hole in the underside of the panel
(2).
The magnet has a 20 cm long cable with a 2 pin plug firmly attached.
The magnet is plugged into connector X30a on the back of the "backplane control
module" via the "cable: holding magnet loading flap" [03083109-01].
The adjustment with respect to the distance of the magnet to the loading door via the
"magnetic plate", which is mounted on the tailgate.
1
2
Attention: Do not clamp the cable!
Lead the cable through the notch on
the magnet.