00197471-03_Service Manual Internal WPC5_6, EN_01-2019.pdf - 第28页
Service Manual In ternal WPC5 / WPC6 Page 3- 28 3.4.6 Setting the Feed Axis Belt Tension Tools required Measurement setu p - measuring the fee d axis belt tension Note: the bridge cover has been rem oved in this diagra…
Service Manual Internal WPC5 / WPC6
Page 3-27
Final Work
➢ Align the driver unit (see "3.4.4.1 Align the Driver Unit" [➙ 3-24]).
➢ Check the belt tension (see "3.4.6 Setting the Feed Axis Belt Tension" [➙ 3-28]).
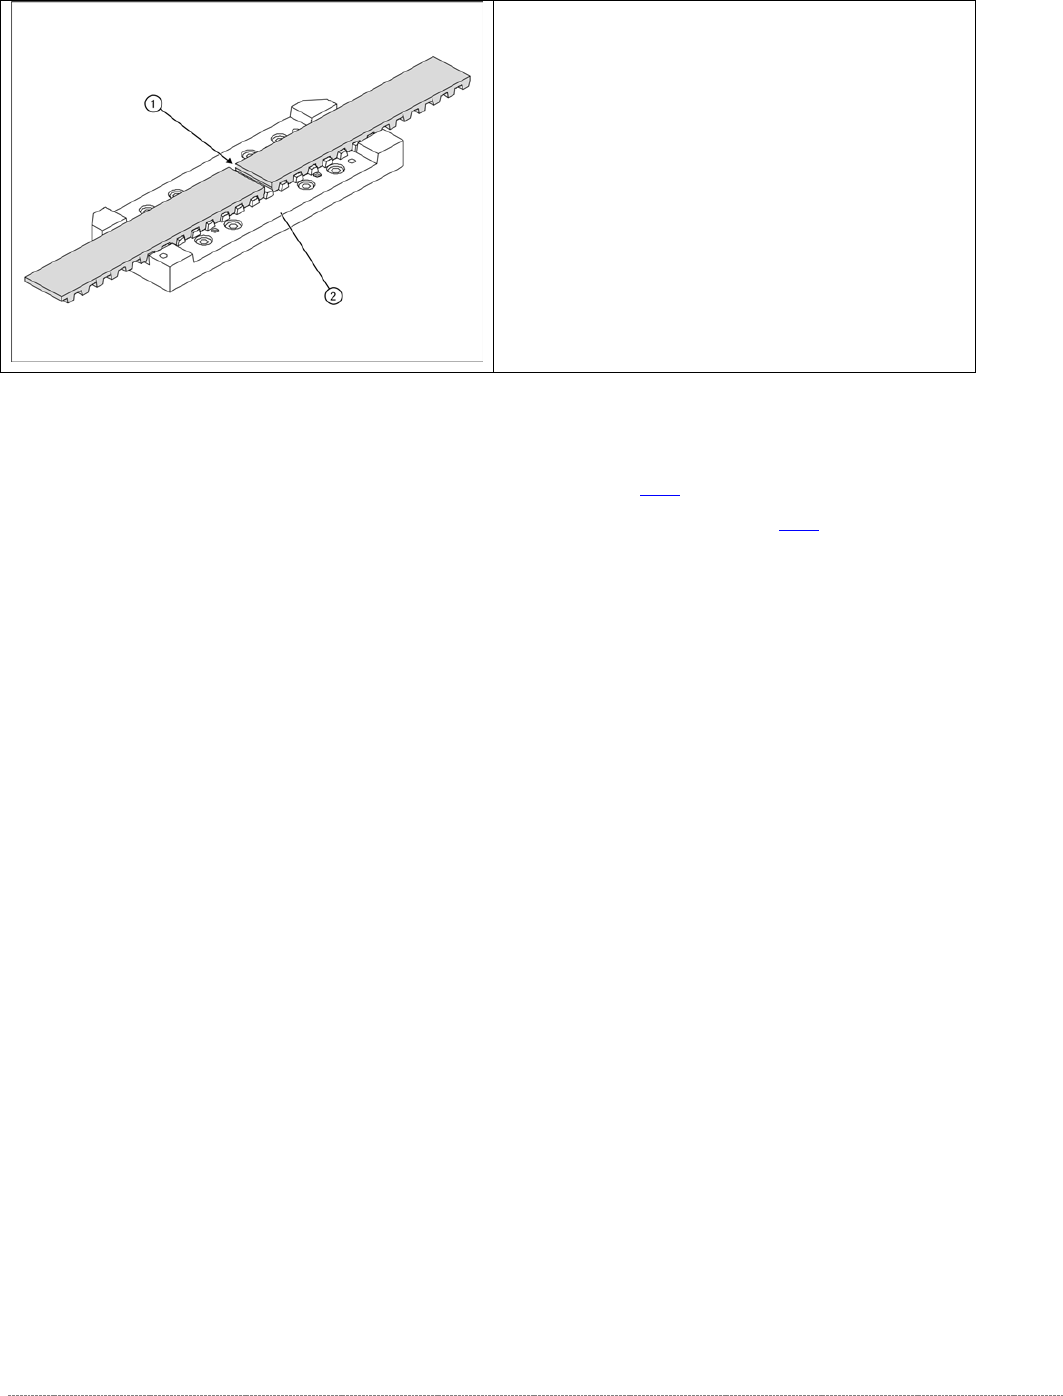
➢ The two ends of the toothed belt must be inserted
into the clamping unit (2) so that the clamping unit
teeth engage with the belt teeth. The two ends must
meet (1).
➢ Note the length of the new toothed belt. The toothed
belt is 2120 mm long/ number of teeth: 424.
➢ If the belt is too long, shorten it to the correct length.
➢
Fit the driver unit onto the clamping unit (2). While
doing this, tighten the 4 fastening screws
"crosswise" with a torque of 1.3Nm.
Service Manual Internal WPC5 / WPC6
Page 3-28
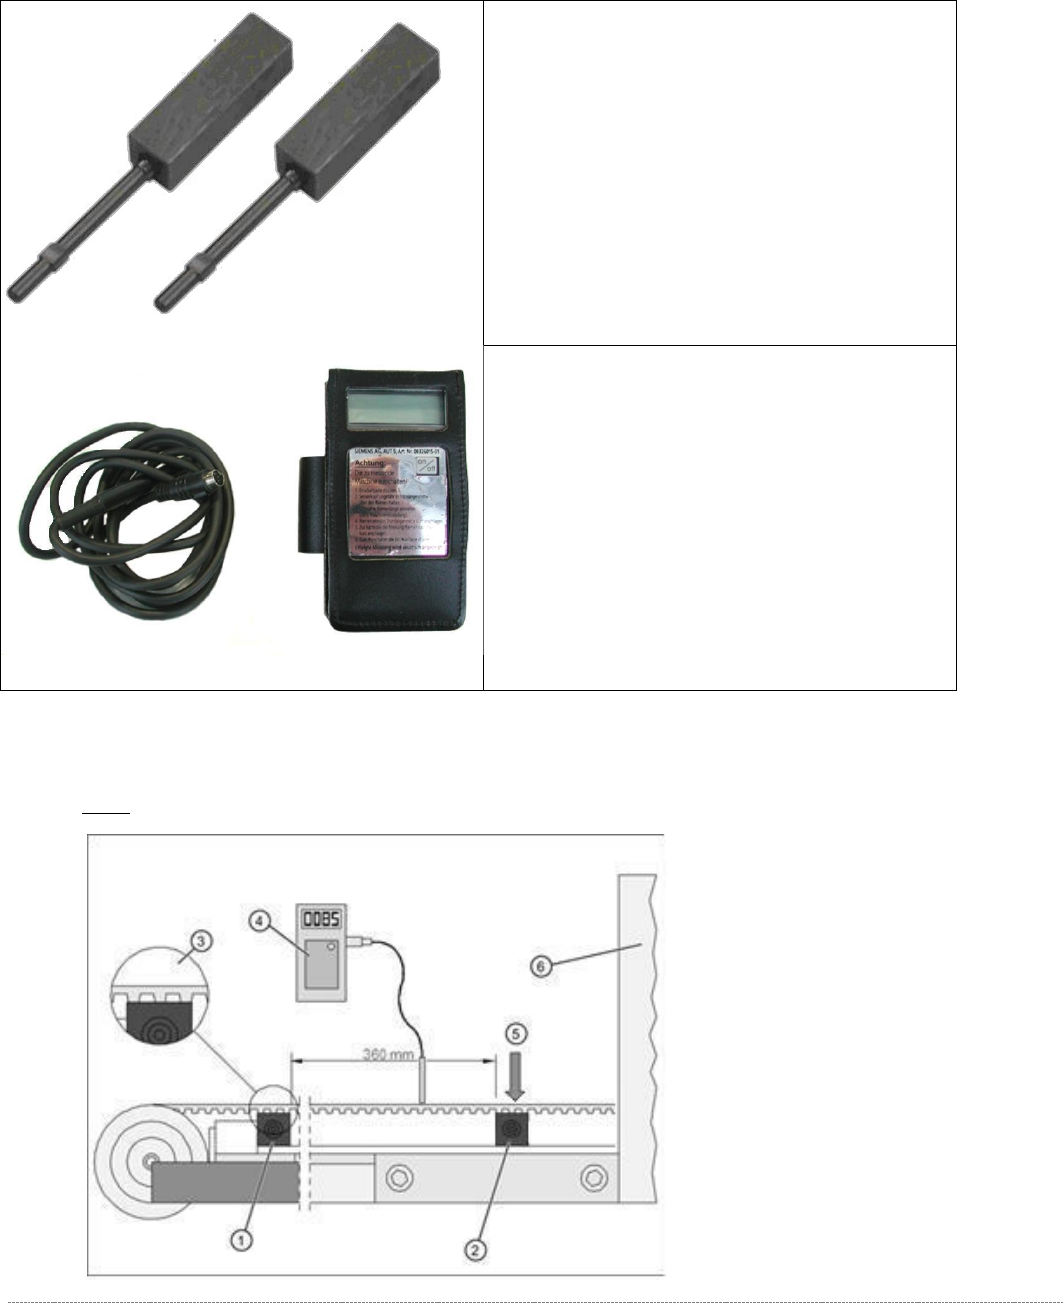
3.4.6 Setting the Feed Axis Belt Tension
Tools required
Measurement setup - measuring the feed axis belt tension
Note: the bridge cover has been removed in this diagram.
• Setting gauge small [03052363-02] 2x
• Belt tension measuring device [00326015-xx] with
instruction guide

Service Manual Internal WPC5 / WPC6
Page 3-29
➢ Push the driver unit fully into the tower.
➢ Push the two setting gauges (1) + (2) under the toothed belt, at a distance of 360 mm.
⇨ The teeth of the toothed belt (3) must lie on the setting gauge.
➢ Press the large setting gauge downwards with a suitable object or with your finger, so that
the toothed belt lies on the gauge (5).
➢ Adjust the belt tension. To do this, gently pull the toothed belt or tap it with an Allen wrench,
so that it starts swinging and then measure the value with the belt tension measuring device.
⇨ Setting value: The belt tension must be 90 Hz +/-5 Hz.