00197471-03_Service Manual Internal WPC5_6, EN_01-2019.pdf - 第37页
Service Manual In ternal WPC5 / WPC6 Page 3- 37 ➢ Fasten the new motor t o the motor flang e and follow the instructio ns for removal in revers e order. ➢ Support the motor from below and loosen the screws fastening th…
Service Manual Internal WPC5 / WPC6
Page 3-36
Removal / Installation
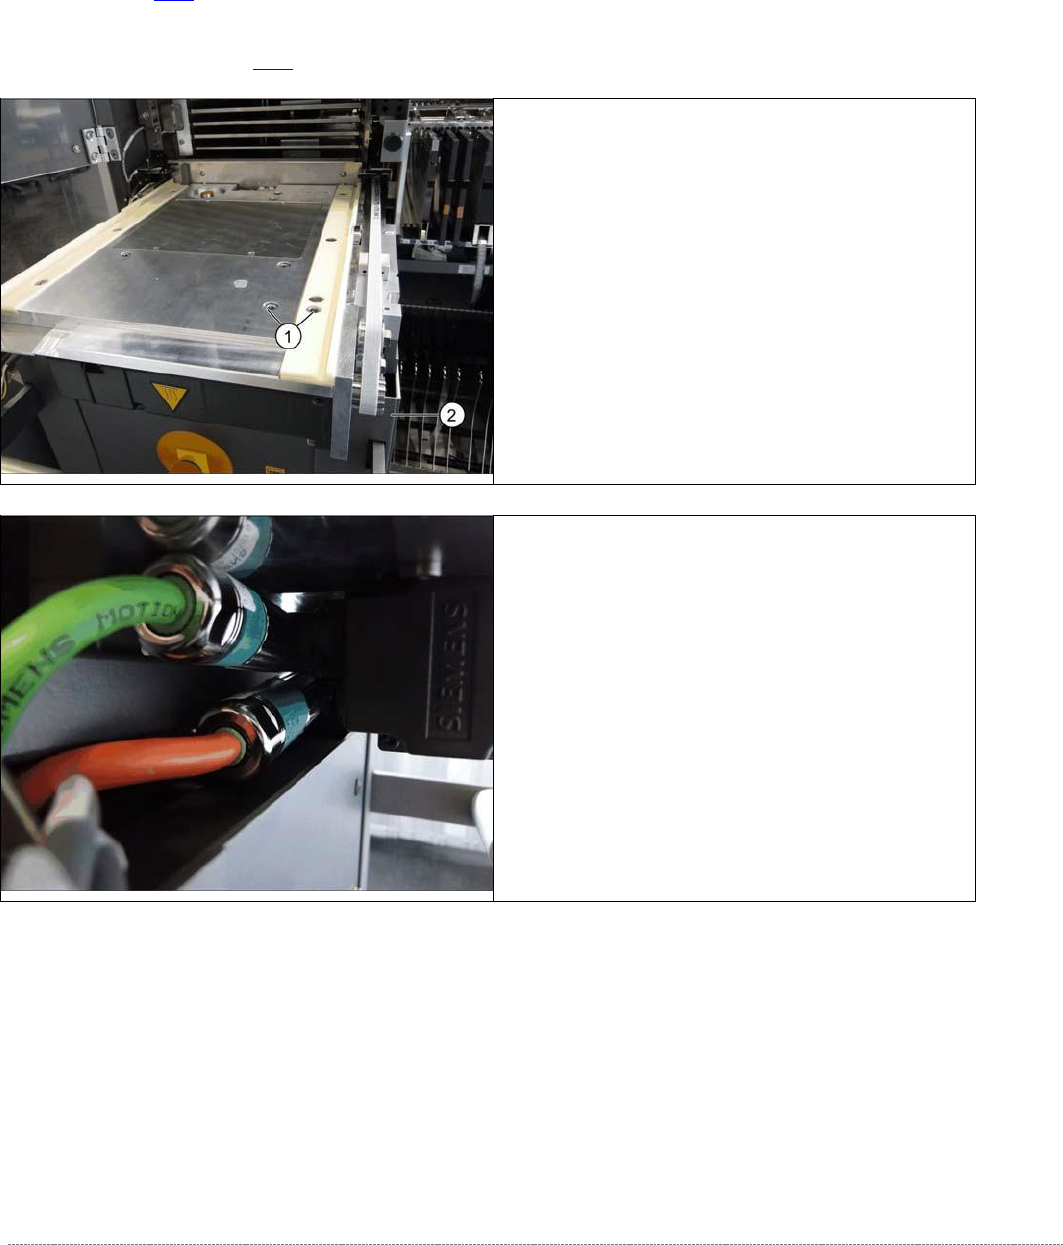
The load unit drive motor is located under the base plate of the load unit.
➢ Remove the cover on the load unit (see "3.5.1.1 Remove the Cover on the Load Unit"
[➙ 3-33]).
➢ Loosen the belt tension of the load axis (see "3.5.1.4 Loosen the Tension of the Load Axis
Drive Belt" [➙ 3-34]).
➢ Loosen the screws fastening the motor to the base
plate and the plastic rail (1).
➢ Pull the motor a little to the front, until you have
access to the electrical connections on the left side.
➢ Loosen the two screws fastening the electrical
connections.
⇨ X1 orange cable = power cable
⇨ X2 green cable = control cable
➢
Remove the motor. Make sure that the belt is not
bent or damaged.
Service Manual Internal WPC5 / WPC6
Page 3-37
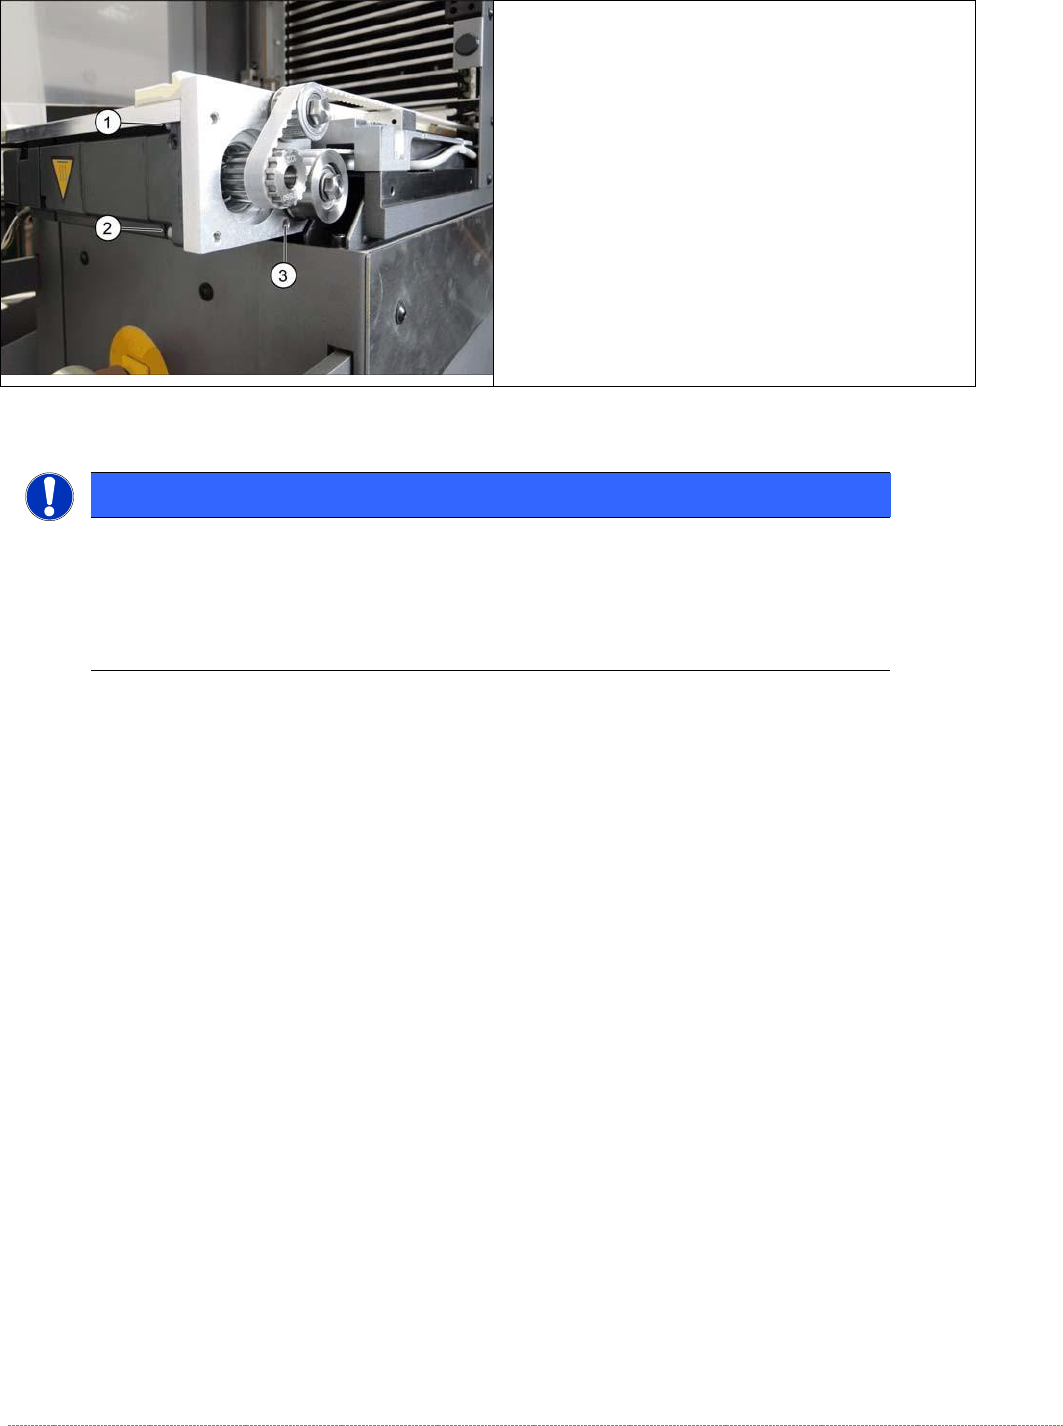
➢ Fasten the new motor to the motor flange and follow the instructions for removal in reverse
order.
➢
Support the motor from below and loosen the
screws fastening the motor flange at the points
marked 1 to 3..
NOTICE
Screw joints difficult to loosen
Each screw joint has an O-ring seal. This can make opening the screw joint difficult.
Use a pair of water pump pliers to help you unscrew the connection.
Make sure that the O-rings do not fall out of the screw joint and that they are not damaged.

Service Manual Internal WPC5 / WPC6
Page 3-38
3.5.3 Replace the Load Axis Drive Toothed Belt
➢ When installing the motor, make sure that it is aligned parallel to the slide bar.
➢ Readjust the belt tension (see "3.5.6 Setting the Load Axis Belt Tension" [➙ 3-44]).
Spare Part
• Toothed belt 10T5/1640 E [03053795-xx]
Preparations
➢ Move the tower into the refill position.
➢ Remove all waffle pack tray carriers (WPTCs) from the tower.
➢ Move the tower downwards.
⇨ Check sensors and functions ⇨ Check sensors and functions of specific components ⇨
⇨ Location ⇨ Check functions for WPC ⇨ Move into transport position.
➢ Undock the WPC from the SIPLACE machine and move it to a suitable position for service
work.
➢ Switch the WPC off at the main switch.
➢ Unplug from the power supply and secure the WPC to prevent unauthorized reactivation.
➢ Remove the cover from the non-stop module (see "3.5.1.1 Remove the Cover on the Load
Unit" [➙ 3-33]).
➢ Remove the hand guard from the feed axis (see "3.5.1.2 Removing the Right Side Cover
from the WPC" [➙ 3-33]).