00197471-03_Service Manual Internal WPC5_6, EN_01-2019.pdf - 第79页
Service Manual In ternal WPC5 / WPC6 Page 3- 79 3.7.4 Sensor 7 " WPTC Present in Tower " Spare Part • W affle-pack tray carrier proxim ity switch in m emory [03 057841- xx] Preparatio ns ➢ Remove the cover on…
Service Manual Internal WPC5 / WPC6
Page 3-78
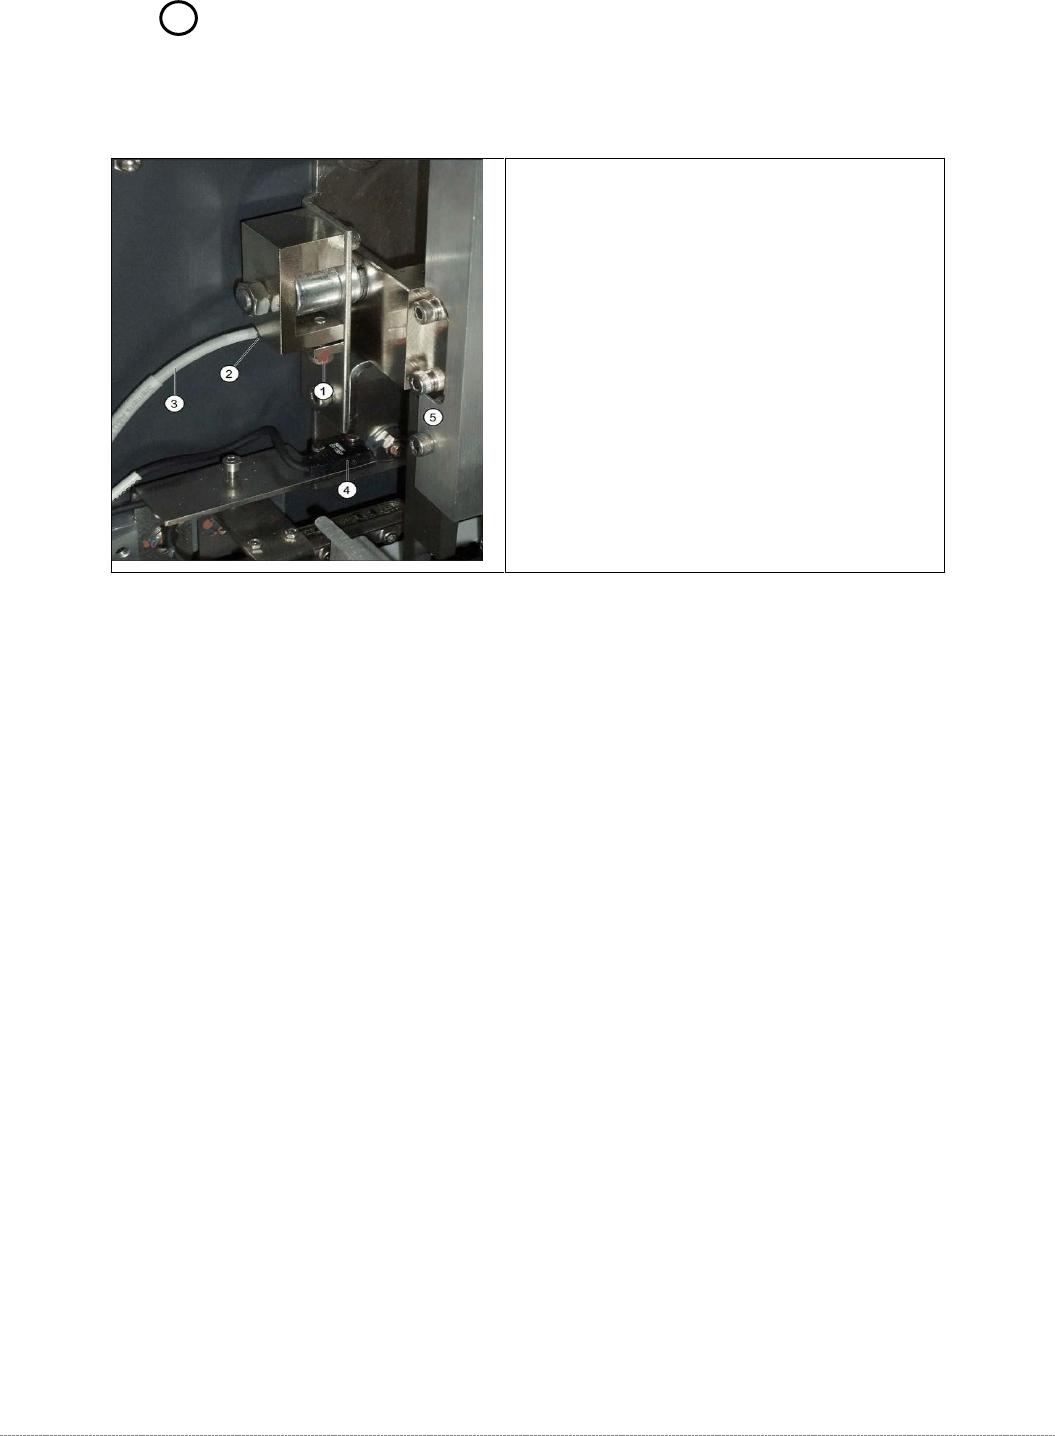
3.7.3 Sensor 9 "WPTC Lock Sensor Cloesd"
Spare Part
• Sensor anti-twist device [03056854-xx]
Aus-/Einbau
➢ Loosen the screw fastening the sensor (1).
➢ Pull the sensor (2) out of its mount.
➢ Loosen the cable clamps and remove the cable ties.
➢ Unthread the connection cable as far as the control unit back plane and unplug it from the
terminal strip.
➢ Push the new sensor (2) into the mount.
➢ Fix the sensor into place in its mount with the help of the fastening screw (1).
➢ Restore the electrical connection and fix the connection cable into place..
Settings
➢ The sensor must be fitted so that it switches reliably when the locking strip (5) is closed.
➢ Close and open the locking strip (5) manually. The sensor must switch when lock is closed.
➢ The LED on the sensor will show the status:
⇨ LED shines = switched
⇨ LED does not shine = not switched.
➢ Check whether the correct output was switched.
To do this, open the station software menu
⇨ Sensors and Functions ⇨ Location ⇨ Check functions for WPC ⇨ Advanced functions ⇨
⇨ WPC E/A Ports.
The
Sensor FMT Verriegelung offen
option must be enabled.
➢ Open the lock.
⇨ The corresponding display must be OFF.
Overview
1. Fastening screw for anti-twist proximity
switch
2. Sensor anti-twist device
3. Sensor cable for anti-twist device
4. crash light barrier for high components
5. Locking strip
Service Manual Internal WPC5 / WPC6
Page 3-79
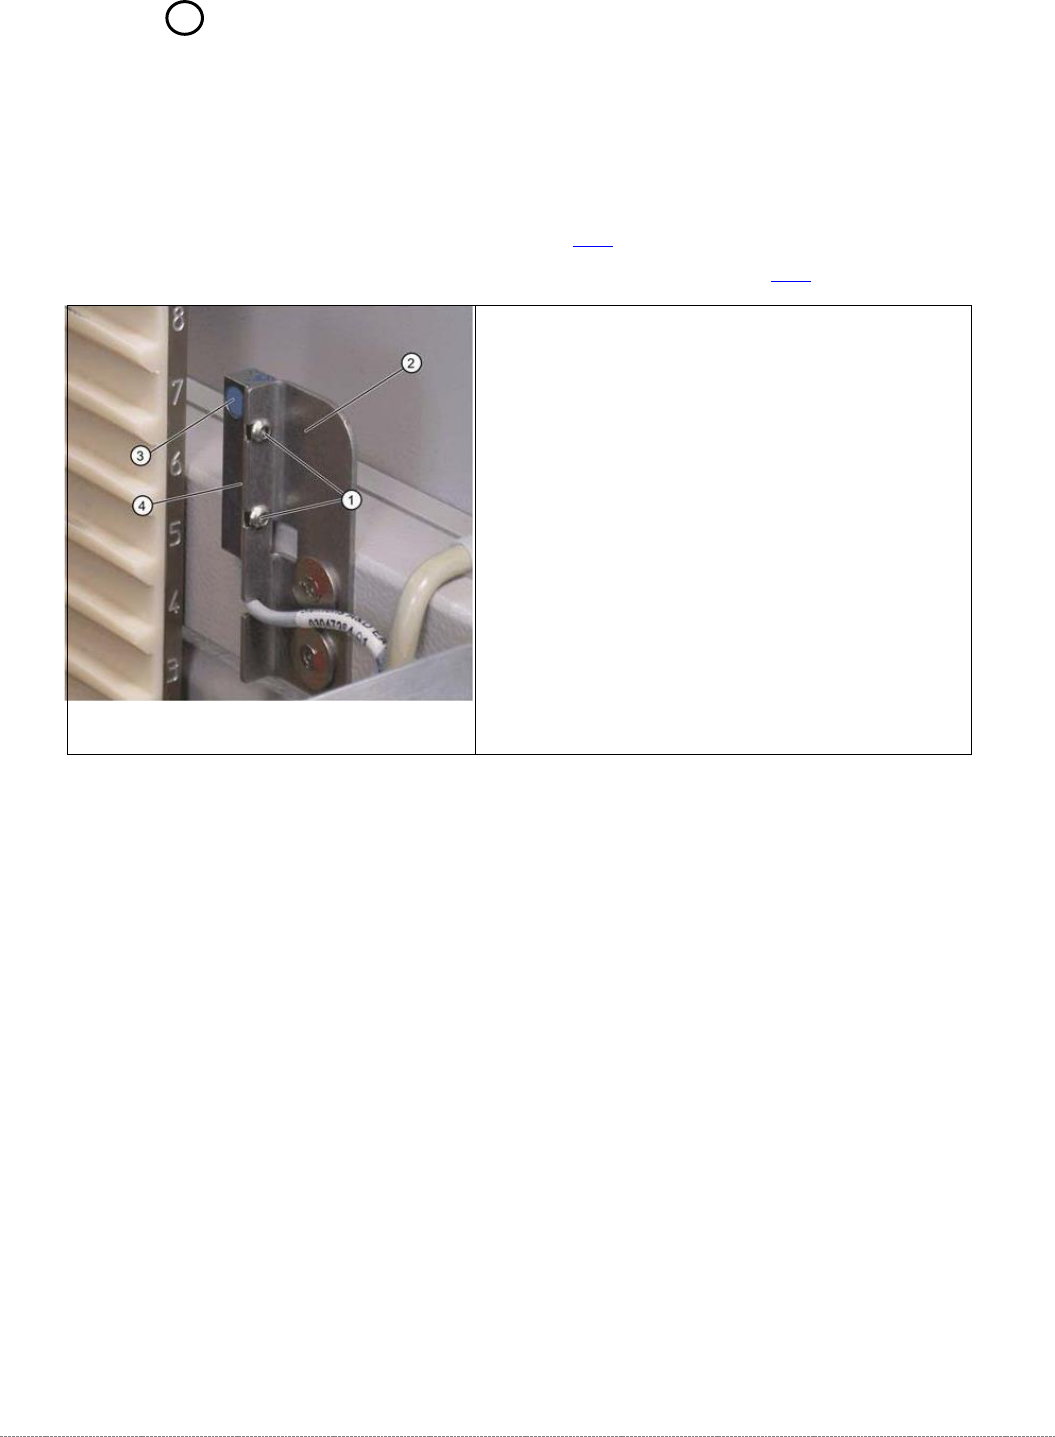
3.7.4 Sensor 7 "WPTC Present in Tower"
Spare Part
• Waffle-pack tray carrier proximity switch in memory [03057841-xx]
Preparations
➢ Remove the cover on the load unit (see 3.5.1.1 [➙ 3-33]).
➢ Dismantle the lifting magnets (see "3.5.4 Replace the Lifting Magnets" [➙ 3-40]).
Settings
➢ Check the sensor function.
➢ To do this, push a WPTC, resp. the Base Plate of the Adjustment gauge, into the tower by
hand. The sensor must switch when the waffle pack tray moves past it.
➢ Move the waffle pack tray back and forth inside the tower guidance. The sensor must switch
reliably.
➢ Move the waffle pack tray to the right and left inside the tower guidance. The sensor must
recognize the WPTC reliably. The LED on the sensor must shine continuously.
➢ The LED on the sensor will show the status:
⇨ LED shines = switched
⇨ LED does not shine = not switched.
➢ Check whether the correct output was activated.
To do this, open the station software menu Sensors
⇨ Sensors and Functions ⇨ Location ⇨ Check functions for WPC ⇨ Advanced functions ⇨
⇨ WPC I/O Ports.
The
Sensor, WPTC in tower
option must be enabled.
➢ Remove the
waffle-pack tray carrier (WPTC)
.
⇨ The corresponding LED must be off.
Removal / Installation
➢ Loosen the two screws (1) fastening the sensor
mounting bracket (2).
➢ Loosen the cable clamps and remove the cable ties.
➢ Unthread the connection cable as far as the control
unit back plane and unplug it from the terminal strip.
➢ Fit the sensor so that the sensor surface (4) points to
the side.
➢ Align the sensor parallel to the mounting bracket (2).
The sensor surface (3) must be aligned centrally to
the edge of the waffle-pack tray carrier. Do not
dismantle the mounting bracket.
➢ Restore the electrical connection and fix the
connection cable into place.
Service Manual Internal WPC5 / WPC6
Page 3-80
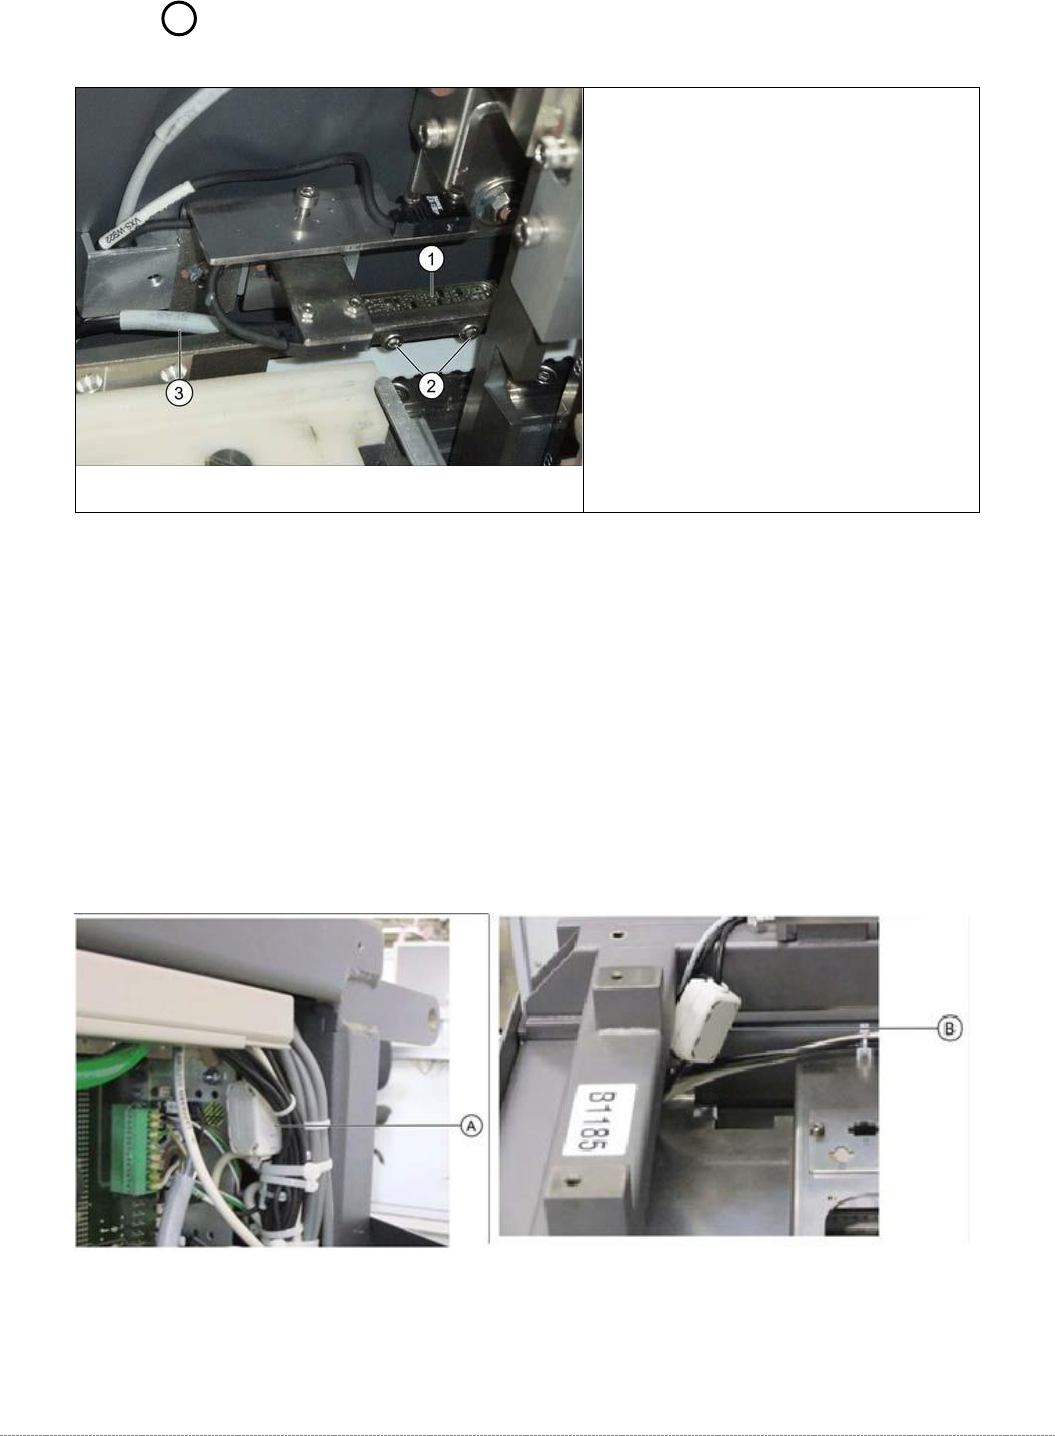
3.7.5 Sensor 8 Referenzsensor "Feed axis"
Removal
➢ Loosen the two fastening screws (2) on the sensor.
➢ Unthread the sensor cable (3).
➢ Open the ferrite core (A for WPC6 or B for WPC5) at the fixtures provided, with the help of a
screwdriver.
➢ Unthread the cable clamp and remove the ferrite core. Keep these in a safe place for later
installation.
➢ Unthread the connection cable as far as the control unit back plane and unplug it from the
terminal strip.
Spare Part
• Reference point proximity switch for
feed axis [03057837-xx]
Overview
1. Reference point proximity switch for feed
axis
2. Reference sensor fastening screws
3. Sensor cable for feed axis reference
point proximity switch A = Position of the
ferrite core for WPC6 on the backplane of
the control unit B = Position of the ferrite
core for WPC5 in the load unit