00197783-01_AI_Gantry-Retrofit_X-Series_S_INTERNAL_de_en.pdf - 第104页
Installation Preparatory Steps 3.1.3 Removing the Middle C over 104 Gantry Retrofit Portalna chrüstung ► Loosen the eight top screws (1) fastening the cover (two on each side and four at the front). ► Lift off the top co…
Installation
3.1.3 Removing the Middle Cover Preparatory Steps
Gantry Retrofit Portalnachrüstung 103
3.1.3
3.1.3 Removing the Middle Cover
Removing the Middle Cover
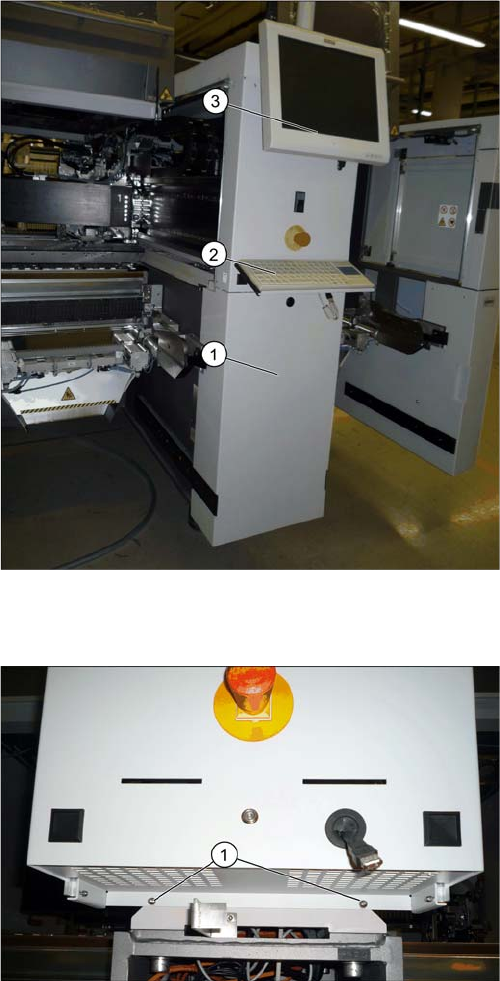
Removing the lower cover, keyboard and monitor
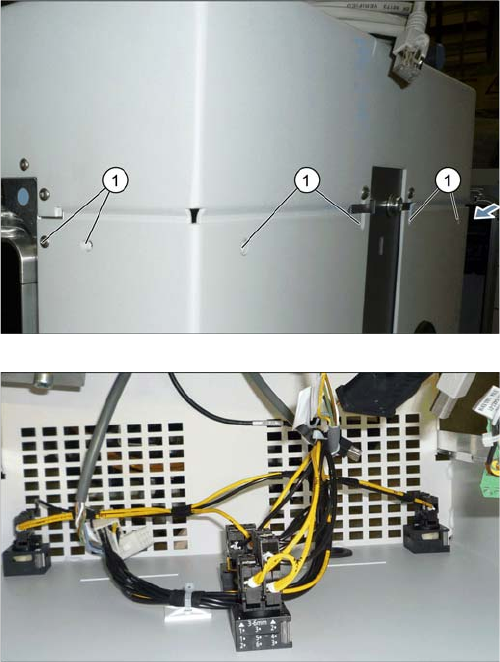
Removing the top cover
► Unhook the lower cover (1).
► Unplug the keyboard (2) and remove it.
► Loosen the two screws fastening the monitor (3),
loosen all electrical connections and remove the
monitor.
► Push the USB cable for the keyboard and all monitor
cables through the openings behind the cover.
► Loosen the two lower screws (1) fastening the cover.
Installation
Preparatory Steps 3.1.3 Removing the Middle Cover
104 Gantry Retrofit Portalnachrüstung
► Loosen the eight top screws (1) fastening the cover
(two on each side and four at the front).
► Lift off the top cover. Unplug the electrical connection,
while doing so.
Installation
3.1.4 Removing the Top Cover Preparatory Steps
Gantry Retrofit Portalnachrüstung 105
3.1.4
3.1.4 Removing the Top Cover
Removing the Top Cover
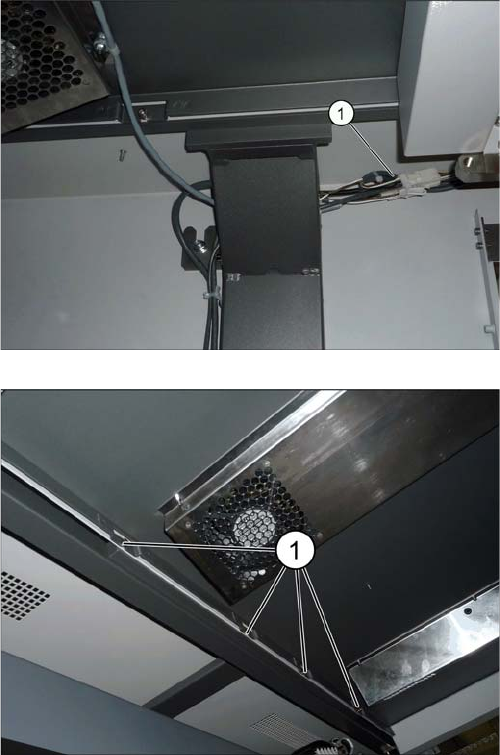
For better access to the work area, we recommend that you remove the top cover on the placement area.
► Unplug the connector (1) on the cover fan at both
sides.
► Loosen the eight screws fastening the cover (four on
each side) (1).
► Lift the cover up and off the machine.