00197783-01_AI_Gantry-Retrofit_X-Series_S_INTERNAL_de_en.pdf - 第127页
Installation 3.1.4 Removing the Top Cover Fitting the GCU Gantry Retrofit Portalnachrüstung 127 3.8 3 . 8 F it t in g t h e G C U Fitting the GCU ► Pull the rack for the GCUs out of the m achine. To do this, loosen the l…
Installation
Fitting the Y Trailing Cable for the New Gantry 2/4 3.1.4 Removing the Top Cover
126 Gantry Retrofit Portalnachrüstung
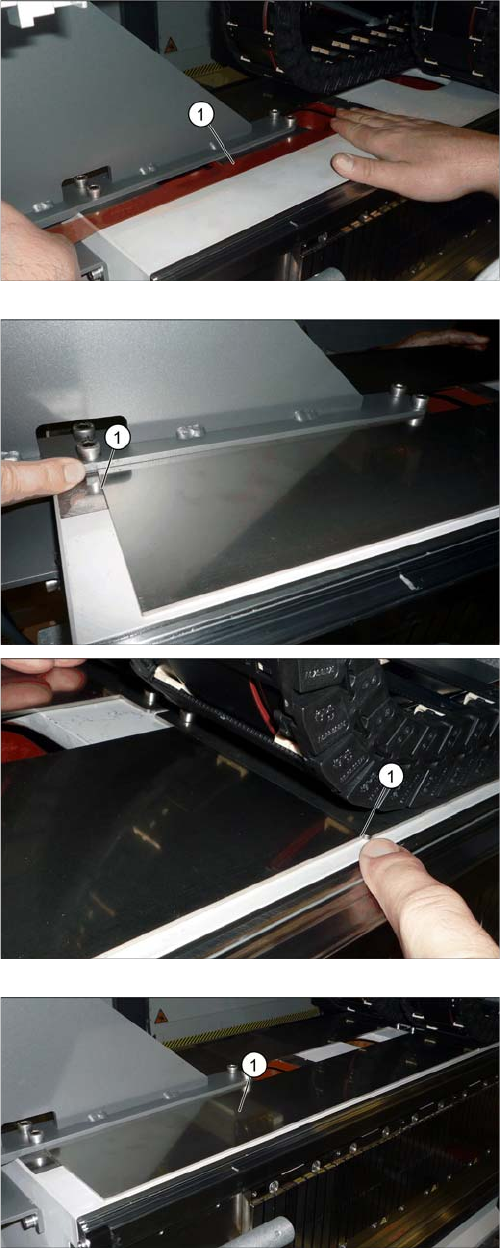
► Attach a strip of double-sided adhesive tape (1) to the
unwind surface of the trailing cable, as shown.
► Pull off the upper protective foil on the adhesive strip.
► Pull the protective foil off the "trailing cable support
plate 2P assy" and attach this to the roll-off area of
the trailing cable.
Make sure that the unwind plate is exactly parallel at
the front and back (1).
The diagram shows the completely attached "trailing ca-
ble support plate 2P assy" (1).
Installation
3.1.4 Removing the Top Cover Fitting the GCU
Gantry Retrofit Portalnachrüstung 127
3.8
3.8 Fitting the GCU
Fitting the GCU
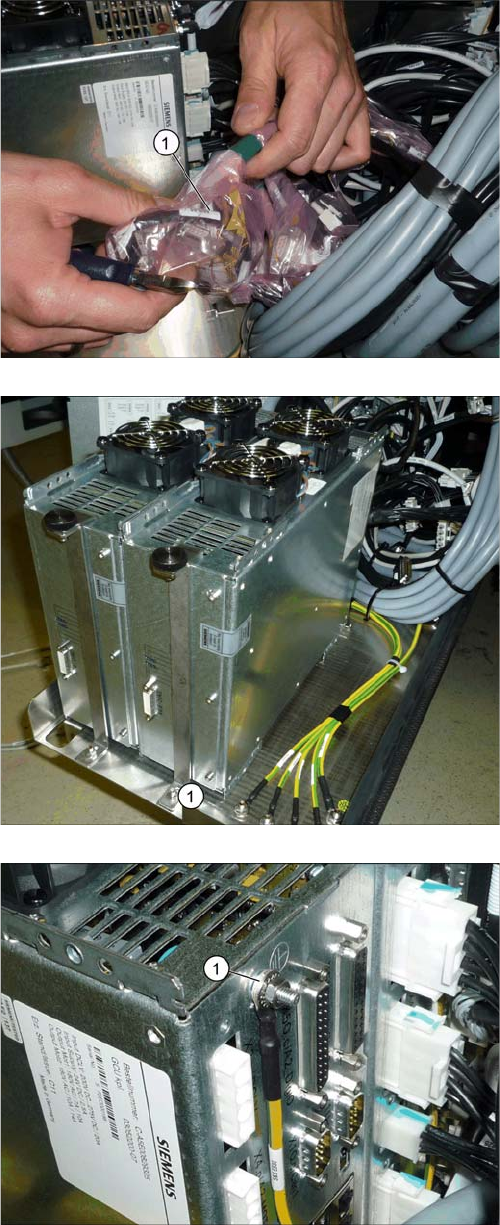
► Pull the rack for the GCUs out of the machine. To do
this, loosen the lockscrew on the bottom left of the
rack.
► Find the cable for the new GCU (1).
► Insert the new GCU into the machine and fix this into
place with the front holder (1).
► Fit the ground connection (1).
Installation
Attaching the Hoses to the Proportional Valve 3.1.4 Removing the Top Cover
128 Gantry Retrofit Portalnachrüstung
3.9
3.9 Attaching the Hoses to the Proportional Valve
Attaching the Hoses to the Proportional Valve
► Dismantle the lower side cover at location 4 (see "4.1.5 Dismantling the Lower Side Cover" [➙146]).
► Connect the two hoses (hold circuit and placement circuit) for the new gantry to the proportional
valve (see also "4.1.6 Replacing the Proportional Controller (Location 4) [03065425-xx]" [ ➙ 147]).
3.10
3.10 Attaching the Hotlink Cable
Attaching the Hotlink Cable
► Attach the hotlink cable P2 to the hotlink card in the BoxPC (see also "4.1.7 Overview of Distributor"
[ ➙ 150]).
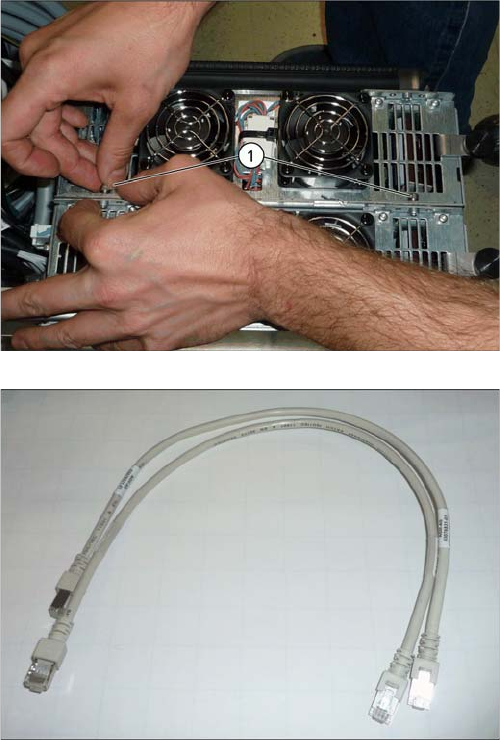
► Connect the GCU to the adjacent GCU, using two
screws (1).
► Run the cables for the new GCU (see also "4.1.2
Overview of GCUs" [ ➙ 140]).
Use the patch cable supplied.
► Push the rack back into the machine.
► Fasten the rack with the lockscrew.