00197783-01_AI_Gantry-Retrofit_X-Series_S_INTERNAL_de_en.pdf - 第138页
Appendix Excerpts from the Service Manual 4.1.1 Replacing the Trailing Cable 138 Gantry Retrofit Portalna chrüstung ► Carefully remove the trailing cable from the machine. You might need to enlist the help of a second pe…
Appendix
4.1.1 Replacing the Trailing Cable Excerpts from the Service Manual
Gantry Retrofit Portalnachrüstung 137
4.1.1.3
4.1.1.3 Replacing the Y Trailing Cable
Replacing the Y Trailing Cable
Parts, Equipment and Tools
▪ Y trailing cable (see above)
▪ Hose unlocking tool [03047090-xx]
▪ Pipe/hose cutters [00381443-xx]
▪ If required, assembly instructions for the "vacuum pump" [00196845-xx]
▪ Sealing varnish Loctite 241 [02101037-xx]
▪ Edding marker, white [00382740-xx]
▪ Help of second person, if needed
Removal
► Switch off the machine, disconnect it from the power supply and secure it to prevent unauthorized
reactivation. Observe the instructions in section "1.2 Preparatory Work..." [ ➙ 89].
Pneumatics Sy stem - Shutting off the Compressed Air Supply
NOTICE
Vacuum pump
► When a vacuum pump is fitted, also observe the assembly instructions "Vacuum pump X-
Series S, SX4/DX4" [00196845-xx].
Disabling the compressed air supply
CAUTION!
When working on the pneumatic system, always switch
off the compressed air supply.
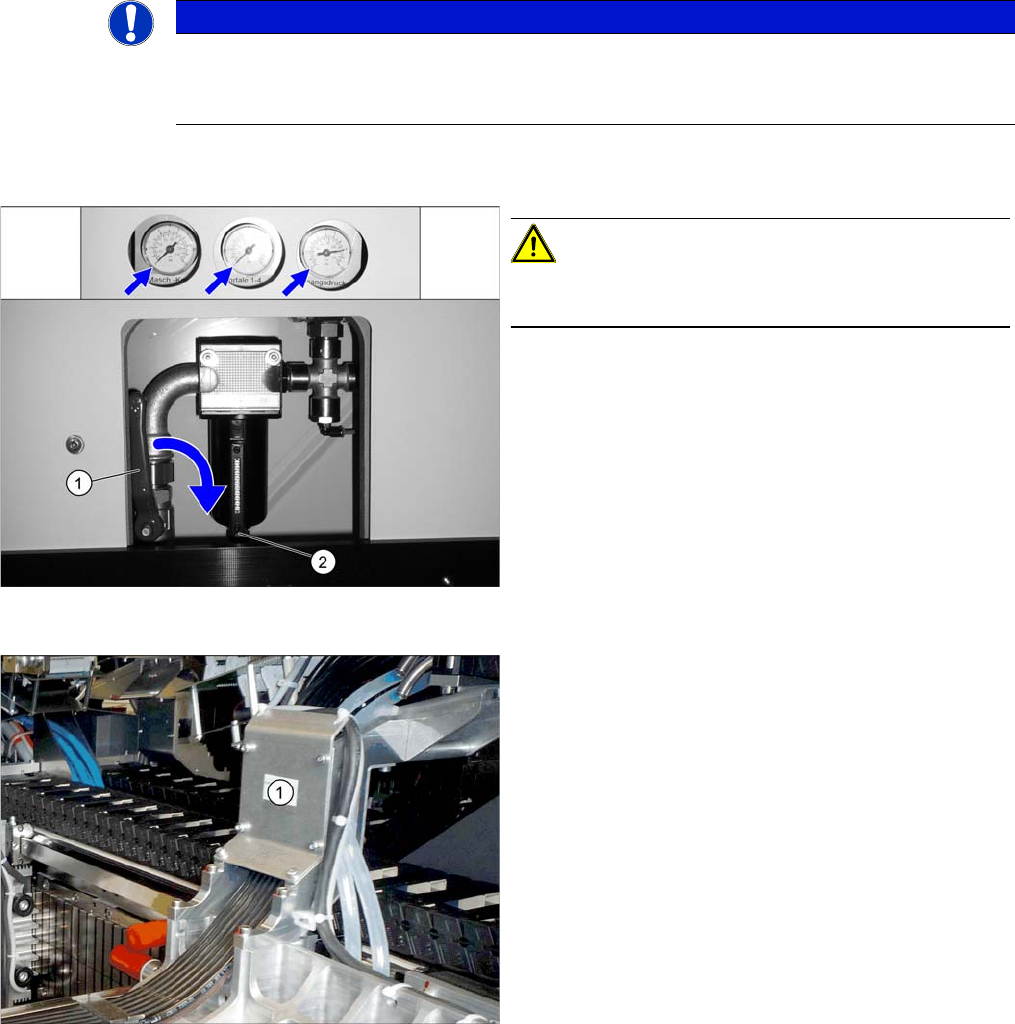
► Push the lever (1) for the compressed air supply
back, until it is positioned horizontally.
► Open the screw (2) on the inlet filter to vent the sys-
tem. Hold a cloth underneath to capture any escaping
oil.
► All manometers must be set to zero.
► Loosen the six screws fastening the cover (1) and
then remove the cover.
Appendix
Excerpts from the Service Manual 4.1.1 Replacing the Trailing Cable
138 Gantry Retrofit Portalnachrüstung
► Carefully remove the trailing cable from the machine. You might need to enlist the help of a second
person.
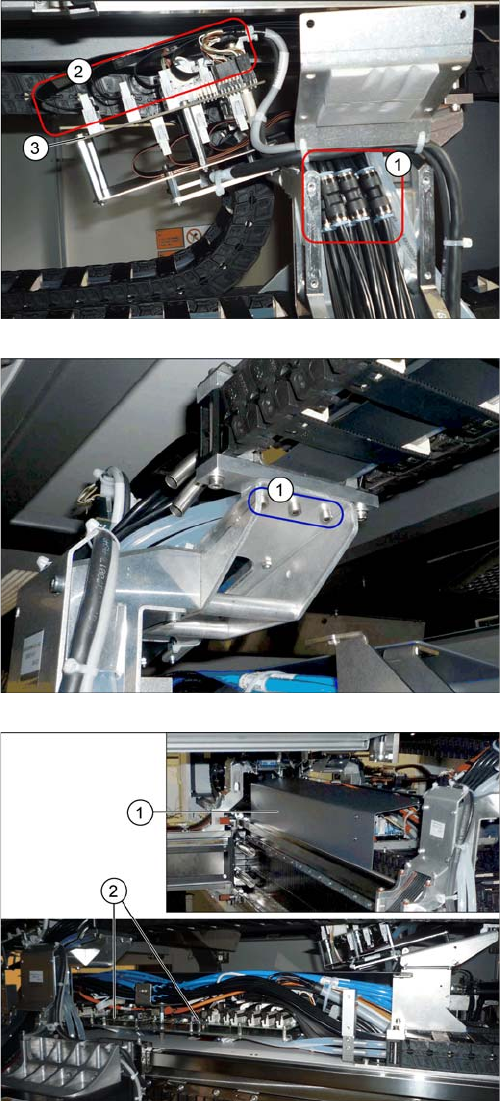
► Mark the positions of the hoses on both sides of the
couplings (1), so that these can be easily assigned
later on.
► Disconnect the hoses from the couplings.
► Mark the positions of the connectors (2) on the gantry
interface (3), so that these can be easily assigned lat-
er on.
► Unplug the connectors from the gantry interface.
► Loosen the screws fastening the upper end of the
trailing cable.
► Dismantle the cover (1) on the trailing cable
interface (2).
► Mark the cables coming from the trailing cable on the
trailing cable interface, to make clear assignment
easier later on.
► Unplug the cables coming from the trailing cable at
the trailing cable interface.

Appendix
4.1.1 Replacing the Trailing Cable Excerpts from the Service Manual
Gantry Retrofit Portalnachrüstung 139
Installation
► Installation is performed by following the above instructions in the reverse order. Also observe the
following instructions:
CAUTION
Always handle the trailing cable with care
► If a vacuum pump is fitted, also observe the relevant assembly instructions [00196845-xx].
► Always handle the new trailing cable with care.
► You might need to enlist the help of a second person.
► Make sure that the flat ribbon cable and the pneumatic hoses are not rubbed against any
parts or folded. Look out for sharp edges.
► Prepare the trailing cable. Place the old and new trailing cables next to one another and
match the length of the new trailing cable hose to the old one.
► For production reasons, the new trailing cable is supplied with a holder. This new holder
can be dismantled before installation and the holder already in the machine can be used
again.
► If you use the new holder, you will need to dismantle all attached items (boards etc.) from
the old holder and attach them to the new holder.
► If hose ends were damaged during removal, cut these with hose cutters.
► Clean the trailing cable contact surface on the machine base with a dry cloth.
► Carefully insert the new trailing cable into the prescribed position. Make sure you do not fold
or twist the trailing cable.
► Check that the power track chain runs parallel to the machine base. Move the gantry back
and forth.
► If it is difficult to push the hoses onto the tubes, moisten these first with white spirits or iso-
propanol.
► Secure with screws with Loctite 241.