00197783-01_AI_Gantry-Retrofit_X-Series_S_INTERNAL_de_en.pdf - 第109页
Installation 3.1.4 Removing the Top Cover P reparing the Cable and Hoses Gantry Retrofit Portalnachrüstung 109 3.3 3 . 3 P r e p a r in g t h e C a b le a n d H o s e s Preparing the Cable and Hoses ► Remove the h older …
Installation
Gantry 1/3: Removing the Y Trailing Cable and Trailing Interface 3.1.4 Removing the Top Cover
108 Gantry Retrofit Portalnachrüstung
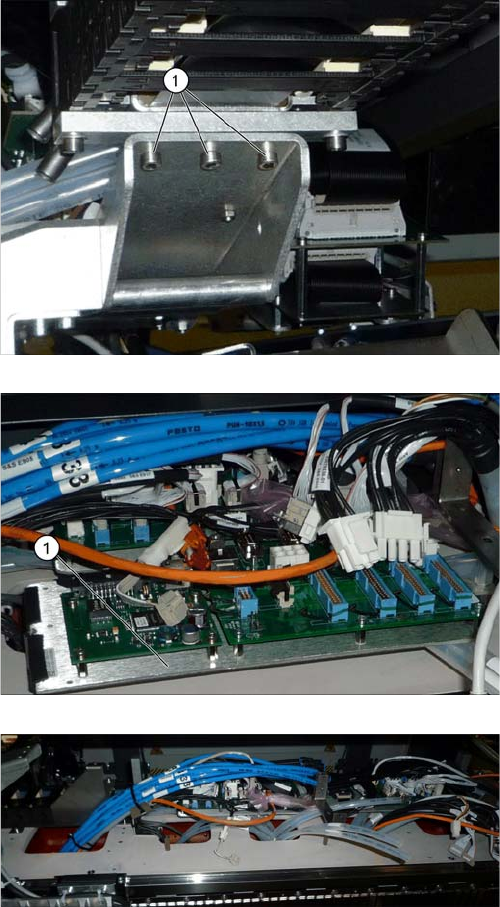
► Loosen the three screws (1) fastening the top Y trail-
ing cable.
⇨ The top end of the Y trailing cable has now been com-
pletely disconnected from the gantry.
► Carefully remove the Y trailing cable from the ma-
chine.
► Remove the trailing interface (1) and the Vision Hot-
link Adapter (2), together with the plate on which
these are fitted.
Removal of the Y trailing cable, trailing interface and Vi-
sion Hotlink Adapter has been been completed.
Installation
3.1.4 Removing the Top Cover Preparing the Cable and Hoses
Gantry Retrofit Portalnachrüstung 109
3.3
3.3 Preparing the Cable and Hoses
Preparing the Cable and Hoses
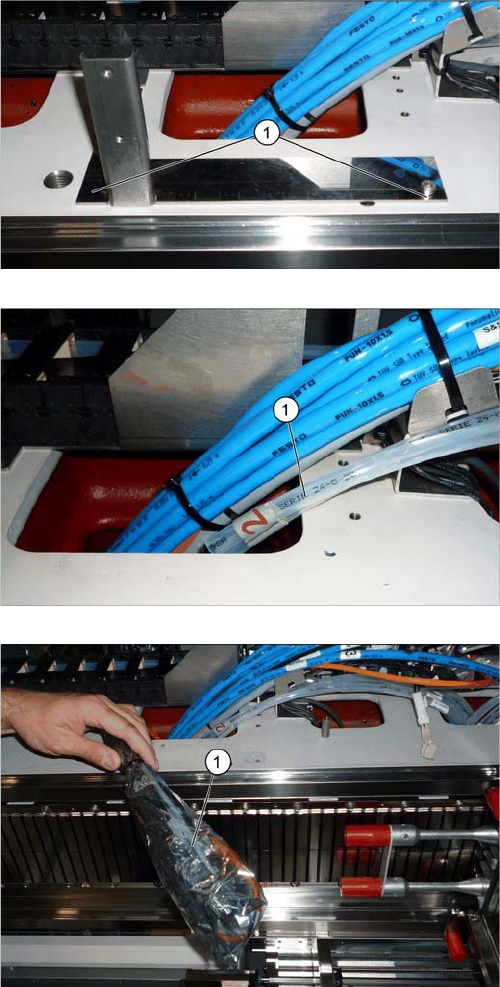
► Remove the holder for the trailing cable cover (1) at
locations 2/4.
► Pull the two white hoses (1) out of the machine frame.
► Unplug the electrical connections (1) for gantries 2/4
from the machine frame.
Installation
Preparing the Cable and Hoses 3.1.4 Removing the Top Cover
110 Gantry Retrofit Portalnachrüstung
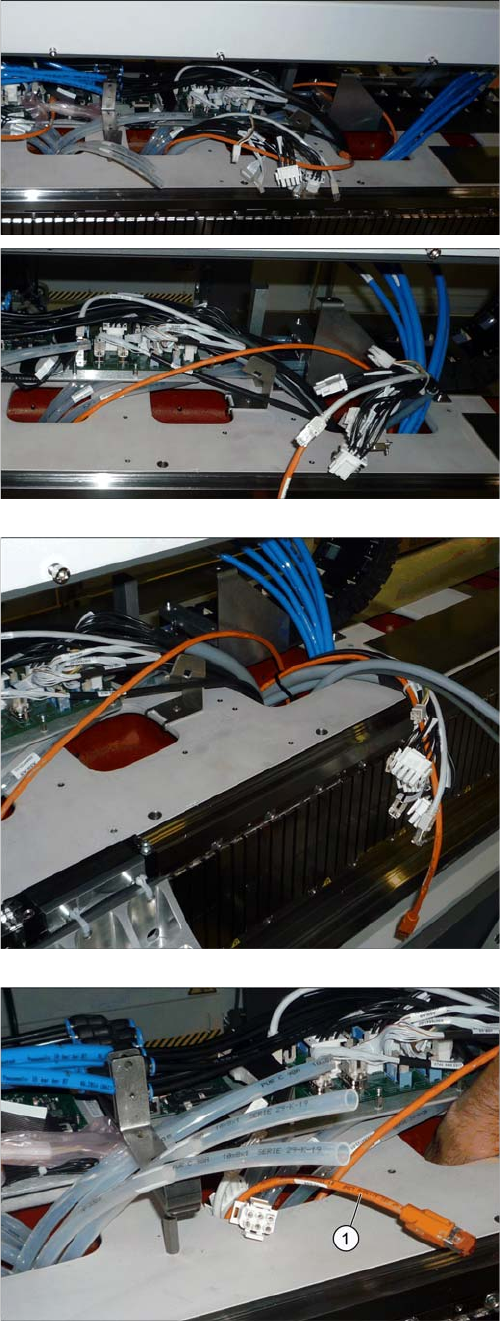
► Pull the connections from gantry 1/3 through the ma-
chine frame and two openings onwards. These can
be found further on the outside, near the blue hoses.
► Pull the cables [03076516-xx] for connectors X13ba
and X14ba (for gantry 2 in each case) out of the open-
ing at location 1/3.
► Pull the orange hotlink cable (1) for gantry 2 out of the
bag.