SI-F130 Manual(EN)_jpg_ Rev1.pdf - 第14页
Remove Production Nozzle HLF-10102-01 Remove Production Nozzle SHEET 2/2 2 Move the nozzle to be removed toward you. 1. Click the Jog Move button in the mov e mode. 2. Press the cursor k ey on the left and right to jog m…
Remove Production Nozzle
HLF-10102-01
Remove Production Nozzle
SHEET
1/2
Remove Production Nozzle
Remove the nozzle used for production according to the procedure in this section because it is not
used for calibration operation.
[Procedure]
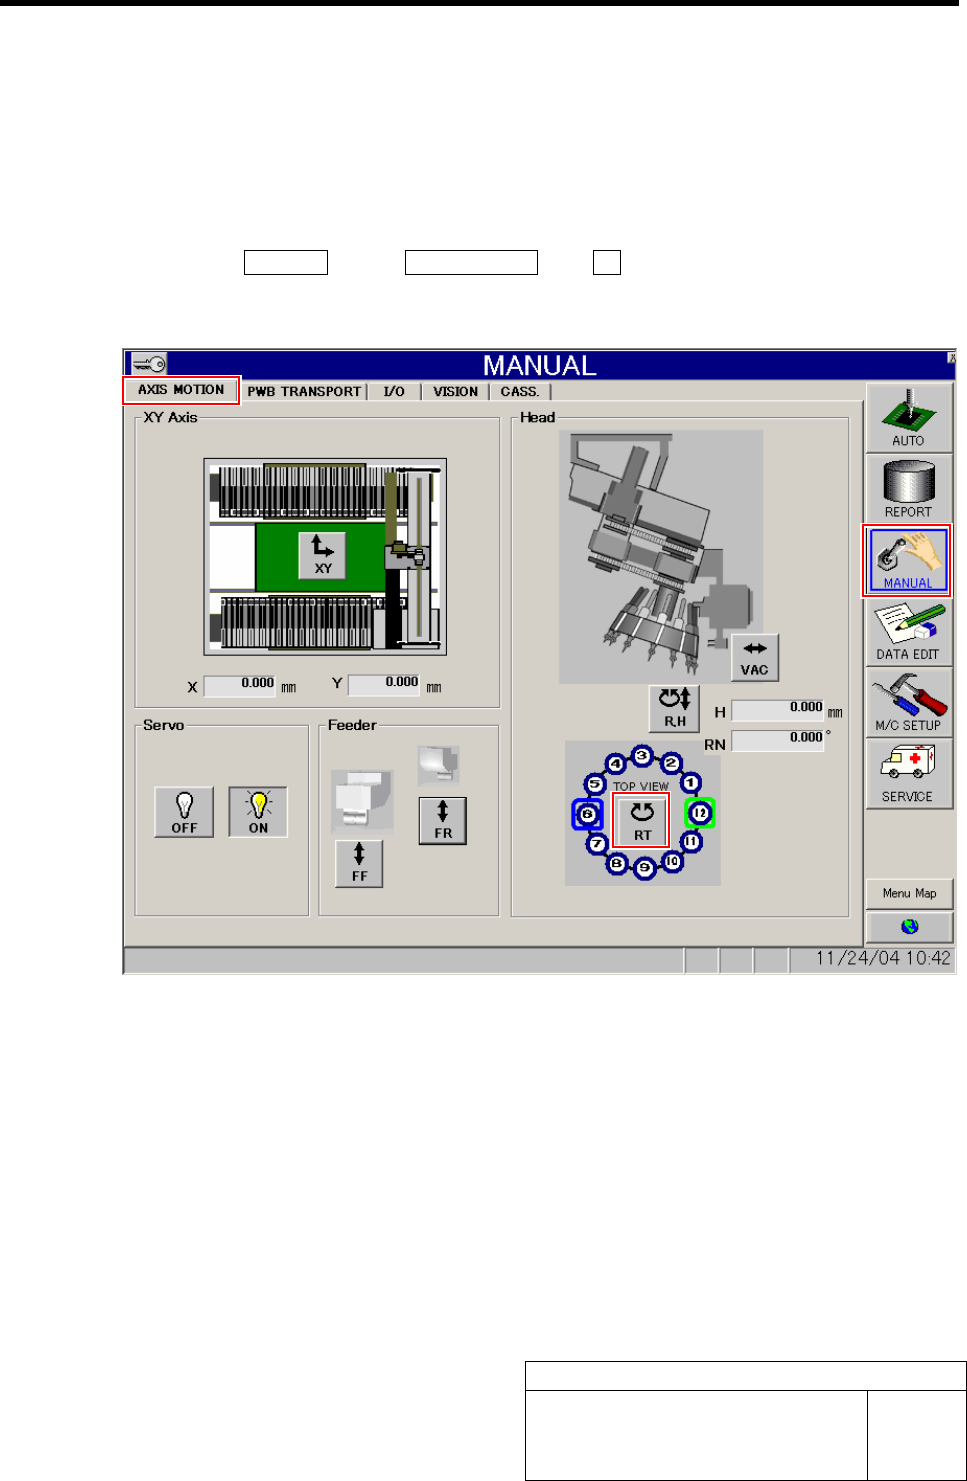
1 Click in an order of MANUAL menuÎAXIS MOTION tabÎRT button.
Turret RT Axis screen is displayed.
Remove Production Nozzle
HLF-10102-01
Remove Production Nozzle
SHEET
2/2
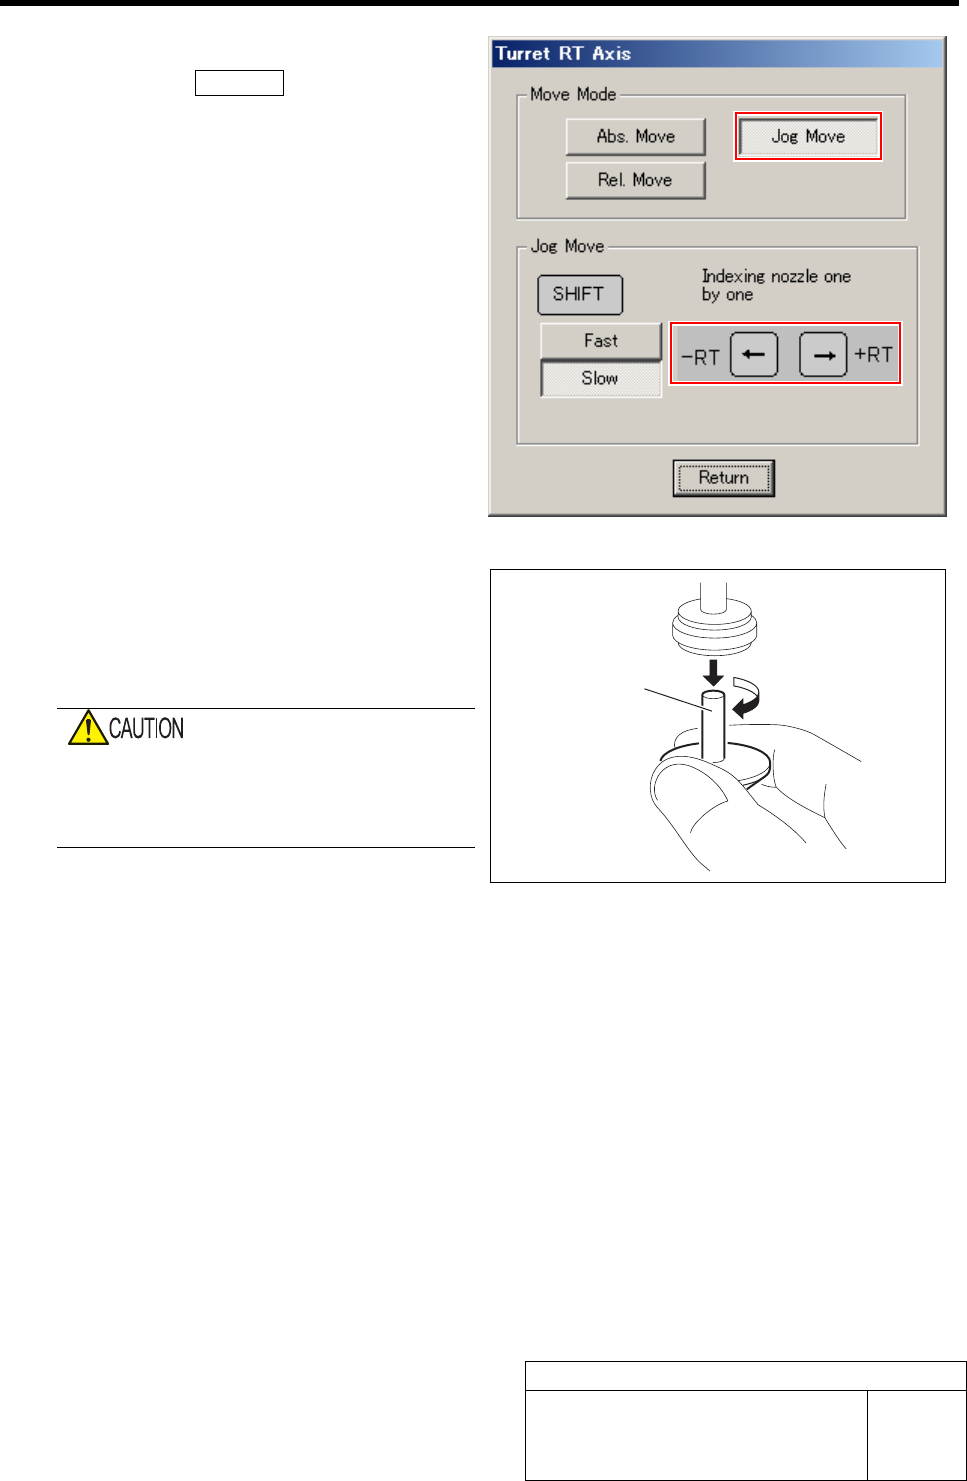
2 Move the nozzle to be removed toward you.
1. Click the Jog Move button in the move
mode.
2. Press the cursor key on the left and
right to jog move the nozzle to be re-
moved toward you.
3 Grab circumference of the nozzle by fingers
and pull out downward with light force while
turning the nozzle slowly.
When removing the nozzle, do not grab the
end of the nozzle.
Otherwise, the nozzle may be deformed,
causing failure of adsorption or placement.
4 Repeat the procedure 2 and 3 to remove all
of the 12 nozzles.
Nozzle
How to Display Calibration Screen
HLF-10103-01
How to Display Calibration Screen
SHEET
1/3
How to Display Calibration Screen
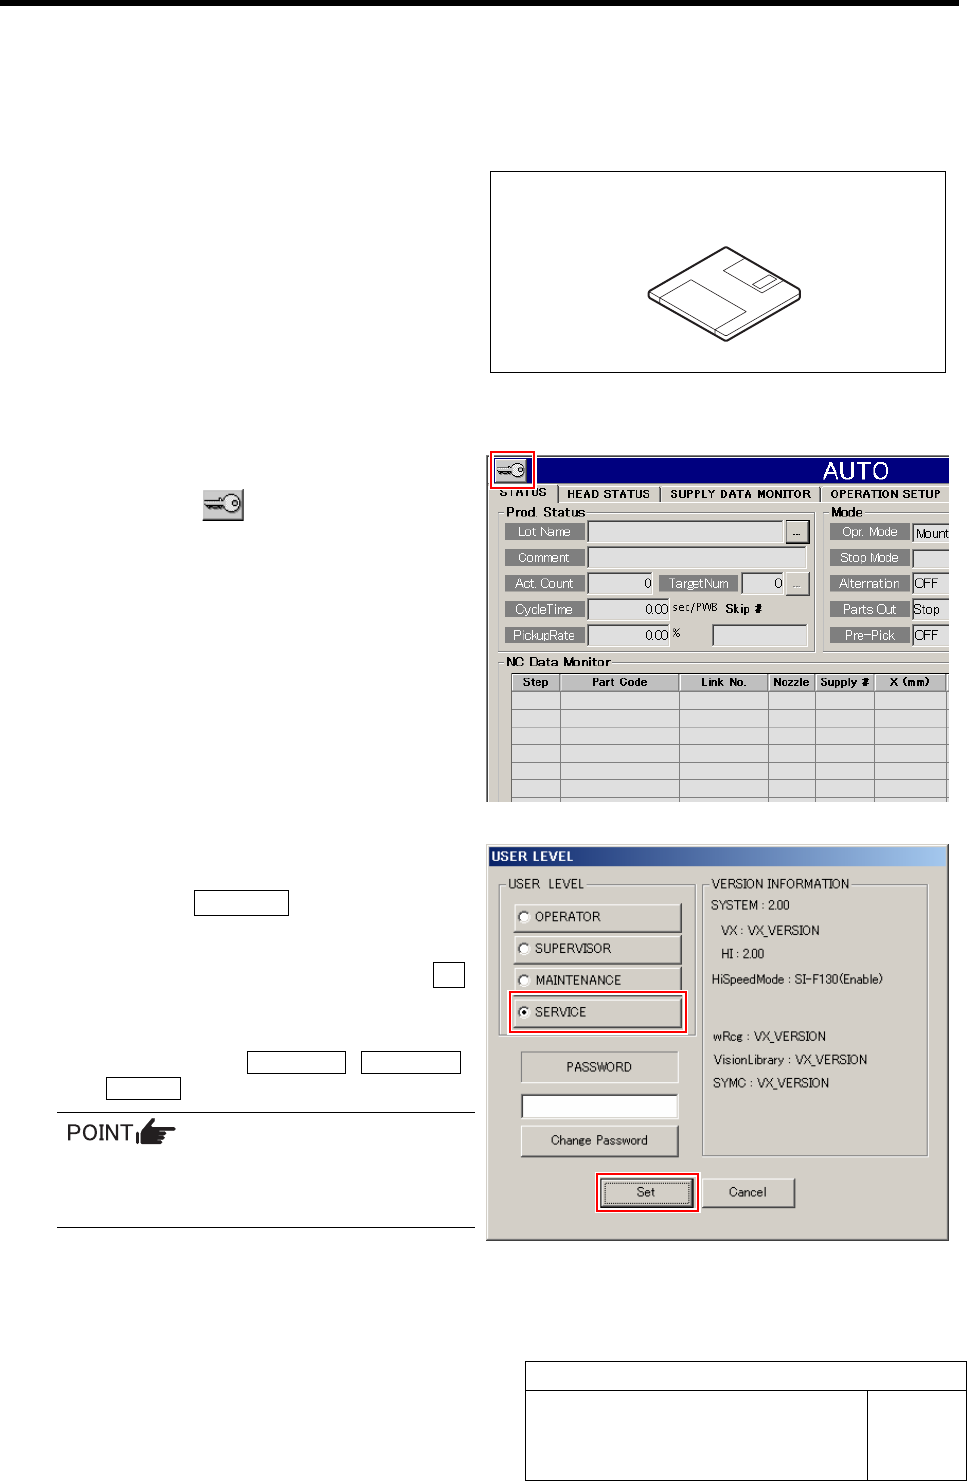
[Necessary jigs]
• Jig floppy disk
[Procedure]
1 Display the USER LEVEL screen.
1. Click the button on the left up-
per of the screen.
USER LEVEL screen is displayed.
2 Change the USER LEVEL to “SERVICE”.
1. Click the SERVICE button.
A cursor appears on a PASSWORD entry space.
2. Enter the password and click the Set
button.
The screen returns to HI screen and respective
menu buttons of DATA EDIT, M/C SETUP,
SERVICE appear on the right of the screen.
To display the calibration screen, it is necessary
to change the USER LEVEL to
[MAINTENANCE] or [SERVICE].
Jig floppy disk