SI-F130 Manual(EN)_jpg_ Rev1.pdf - 第34页
F Axis Origin Position Setup HLF-10206-01 F A xis Origin Position Setup SHEET 1/2 F Axis Origin Position Setup [Necessary jigs] • Do not use jig. [Procedure] 1 Display the F Axis Home screen. 1. Click the Machine Setup b…

Fiducial Mark Setup
HLF-10205-01
Fiducial Mark Setup
SHEET
2/2
2. Click the Jog Move button.
3. Press the cursor key to jog move the
PWB camera to above the target mark
plate installed on the right side of the
conveyor.
3 Mate the cross hairs on the PCBOARD
DISPLAY with the target mark.
1. Adjust by jog moving so that the cross
hairs mate with the target mark while
checking on PCBOARD DISPLAY.
In case of jog fast move, movement by one
stroke can be made every time when the
cursor key is pressed.
When finely adjusting, use jog slow move.
2. Click the Return button to return to
the Fiducial Mark Setup screen.
4 Click the Save button.
The fiducial mark position is saved and the Fiducial
Mark Setup screen closes.
Target mark plate upper surface figure
Target mark
F Axis Origin Position Setup
HLF-10206-01
F Axis Origin Position Setup
SHEET
1/2
F Axis Origin Position Setup
[Necessary jigs]
• Do not use jig.
[Procedure]
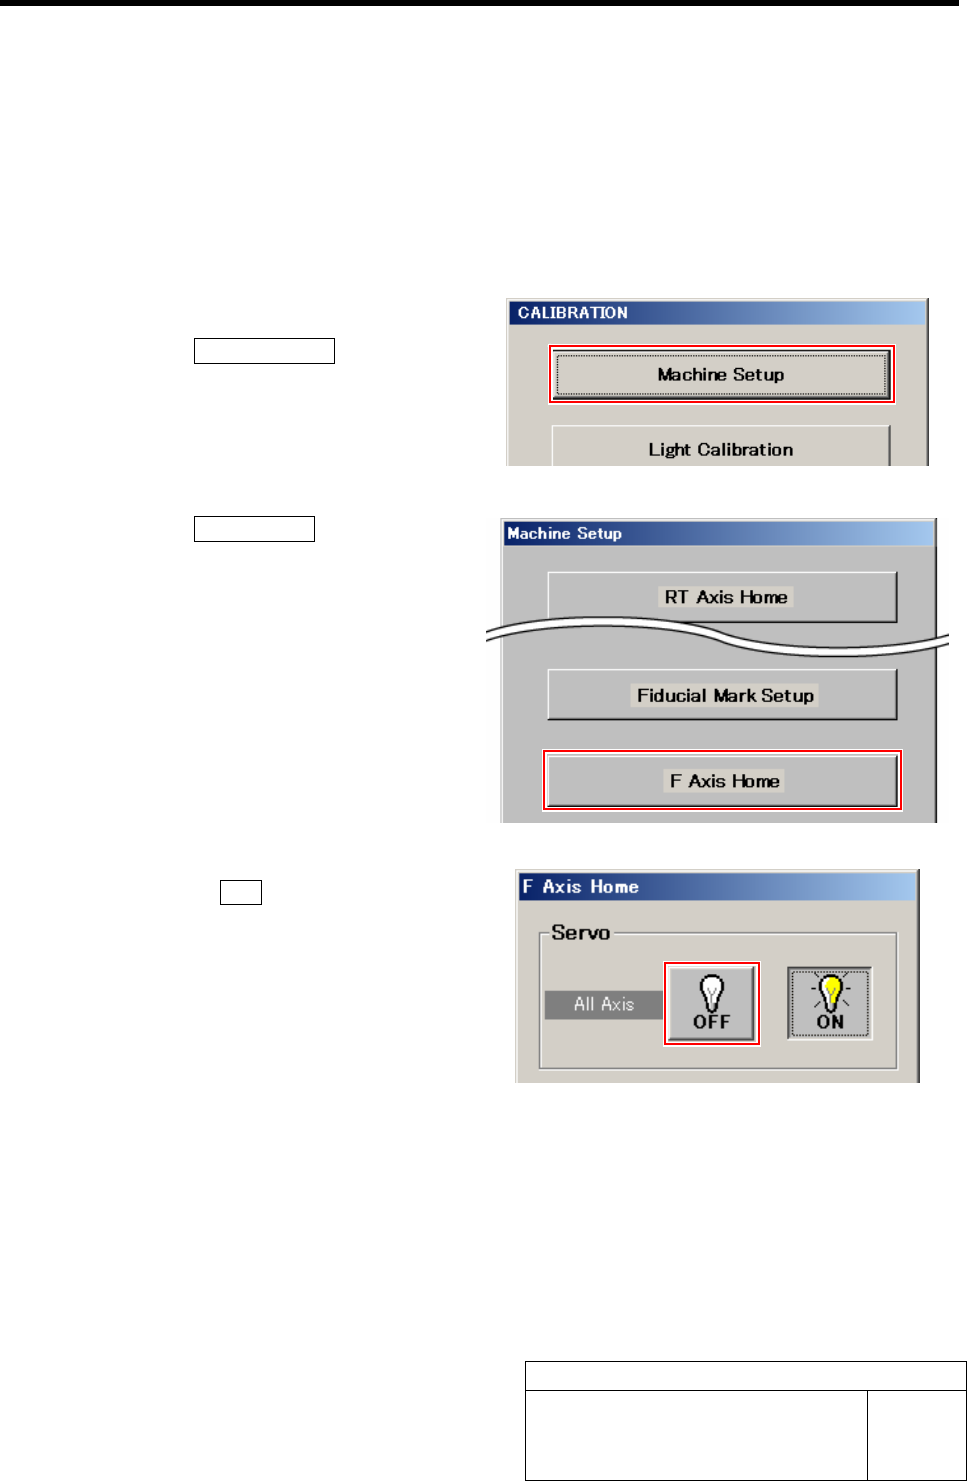
1 Display the F Axis Home screen.
1. Click the Machine Setup button on the
CALIBRATION screen.
Machine Setup screen is displayed.
2. Click the F Axis Home button.
F Axis Home screen is displayed.
2 Click the servo OFF button on the F Axis
Home screen.
Servos for all axes are turned off.
F Axis Origin Position Setup
HLF-10206-01
F Axis Origin Position Setup
SHEET
2/2
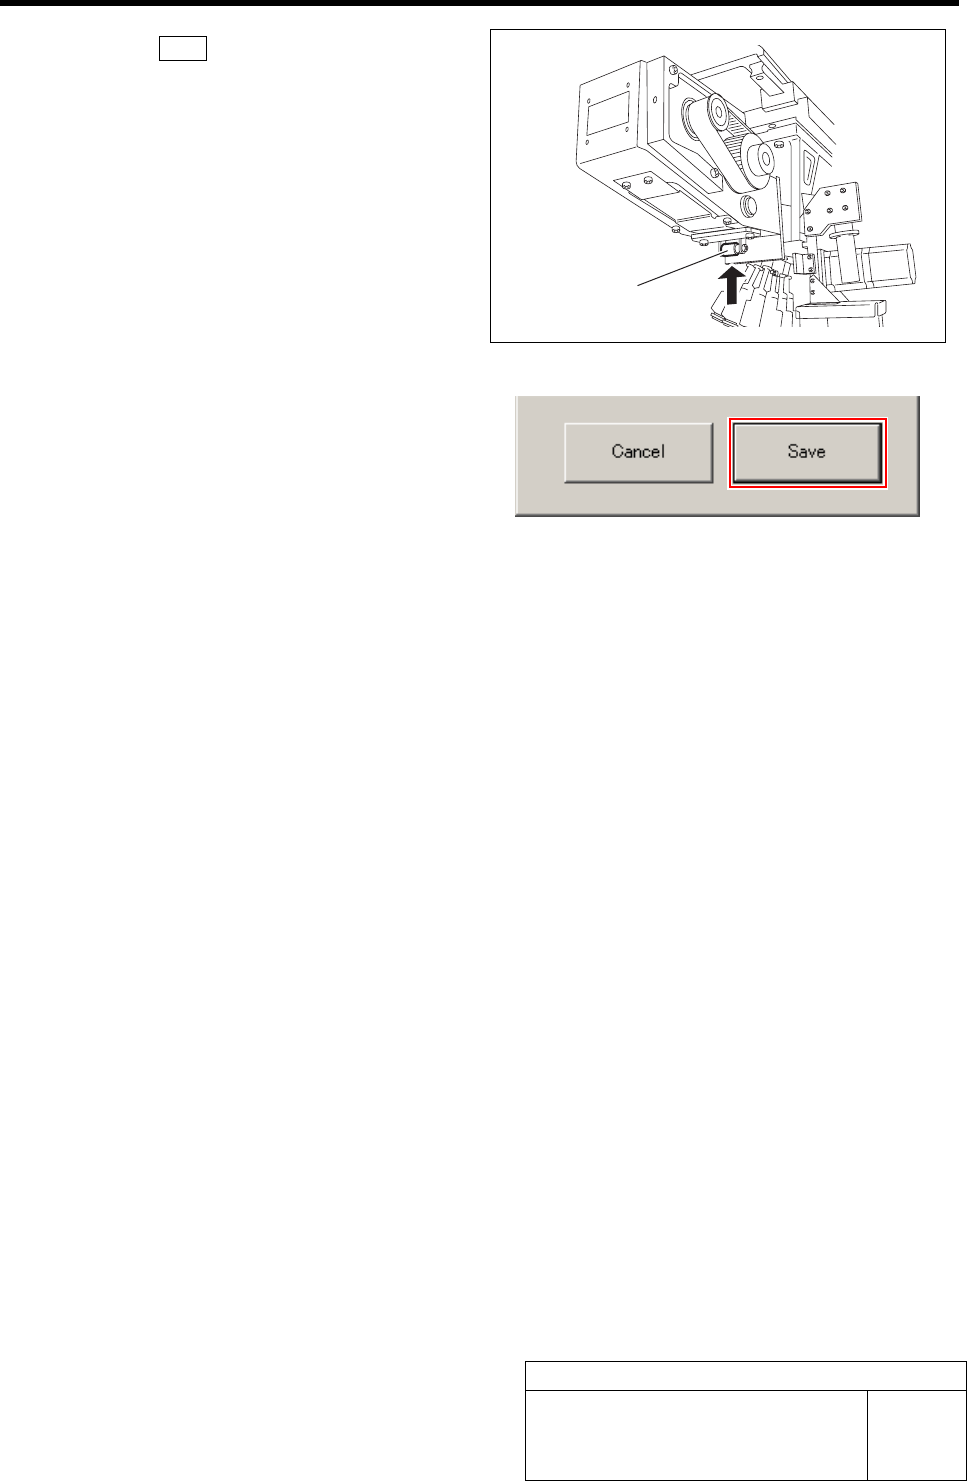
3 Click the Save button on the F Axis Home
screen with the feed roller on the front feed
body retained from the lower.
F axis origin position is saved and F Axis Home
screen closes.
Feed roller