编带机说明书-含图纸tm401.pdf - 第150页
6-4 TM-401 User’s Guide Preparing to Run a Pre -programmed Job D292104.8a.fm Pr eparing to Run a Pre-pr ogrammed J ob The initial set-up and configu ration of a new job are covered in Chapter 4: Setup . This chapter disc…

D292104.8a.fm Quick Start: Running a Job
Chapter 6: Operation 6- 3
6. Select Job.
• Open the Job Tab on the HMI. Select the desired job from the Job Library and
press Open to open the selected job in the Run Tab.
7. Setup Vision.
• Open the Taper Tab on the HMI and advance to the second screen.
• Ensure camera is enabled. Configure inspection as needed.
Note: To configure vision inspection, see Chapter 4: Setup.
8. Run the Job.
• On the HMI, select the Run Tab then press Run.
• Load/unload parts and reels as needed.
Caution!
V-TEK® Incorporated takes no responsibility for the safety of TM-401 if it is
used for any purpose other than the intended purpose as specified in this
User’s Guide.
Quick
Start
Downloaded from www.Manualslib.com manuals search engine
6-4 TM-401 User’s Guide
Preparing to Run a Pre-programmed Job D292104.8a.fm
Preparing to Run a Pre-programmed Job
The initial set-up and configuration of a new job are covered in Chapter 4: Setup. This
chapter discusses the procedure for setting up existing jobs, running a job and routine
operator tasks.
Caution: Users should always wear protective eye wear when operating
or maintaining the TM-401.
Power up the System
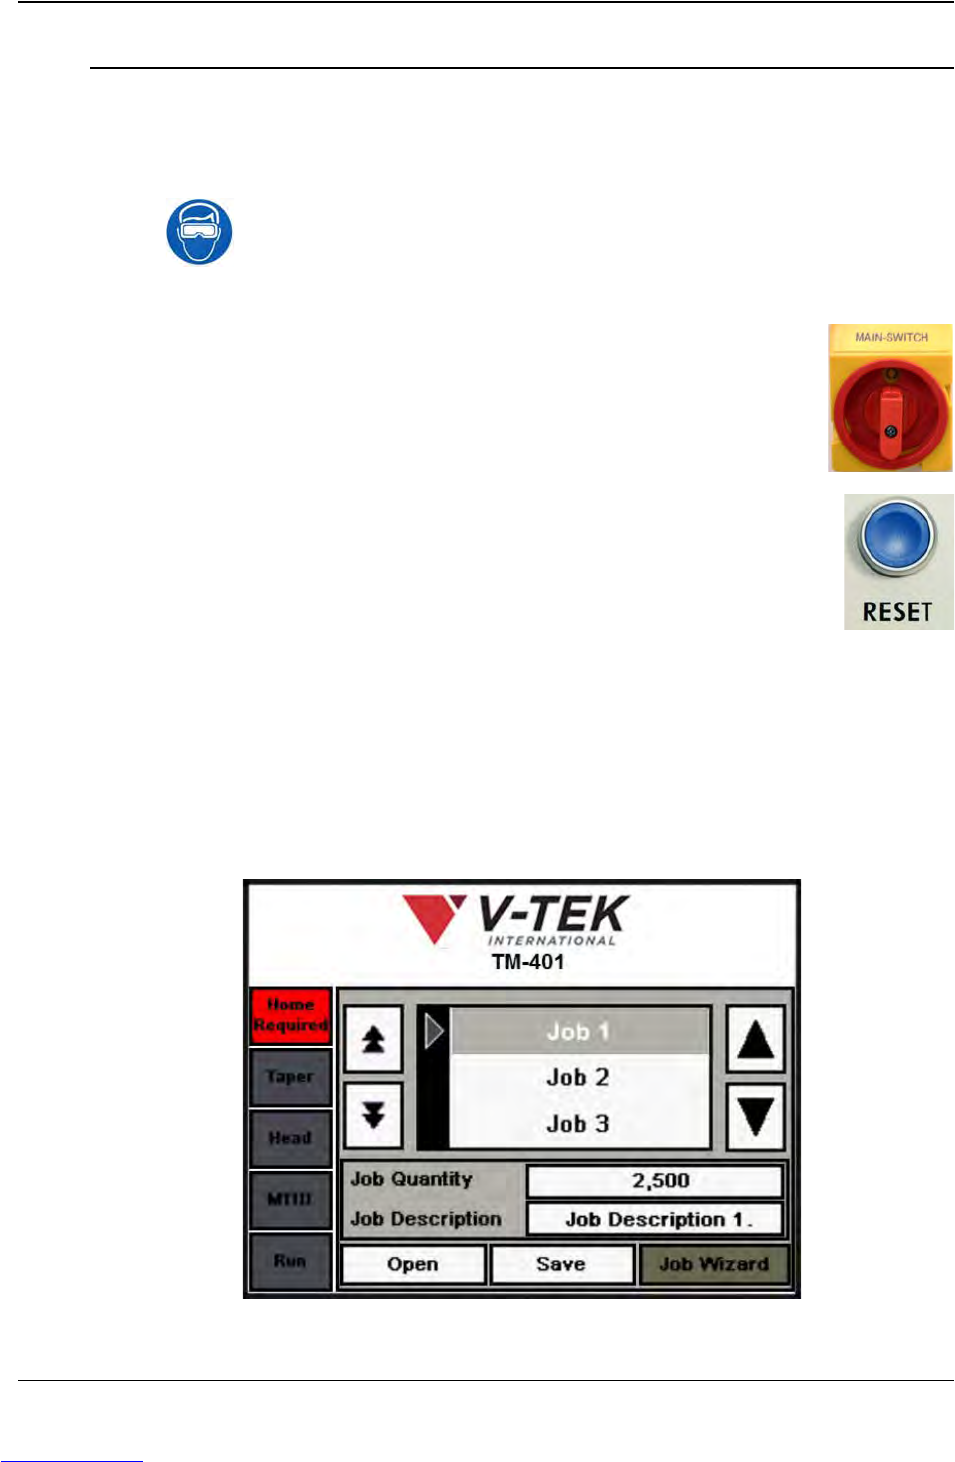
1. Power up the machine by turning the Main Power Switch, which is
located on the right side of the machine, to the ON position.
2. Press the blue Reset button on the left side of the machine.
Home Motors
Note: The TM-401 only needs to be homed once after each power up or emer-
gency stop. Once the motors have been homed, they remain homed until the
machine is powered down.
1. The HMI will open to the Job Tab with a red Home Required button at the top of
the Tab Menu and the other tab buttons grayed out. Press Home Required to
open the Homing Status window.
Step 1:
Power
Up
Step 2:
Home
Motors
Downloaded from www.Manualslib.com manuals search engine
D292104.8a.fm Preparing to Run a Pre-programmed Job
Chapter 6: Operation 6- 5
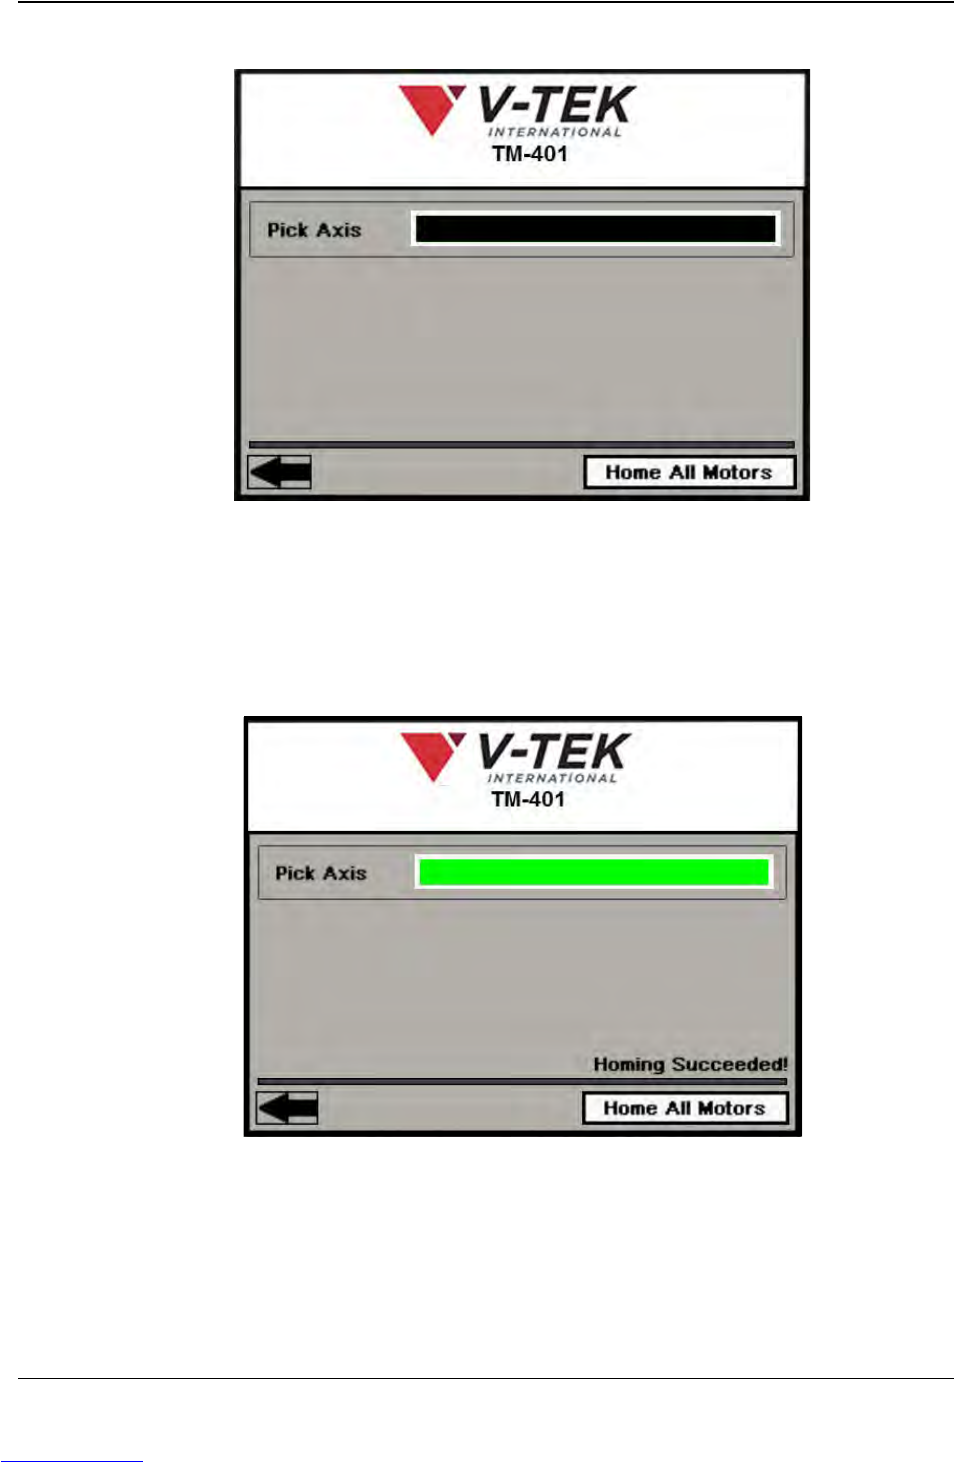
2. Press the Home All Motors button.
The motor homing sequence begins with the nozzle moving slowly upwards (Z
Axis movement). After about a three second delay, the pick head will begin to
move slowly to the right towards the taper (X Axis movement).
The homing sequence will continue until the nozzle has risen to its highest position
and then returned to home and the head has moved all the way to the right and
then returned to home..
Homing progress is displayed as a green bar in the Pick Axis Motor field of the
Homing window. Once the nozzle and head have stopped moving, homing is
complete. A Homing Succeeded! message will appear on the bottom of the
screen.
Press the left Arrow button to return to the Job screen.
Step 2:
Home
Motors
Downloaded from www.Manualslib.com manuals search engine