编带机说明书-含图纸tm401.pdf - 第152页
6-6 TM-401 User’s Guide Preparing to Run a Pre -programmed Job D292104.8a.fm Setup the Manual T ube Input De vice (MTID) 1. Ensure the correct tooling is inst alled. 2. Adjust Feeder positio n on Sliding Plate so nozzle …
D292104.8a.fm Preparing to Run a Pre-programmed Job
Chapter 6: Operation 6- 5
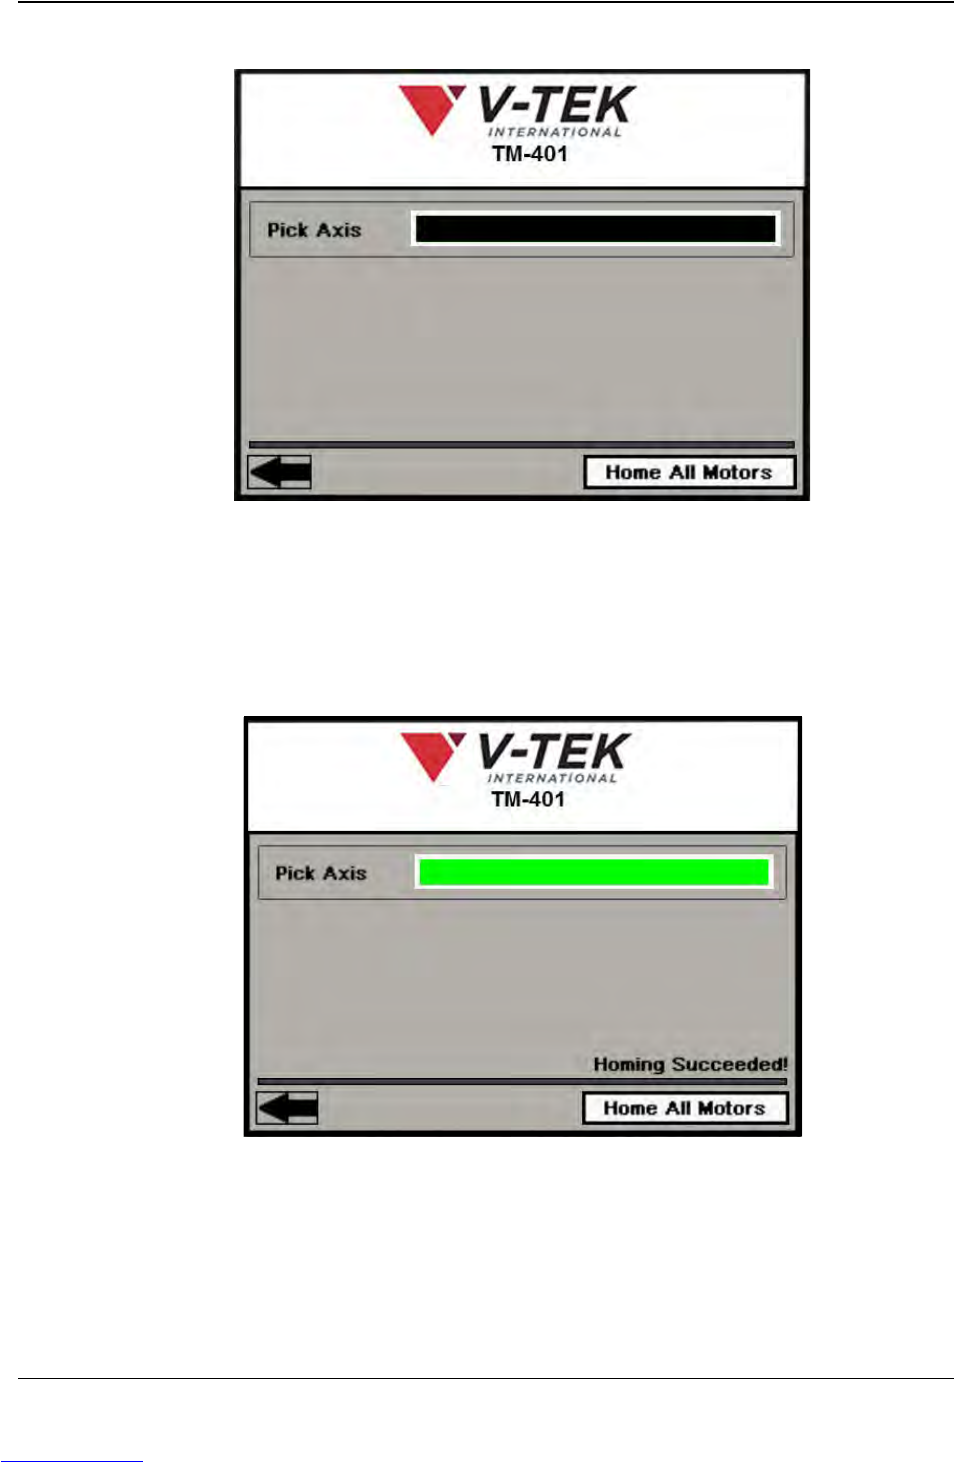
2. Press the Home All Motors button.
The motor homing sequence begins with the nozzle moving slowly upwards (Z
Axis movement). After about a three second delay, the pick head will begin to
move slowly to the right towards the taper (X Axis movement).
The homing sequence will continue until the nozzle has risen to its highest position
and then returned to home and the head has moved all the way to the right and
then returned to home..
Homing progress is displayed as a green bar in the Pick Axis Motor field of the
Homing window. Once the nozzle and head have stopped moving, homing is
complete. A Homing Succeeded! message will appear on the bottom of the
screen.
Press the left Arrow button to return to the Job screen.
Step 2:
Home
Motors
Downloaded from www.Manualslib.com manuals search engine
6-6 TM-401 User’s Guide
Preparing to Run a Pre-programmed Job D292104.8a.fm
Setup the Manual Tube Input Device (MTID)
1. Ensure the correct tooling is installed.
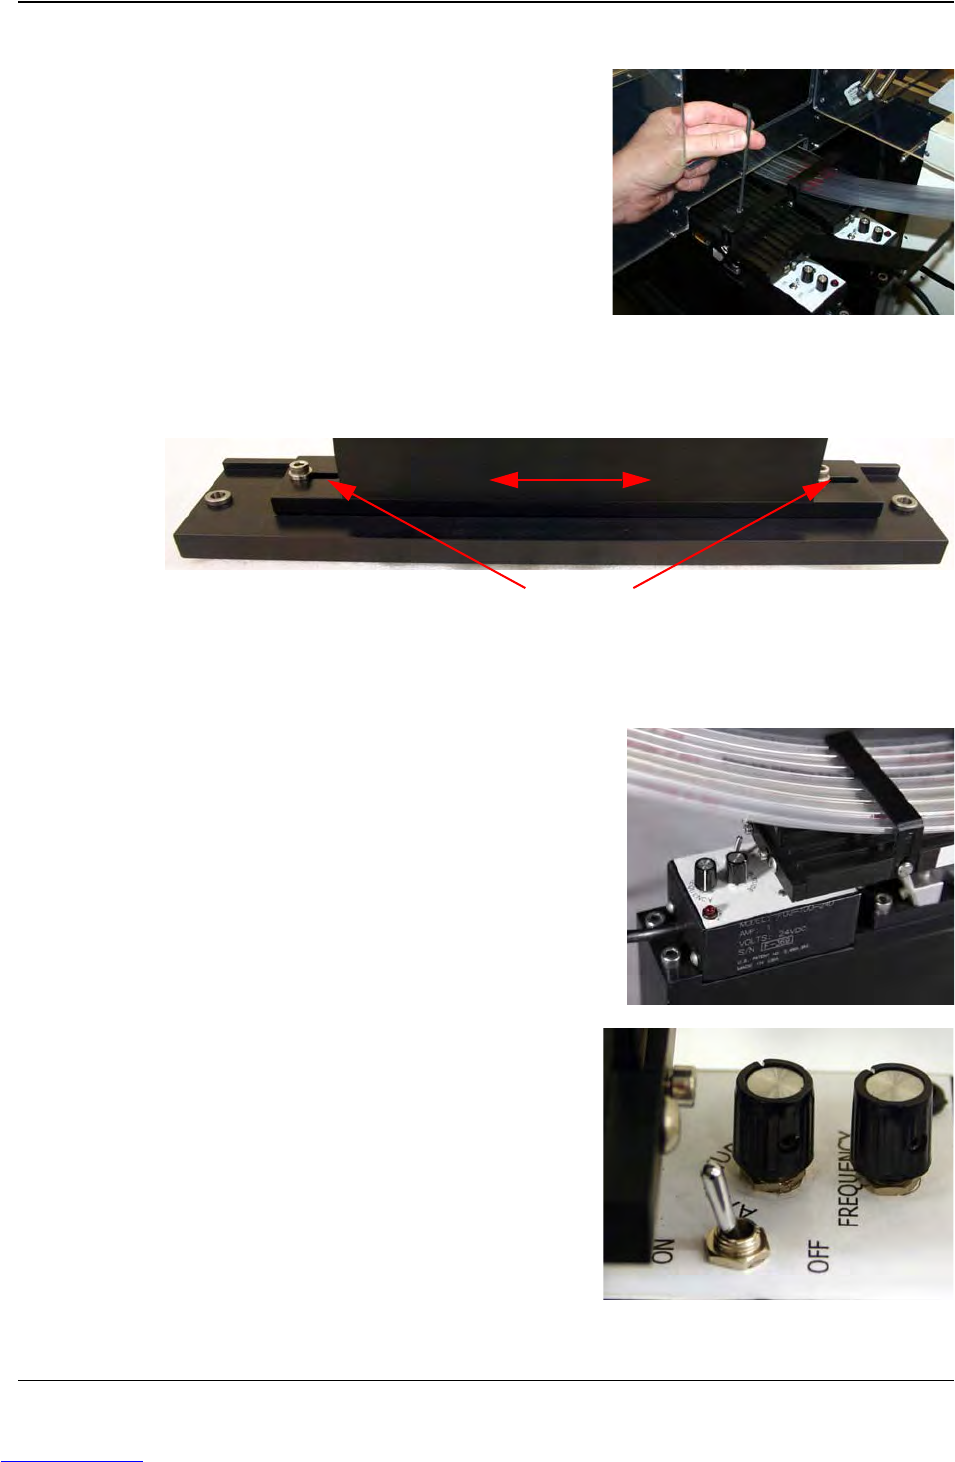
2. Adjust Feeder position on Sliding Plate so nozzle is centered over pick position..
3. Load filled tubes into feeder..
Note: The TM-401 is designed to work with
one or two MTIDs installed. Follow the
setup procedures for both MTIDs if the
optional second feeder is installed.
4. Turn the Vibratory ON and set Vibratory
Off Delay.
5. Adjust the Vibratory’s Amplitude and
Frequency controls as needed to feed
selected parts smoothly.
Step 3:
Setup
MTID
Y Axis Clamping Bolts
Adjust feeder position on Slotted Plate
Downloaded from www.Manualslib.com manuals search engine
D292104.8a.fm Preparing to Run a Pre-programmed Job
Chapter 6: Operation 6- 7
Setup the Taper
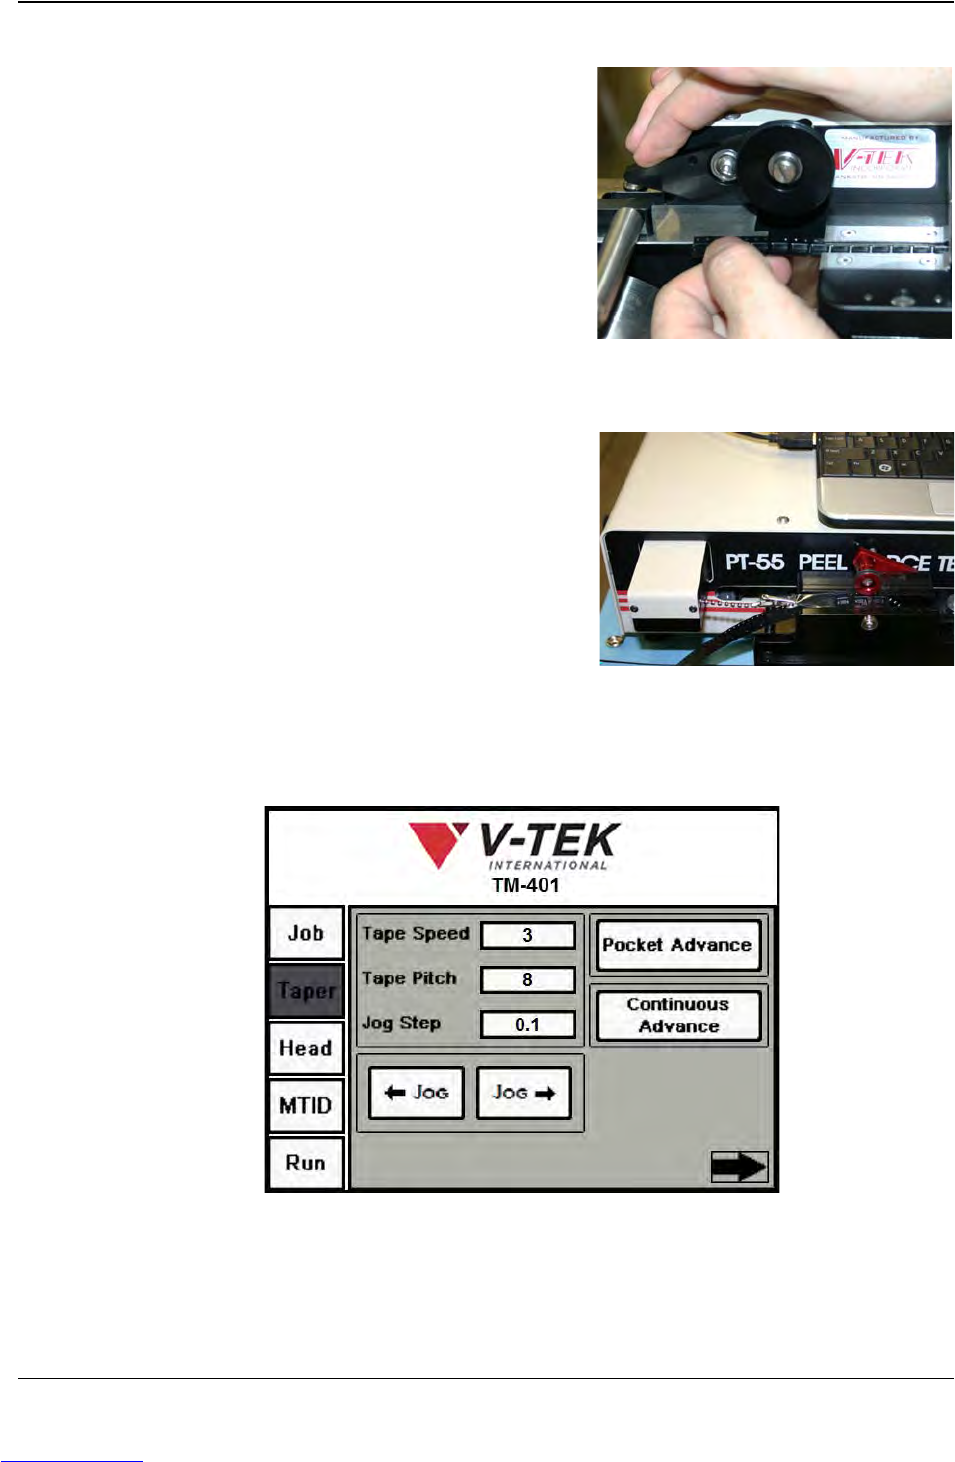
1. Load the correct carrier tape and cover
tape, adjusting the track width as
necessary.
2. Select PSA or Heat seal.
3. Align cover tape with carrier tape.
4. Run a pull test and adjust seal strength
as needed.
5. Place an empty reel onto the take-up
reel spindle.
6. Use the Continuous Advance button on the Taper Tab to run out the tape until it
can be attached to the reel.
The tape normally can be attached by inserting it into the reel hub or with adhesive
tape.
Step 4:
Setup
Ta p e r
Downloaded from www.Manualslib.com manuals search engine