编带机说明书-含图纸tm401.pdf - 第52页
3-10 TM-401 User’s Guide Job Tab D292104.6.fm The fif th Job Wizard screen is used to ente r the number of tubes that will be lo aded in the MTID. A. Enter the number of tubes that will be processed. If two T ube Feeders…
D292104.6.fm Job Tab
Chapter 3: Human Machine Interface 3-9
B. Seal Type toggles between PSA and Heat seal, select correct seal type.
C. The Set Point fields for the Inner and Outer Sealer are used to set the desired
temperature for Heat Seal. Enter the correct value in both fields, then press the
right Arrow Key to move to the next Job Wizard screen.
Note: The TM-401 accommodates a wide range of carrier tapes and cover tapes. Set-
tings may vary from one tape product to another. The recommended starting point is 90°
C. The maximum recommended operating temperature is 160° C. The temperature for
each seal shoe should be increased or decreased as needed after running a peel force
test.
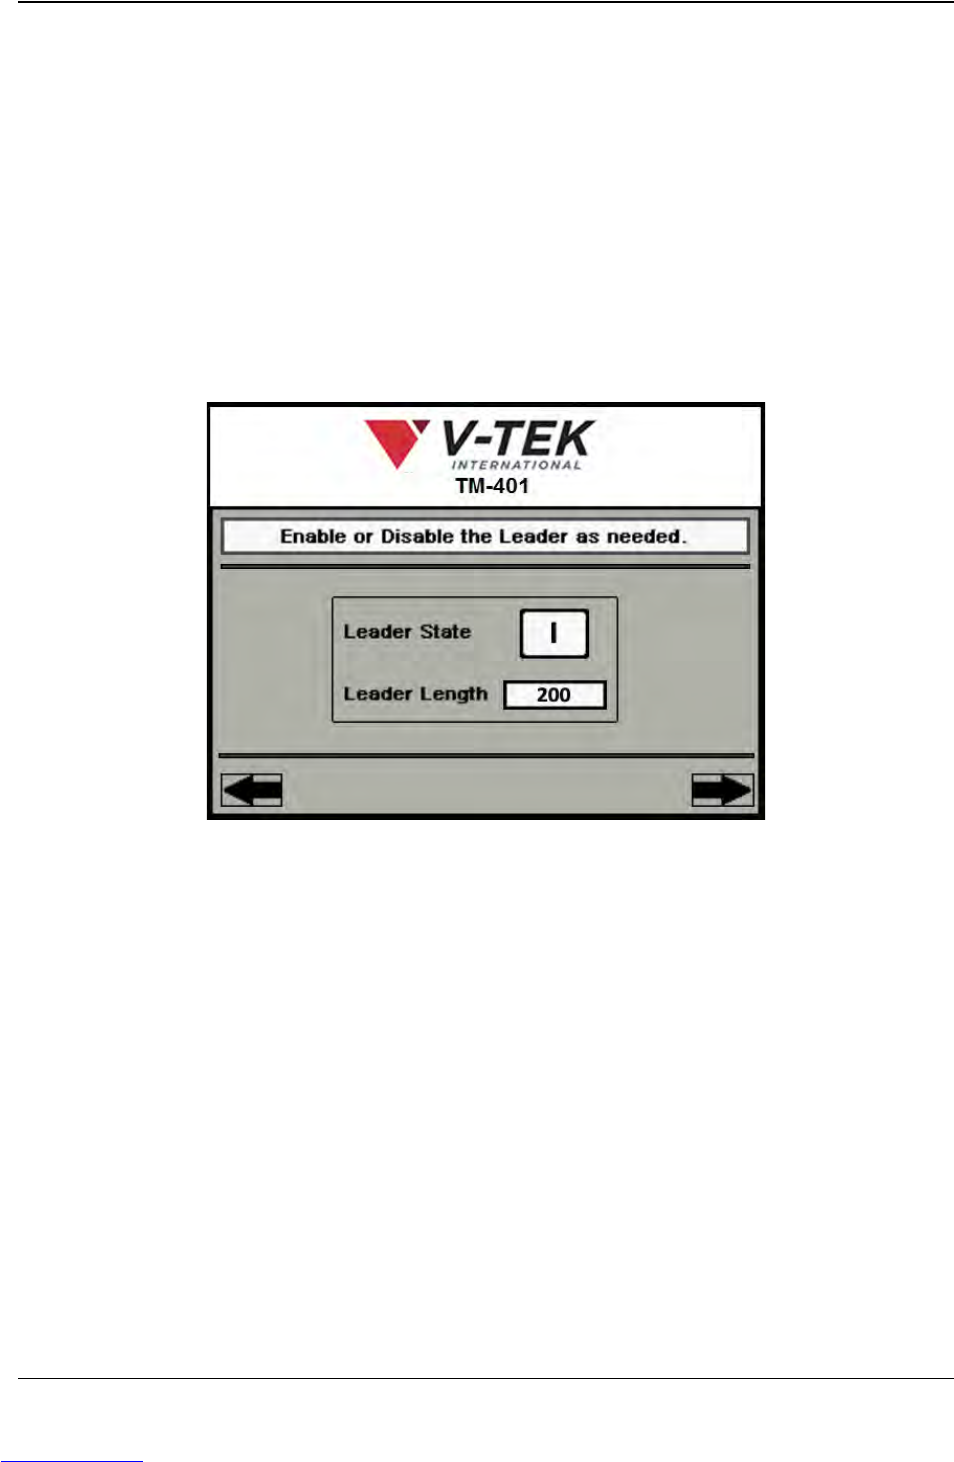
The fourth Job Wizard screen enables or disables the tape Leader.
A. Leader State toggles between ON ( I ) and OFF (O).
B. Pressing the Leader Length field will open a keypad. Type in the desired value,
then press the right Arrow Key to move to the next Job Wizard screen.
A
B
Job Wizard Step 4
Downloaded from www.Manualslib.com manuals search engine
3-10 TM-401 User’s Guide
Job Tab D292104.6.fm
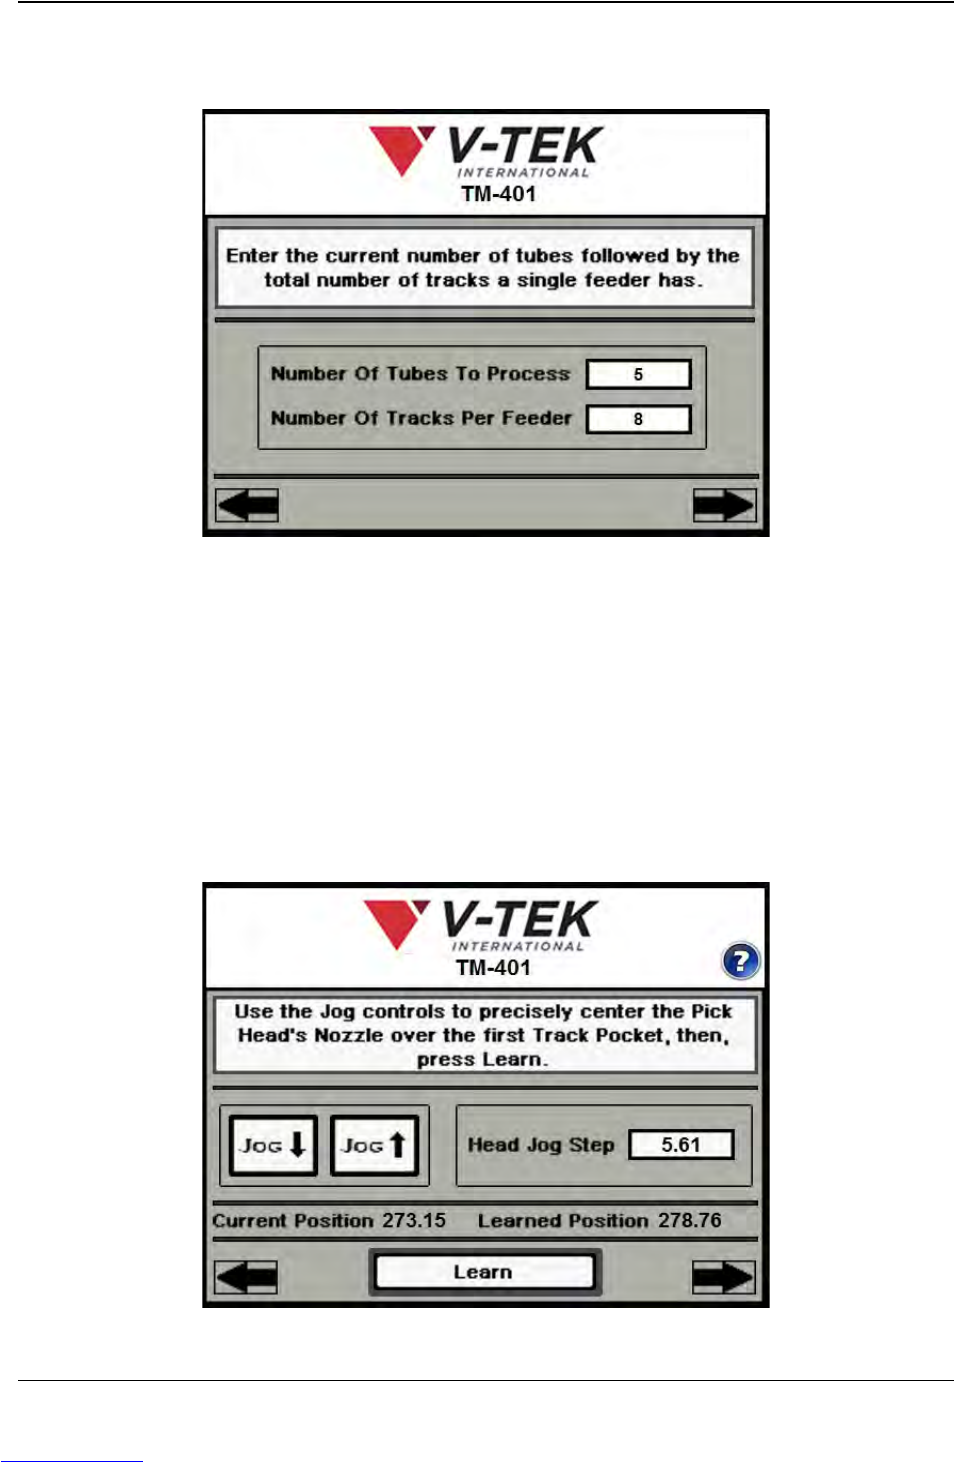
The fifth Job Wizard screen is used to enter the number of tubes that will be loaded in the
MTID.
A. Enter the number of tubes that will be processed. If two Tube Feeders are
installed, this will include the total number of tubes to be processed from both
feeders.
B. Enter the maximum number of tubes a single feeder will hold, then press the right
Arrow Key to move to the next Job Wizard screen.
The sixth and seventh Job Wizard screens are used to automatically determine Tube
Pitch.
A
B
Job Wizard Step 5
A
C
Job Wizard Step 6
B
Downloaded from www.Manualslib.com manuals search engine
D292104.6.fm Job Tab
Chapter 3: Human Machine Interface 3-11
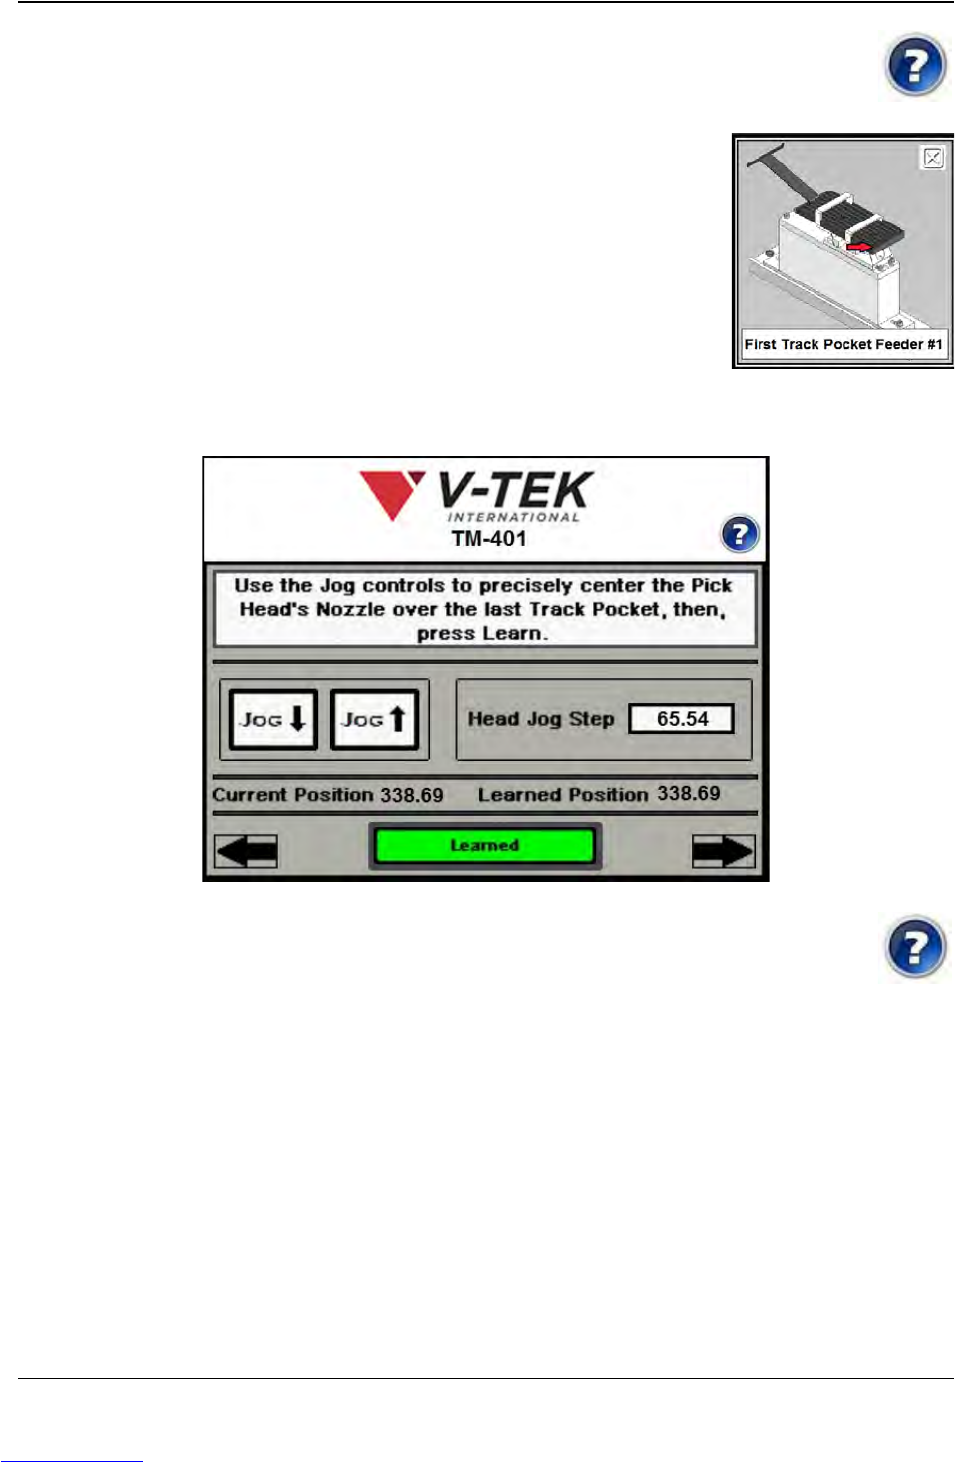
A. Center the Pick Head over the first track pocket using the HMI Jog but-
tons or the Jog buttons on top of the Sealer enclosure. To see an illus-
tration of the correct head placement, push the Help icon.
An illustration of the Tube Feeder with the first track
pocket identified will appear.
B. The distance the head moves with each Jog is set in
the Head Jog Step field.
C. Press Learn. The Learned Position will now match the
Current Position and the Learn button will turn green
and update to read Learned. (see Step 7 below.)
Press the right Arrow to move to the next Job Wizard screen.
A. Center the Pick Head over the last track pocket using the Jog buttons.
To see an illustration of the correct head placement, push the Help
icon.
B. The distance the head moves with each Jog is set in the Head Jog Step field.
C. Press Learn. The right Arrow Key will appear. Press the right Arrow to move to
the next Job Wizard screen.
Note: It is useful to note the current position for both Pick Position 1 and Pick Position 2
for future use or to help when making fine adjustments.
A
C
Job Wizard Step 7
B
Downloaded from www.Manualslib.com manuals search engine