编带机说明书-含图纸tm401.pdf - 第192页
8-4 TM-401 User’s Guide General Maintenance Tasks D2921 04.10a.fm General Maintenance T asks Daily cleaning V acuum or brush of f the machine with a stiff bristled paint brush daily , removing dust and debris from all op…
D292104.10a.fm Maintenance
Chapter 8: Maintenance 8- 3
Maintenance
Only maintenance personnel that have thoroughly read and understand the TM-401 User’s
Guide and have several years experience operating and maintaining similar machines should be
permitted to maintain the TM-401.
Routine Maintenance Schedule
The TM-401’s simple, low-maintenance design keeps required maintenance to a minimum. The
following schedule indicates common maintenance tasks and how frequently they should be per-
formed.
Caution!
Users should always wear protective eye wear when operating or maintaining the
TM-401.
Maintenance Task Schedule Materials needed
Vacuum or brush dust and
debris off machine, including
sensors
Daily • soft bristled paint brush or
vacuum
Inspect nozzle tip for wear or
damage
Daily • To replace worn nozzle tip,
call V-TEK Service for spe-
cific nozzle part number.
Check and set incoming air
pressure to 85 psi with the
vacuum on
Every 120 hours of operation
or as needed.
• None
Check & record vacuum lev-
els
Every 40-80 hours of opera-
tion
• None
Clean Heat Sealer shoes Every 120 hours of operation
or as needed
• 3/32” hex wrench
• plastic or brass brush
• alcohol
Clean Loading Track Every 40 hours of operation • small, stiff bristled paint
brush
Clean Cover Tape Guide Every 40 hours of operation • alcohol
• cotton swabs
Inspect Air Pressure Regula-
tor for moisture build-up
Every 40 hours of operation • none
Clean PSA Sealer assembly Every 40 hours of operation • alcohol
• cotton swabs
Replace nozzle vacuum filter Every 200-300 hours of oper-
ation
• nozzle vacuum filter (p/n
201026)
Remove heat shoes, replace
if necessary
Every 4 months • Heat Shoes (p/n 261122)
Downloaded from www.Manualslib.com manuals search engine
8-4 TM-401 User’s Guide
General Maintenance Tasks D292104.10a.fm
General Maintenance Tasks
Daily cleaning
Vacuum or brush off the machine with a stiff bristled paint brush daily, removing dust and debris
from all operating areas including the sensors.
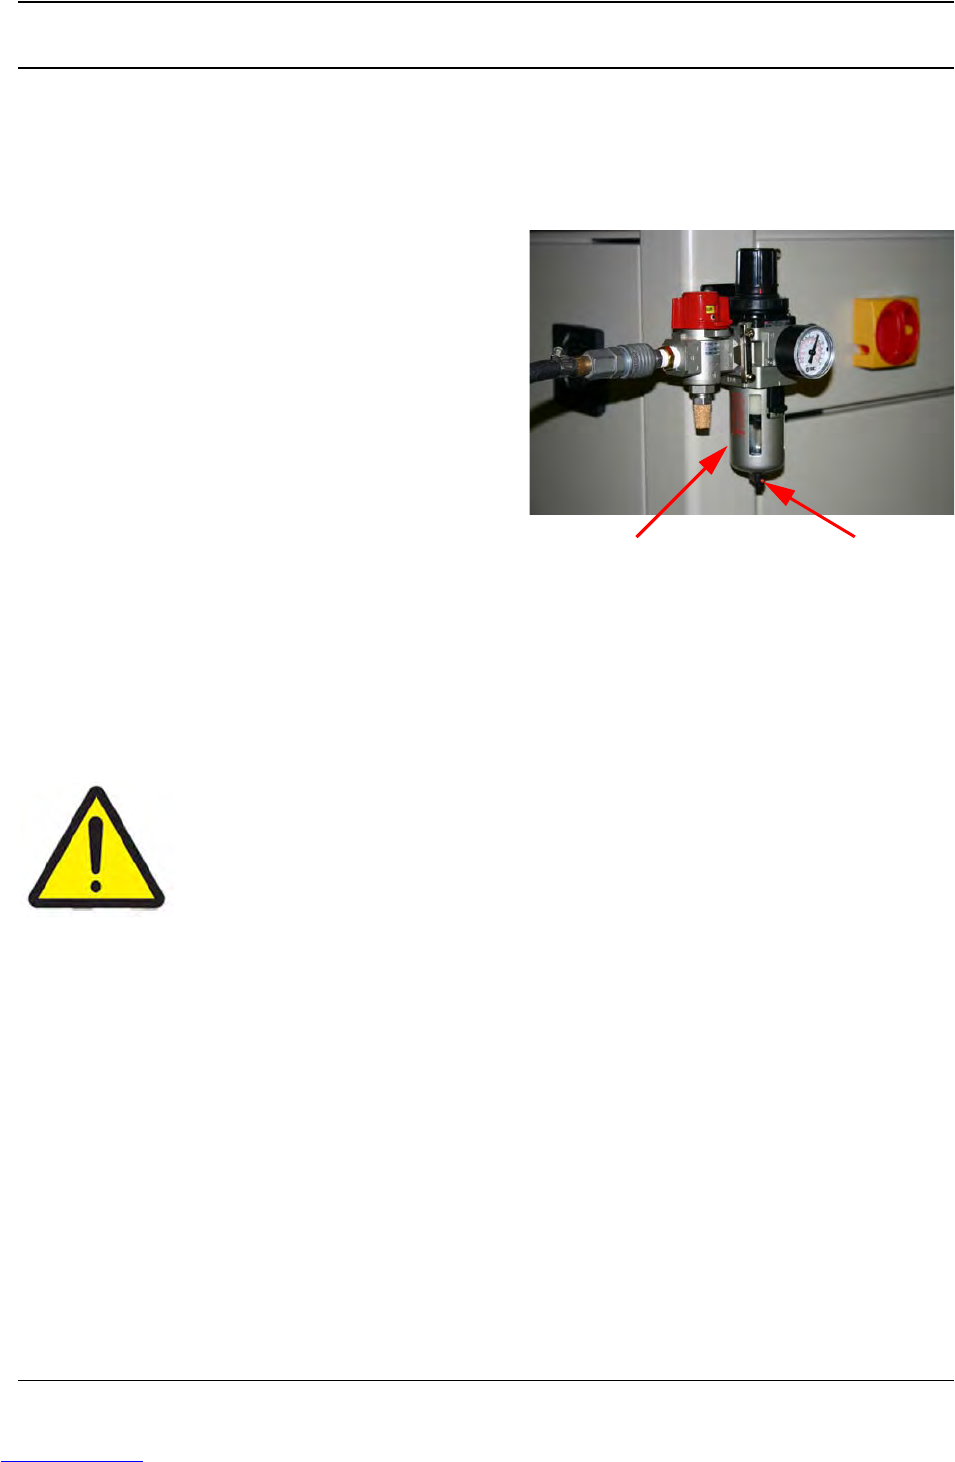
Air Pressure Regulator
Check the incoming air pressure every 40-80
hours of operation to ensure it is set to 85 psi
with all vacuums ON. Adjust if necessary.
Inspect the air regulator for moisture accumula-
tion after every 40 hours of operation. Turn the
petcock on the bottom of the regulator clockwise
to release the fluid if moisture is present. Tighten
the petcock when moisture is gone.
Note: Frequency of moisture build-up will
vary with air quality. Check the Air Pres-
sure Regulator periodically to determine
if fluids need to be released more fre-
quently.
Other than the release of moisture build-up, the TM-401 pneumatic system should not
require adjustment or replacement. Should an issue with the pneumatic system arise, call
V-Tek Service for assistance.
Caution!
The TM-401 air supply should be adjusted to operate at a maximum working
pressure not exceeding 7.6 bar (110 psi). The maximum permissible source
pressure should not exceed 9 bar (130 psi). Failure to set the within these lim-
its could result in a failure in the pneumatic system which could lead to injury.
Lubrication
No lubrication is required or desired on the TM-401 as all parts are no maintenance in this regard
and the use of lubricants could interfere with components.
Check for moisture here
Petcock
Downloaded from www.Manualslib.com manuals search engine
D292104.10a.fm General Maintenance Tasks
Chapter 8: Maintenance 8- 5
Pick Head Maintenance
Nozzle Tip
Inspect the nozzle tip daily for excessive wear or damage. Remove and replace as necessary.
See Chapter 4: Machine Setup for instructions on changing the nozzle tip.
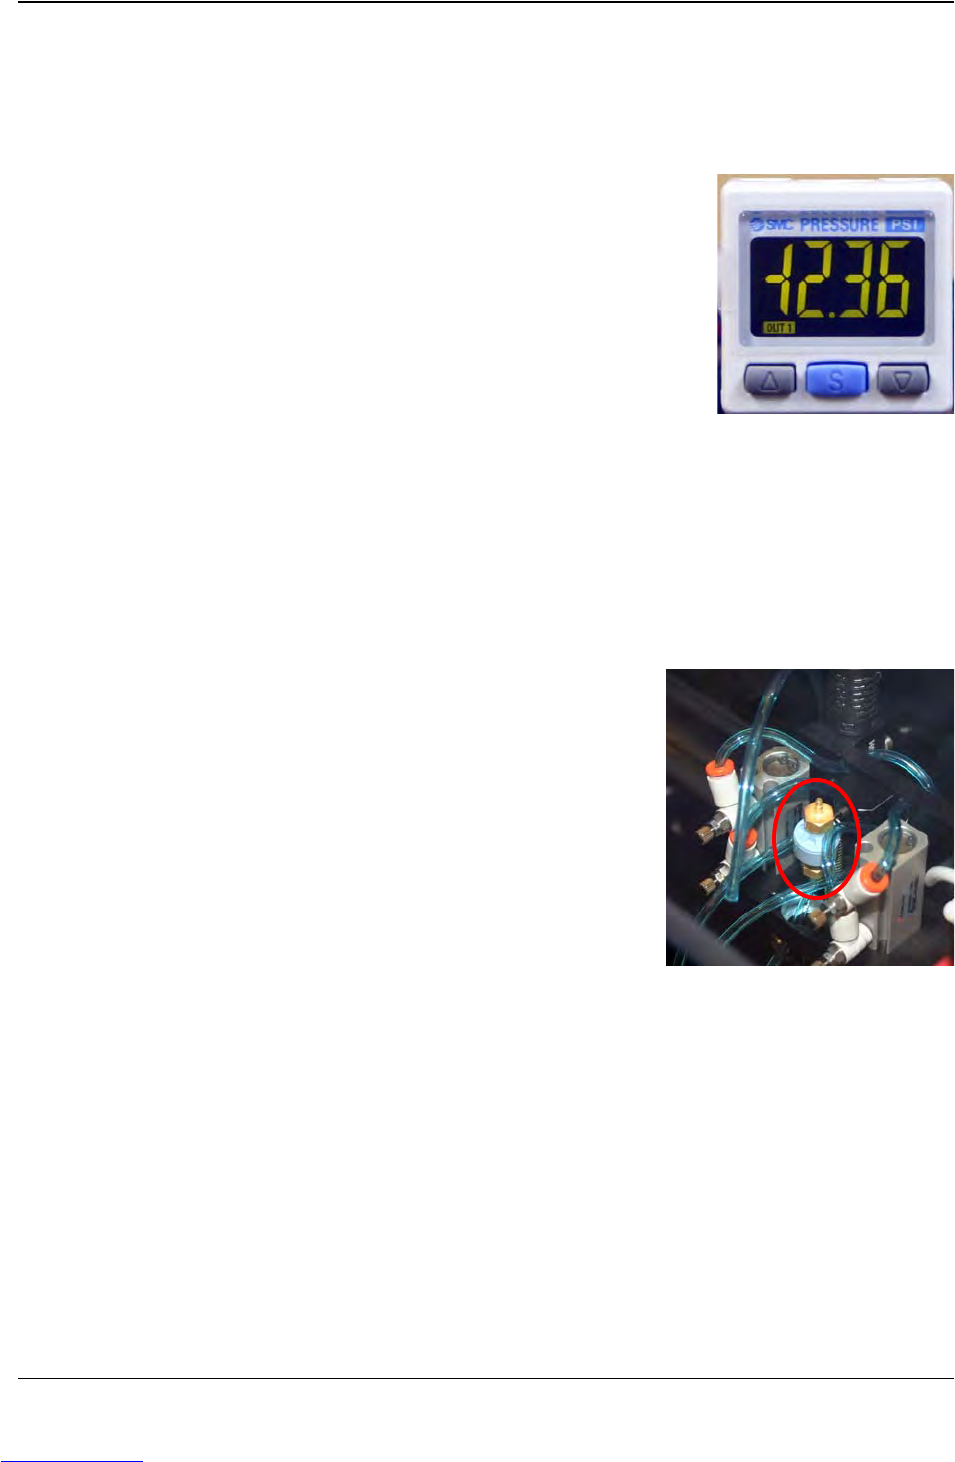
Vacuum Levels.
Check Vacuum levels weekly. This recorded information on high/
low vacuum levels is useful on a week to week basis and can indi-
cate pneumatic problems such as loose fittings or seal problems.
1. Turn on the vacuum generator from the HMI.
2. Observe and record vacuum level for the nozzle with no part
present.
3. Cover the nozzle (with part or some object) and record vac-
uum levels.
4. Compare the current vacuum levels with those previously recorded. A partially blocked
nozzle or restricted filter in the nozzle assembly is indicated by a smaller vacuum swing.
5. Remove and replace the nozzle vacuum filter if there are high vacuum levels without part
or poor pickup.
Replace the Vacuum Filter
If parts are not picking consistently or if the Nozzle Vacuum
Sensor indicates there is a part on the Nozzle (values appear
green) without a part on the nozzle, this is an indicator that the
Vacuum Filter needs to be cleaned or replaced. Typically the
Vacuum Filter will require attention after 200-300 hours of
operation.
The Vacuum Filter is located on top of the Pick Head Assem-
bly.
1. Open the front door and manually move the pick head
all the way to the front for easy access.
Downloaded from www.Manualslib.com manuals search engine