编带机说明书-含图纸tm401.pdf - 第181页
D292104.9a.fm Tips on Part Placement Chapter 7: Troubleshooting 7-23 Tips on P ar t Pla cement If component s are not dropped properly , there are four variables that can be adjusted to correct the problem. Note: Each pa…
7-22 TM-401 User’s Guide
Adjusting Nozzle Vacuum Sensors D292104.9a.fm
Adjusting Nozzle Vacuum Sensors
The TM-401’s Nozzle Vacuum Sensor is setup before the machine is shipped. It may occasion-
ally require adjustment depending on vacuum sensitivity and the type of part that is being pro-
cessed.
If the TM-401 places “empty” pockets (i.e. places as though it held a part when it did not) or
returns a picking part error when it picked a part, the vacuum sensor’s threshold point probably
needs to be adjusted.
Vacuum Sensor Settings
1. Close the enclosure doors, then open the Head Setup Tab.
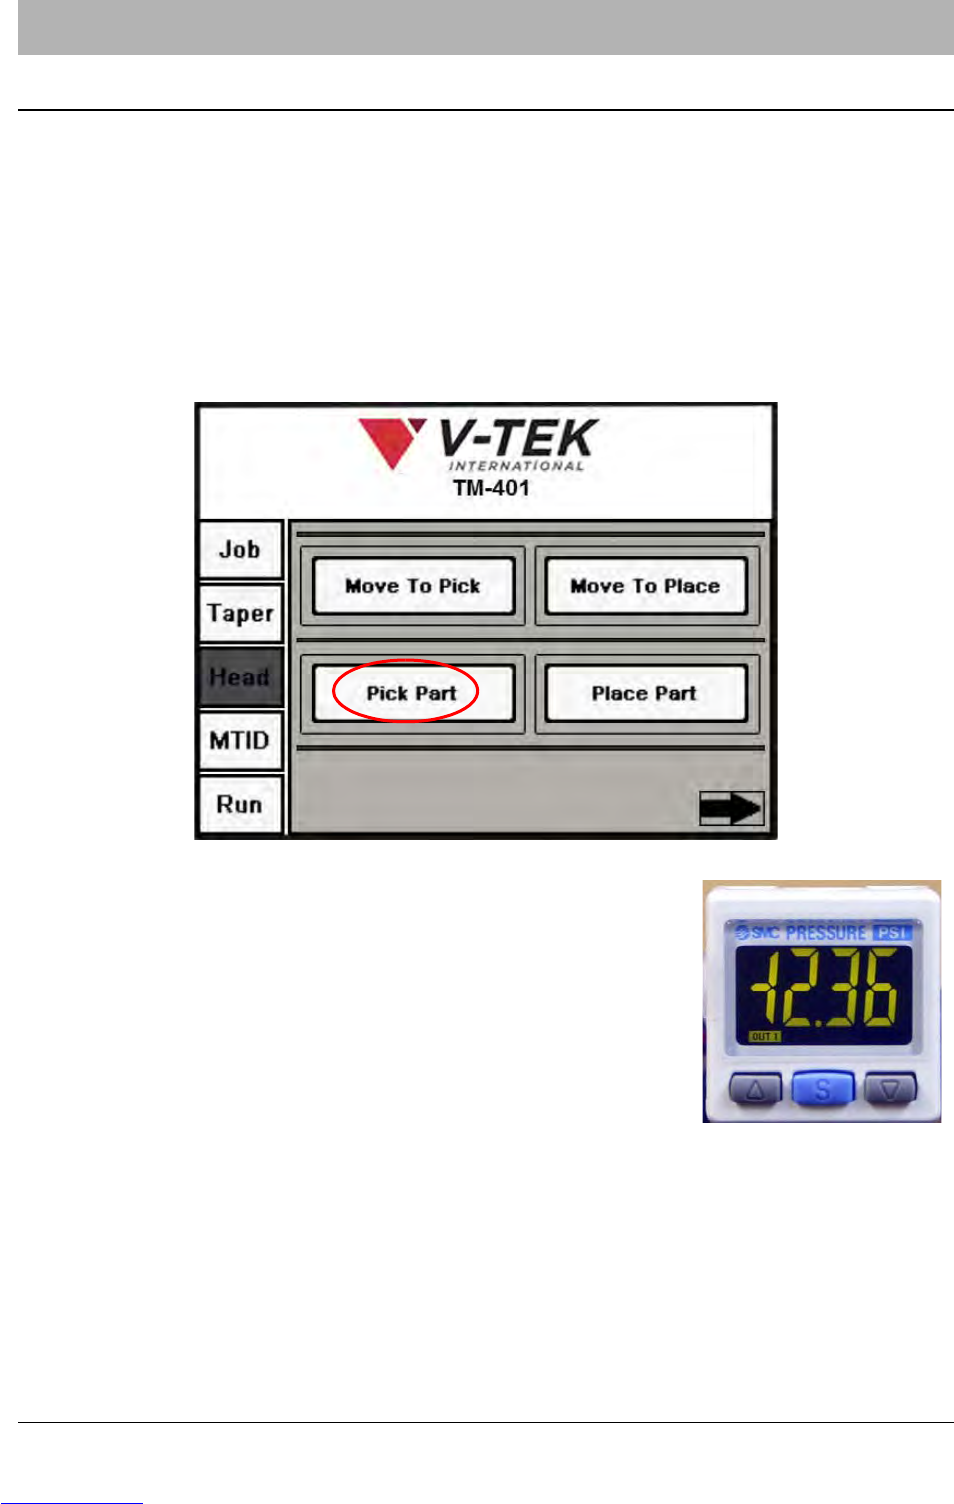
2. Press the Pick Part button to activate vacuum and pick a
part. Observe the vacuum sensor indicator which is located
on the Pick & Place Head above the nozzles. The numbers
should be lit in green with components on the nozzle and
red if components are not.
3. If the sensors require adjustment, Press the blue Set button
once. The sensor will alternately flash P_1 and the current
value.
4. Use the Up/Down Arrow Keys to adjust the sensor as
needed with components both on and off of the nozzles.
5. Press the blue Set button again to exit back to normal operation.
Downloaded from www.Manualslib.com manuals search engine
D292104.9a.fm Tips on Part Placement
Chapter 7: Troubleshooting 7-23
Tips on Part Placement
If components are not dropped properly, there are four variables that can be adjusted to correct
the problem.
Note: Each part is different and may require a different combination of adjustments to
obtain proper place performance.
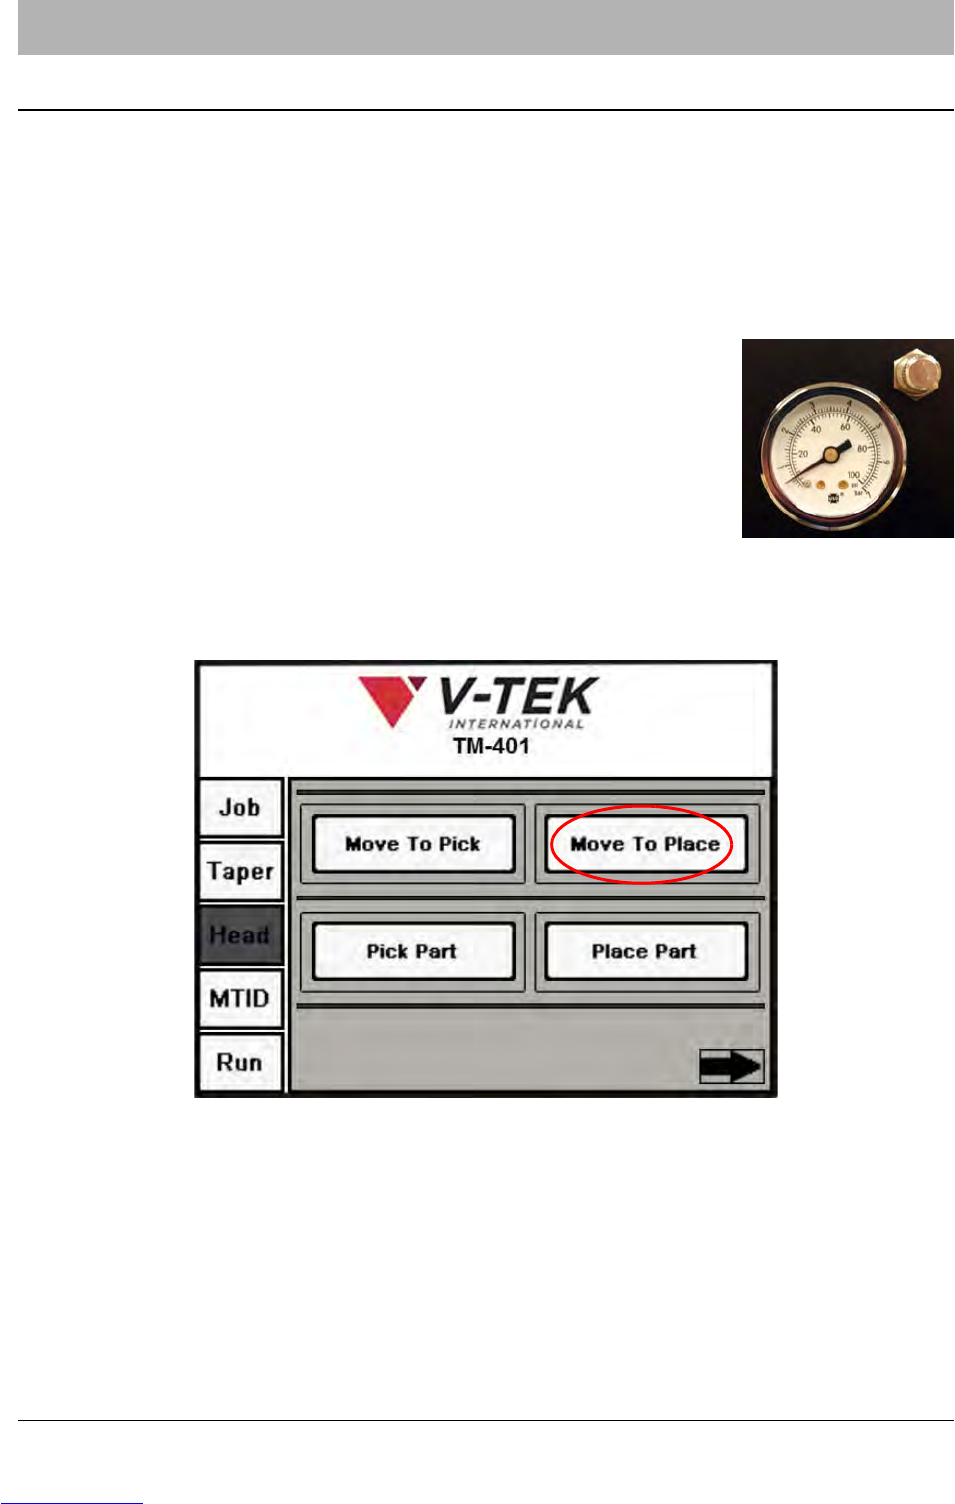
1. Adjust Blow-off Pressure. The Blow-off Pressure Gauge is
located on the front of the Pick Head enclosure. If components
are not dropping properly, loosen locking nut and rotate to adjust
pressure levels. When the desired pressure level is reached,
tighten locking nut.
Note: Every part is different and may require a different combi-
nation of adjustments to obtain proper place performance.
2. Adjust Place Position X. Open the HMI Head Tab. Press the Move To Place button.
Downloaded from www.Manualslib.com manuals search engine
7-24 TM-401 User’s Guide
Tips on Part Placement D292104.9a.fm
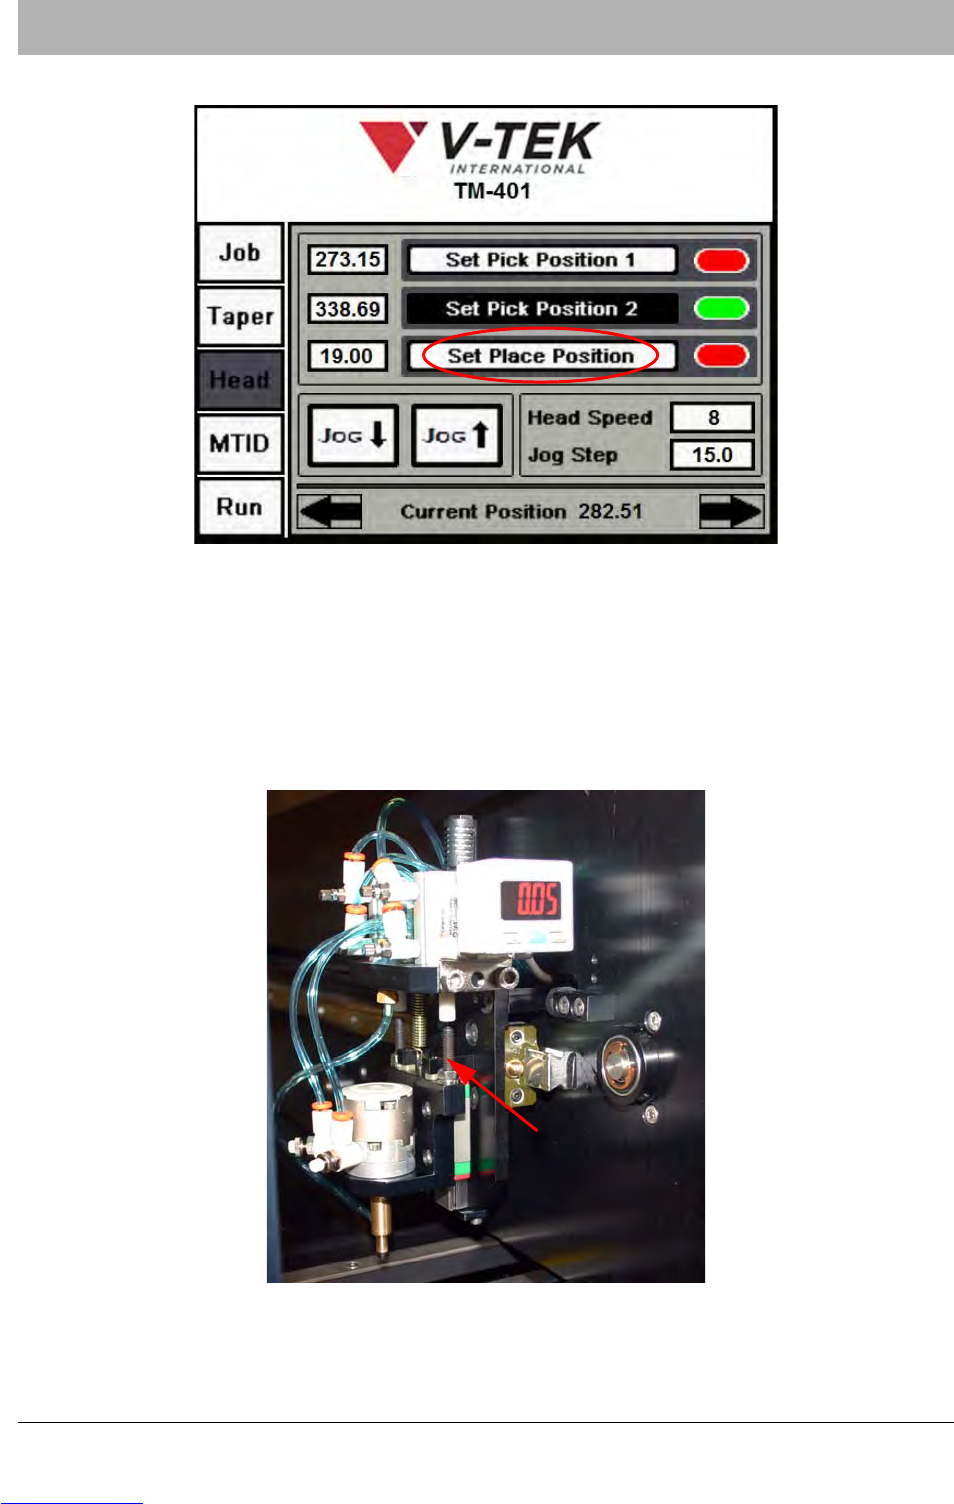
3. Press the Right Arrow to move to the next Head Tab..
Jog the head up or down until the nozzle is centered correctly over the place location.
When the nozzle is positioned correctly, press the Set Place Position button.
4. Adjust Place Position Z. Manually adjust the right Actuator Adjustment Screw up or
down until the nozzle is extended the appropriate distance above the place location. You
may need to experiment with placing a part to determine what Z Axis height works best.
When the nozzle is positioned correctly, press the Set Place Position button.
Actuator
Adjustment
Screw
Downloaded from www.Manualslib.com manuals search engine