编带机说明书-含图纸tm401.pdf - 第194页
8-6 TM-401 User’s Guide General Maintenance Tasks D2921 04.10a.fm 2 . Remove the air line from the Nozzle Shank . 3. Use a needle-nose pliers t o remove the air line from the Upper Filter Fitting which is located at the …
D292104.10a.fm General Maintenance Tasks
Chapter 8: Maintenance 8- 5
Pick Head Maintenance
Nozzle Tip
Inspect the nozzle tip daily for excessive wear or damage. Remove and replace as necessary.
See Chapter 4: Machine Setup for instructions on changing the nozzle tip.
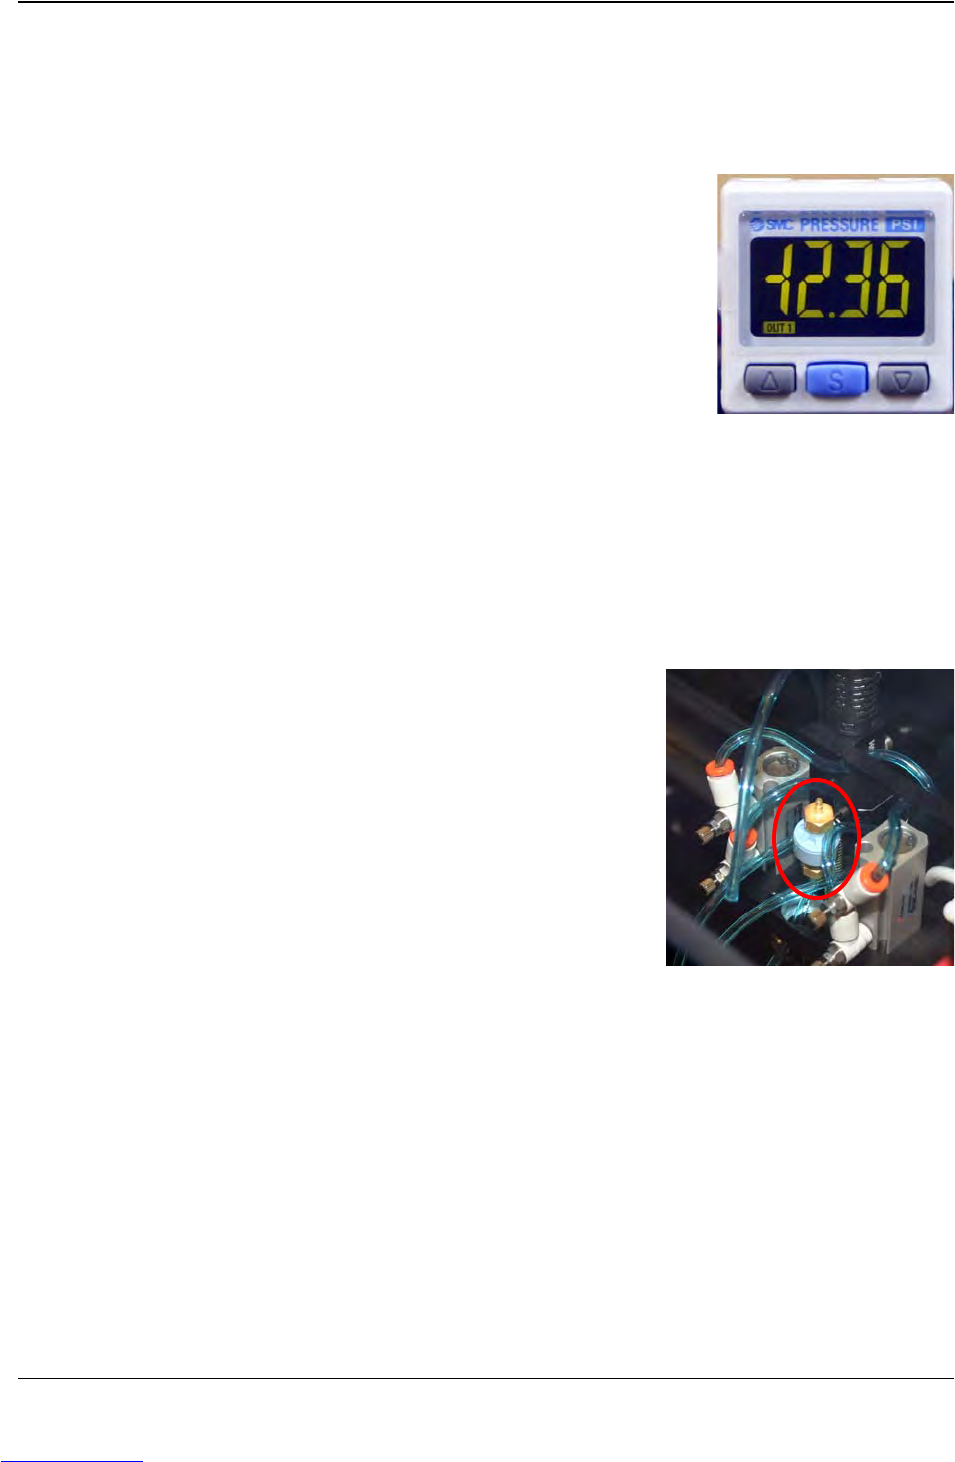
Vacuum Levels.
Check Vacuum levels weekly. This recorded information on high/
low vacuum levels is useful on a week to week basis and can indi-
cate pneumatic problems such as loose fittings or seal problems.
1. Turn on the vacuum generator from the HMI.
2. Observe and record vacuum level for the nozzle with no part
present.
3. Cover the nozzle (with part or some object) and record vac-
uum levels.
4. Compare the current vacuum levels with those previously recorded. A partially blocked
nozzle or restricted filter in the nozzle assembly is indicated by a smaller vacuum swing.
5. Remove and replace the nozzle vacuum filter if there are high vacuum levels without part
or poor pickup.
Replace the Vacuum Filter
If parts are not picking consistently or if the Nozzle Vacuum
Sensor indicates there is a part on the Nozzle (values appear
green) without a part on the nozzle, this is an indicator that the
Vacuum Filter needs to be cleaned or replaced. Typically the
Vacuum Filter will require attention after 200-300 hours of
operation.
The Vacuum Filter is located on top of the Pick Head Assem-
bly.
1. Open the front door and manually move the pick head
all the way to the front for easy access.
Downloaded from www.Manualslib.com manuals search engine
8-6 TM-401 User’s Guide
General Maintenance Tasks D292104.10a.fm
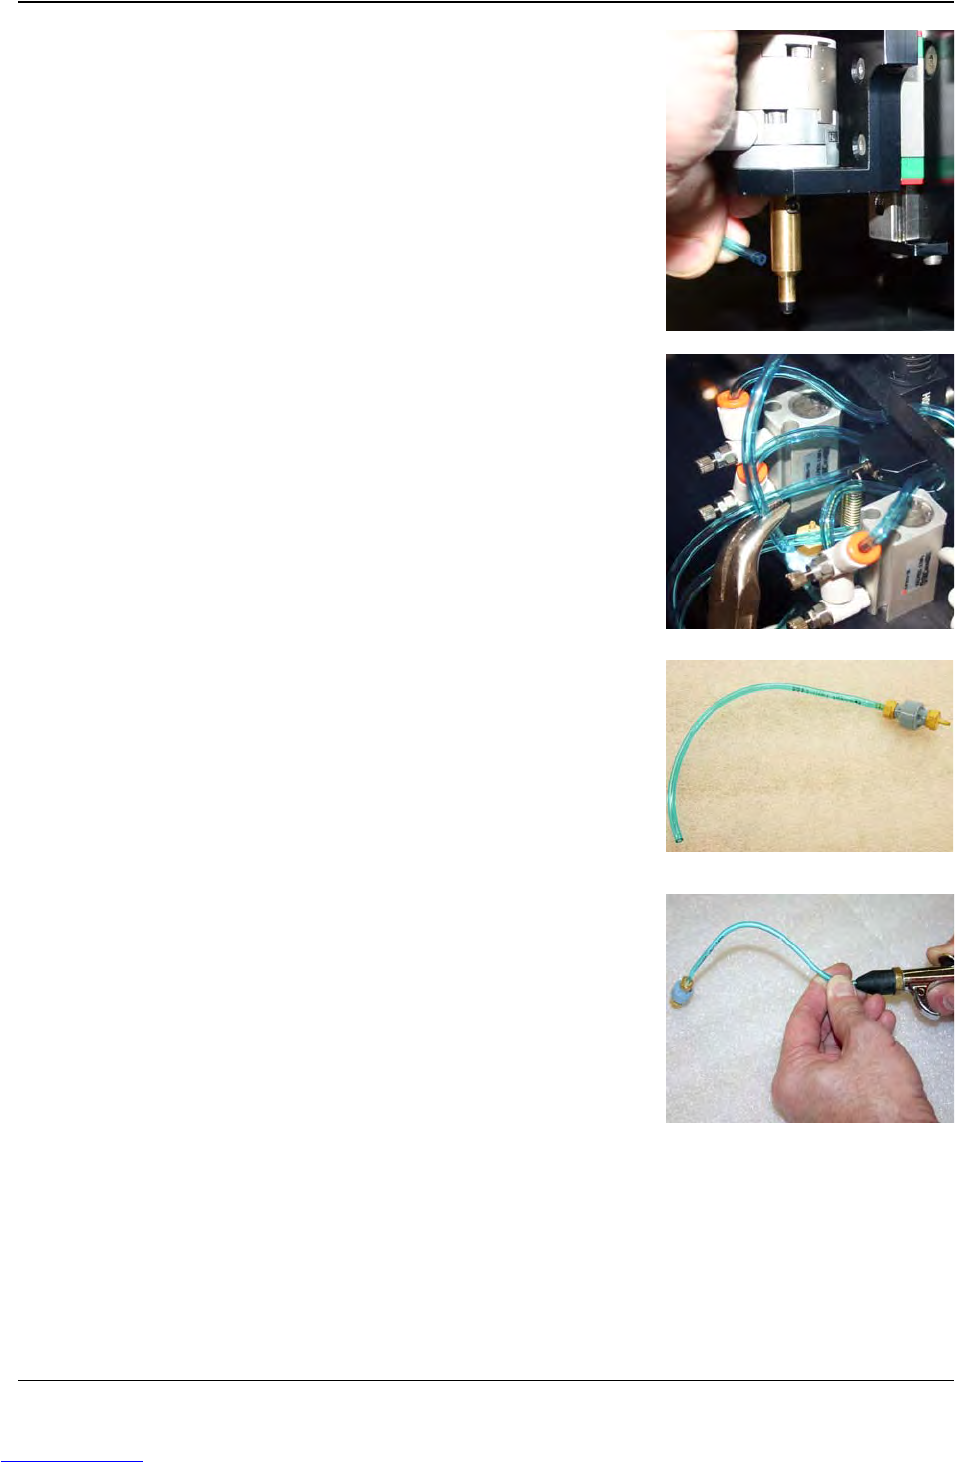
2. Remove the air line from the Nozzle Shank.
3. Use a needle-nose pliers to remove the air line from
the Upper Filter Fitting which is located at the top of
the Vacuum Filter.
4. Use a 2.5mm Hex wrench to remove the retaining
screw that holds the Filter in place.
5. Lift the Filter from the housing and remove it from the
machine.
6. Blow air through the filter to clean it or replace with a
new filter. (See Spare Parts List in the back of this
User’s Guide for order information.).
7. Replace the Filter on the Pick Head, reconnecting the
air line at the top of the Vacuum Filter and at the Noz-
zle Shank.
Downloaded from www.Manualslib.com manuals search engine
D292104.10a.fm General Maintenance Tasks
Chapter 8: Maintenance 8- 7
Check Actuator Belt Tension
The Actuator Belt tension should be measured after its first 30-40 hours of run time, then annu-
ally after that. To measure belt tension, follow the instructions below.
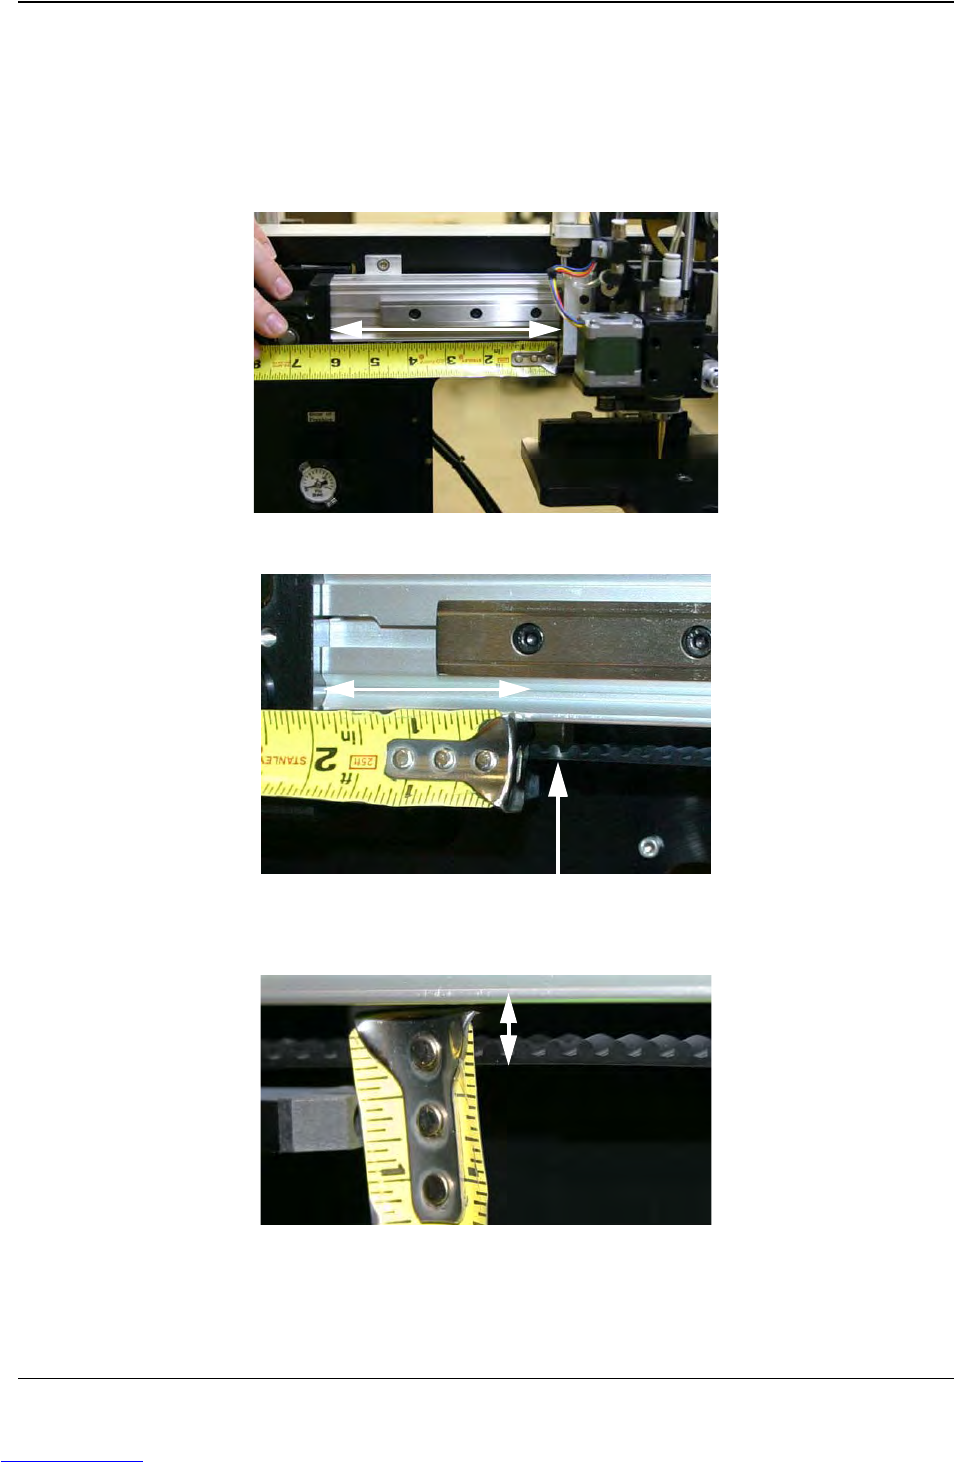
1. Position the Pick Head Carrier so the edge of the carrier is 6" from the inside end of the
Actuator Head.
2. Position a force gauge on the Belt 2” from the inside end of the Actuator Head.
3. Deflect the Belt 1/4" (6 mm) in either direction. The force gauge should read between 12
and 16 lbs. [53 - 62 N].
Note: Contact V-TEK Service for tensioning procedure if belt tension is outside tolerance.
6”
2”
Deflect 1/4”
Downloaded from www.Manualslib.com manuals search engine