EN 3.pdf - 第169页
Model DECAN Series Company SAMSUNG TECHWIN Module 3.1 1 HEAD V ersion 01 Tit le HEAD BLOW & V ACUUM SETTING (L2) Page 3-1 1-9 Note Head Blow operation check and setting 1. T urn the vacuum on one by one. 2. Adjust …
Model
DECAN Series
Company
SAMSUNG TECHWIN
Module
3.11 HEAD
Version
01
Title
HEAD BLOW & VACUUM SETTING (L2)
Page
3-11-8
Note
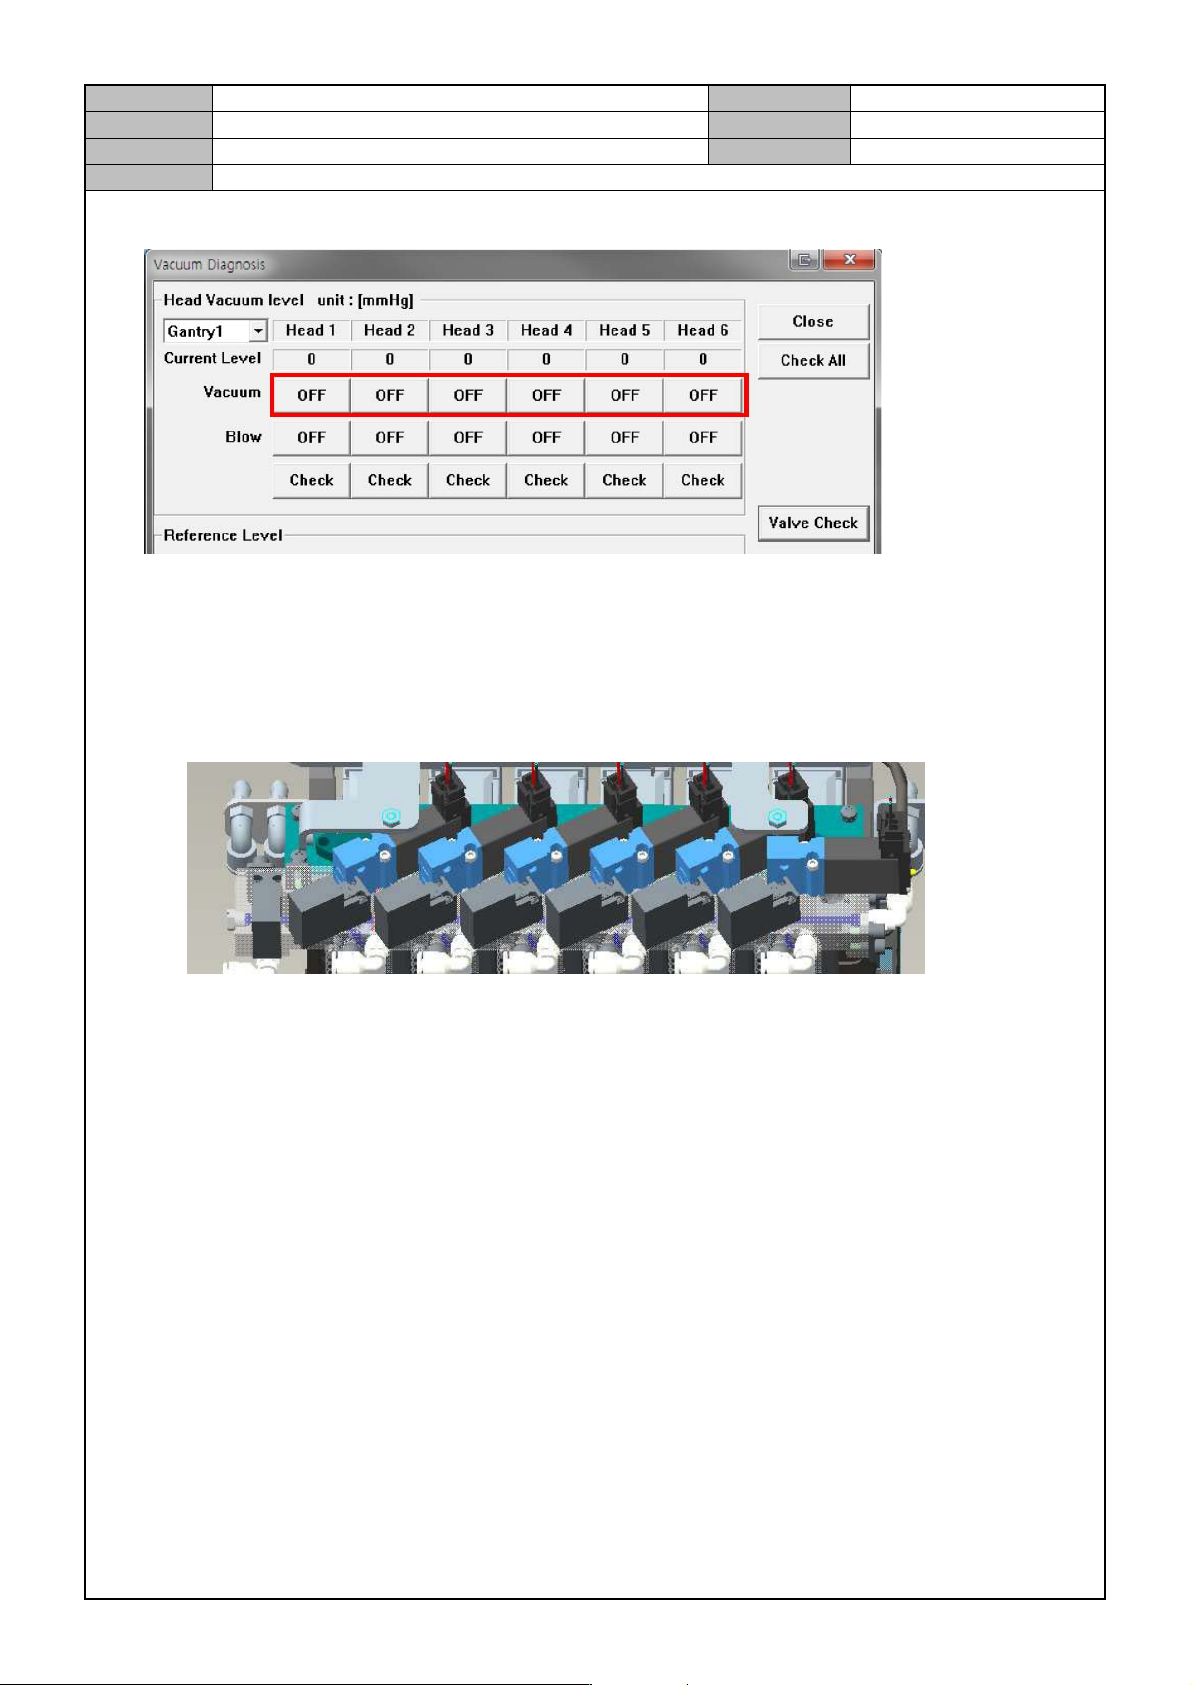
Head Vacuum operation check
1. Manually lower the Z axis of Head1~6 and then mount the CN040 Nozzle.
2. While the blow is off, turn on/off each head's vacuum condition and check if the vacuum is created and
check the current value.
When it is on, the vacuum is greater than 480mmHg.
When the Vacuum is On/Off, check if the Sol Valve's Vacuum LED is lit.
3. When the Vacuum is On, block the nozzle and see if the degree of vacuum is greater than 600mmHg.
Model
DECAN Series
Company
SAMSUNG TECHWIN
Module
3.11 HEAD
Version
01
Title
HEAD BLOW & VACUUM SETTING (L2)
Page
3-11-9
Note
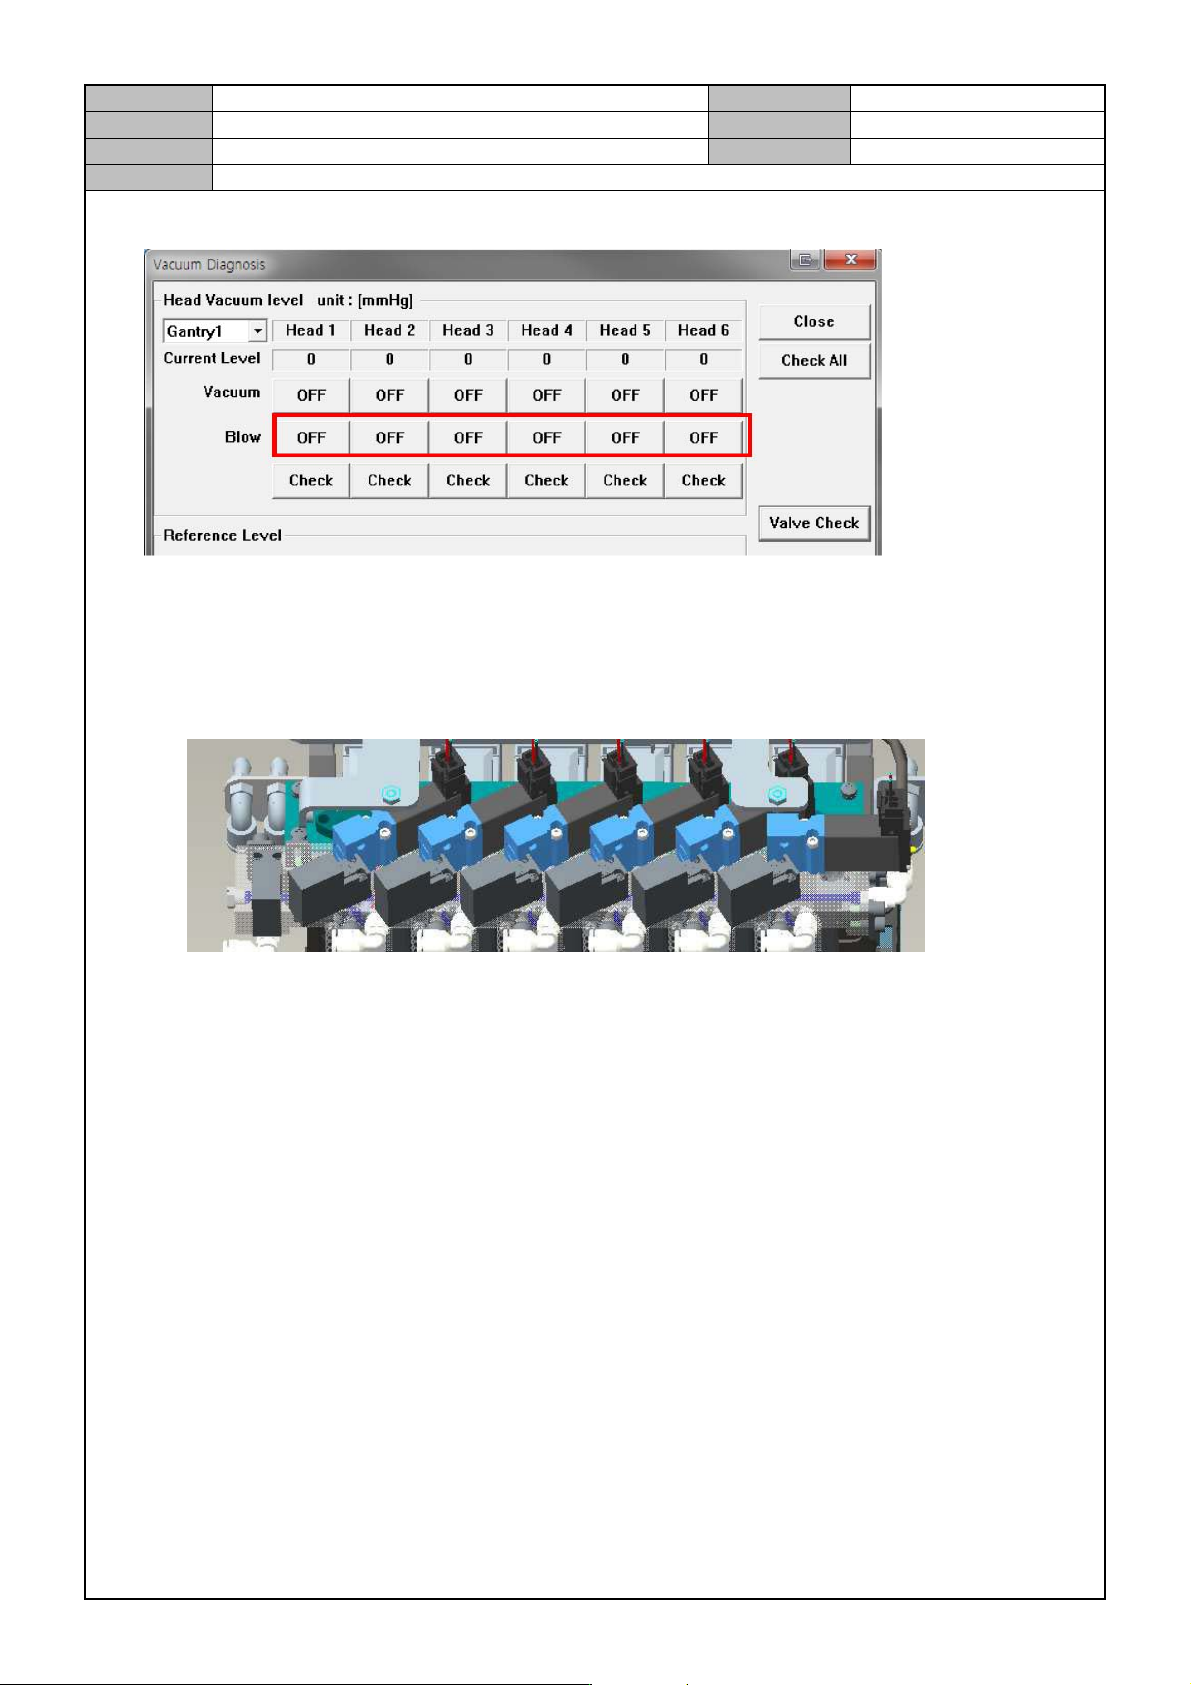
Head Blow operation check and setting
1. Turn the vacuum on one by one.
2. Adjust the speed control, so that the current blow reading is within -70~-90 mmHg.
After the adjustment, fix the nuts securely.
When the Vacuum is On/Off, check if the Sol Valve's Vacuum LED is lit.
Model
DECAN Series
Company
SAMSUNG TECHWIN
Module
3.11 HEAD
Version
01
Title
HEAD BLOW & VACUUM SETTING (L2)
Page
3-11-10
Note
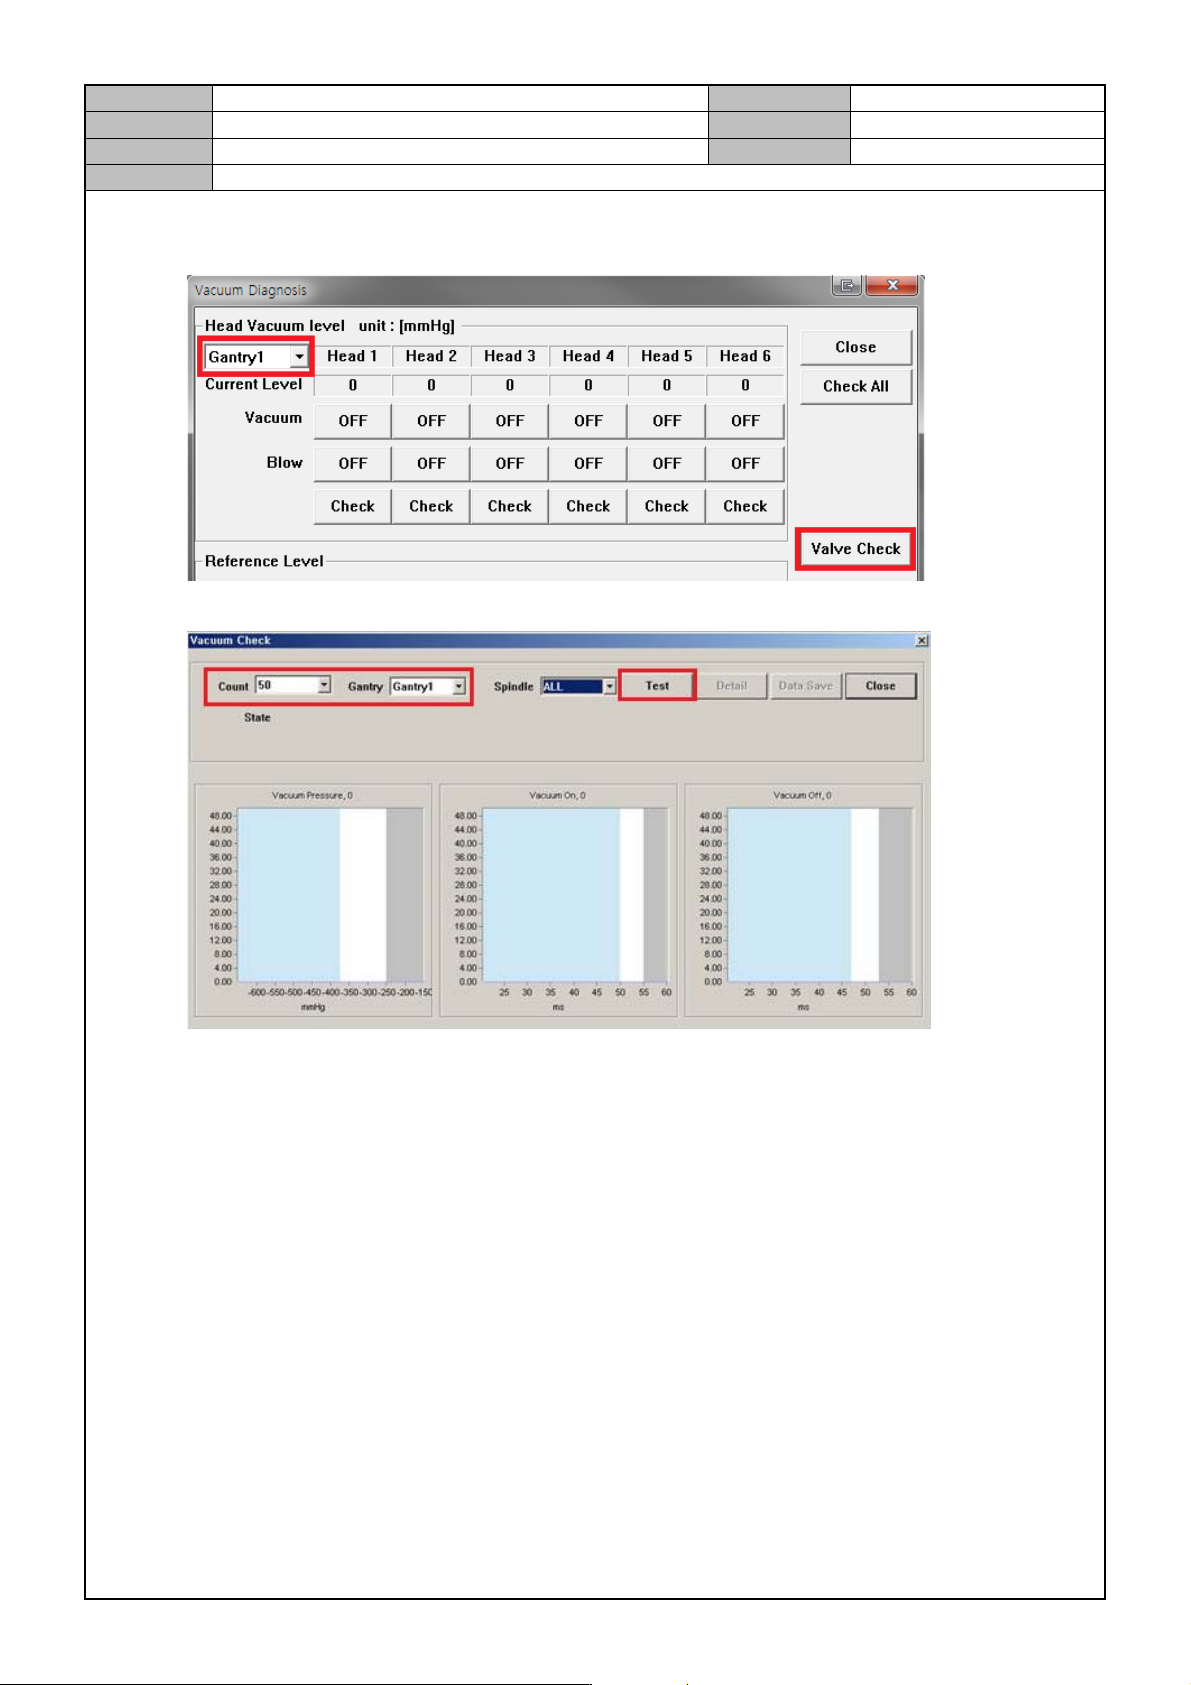
Valve Check
1. Select Gantry1 and click on <Valve Check>.
2. Enter 50 for <Count> and when <Gantry1 Spindle All> is on, click on <Test> to check.
3. Take necessary actions depending on the test result as follows.
Green: normal / Yellow: observe / Red: abnormal, replace.
A head with yellow/red lights should be checked 100 more times.
4. Remove the nozzle from Head1~10.
5. Check the same thing for Gantry2's Head 7~12.