EN 3.pdf - 第314页
Model DECAN Series Company SAMSUNG TECHWIN Module 3.18 V ACUUM DEVICE V ersion 01 Tit le FRONT SOL ASSY SUB ASSEMBL Y Page 3-18-6 Note Sol V alve Assy 1,2 Air Pressure T ube Connection Diagram Sol V alve Assy 1,2 Ass…
Model
DECAN Series
Company
SAMSUNG TECHWIN
Module
3.18 VACUUM DEVICE
Version
01
Title
FRONT SOL ASSY SUB ASSEMBLY
Page
3-18-5
Note
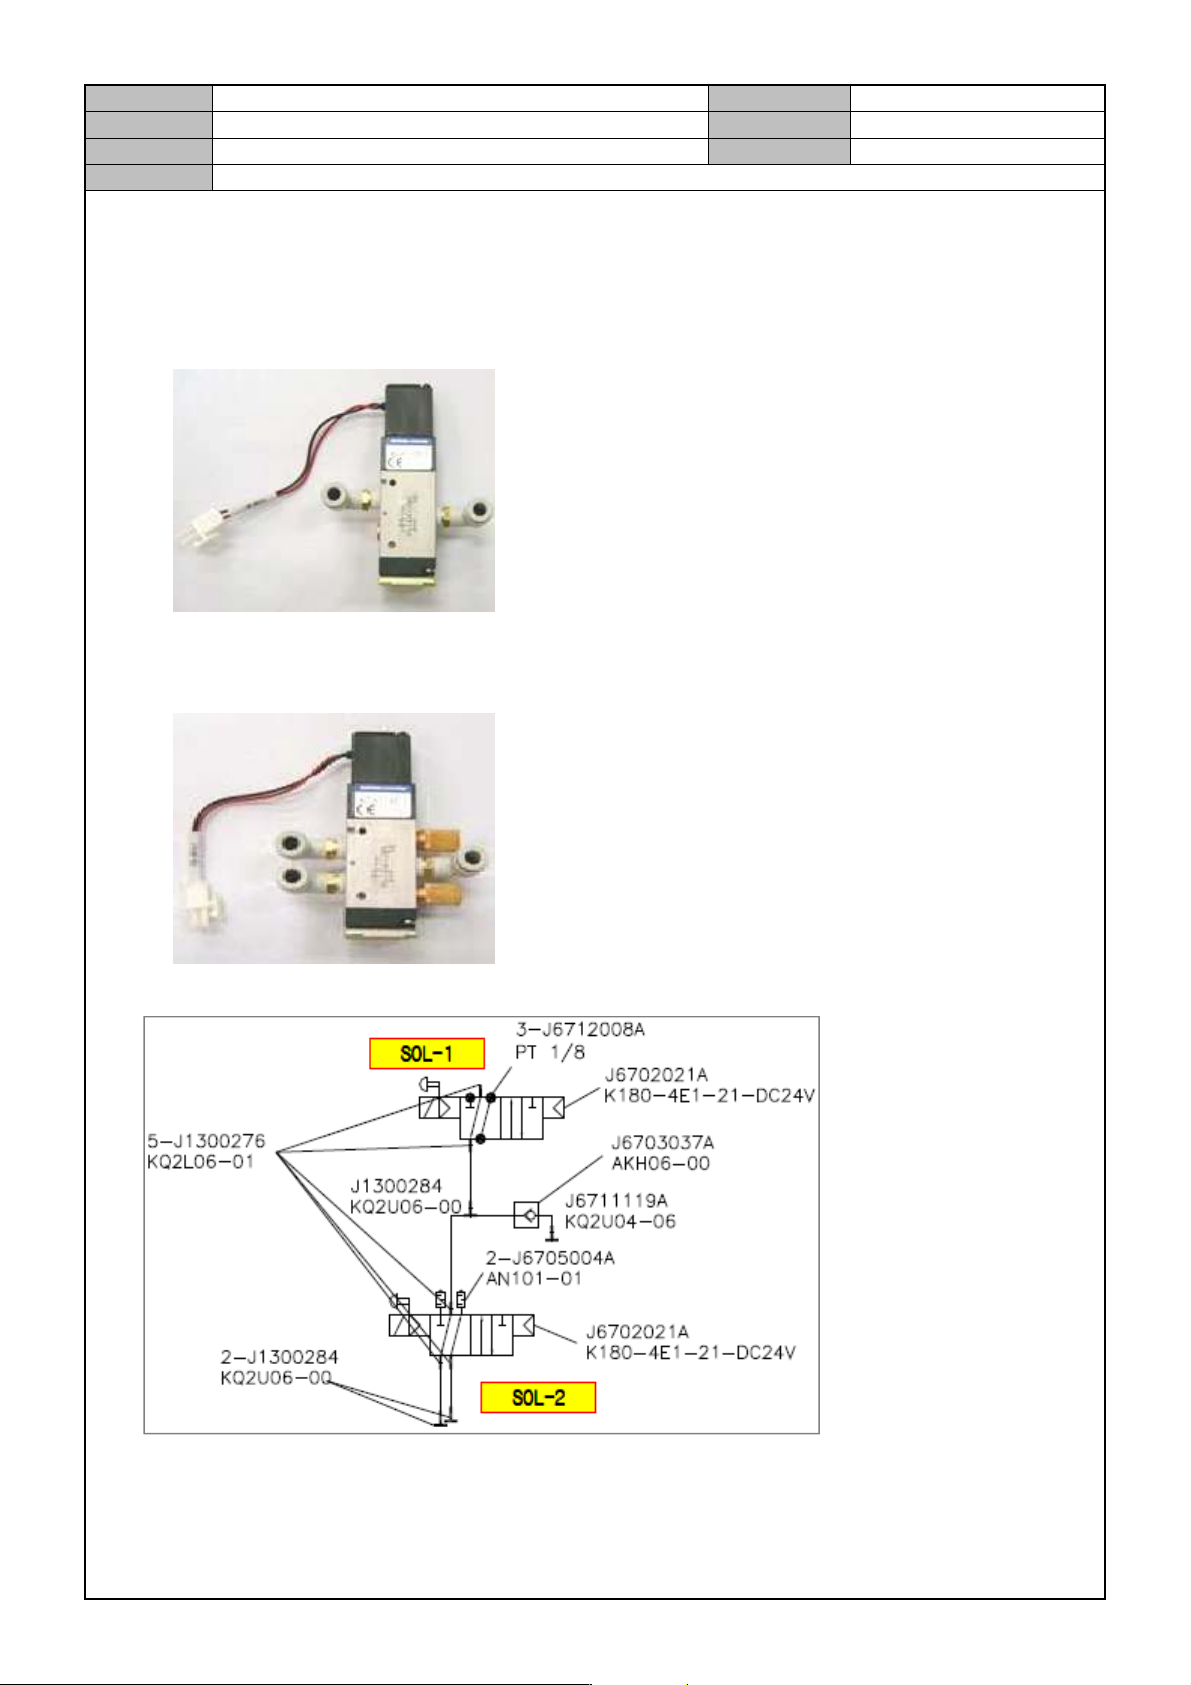
[FRONT SOL ASSY SUB ASSEMBLY]
Sol Valve Assy 1 Assembly
The Silencer or Plug requires Teflon tape to be attached to it. Fix it after attaching tape.
When assembling the fitting, pay attention to the direction of assembly.
Sol Valve Assy 2 Assembly
The Silencer or Plug requires Teflon tape to be attached to it. Fix it after attaching tape.
When assembling the fitting, pay attention to the direction of assembly.
Sol Valve Assy 1,2 Air Pressure Diagram
Model
DECAN Series
Company
SAMSUNG TECHWIN
Module
3.18 VACUUM DEVICE
Version
01
Title
FRONT SOL ASSY SUB ASSEMBLY
Page
3-18-6
Note
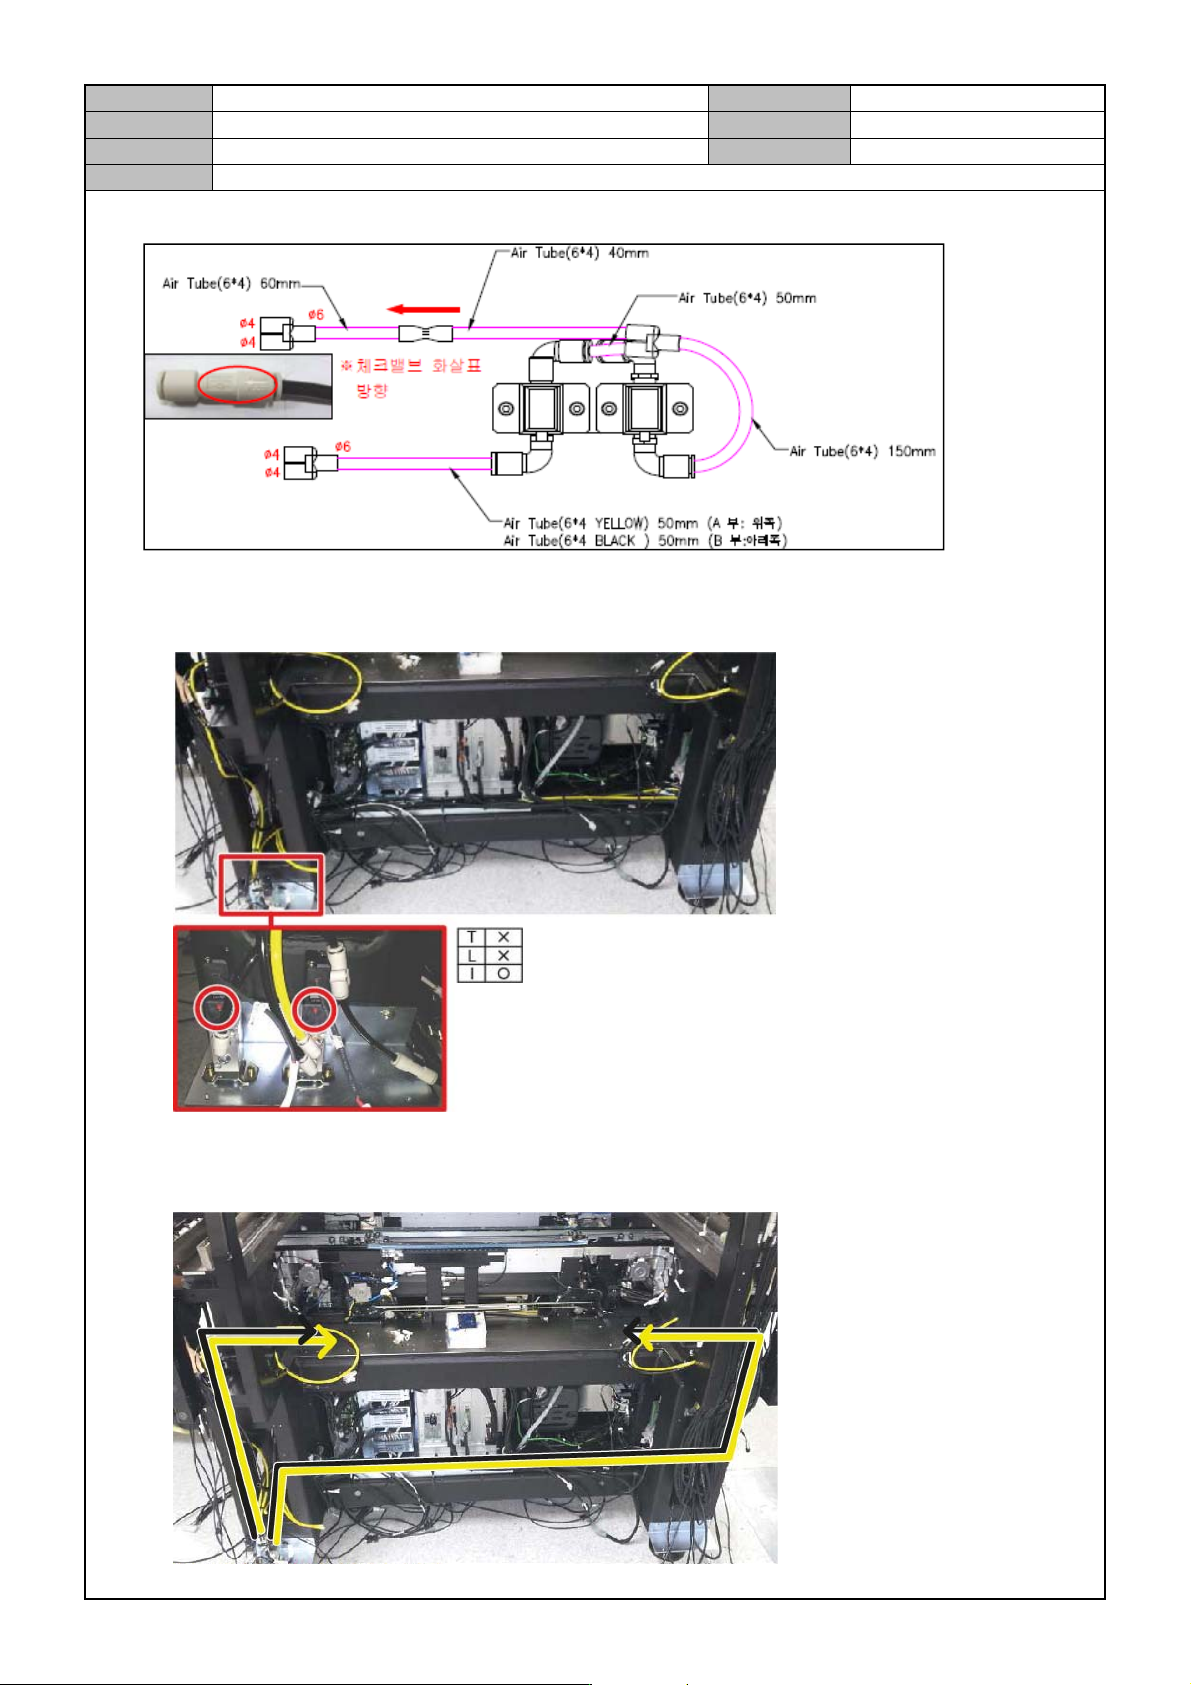
Sol Valve Assy 1,2 Air Pressure Tube Connection Diagram
Sol Valve Assy 1,2 Assembly into the Base Frame
Assemble it into the Cover Frame in the bottom front left of equipment.
When assemble it, make sure that the cable and the operation switch face out.
Sol Valve Assy Air Tube Path
Left : 6 Yellow 1700mm, 6 Black 1700mm, 4 Black 1700mm
Right : 6 Yellow 3200mm, 6 Black 3200mm, 4 Black 3200mm
Model
DECAN Series
Company
SAMSUNG TECHWIN
Module
3.18 VACUUM DEVICE
Version
01
Title
REAR SOL ASSY SUB ASSEMBLY
Page
3-18-7
Note
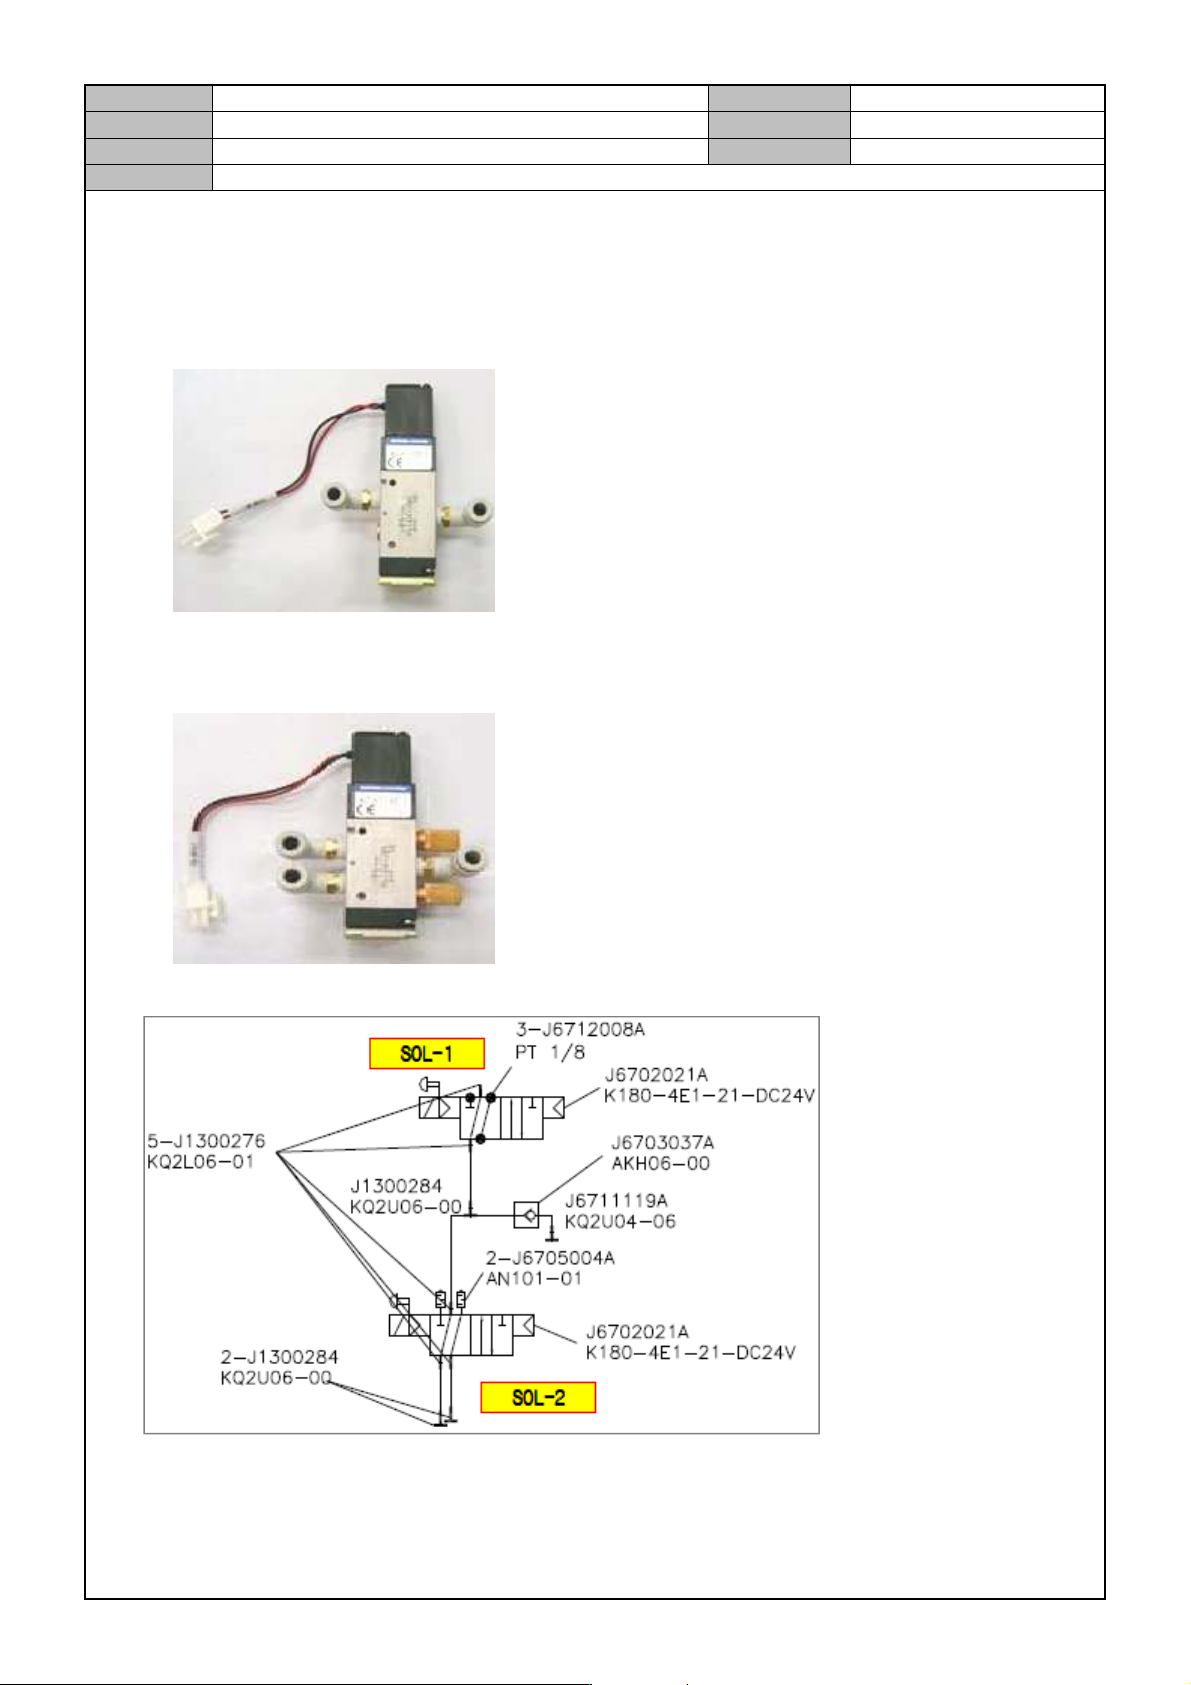
[REAR SOL ASSY SUB ASSEMBLY]
Sol Valve Assy 1 Assembly
The Silencer or Plug requires Teflon tape to be attached to it. Fix it after attaching tape.
When assembling the fitting, pay attention to the direction of assembly.
Sol Valve Assy 2 Assembly
The Silencer or Plug requires Teflon tape to be attached to it. Fix it after attaching tape.
When assembling the fitting, pay attention to the direction of assembly.
Sol Valve Assy 1,2 Air Pressure Diagram