EN 3.pdf - 第224页
Model DECAN Series Company SAMSUNG TECHWIN Module 3.12 MMI V ersion 01 Tit le JOG BOX CHECK Page 3-12-2 Note [JOG BOX CHECK] 1. In the MMI, select < Diagnosis > → <Jogbox>. 2. When the Jogbox button is presse…
Model
DECAN Series
Company
SAMSUNG TECHWIN
Module
3.12 MMI
Total Pages
26
Table of Contents
[JOG BOX CHECK] ............................................................................................. 2
[MMI IO CHECK PREPARATION] ....................................................................... 3
[MMI IO CHECK(OUTPUT)] ................................................................................ 5
[MMI IO CHECK(INPUT)] .................................................................................. 12
[MOTOR IO CHECK] ......................................................................................... 17
[LIGHT CHECK] ................................................................................................. 21
[MMI VERSION CHECK] ................................................................................... 23
[MMI Installation] ................................................................................................ 24
Model
DECAN Series
Company
SAMSUNG TECHWIN
Module
3.12 MMI
Version
01
Title
JOG BOX CHECK
Page
3-12-2
Note
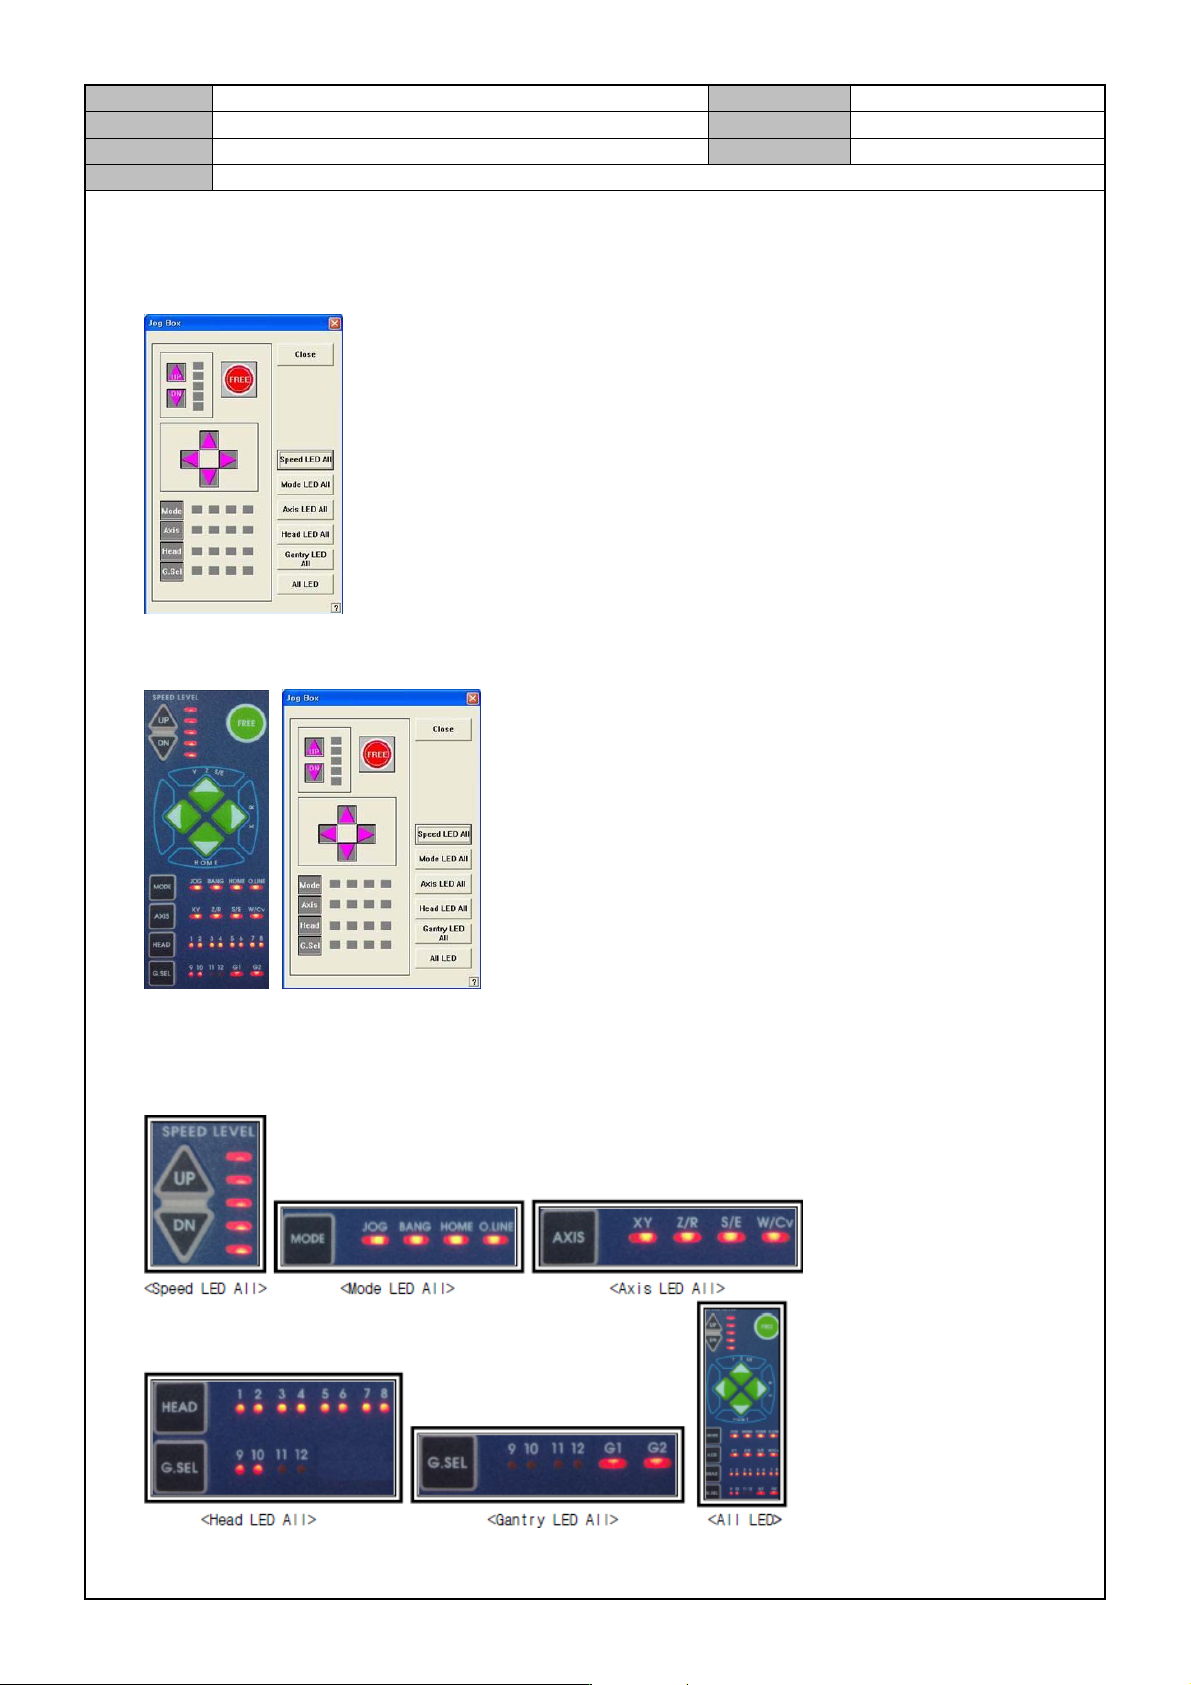
[JOG BOX CHECK]
1. In the MMI, select < Diagnosis > → <Jogbox>.
2. When the Jogbox button is pressed, check if the signal from the jogbox of MMI is received and it is
displayed in dark gray.
3. Press the Jogbox's Up/ Down button, Free button, Directional key, Mode button, Axis button and Head
button in the order to check if the Jogbox LED on the MMI receives the signal.
4. On the MMI, press the JogBox window button to see if the JogBox LED is lit.
Model
DECAN Series
Company
SAMSUNG TECHWIN
Module
3.12 MMI
Version
01
Title
MMI IO CHECK PREPARATION
Page
3-12-3
Note
[MMI IO CHECK PREPARATION]
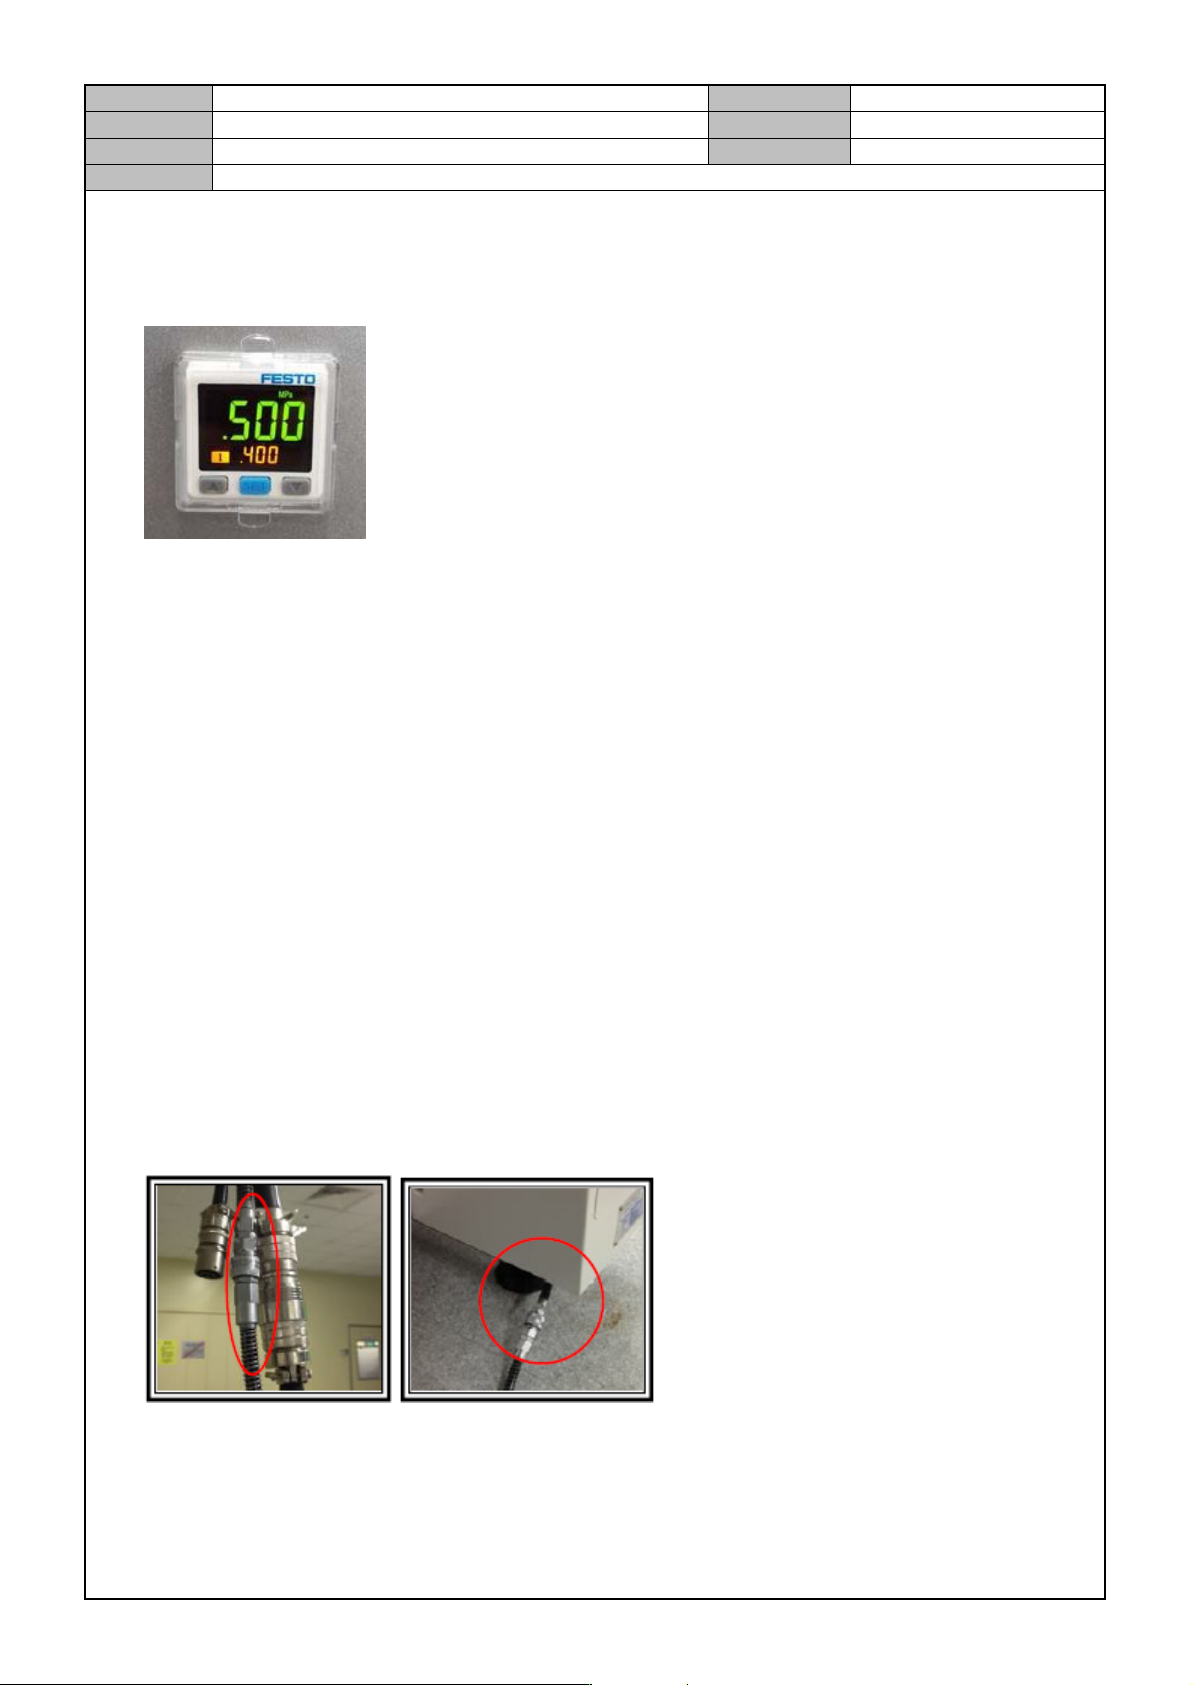
Digital Gauge Setting
1. Home setting
When the air pressure is not applied, press ▼ and ▲ at the same time until the display window displays
<00>.
2. Initial setting mode
① In the initial operation condition, press the [SET] button for three seconds.
② In <ot1>, press [▼] and [▲] to set <HYS> and then press the [SET] button.
③ In <ot1>, press [▼] and [▲] to set <no> and then press the [SET] button.
④ In <ot2>, press [▼] and [▲] to set <oFF> and then press the [SET] button.
⑤ In <rES>, press [▼] and [▲] to set <2.5> and then press the [SET] button.
⑥ In <cOL>, press [▼] and [▲] to set <SoG> and then press the [SET] button.
⑦ In <uni>, press [▼] and [▲] to set <Mpa> and then press the [SET] button.
3. Pressure setting mode
① Press the [SET] button once to see <L1> on the sub window. Then, press the [▼] and [▲] buttons to
set it to 0.4.
② When the sub window displays <H1>, press the [▼] and [▲] buttons to set it to 0.45.
MAIN AIR PRESSURE SETTING
1. Connect the Main Air Pressure Cable.