EN 3.pdf - 第188页
Model DECAN Series Company SAMSUNG TECHWIN Module 3.1 1 HEAD V ersion 01 Tit le HEAD SOLENOID V A L VE REPLACEMENT (F2) Page 3-1 1-28 Note [HEAD SOLENOID V AL VE REPLACEMENT (F2)] Separate the Air Module. Separate the …
Model
DECAN Series
Company
SAMSUNG TECHWIN
Module
3.11 HEAD
Version
01
Title
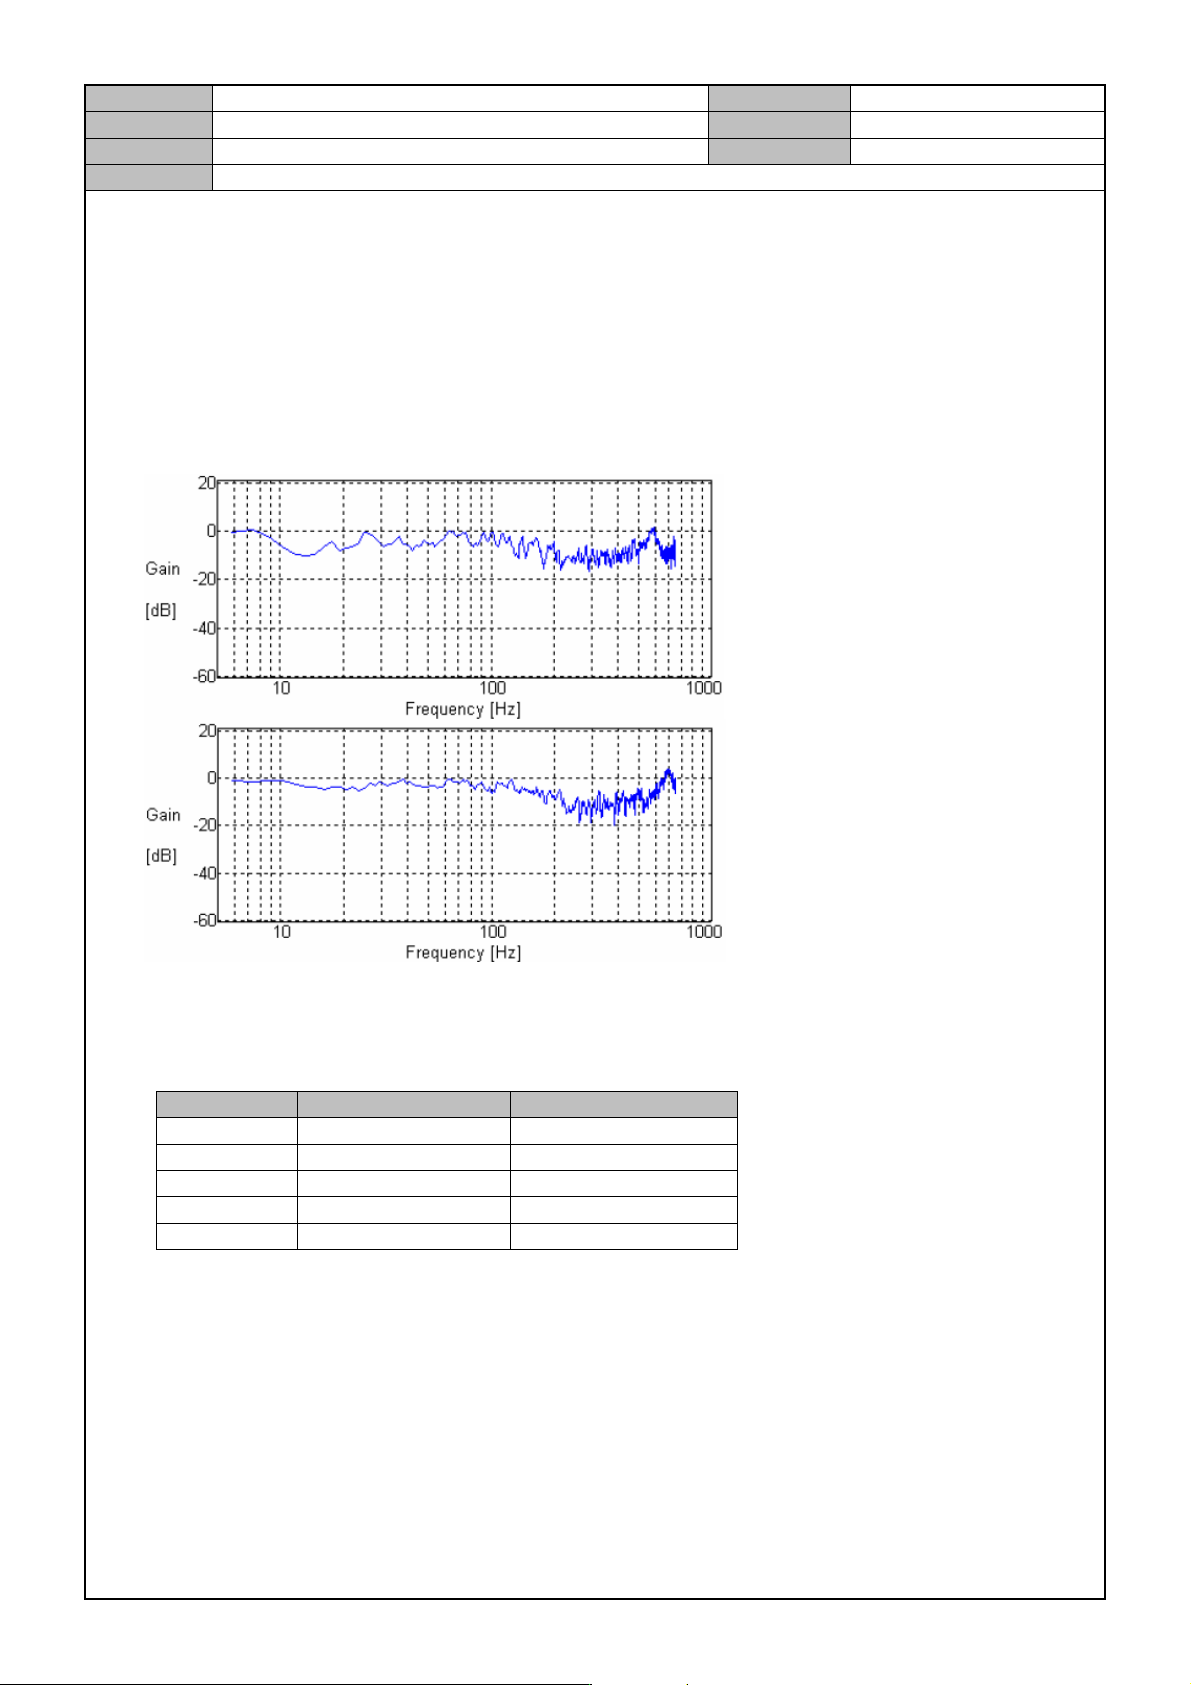
Z AXIS NOISE DECISION CRITERIA
Page
3-11-27
Note
[Z AXIS NOISE DECISION CRITERIA]
1. Check the noise level in Hz, Gain dB.
2. Check the ID (1st Notch Frequency) Setting Valve.
3. If the ID (1st Notch Frequency) Setting Valve is not matched, change the ID from 500Hz → 700Hz.
4. After changing the ID value, check if the magnitude is changed. (Hz changed to less than 0 dB.)
5. If the noise is removed but there is a little vibration, then change the 1E (1st Notch Width Selection) value
from 1 → 2 → 3.
*Parameter adjustment range
Part No. Basic Range
1D 500Hz 500~650Hz
1E 1 1~2
28 310Hz 280~380Hz
29 1 1~2
2A 30 30~50
Model
DECAN Series
Company
SAMSUNG TECHWIN
Module
3.11 HEAD
Version
01
Title
HEAD SOLENOID VA LVE REPLACEMENT (F2)
Page
3-11-28
Note
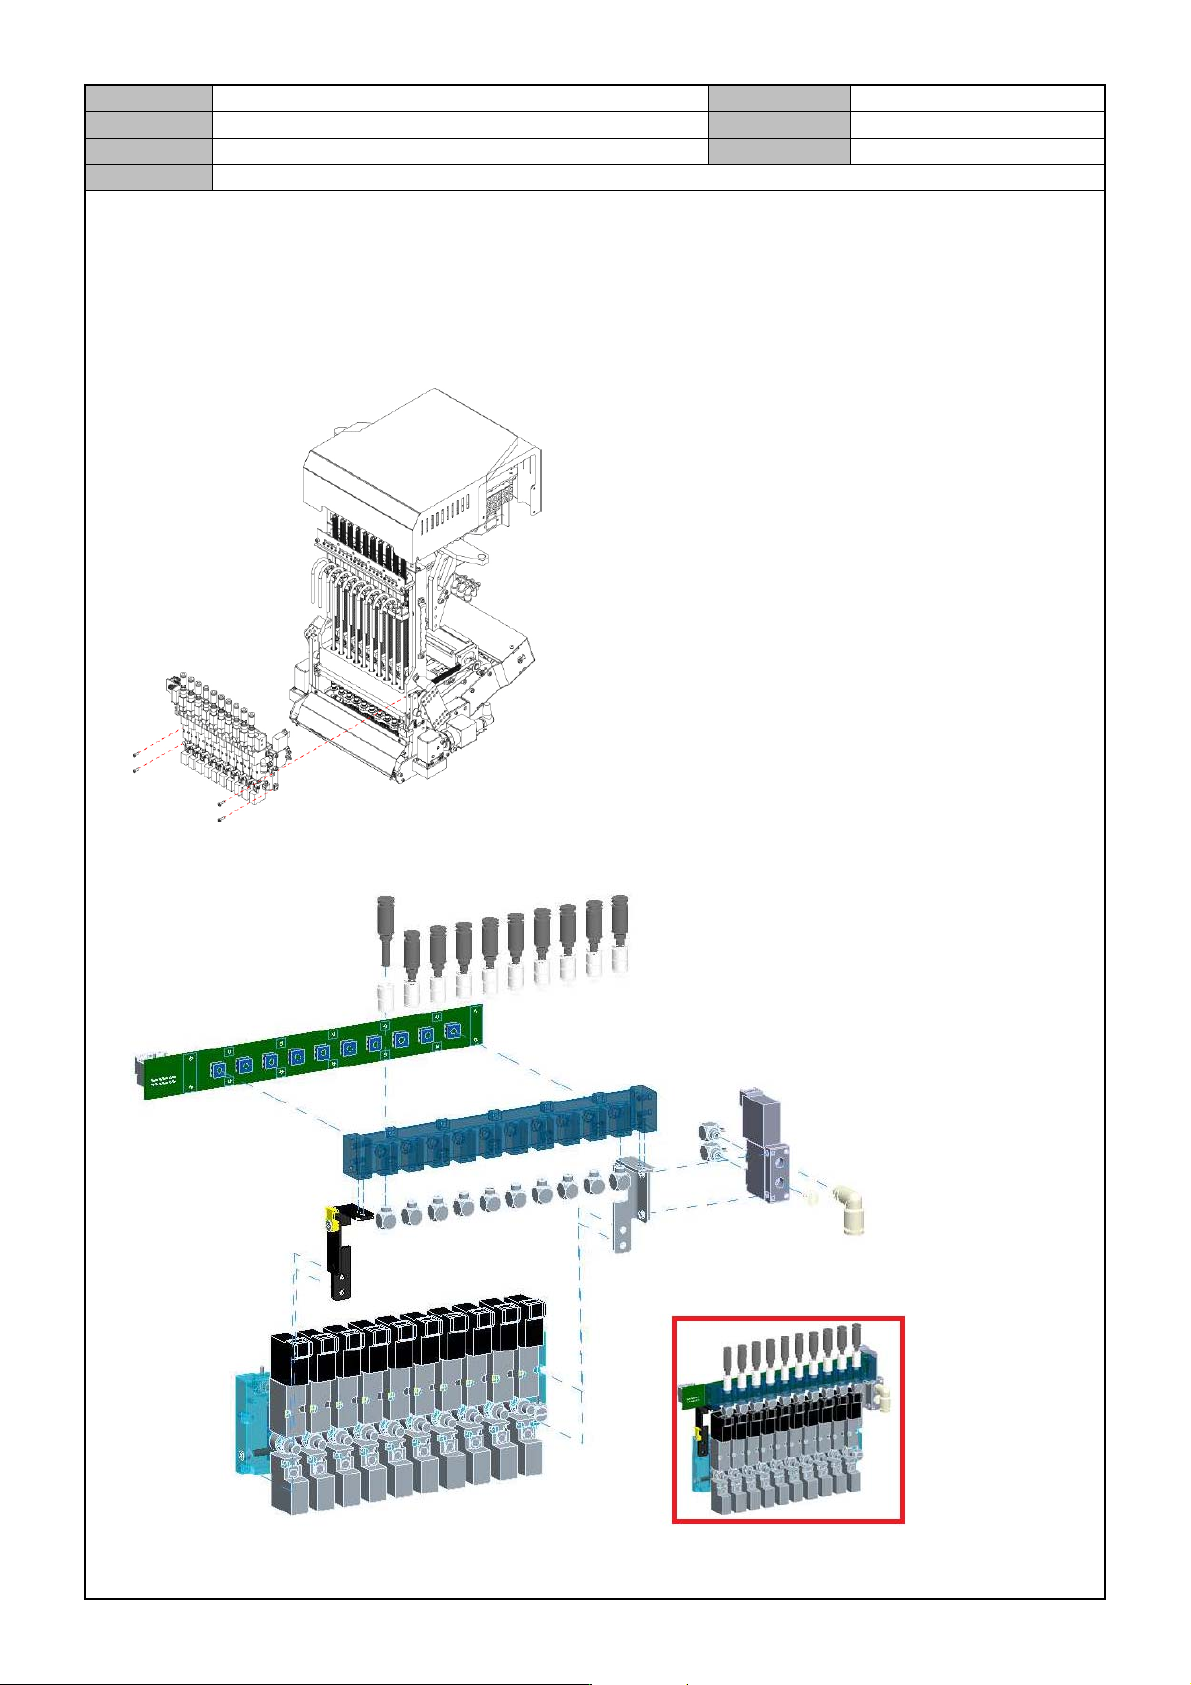
[HEAD SOLENOID VALVE REPLACEMENT (F2)]
Separate the Air Module.
Separate the Air Tube from the Air Module Assy and then separate the Air Module Assy by releasing the
fixing bolts.
Disassemble the Air Module.
Model
DECAN Series
Company
SAMSUNG TECHWIN
Module
3.11 HEAD
Version
01
Title
HEAD SOLENOID VA LVE REPLACEMENT (F2)
Page
3-11-29
Note
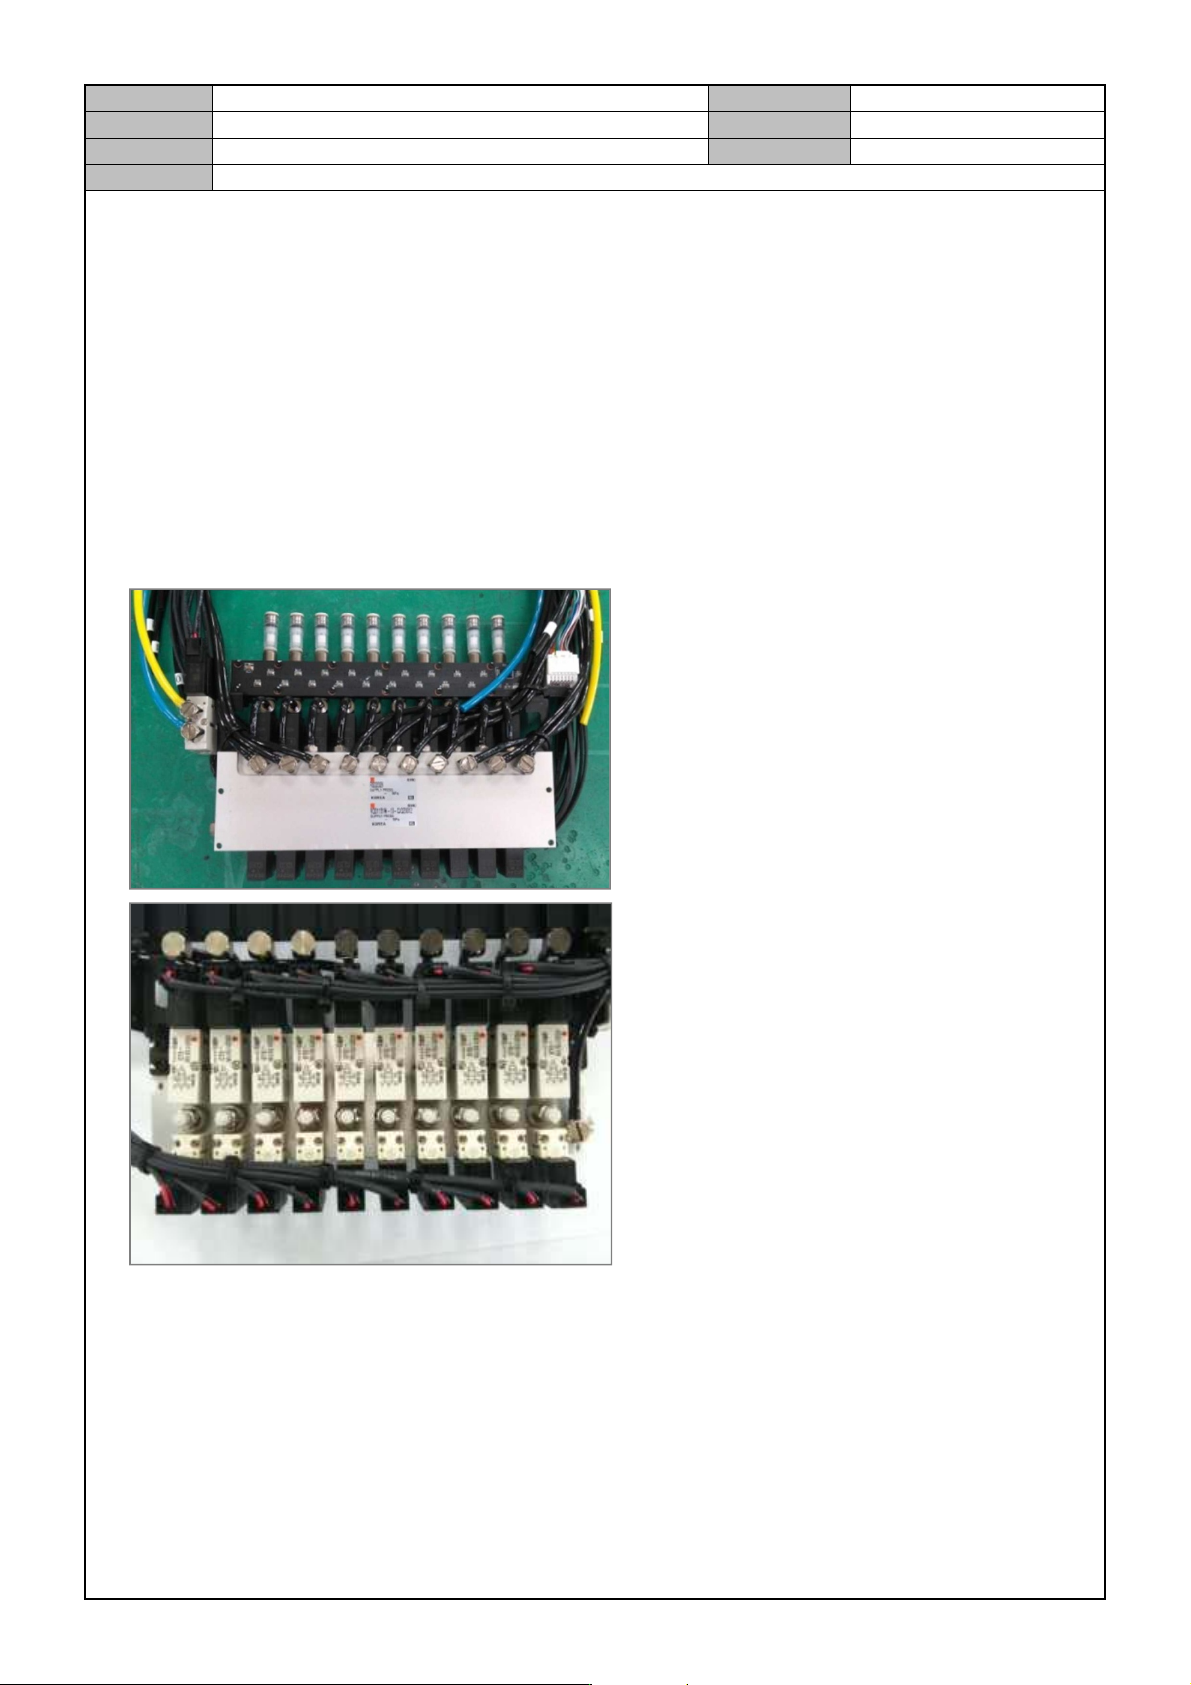
Air Module assembly
1. Assemble the following in the order: Elbow Fitting, Straight Fitting, Filter.
2. Insert the O-ring and fix the Vacuum Sensor Board with Screws.(3Kgf.cm)
3. Assemble the Plug Fitting and the Elbow Fitting.
4. Fix the Blow Valve with Screws.(10Kgf.cm)
5. Fix the Manifold Plate1 and 2 with Screws.(7Kgf.cm)
6. Fix the Manifold Plate1/2 into the Air Module Assy with Screws.(10Kgf.cm)
Connect the air pressure tube.