EN 3.pdf - 第312页
Model DECAN Series Company SAMSUNG TECHWIN Module 3.18 V ACUUM DEVICE V ersion 01 Tit le MAIN AI R & BLOW REGULA TOR CHECK Page 3-18-4 Note [MAIN AIR & BLOW REGULA TOR CHECK] 1. On the OP Panel, turn on the Ready…
Model
DECAN Series
Company
SAMSUNG TECHWIN
Module
3.18 VACUUM DEVICE
Version
01
Title
IO CHECK
Page
3-18-3
Note
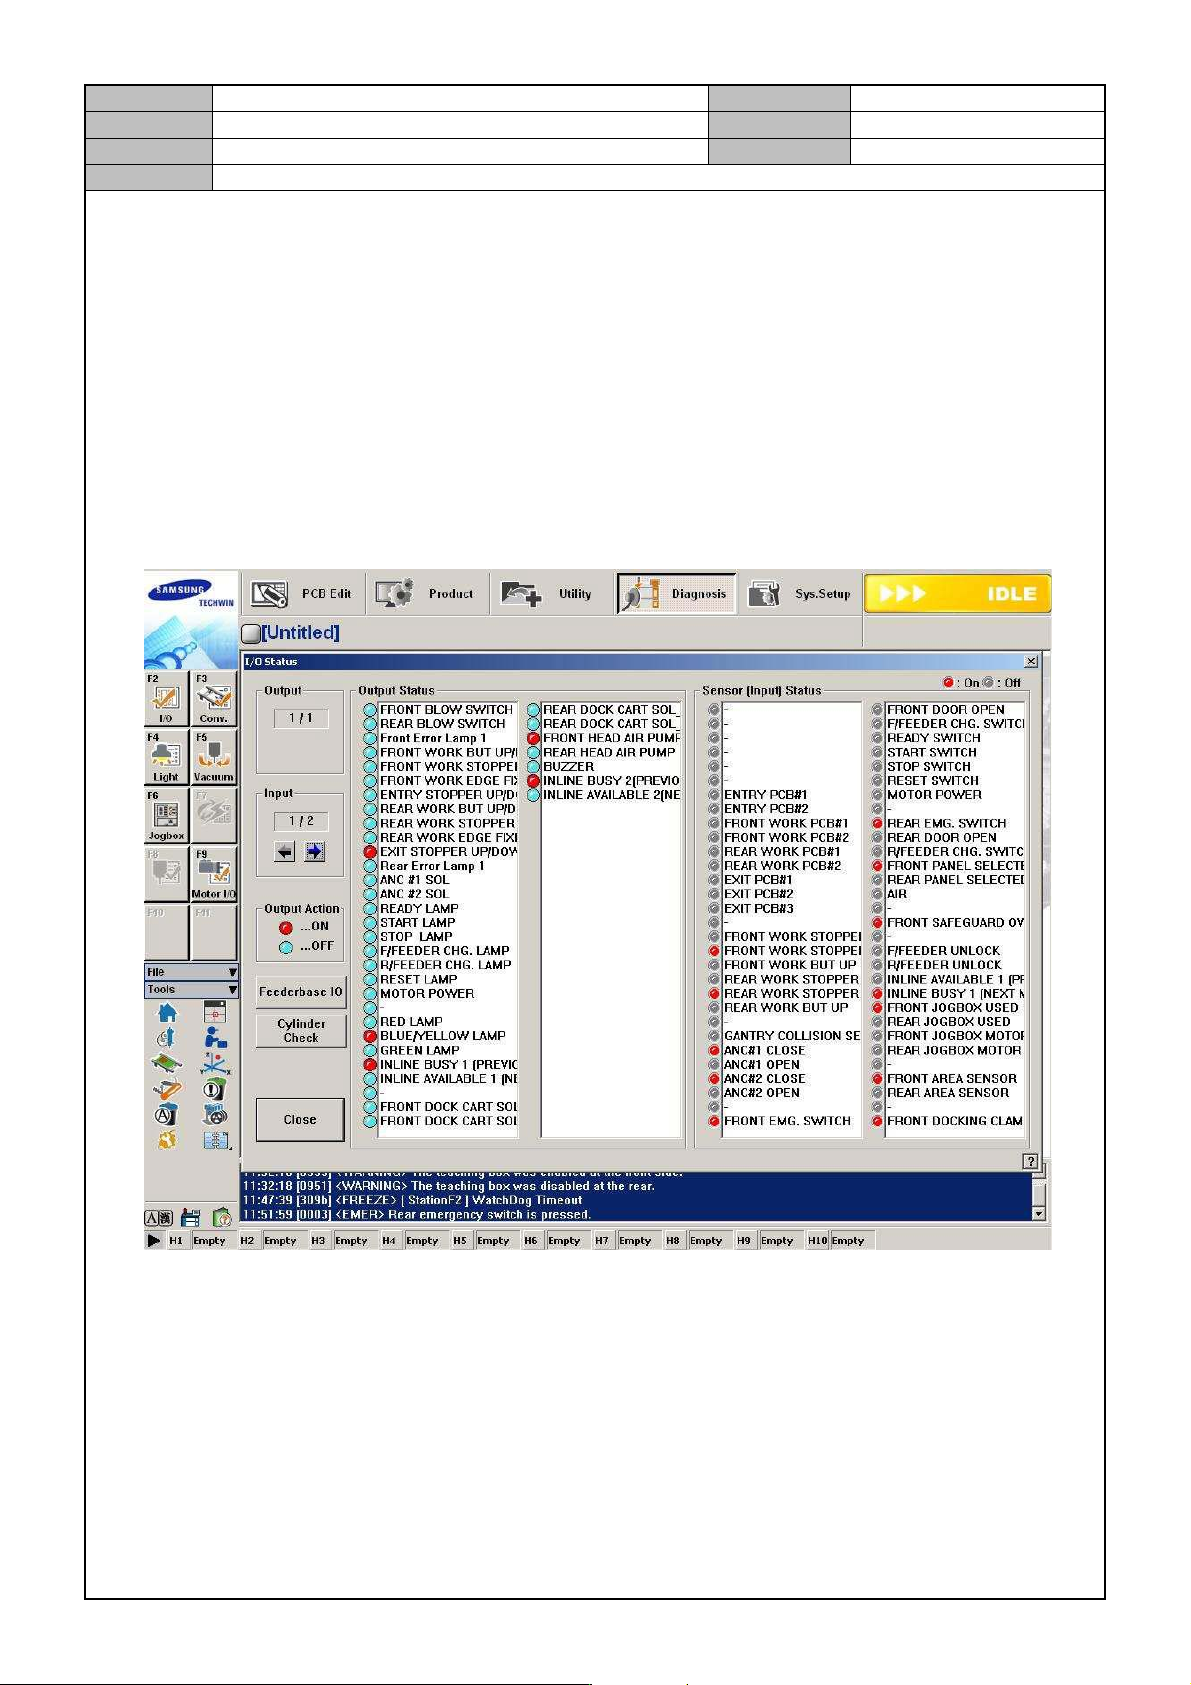
[IO CHECK]
1. On the <Diagnosis>→<F2(I/O)> screen, see the input related areas and check if the sensor and other
signals operate properly.
2. Check for normal operation of the Output related signals.
3. Press the front/rear Select Switch to see if it switches back and forth. Check if the front/rear feeder change
function operates.
4. See if the Feeder Gap Sensor operates.
5. Insert the Feeder Origin tools into feeder slots 1, 30 and 59 one by one to see if the sensor operates.
6. Check if it operates properly according to the criteria.
The I/O signals should be exchanged properly.
The Input Sensor (Entry PCB #1/#2, Front/Rear PCB #1/#2, Exit PCB #1/#2/#3) should operate
properly.
The front/rear Select Switch should toggle properly and the Feeder Change should operate properly.
The front/rear Feeder Gap Sensor should operate properly.
Model
DECAN Series
Company
SAMSUNG TECHWIN
Module
3.18 VACUUM DEVICE
Version
01
Title
MAIN AIR & BLOW REGULATOR CHECK
Page
3-18-4
Note
[MAIN AIR & BLOW REGULATOR CHECK]
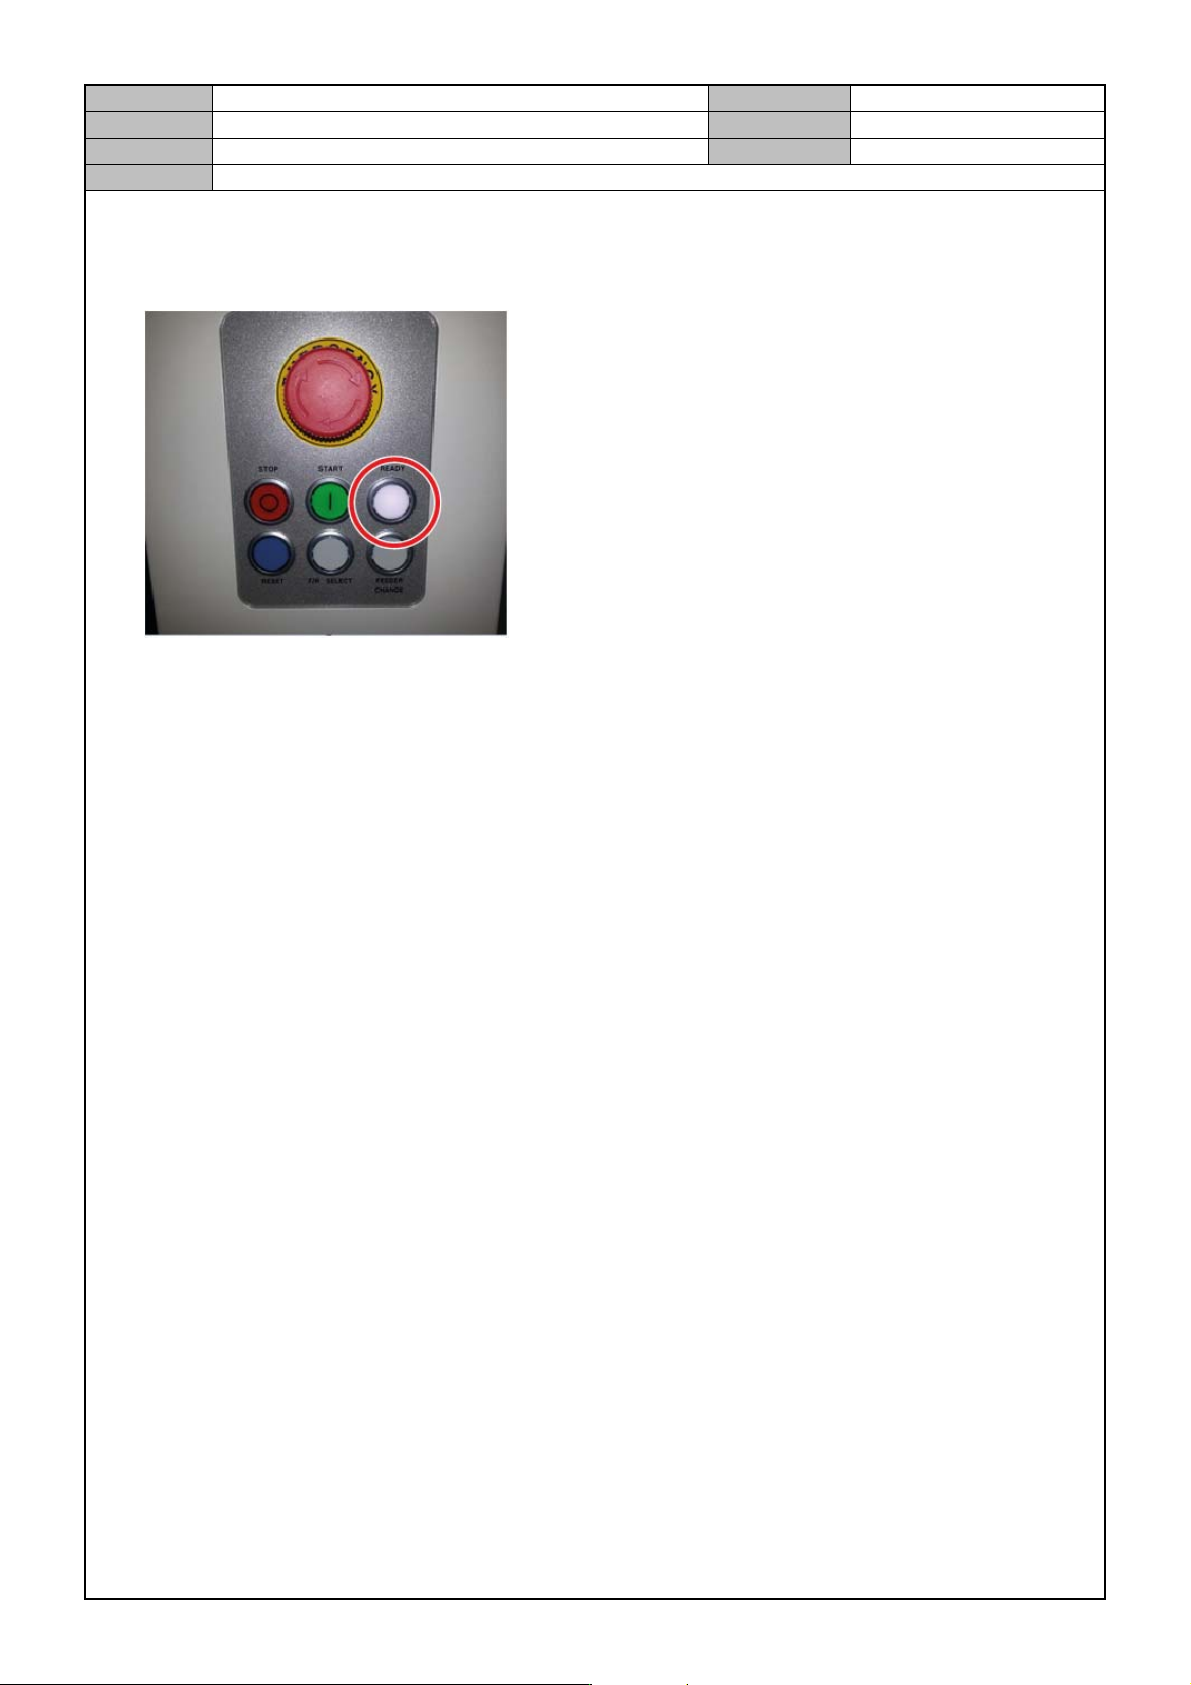
1. On the OP Panel, turn on the Ready Switch.
2. Turn the Air Regulator Adjustment Valve CW and CCW to 4.0 or below. Now, see if the Ready Switch on
the OP panel is turned off.(Air Pressure Sensor's OUT should be turned on: "1→2".)
3. Turn the Air Regulator Adjustment Valve CW to reach 4.5 and check if the Air Pressure Sensor Out is
turned on: "2→1".
4. Check if the Blow Air Regulator reading is 0.9~1.0 bar.
Model
DECAN Series
Company
SAMSUNG TECHWIN
Module
3.18 VACUUM DEVICE
Version
01
Title
FRONT SOL ASSY SUB ASSEMBLY
Page
3-18-5
Note
[FRONT SOL ASSY SUB ASSEMBLY]
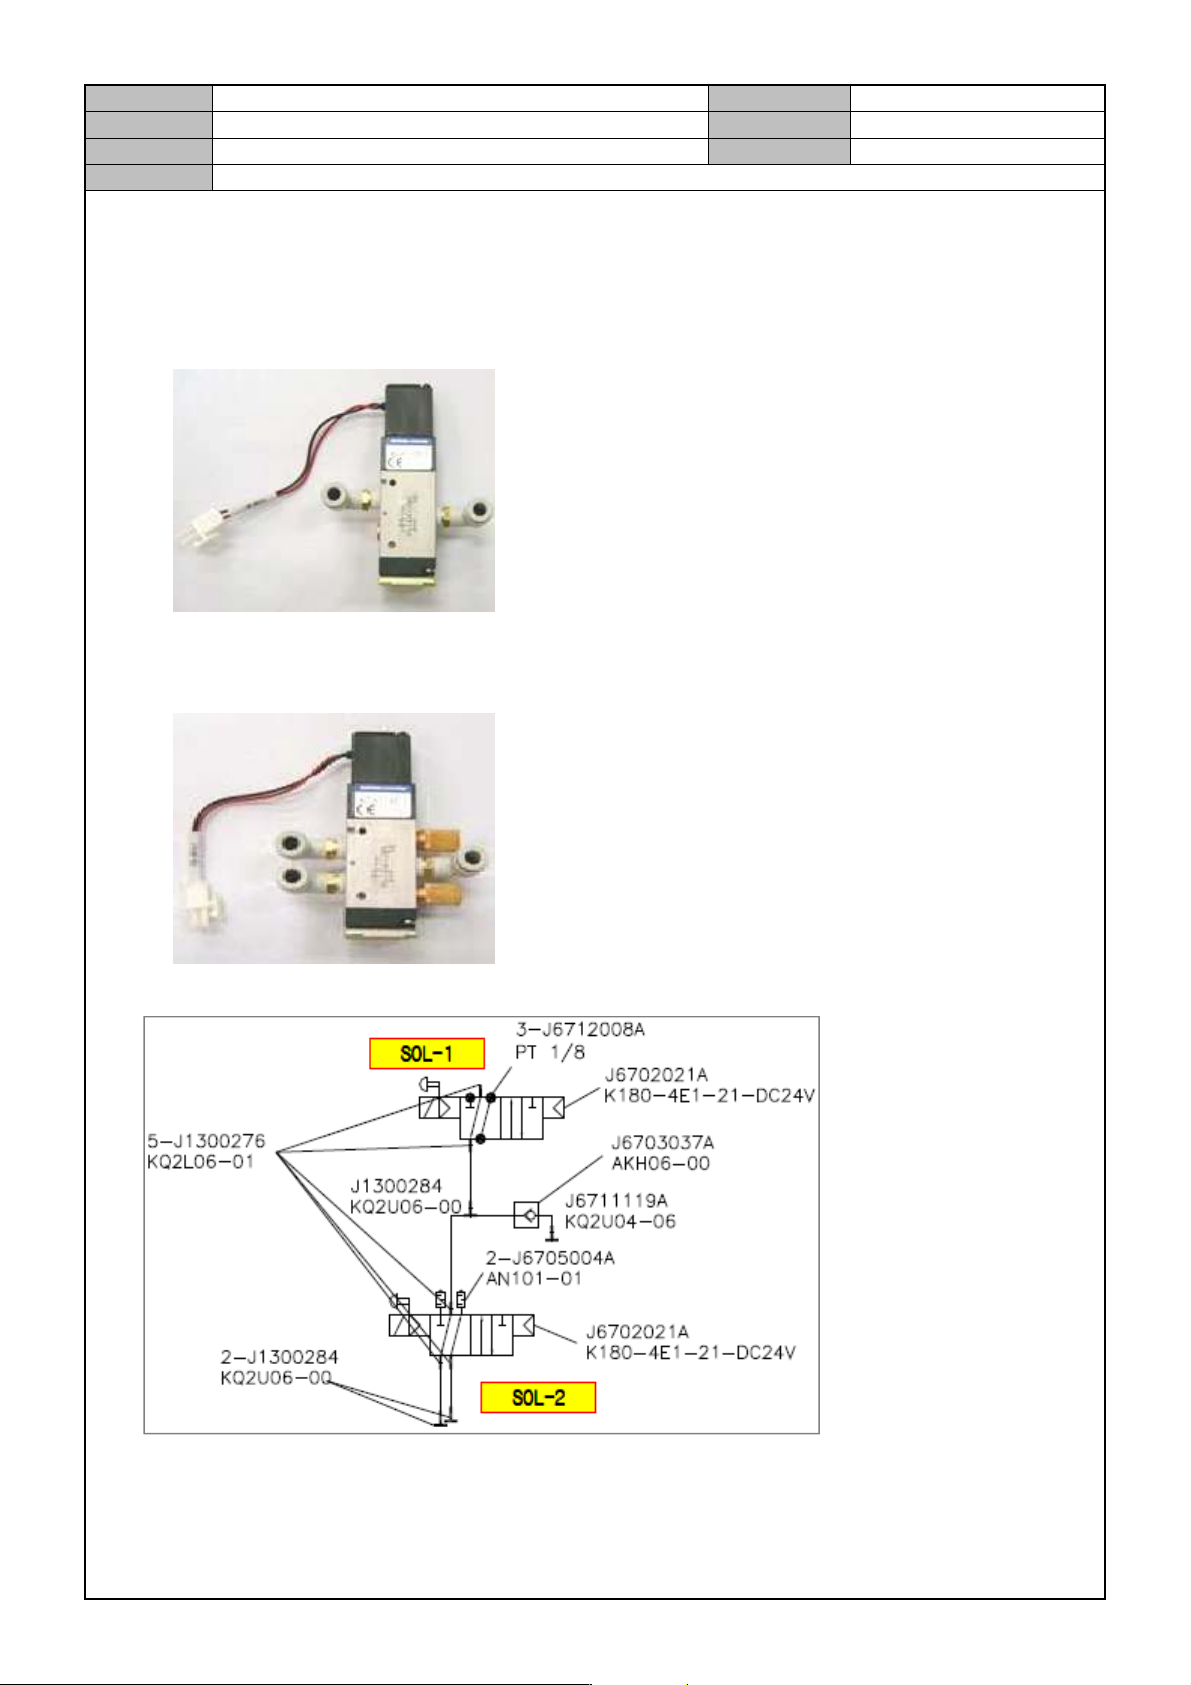
Sol Valve Assy 1 Assembly
The Silencer or Plug requires Teflon tape to be attached to it. Fix it after attaching tape.
When assembling the fitting, pay attention to the direction of assembly.
Sol Valve Assy 2 Assembly
The Silencer or Plug requires Teflon tape to be attached to it. Fix it after attaching tape.
When assembling the fitting, pay attention to the direction of assembly.
Sol Valve Assy 1,2 Air Pressure Diagram