1OM-1626-001_w.pdf - 第111页
1OM-1610 2-12 2. Operation Screen : Chap.2 Button : Image Matching Mode When the button is pressed, after the recognition image is displayed in the single display mode, the image movement buttons appear. F1B6-3 Image Mov…

1OM-1610
2-11
2. Operation Screen : Chap.2
Button :
Image Real-Size Display Mode (Captured image is displayed
in real-size).
After changing to the image real-size display mode using the
button (the shape of the pointer is changed to ), when
the image to be displayed in real-size is touched, or the left
button of the track ball is clicked on the image, the image
is displayed in real-seize from the pointer position as the
center.
When the image is to be displayed in real-size with its
position xed, place the pointer on the center of the image
before the image real-size display operation.
Button :
Image Fitting Mode (the image is displayed fully using the
recognition image display domain).
After changing to the image tting mode using the
button (the shape of the pointer is changed to
), when the
image to be t is touched, or the left button of the track ball
is clicked on the image, the image is displayed fully using
the recognition image display domain, from the pointer
position as the center.
When the image is to be displayed in the image tting mode
with its position xed, place the pointer on the center of the
image before the image tting operation.
0911-001
1OM-1610
2-12
2. Operation Screen : Chap.2
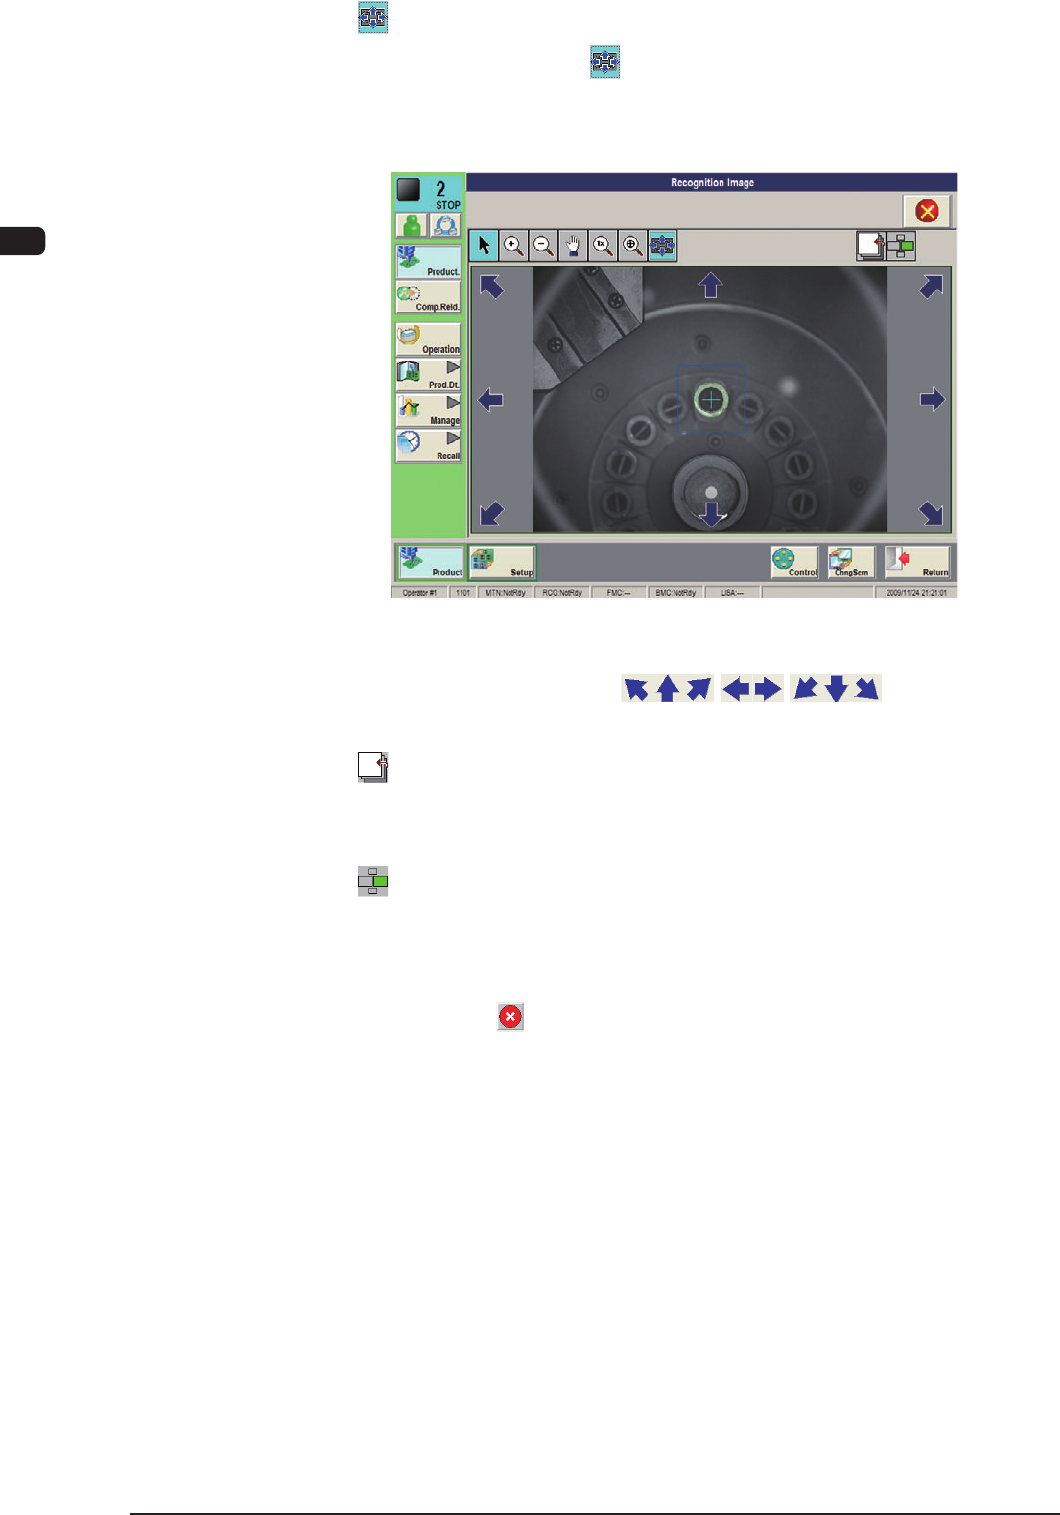
Button :
Image Matching Mode
When the
button is pressed, after the recognition image
is displayed in the single display mode, the image movement
buttons appear.
F1B6-3
Image Movement Buttons ( Buttons)
The image is moved in the arrow direction of the selected button.
Button :
Change Button
Pressing this button changes the image in the front/rear
judgement or polarity judgement operation.
Button :
Multi-Display Mode Button
Pressing this button changes to the multi-display mode
window.
[3]
Close Button (
Button)
Pressing this button closes the recognition window in the image matching
mode.
0911-001
1OM-1610
2-13
3. Entry of Each Paramenter : Chap.2
0911-001
3. Entry of Each Paramenter
The following describes how to enter each parameter in an operation
window.
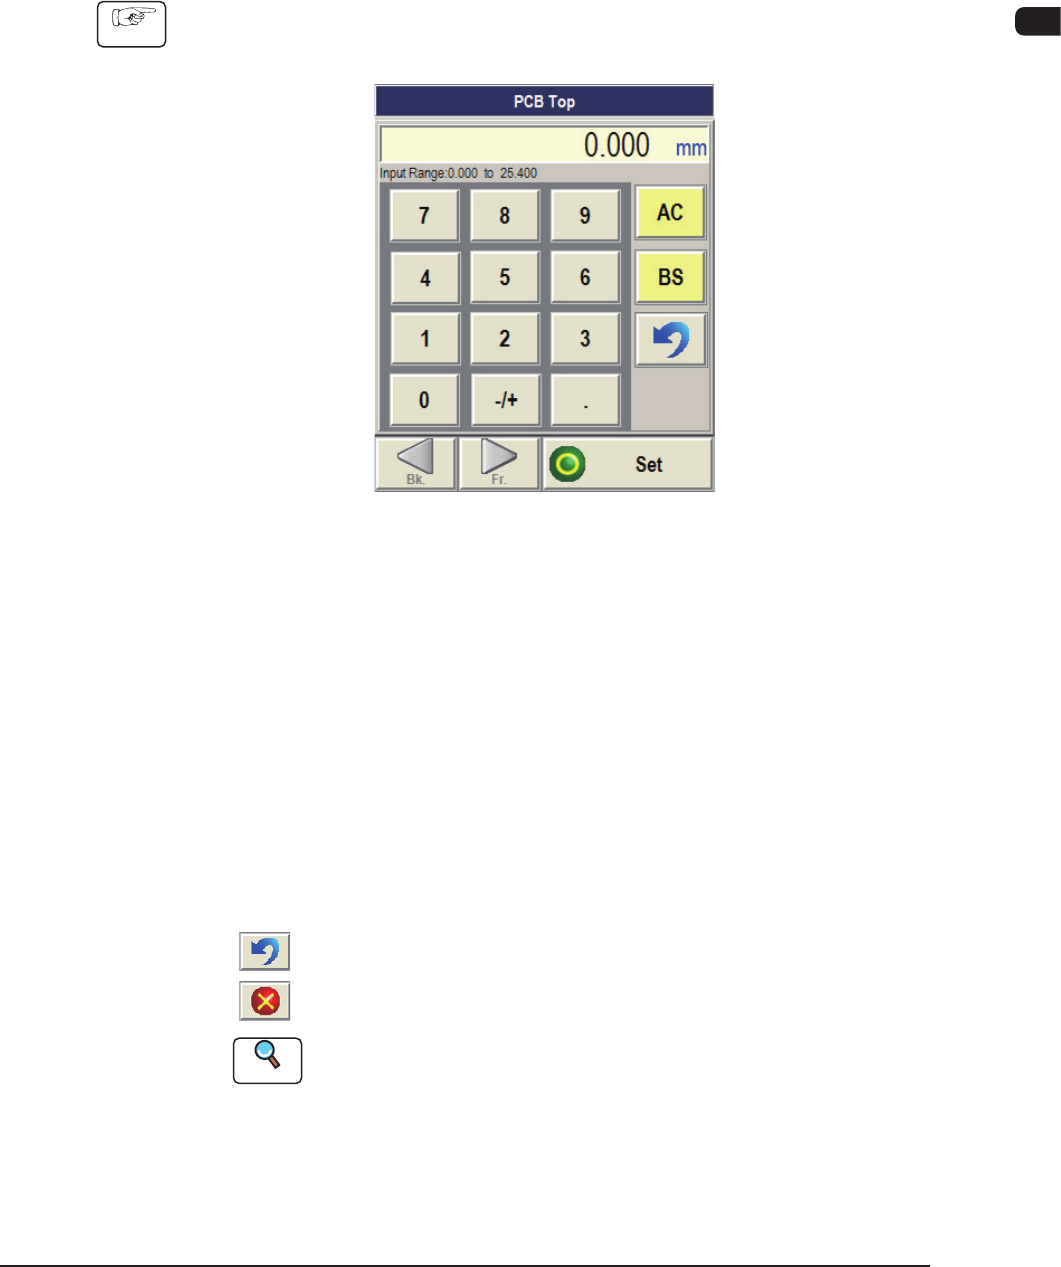
3.1 How to enter numerical values
Procedure
(1) When a button for the data entry is pressed in an operation window, the
corresponding window for the data entry opens.
Numerical Data Entry (Ten-Key pad) Window Example F1B7
(2) Refer to the input range indicated at the bottom of the window and enter the
desired value with the ten-key pad. The entered numerical value appears in
the display box (located at the upper area of the window).
(3) When the [Set] button is pressed after the conrmation of the entered
value, the window for the data entry closes and the entered data appears in
theoperation window.
To cancel the correction of the entered data or the data entry, use the
following buttons.
[BS] Button
:
Deletes a character to the left of the cursor.
[AC] Button
: Deletes the data displayed in the display box.
[
] Button
: Makes it possible to retry the data entry operation.
[
] Button
: Cancels the data entry operation.
Reference
Refer to "3.2 How to enter a string of characters" for the detailed
information on how to enter character data such as a password.