1OM-1626-001_w.pdf - 第135页
1OM-1610 3-16 2. Component Replenishment : Chap.3 (4) Replenish the feeder with components. (5) Install the component-replenished feeder at the specied feeder slot (Fdr No.). NOTICE Be sure to install a feeder to the co…
1OM-1610
3-15
2. Component Replenishment : Chap.3
Procedure
(1) Press the red feeder # button (entitled "Fdr.No") in the "List of Feeders"
pane. The red button indicates that the corresponding feeder is in short of
components.
The "Feeder Allocation" area in the "Fdr Reload" window shows all
feeders in the blocks where component shortage have occurred and the
shortagecaused feeders turn red.
Note
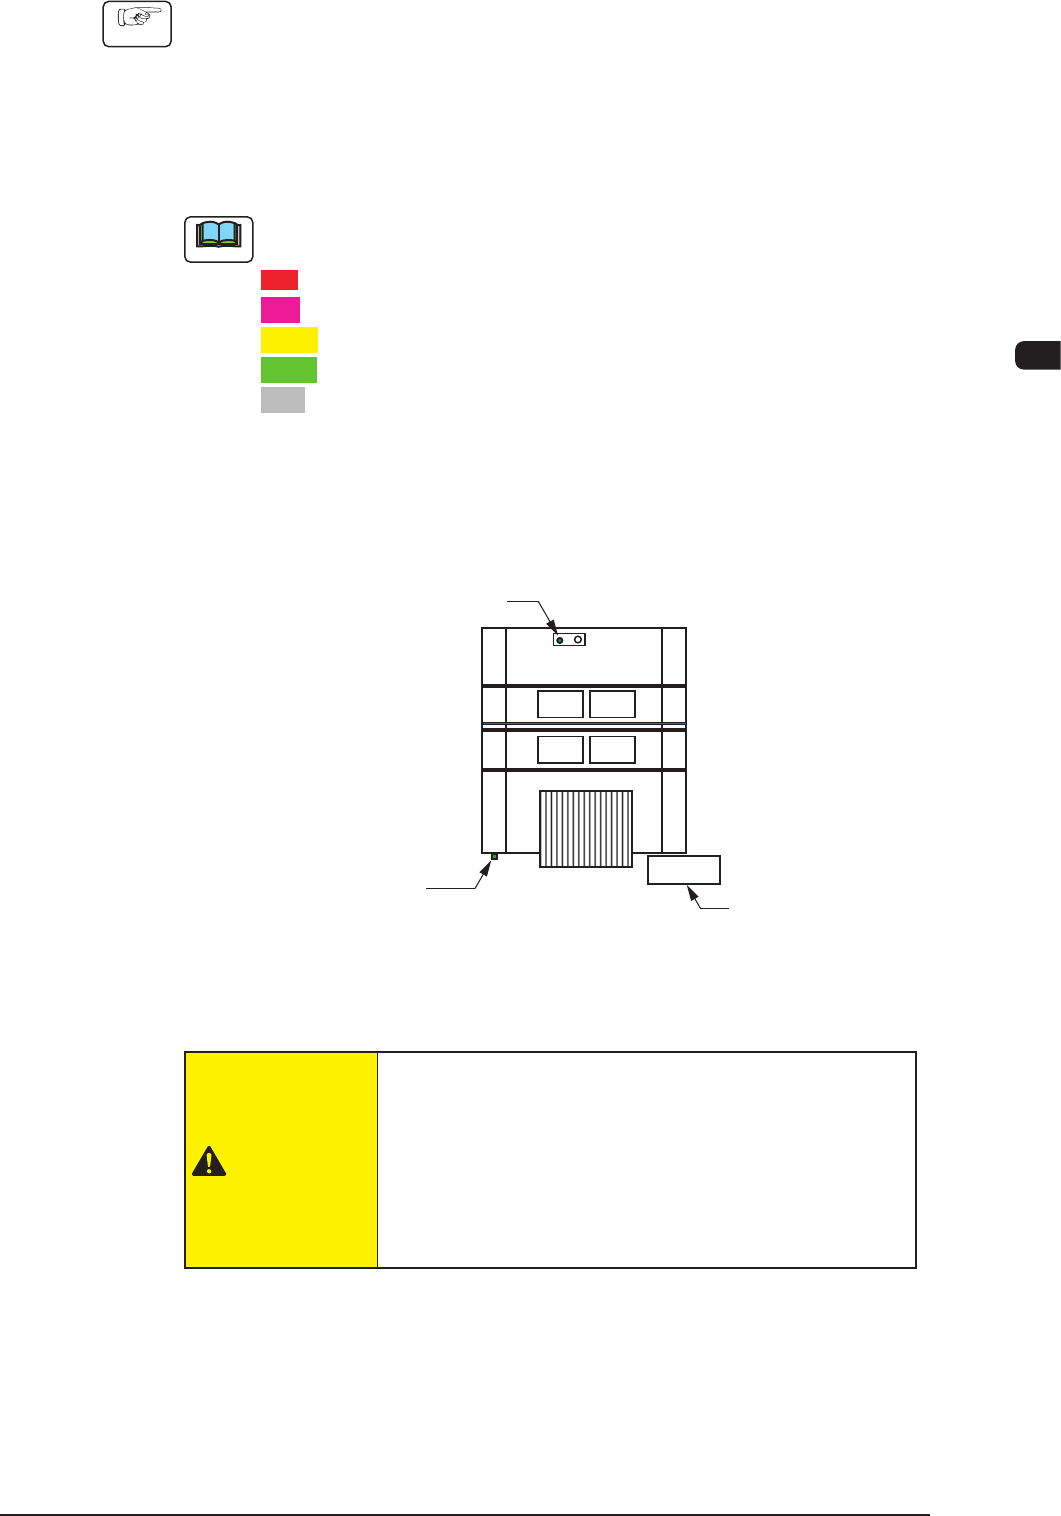
The statuses of the feeders are color-coded in the feeder allocation area.
Red
: Feeder Unavailable (Component Shortage, Feeder Not Installed, etc.)
Pink
: Splicing Stop Generated at Feeder
Yellow
: Attention Required (Warning of Component Shortage, etc.)
Green
: Normal Feeder
Gray
: Not Used in Pattern Program
The statuses of the feeders other than the red-indicated one (the feeder in short
of components) can be conrmed and some feeders can be replenished with
components together with the red-indicated feeder.
(2) Press the [Clr Alarm] button to rest the alarm to its normal condition.
Operation Panel
[Cover READY] Button
(Cover Lock Switches)
Cover Lock Switches
F1C15
(3) Detach the feeder where component shortage has occurred.
CAUTION
When a tape feeder is attached or detached, be sure
not to drop it.
Otherwise, a foot injury will result or the feeder itself may
be damaged.
Carefully handle each feeder one by one and do not drop
any
.
0911-001

1OM-1610
3-16
2. Component Replenishment : Chap.3
(4) Replenish the feeder with components.
(5) Install the component-replenished feeder at the specied feeder slot (Fdr
No.).
NOTICE
Be sure to install a feeder to the correct feeder slot
(Fdr No.).
Otherwise, some components may be trapped between the
heads.
Be sure to insert the feeder deep inside.
Otherwise, if the suppressor is unhooked or lifted aoat,
it cannot be detected, causing the suppressor to interfere
with a head.
Install the feeders correctly such that they are seated
properly.
Otherwise, they may collide with the head sections or a
pickup error will occur.
Reference
Refer to the instruction manual of the tape feeder for the detailed information on
how to attach or detach the feeder.
(6) After the replacement of the feeder is completed, set the number of reloaded
components in the "Fdr. Reload" window.
•
Replenishment of New Tape
Press the [Cmp Reload] button.
Check the remaining number of components in the feeder list and conrm
that the feeder is replenished with components.
•
Replenishment of Used Tape
(when the number of taped components differs from the number of
components
speciedinthecomponentlibrarydata)
Press the [Crnt Cmp Rem] button. The "Crnt Cmp Rem" window opens.
Enter the number of reloaded components.
Check the remaining number of components in the feeder list and conrm
that the feeder is replenished with components.
(7) Press the [START] button on the operation panel.
The ashing [START] button continues to light (in green) and the operation
is re-started.
0911-001
1OM-1610
3-17
2. Component Replenishment : Chap.3
2.2 Intentional Component Replenishment during Automatic
Operation
Procedure
(1) Press the [STOP] button on the operation panel and stop the production
temporarily.
(2) Detach the feeder in short of components from the feeder base.
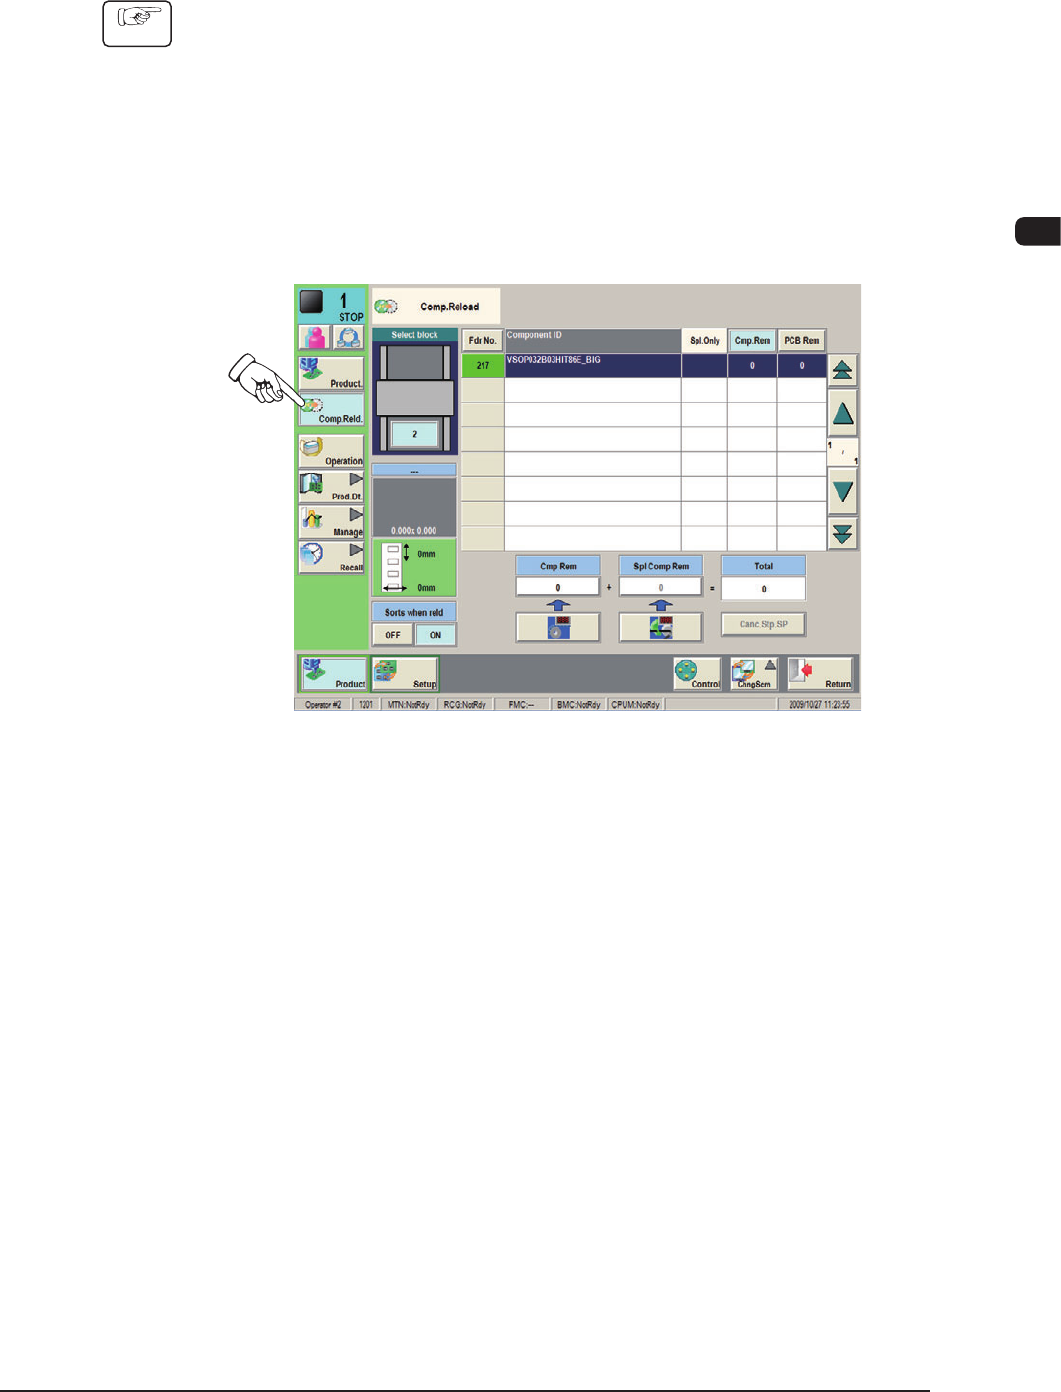
(3) Load the feeder with new components and attach it to the feeder base.
(4) Press the [Comp.Reld.] button in the "Product" menu. The "Comp.Reload"
window opens.
F1C16
(5) Press the "Fdr No." button corresponding to component-replenished feeder
base.
0911-001