MAN00000772_SI-G200BB_SVCPDFA.pdf - 第134页
System software clear installation process WKGB-10109-01 Systemsoft ware clearinstallationprocess 3/1 1 S t artuptaskmanager 1. Open WINDOWS folder to open system32 folder of front PC C drive. Make double cli…
System software clear installation process
WKGB-10109-01
Systemsoftwareclearinstallationprocess
2/11
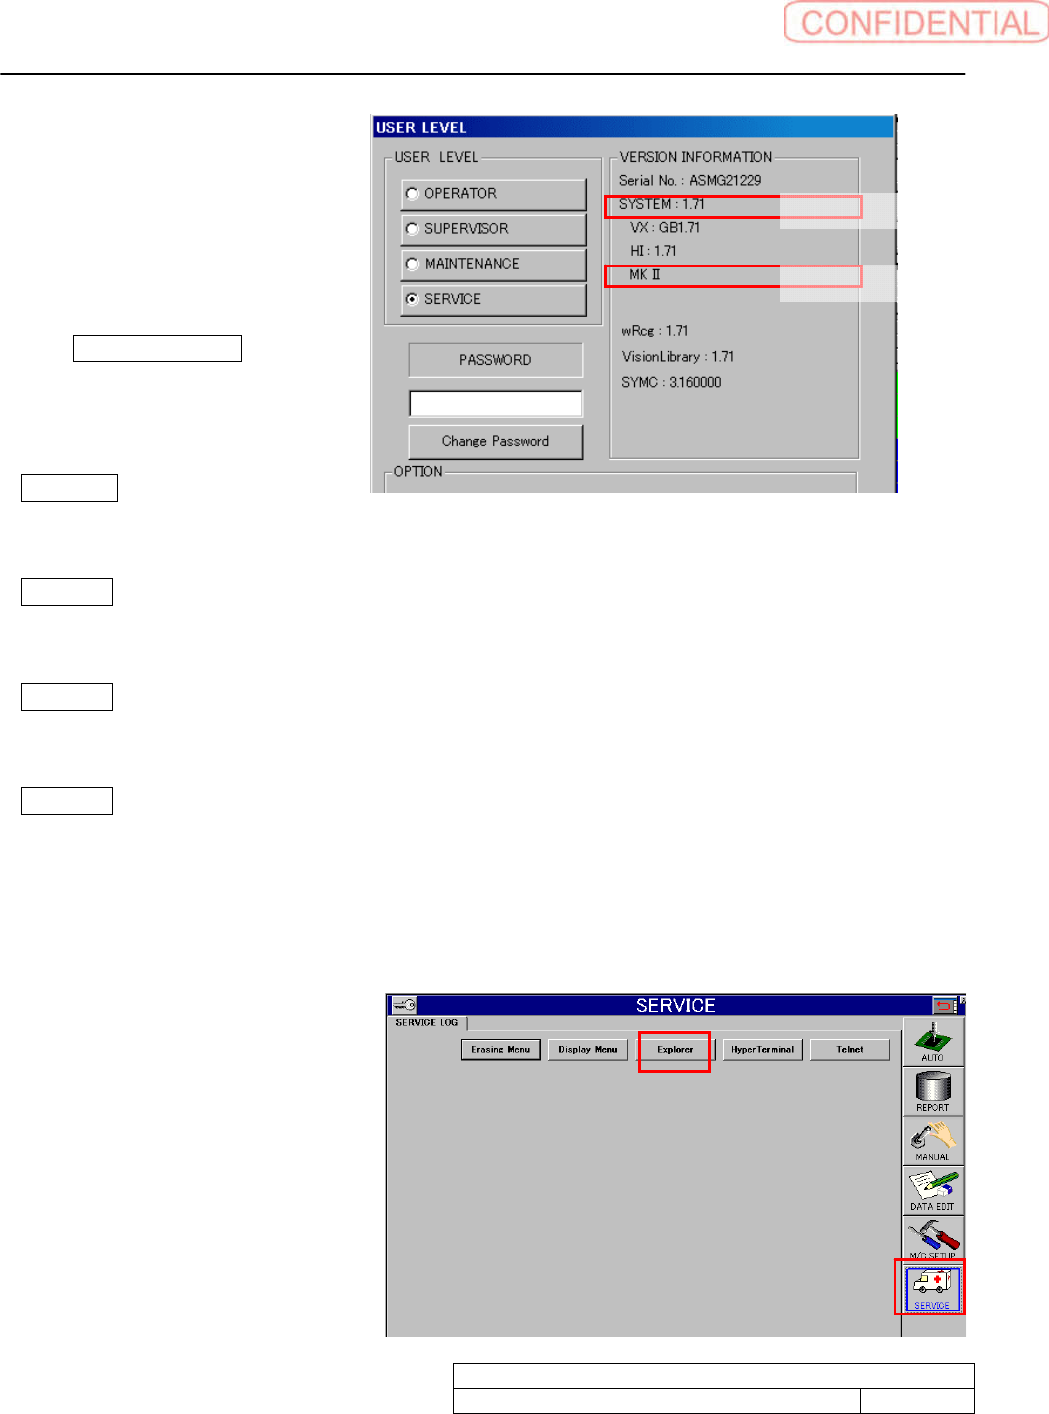
3. Confirm VERSION
INFORMATION. The install
system is depends on machine
model. Take memo system type
referring as below.
If Only 1) System version indication
is available. SelectSI-G200Mk1/
Mk2AA.
If 2)Model indication shows “MK
Ⅱ” SelectSI-G200SelectSI-G200Mk1/Mk2AA.
If 2)Model indication shows “MKⅢ Type F”. Machine has a conveyor with ejector.
SelectSl-G200Mk3TypeFAAwithEJ.
If 2)Model indication shows MKⅢ Type F. Machine has a conveyor without ejector.
SelectG200Mk3TypeFAAwithoutEJ.
If 2)Model indication shows MKⅢ Type F. Machine has parallel conveyors without ejector.
SelectG200Mk3TypeFAAwithoutEJ
4. Input password to click SET button.
5. HI display appears. DATA EDIT, MC_SETUP, and SERVICE button appears on the screen right
side.
Click SERVICE button to show
explorer button. The explorer
starts up.
1)Systemversion
2)Model
System software clear installation process
WKGB-10109-01
Systemsoftwareclearinstallationprocess
3/11
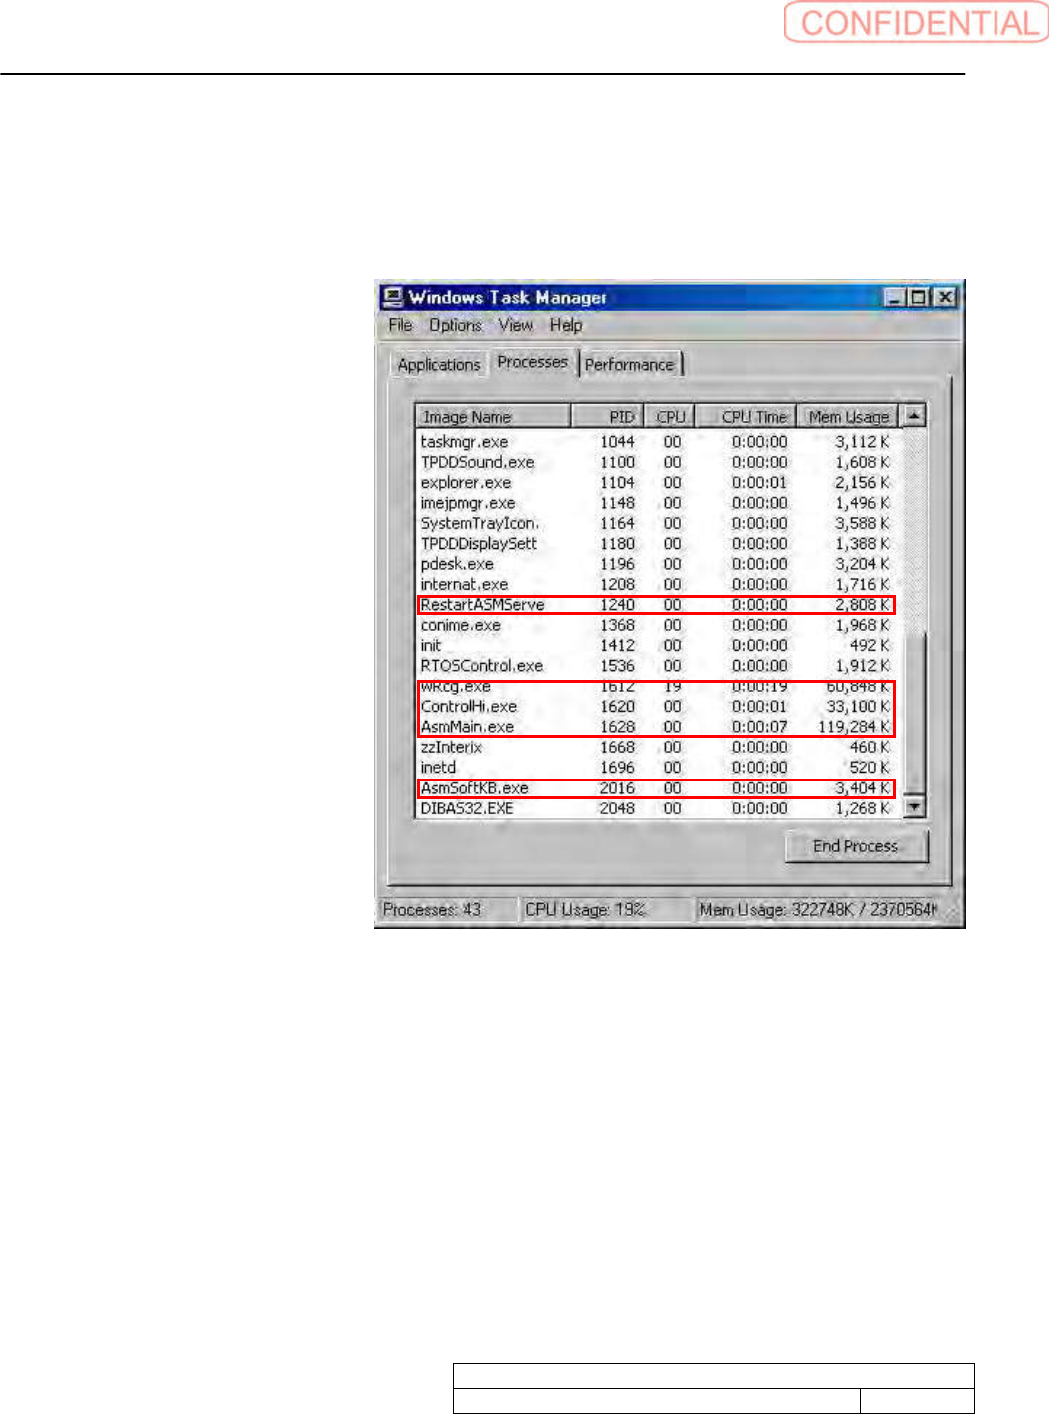
Startuptaskmanager
1. Open WINDOWS folder to open system32 folder of front PC C drive. Make double click on
taskmgr.exe
2. Quit below software.
RestartASMServe
wRcg.exe
ControlHi.exe
AsmMain.exe
AsmSoftKB.exe
3. Change folder names for system installation failure.
Change below folder names.
C drive asm folder
C drive vision folder
Take a memo of folder names before and after change to recover.
System software clear installation process
WKGB-10109-01
Systemsoftwareclearinstallationprocess
4/11
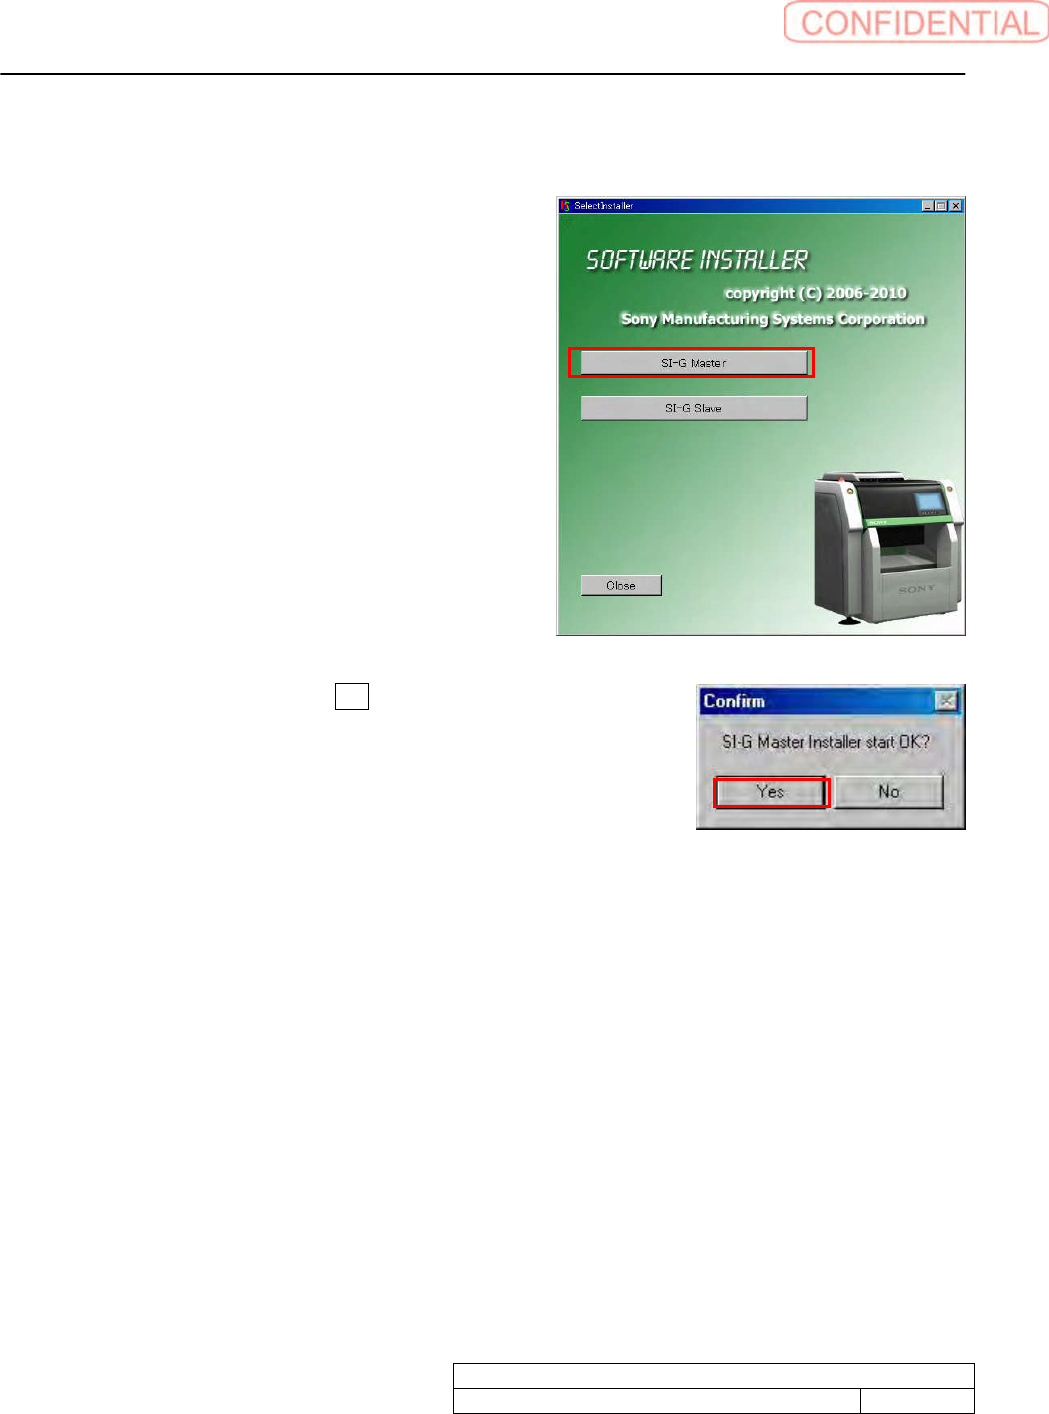
Systeminstallation(forFrontPC)
1. Connect local PC to the machine front PC via network.
2. Make double click on SelectInstaller.exe to start
installer. Click SI-G Master button.
3. Confirm screen appears. Click Yes button.