TR7500E_Manual_en_v28.pdf - 第108页
C h a p t e r 2 M a nu a l B a r i n t r o d u ce T R 7500 U S E R M A N U AL 1 01 6 . 4 . A u t o - C o n f i r m M od e l A f t e r i n s p e c t i ng s y s t e m o u t pu t t h e r e s u l t a n d s t a r t t o i n s …
Chapter 2 Manual Bar introduce
TR7500 USER MANUAL
100
6. Operation
6.1. Auto Mode
l After inspecting system output the result and start to inspect the next PCB
directly.
6.2. Confirm-Pass Mode
l After inspecting system output the result. The next PCB will be inspected until
operator confirm.
6.3. ByPass Mode
l The output is always “Pass”
Chapter 2 Manual Bar introduce
TR7500 USER MANUAL
101
6.4. Auto-Confirm Mode
l After inspecting system output the result and start to inspect the next PCB
directly. And the defect map will be shown as double size it’s easy for operator to
confirm the defects on AOI machine.
6.5. On Machine Confirm
l The function is only for [Confirm Pass Mode]. When you select the function
there must be an operator to confirm the PCB on AOI Machine. The data transfer
to repair station are confirmed and don’t have to confirm again.
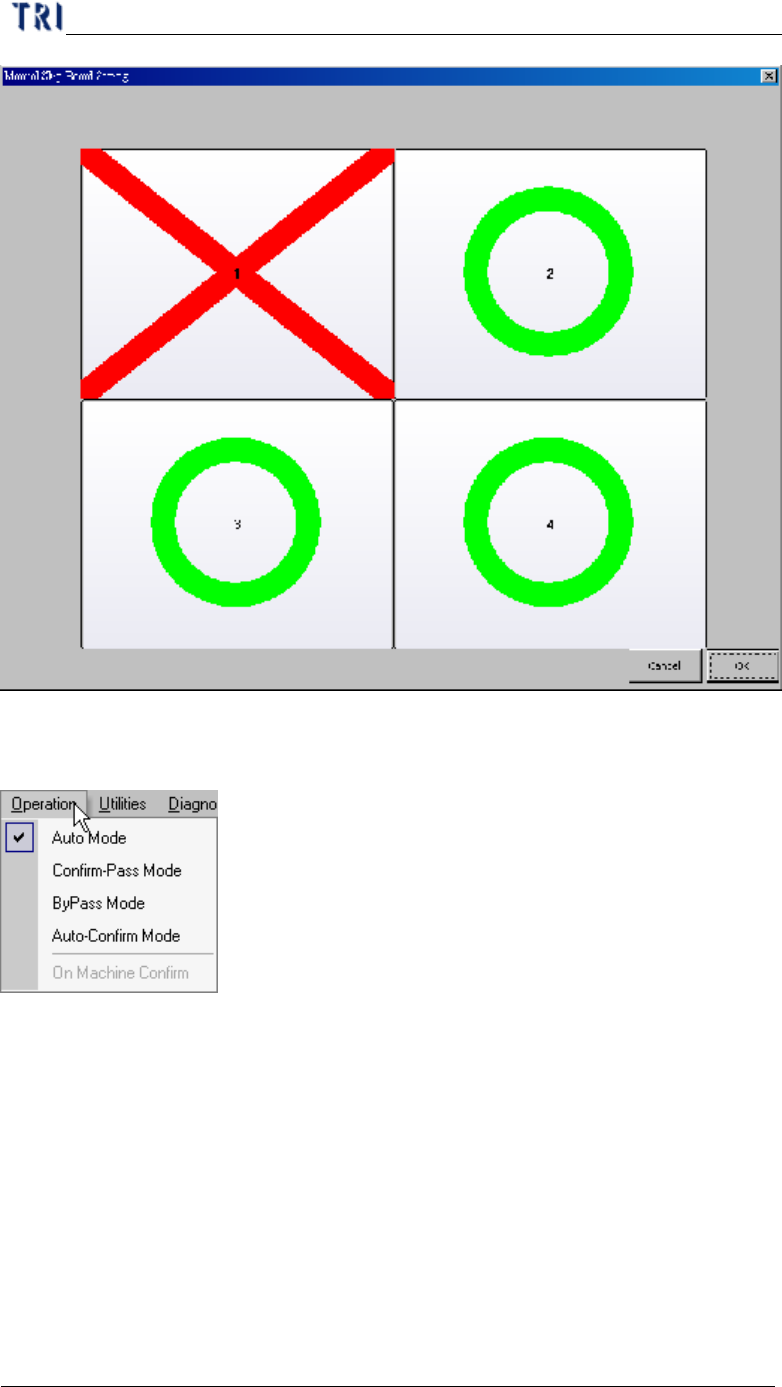
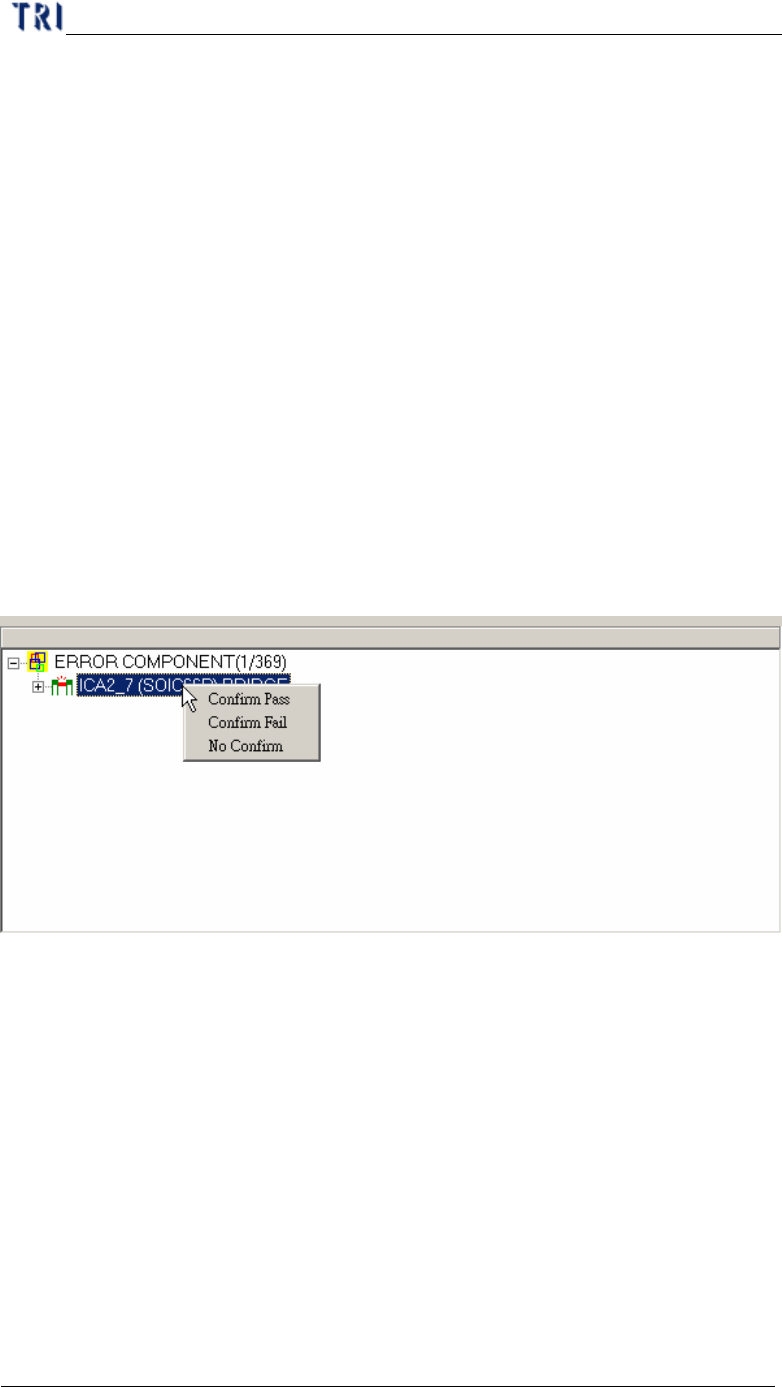
l Right click on defect tree and confirm the defect is pass, fail or no firm. You also
can use keyboard to select, [F8] means [Confirm Pass], [F7] means [Confirm
Fail] and [F6] means [No Confirm]. [No Confirm] means the result is the same
as the result of whole board. If you select [Pass] for whole board the result for
every defects will be set as [pass] automatically no matter what you confirmed
respectively.
Chapter 2 Manual Bar introduce
TR7500 USER MANUAL
102
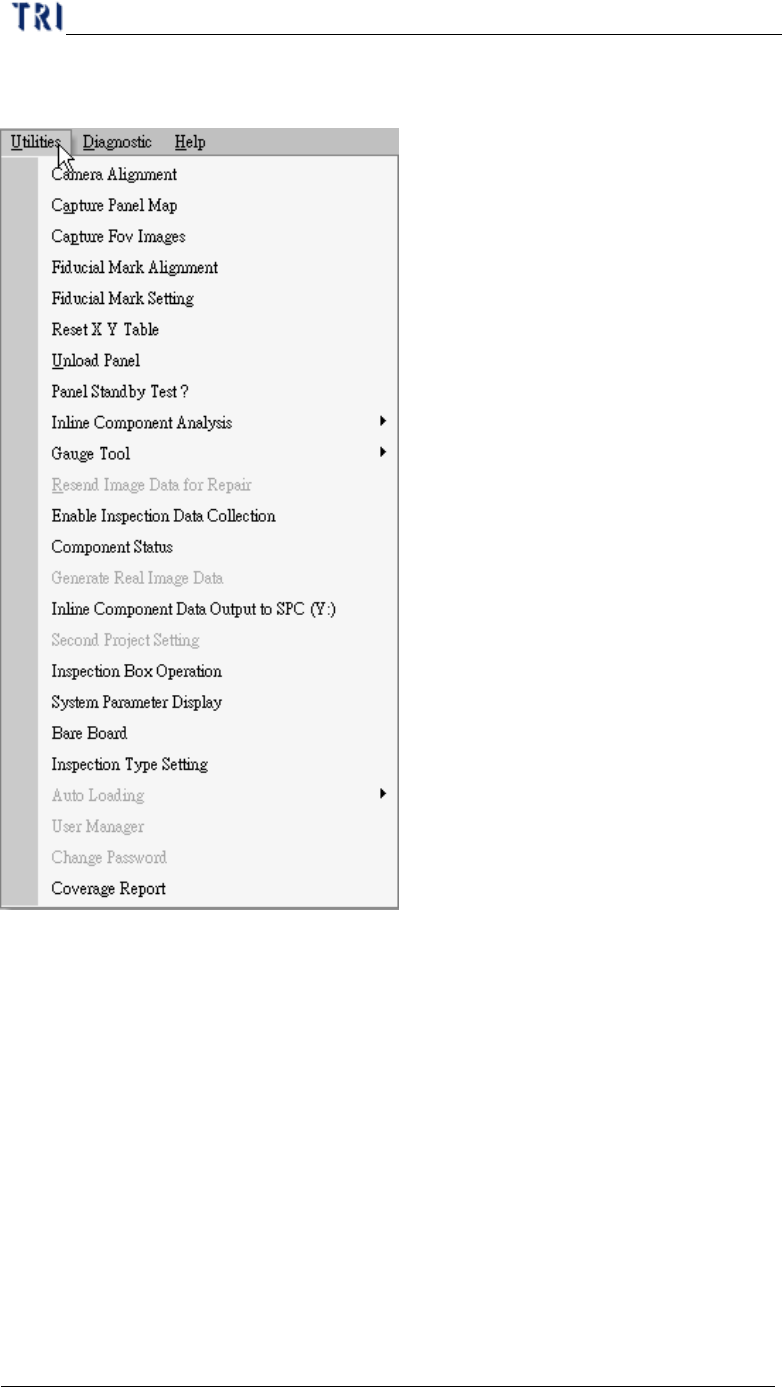
7. Utilities
7.1. Camera Alignment
l You can do camera or lighting alignment or move X-Y table to grab real time
image here.