TR7500E_Manual_en_v28.pdf - 第266页
C h a p t e r 4 T r a i n d i a l og f u n c t i on T R 7500 U S E R M A N U AL 2 59 6 . 1 0 . C h a n g e L ig h t i n g 6.10.1. M o v e to F O V P o si t i on l S e l ec t i ng t h e c h e c k bo x m ea n s m o v e t h…
Chapter 4 Train dialog function
TR7500 USER MANUAL
258
l Panel/Set – [Panel] means to review all the FOVs in the whole PCB; [Set] means
to review set FOVs for multi-board.
l Top Camera – [ON] means to review the FOVs and the FOVs display as red
boxes; [OFF] means not to review and the red boxes are disappeared.
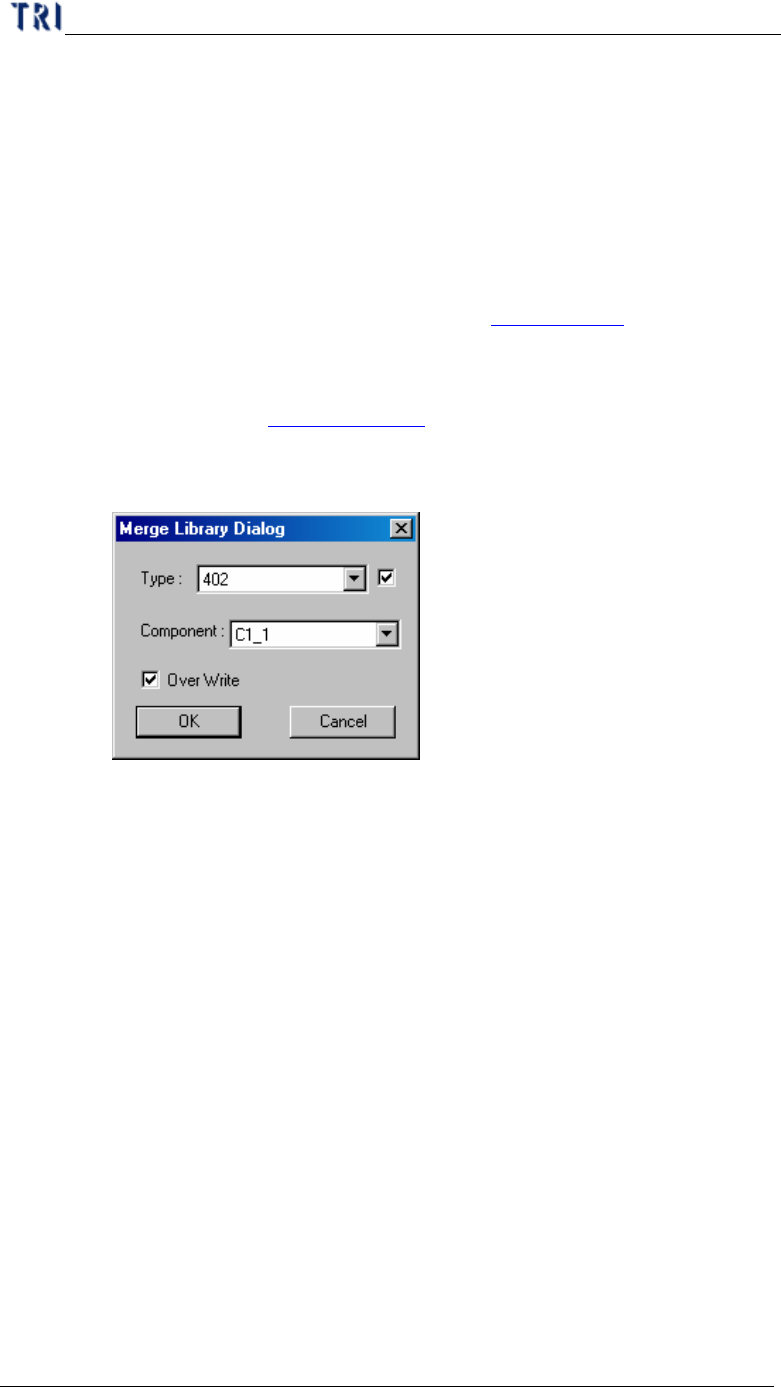
6.8. Merge
l You can press the button to merge the specific library to component. After
merging you should capture FOV images again. (Chapter 2 7.3. ).
l Merge Steps
Step1. Press [Merge] and there is a library window appeared. The detailed
functions are in Chapter 3 10.1.2. . You should select a library and press
[OK].
Step2. Input the object component type or name then press [OK].
l Type – Select the objective type. The check box means merge the
library to all components with the type.
l Component – If you want to merge the library to a single
component you should not select the check box and choose a
component.
l Over Write – Select to over write the data or it just merge the
component don’t have inspection boxes.
Step3. Capture FOV images again.
6.9. Histogram
l The curve displays the distribution of gray level in multi-function window. The
horizontal axis means the gray level; the vertical axis means the pixel counts; the
red line means the gray level where the mouse cursor is on.

Chapter 4 Train dialog function
TR7500 USER MANUAL
259
6.10. Change Lighting
6.10.1. Move to FOV Position
l Selecting the check box means move the camera to the position of FOV that we
review now. You can change and save the lighting.
l Not selecting the check box means capture the image at current position. You can
change the lighting for test, but not save it.
6.10.2. Set Lighting
l You can set the lighting for the FOV

Chapter 4 Train dialog function
TR7500 USER MANUAL
260
n The way to set lighting is in Chapter 3 9. . [For Multi FOV] means to set
the light to relative FOVs in other multi-board; [For Current FOV] means
only set the light to the current FOV; [Change By Type] means set the light
to FOVs that contain the component with specified type; [For Test] means
the light just display for test and the FOV will be inspected by original
lighting. You should press above selection to set lighting or press [Cancel]
not to change and close the window.
n The changed lighting will be named according to the FOV name.
n If you change the lighting with the other default lighting, the system will
ask whether you want to set the lighting with a new name according to the
FOV name or set the lighting with original lighting name.