TR7500E_Manual_en_v28.pdf - 第41页
C h a p t e r 1 AO I S t a nd a r d P r o j ec t Cr ea t i on T R 7500 U S E R M A N U AL 34 l W i t h o u t C A D S t e p 1. P r e ss [ N o C AD ] . S t e p 2. P r e ss [ O K ] . S t e p 3. Y o u h a v e t o u s e t h e…
Chapter 1 AOI Standard Project Creation
TR7500 USER MANUAL
33
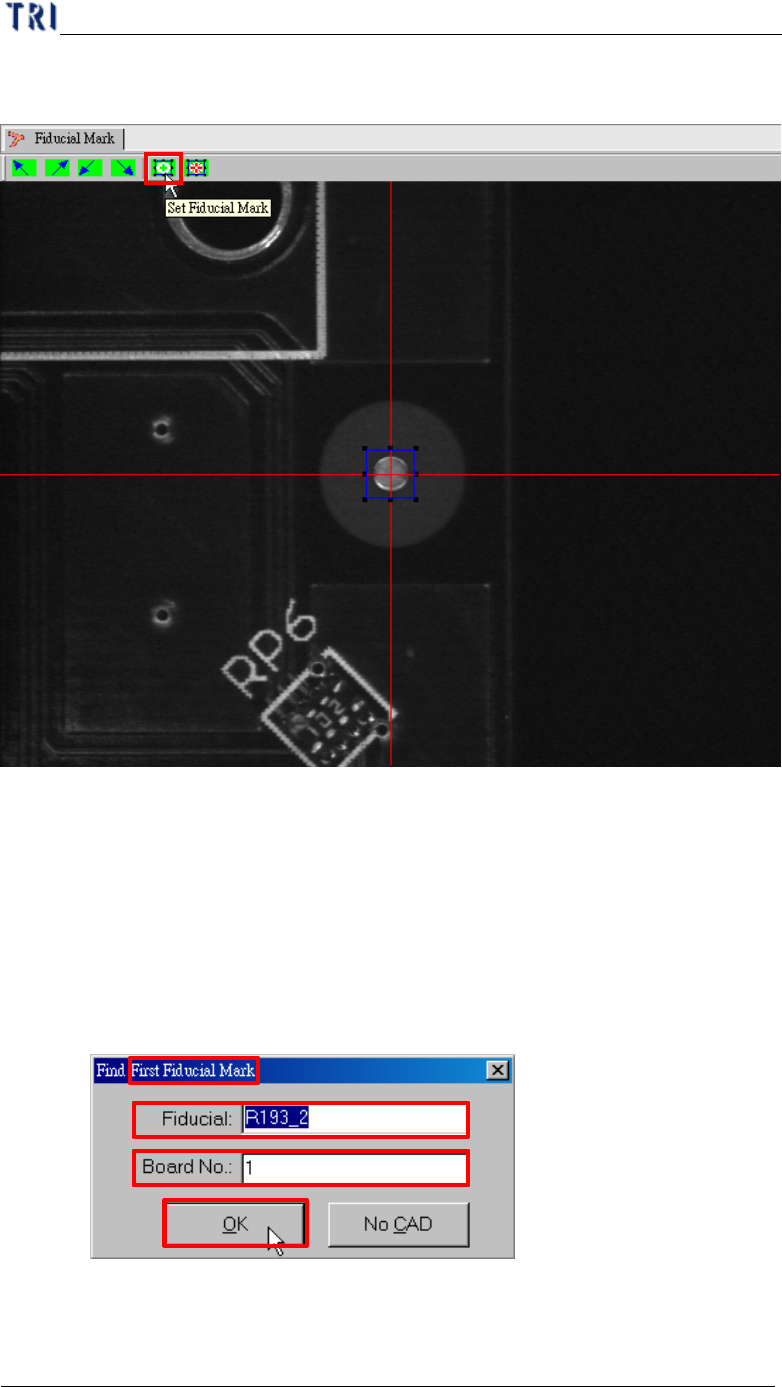
l Fiducial mark setting is for detecting panel offset.
(1) Press [Set Fiducial Mark] icon.
(2) You have to find the first fiducial mark (Fiducial 0) in the beginning. If the
fiducial mark that you want to set is listed in CAD file you can input the name
and board number directly and press [OK]. Or you can press [No CAD] to find
the fiducial mark manually.
l With CAD
Step1. Input the name and the board number of fiducial mark and press
[OK].
Step2. It moves camera to the position of the fiducial mark automatically
according to the CAD data.
Chapter 1 AOI Standard Project Creation
TR7500 USER MANUAL
34
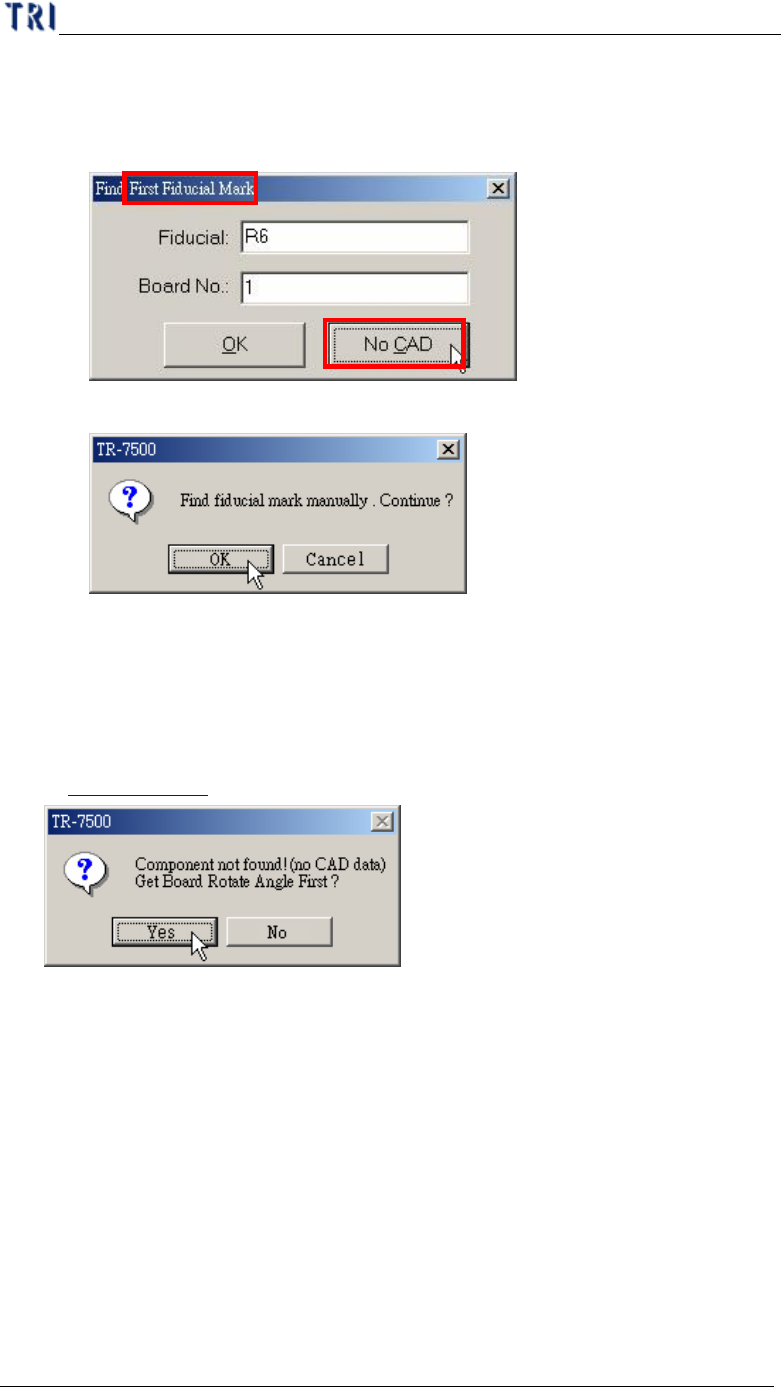
l Without CAD
Step1. Press [No CAD].
Step2. Press [OK].
Step3. You have to use the [Motion Control Panel] or click on the image to
move the camera to the correct position.
l If the PCB is a single board and you select [No CAD] here, the system displays
the asking to find rotation angle first. The procedure for getting rotation angle is
in Chapter 1 4.3.
l If the PCB is a single board and you select [OK] to use fiducial name to set
fiducial mark, the system calculates the rotation angle according to the fiducial
mark coordinates. And you don’t have to get the rotation angle in addition.
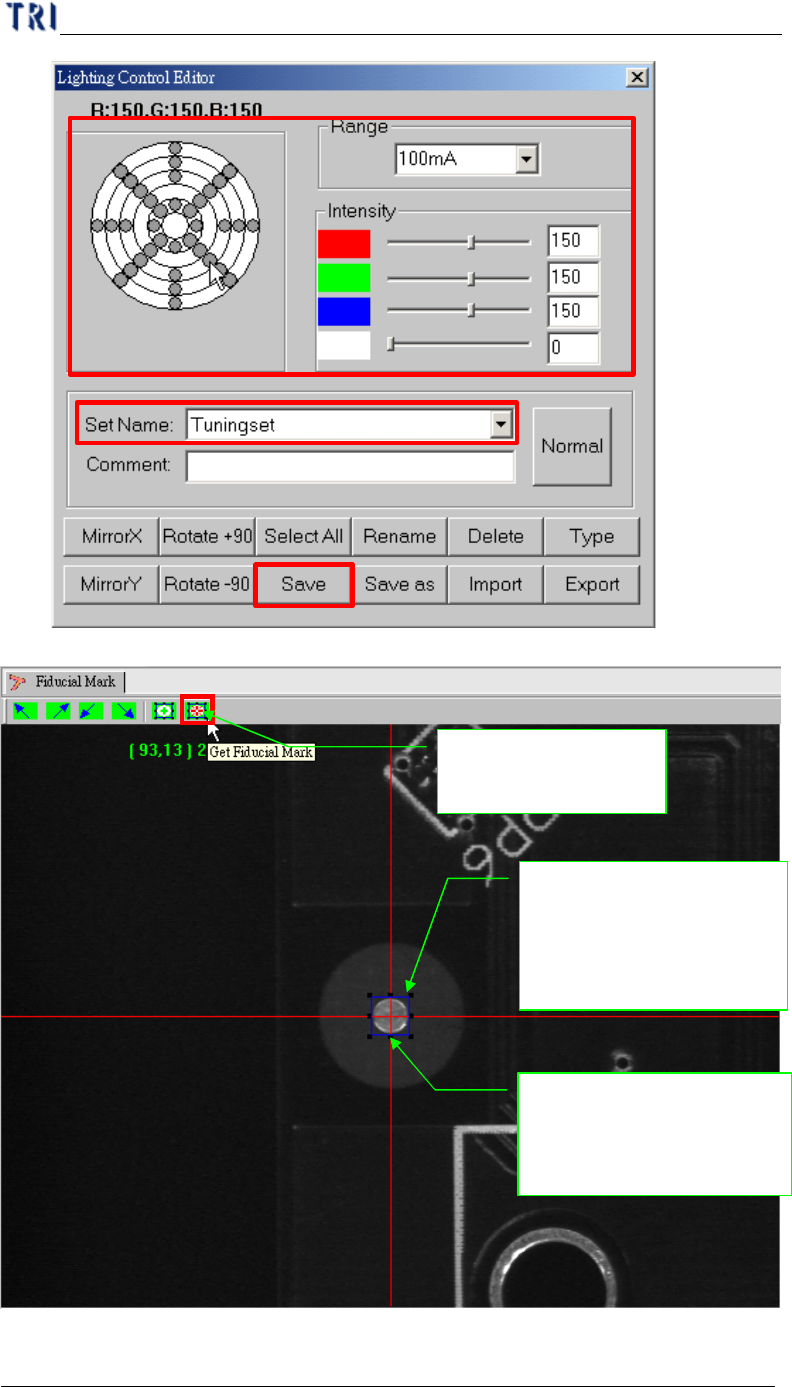
(3) Set the lighting for the first fiducial mark. When the shape of fiducial mark is not
clear under the current lighting, you can adjust the lighting manually. Press the
[Light] button then the [Lighting Control Editor] window appears. Select the
[Fiducial0] item and adjust the lighting then press [Save] to finish the setting.
Chapter 1 AOI Standard Project Creation
TR7500 USER MANUAL
35
1.Select
2.Modify
3.Save
(4) Press [Get Fiducial Mark] icon.
3. Push the button the
fiducial mark
1. Moving the component
to the screen center (cross
red line point)
2. Adjust the blue frame
for assistant user
adjustment; pad can near
the center closely