TR7500E_Manual_en_v28.pdf - 第286页
C h a p t e r 8 O ff l i n e E d i t or T R 7500 U S E R M A N U AL 2 79 C h a p t e r 8 O f f l i n e E d i t or 1 . So ft wa r e ( 1) S a p e r a L T ( 2) C o g n e x D r i v e r ( 3) T R 7 5 0 0 E m a i n p r o g r a …

Chapter 7 Start to Inspection
TR7500 USER MANUAL
278
(2) Press button to close the TR7500E main program. At the same time the
system asks if you want to save the project and you can choose to save according
to your own demand.
(3) Select [Start/Shut down] to close down the TR7500E main pc.
(4) Turn the power switch counterclockwise to shut down the machine.
(5) Close the breaker.
Chapter 8 Offline Editor
TR7500 USER MANUAL
279
Chapter 8 Offline Editor
1. Software
(1) Sapera LT
(2) Cognex Driver
(3) TR7500E main program. Must the same with the TR7500E what you
2. Setting
l Select [Start\Run] and key in [regedit]. Under the path
[\\HKEY_LOCAL_MACHINE\SOFTWARE\TRI] you should add a DWORD
parameter named [offline] and change the value to 1.
3. Procedure
l There two parts you can use on offline editor. One is editing component library
and the other is training in main program.
3.1. Editing component library
(1) Start to create a project according to Chapter 1 . After finishing step 5, setting
fiducial mark, you enter the editing component library window. (Click on [Tune]
page below the ATPG flow chart then selects [Library]. And double click on
[Component Type] item.)
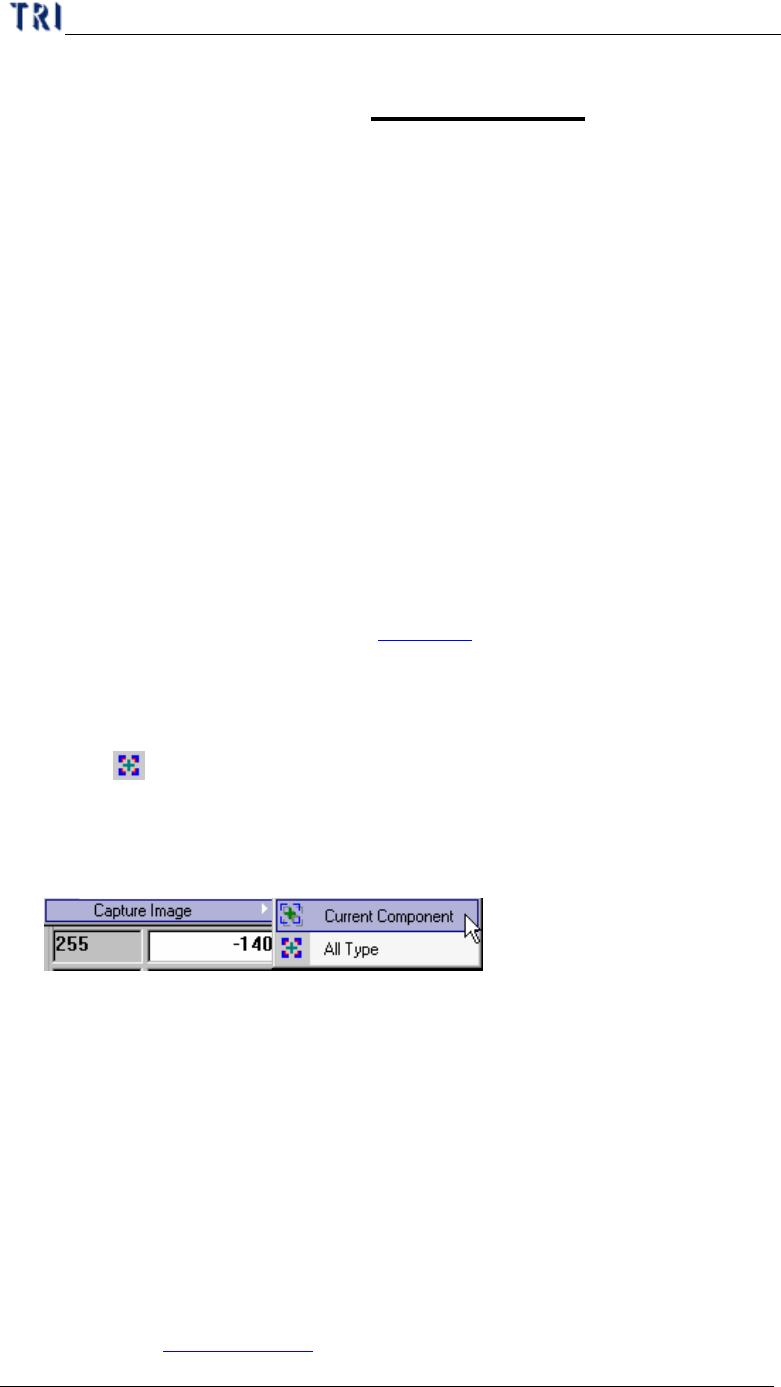
(2) Select [
Tool/Capture Image/ All Type] button then the system captures the
first component (ranked by name) images for all type. There are total 2 images
will be captured for every first component, captured by top camera with
[ToplightA] and [ToplightB].
(3) System will create a new folder named as [OfflineImage] in the folder that
project file is in. The images are named by its type and component name.
(4) Save the project (*.pre).
(5) Copy the whole folder where the project saved in to offline editor. If you want to
continue editing the existing component library you have to copy the
[PackageLibrary] and [ImageLibrary] folder to offline editor.
(6) Execute the main program on offline editor and open the *.pre file.
(7) Select [Program\ ATPG] to enter the ATPG editing window. Click on [Tune]
page below the ATPG flow chart then select [Library]. And double click on
[Component Type] item. Then you can start to edit the component library
according to Chapter 3 10.9.
Chapter 8 Offline Editor
TR7500 USER MANUAL
280
(8) When the size of the component goes beyond the range of one FOV, you still
have to edit this type on TR7500E.
(9) Save the all component library (*.pgl).
(10) Copy the [PackageLibrary] and [ImageLibrary] folder to TR7500E. The default
path is [C:\AOI\packagelibrary] and [C:\AOI\imagelibrary].
(11) Continue the ATPG process to finish: [Merge]à[FOV Generate]à[FOV Verify].
(12) Save the *.pre file.
3.2. Train Dialog
(1) Copy the whole folder where the project saved in to offline editor.將 PRE.
(2) Execute the main program on offline editor and open the *.pre file.
(3) You can train inspection boxes according to Chapter 1 10. Because you can’t
grab image on offline editor, you only can edit on existing image and you can’t
change the lighting.
(4) If you ever do [Merge] when editing, system shows a dialog that remind you that
the system can’t get image. So you have to get FOV images again while getting
back to TR7500E.
(5) Save the project and copy the project to TR7500E. And you can do inspection or
fine tuning.
4. Auto Feedback Function
4.1. Objective
l Transferring the inspecting result to Offline Editor and getting the feedback from
Offline Editor.
4.2. Setting
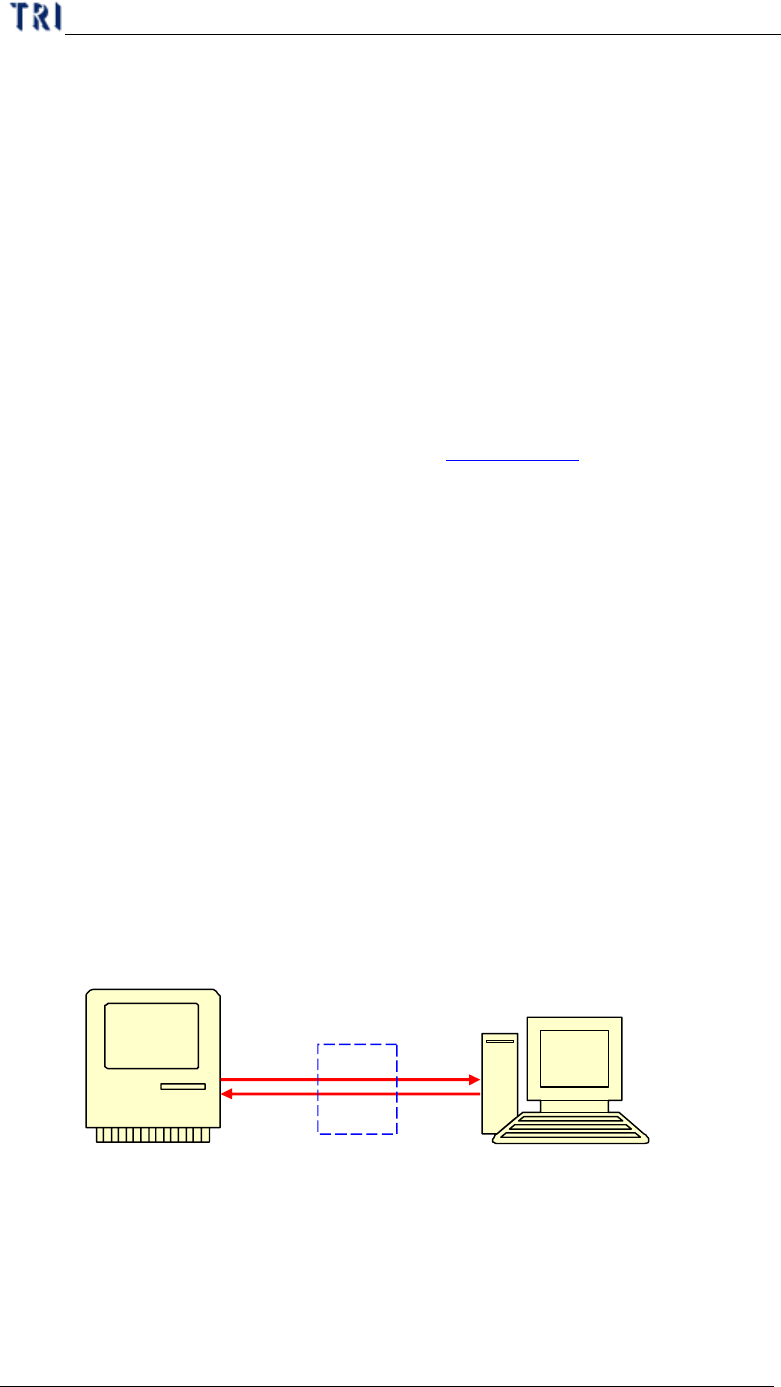
4.2.1. Diagram
4.2.2. Hardware
l Connect AOI machine and Offline Editor with cross over cable.
4.2.3. About Offline Editor
l Create a [AOI_Offline_Data] in C Disc.
l Select [Parameter\User Mode\Link To Machine].
Offline
Editor
TR7500E
(*.pnl)
(*.fbk)
[//OfflinePC/C/
AOI_Offline_Data]