FLEXLINE-CAD_INM.pdf - 第111页
A- 14 7.3 Fi eld T ranslatio n screen Figure A - 19 Filed T ranslation sc reen (component ) * Leave "BOM range charact er" and "BOM delimiter" blank. * "BOM" is a command to link "Refer…
A-13
7.2 Field definition screen
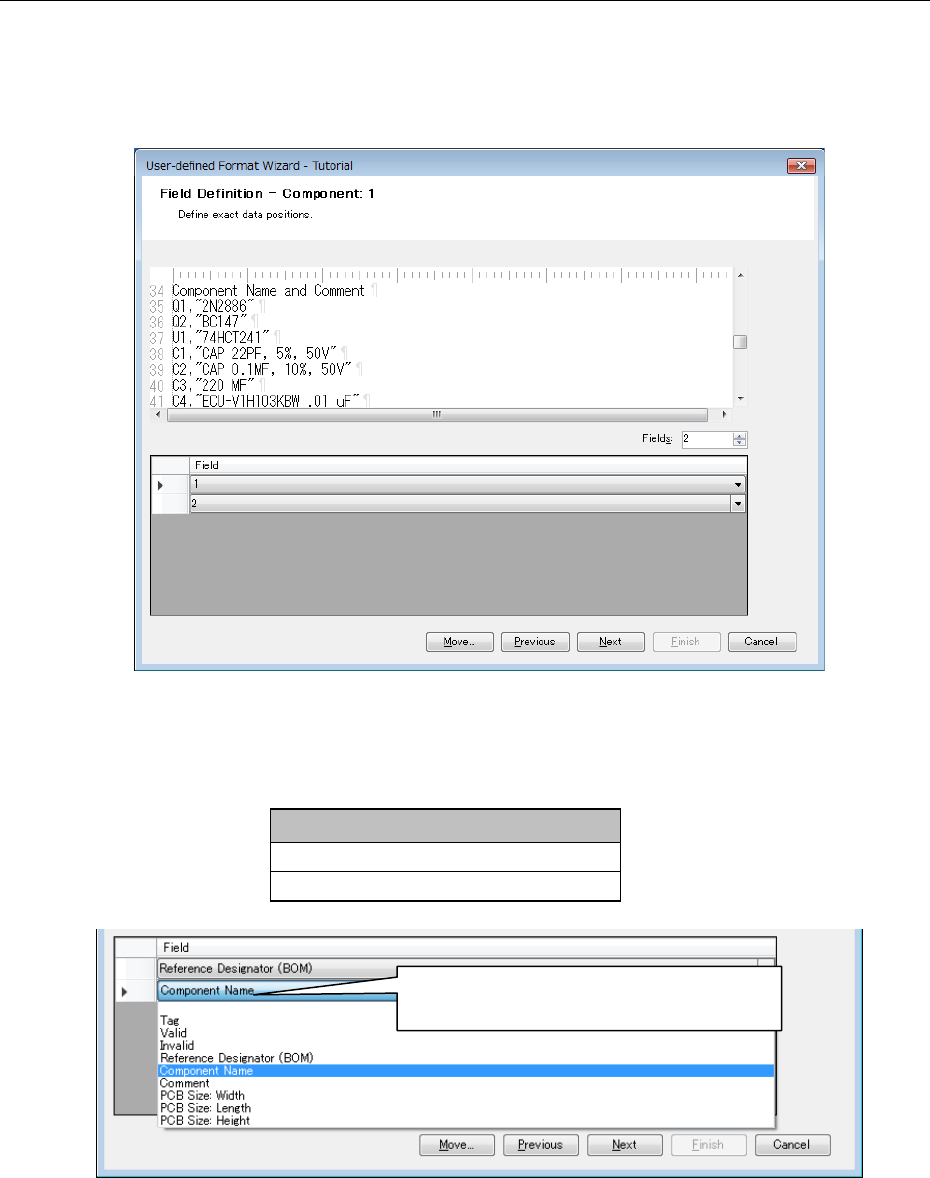
Next, specify the actual field position and define a field.
7.2.1 Specifying the number of fields
Enter "2" as the number of fields in the "Field" text box and press the Enter key.
Figure A-17 Field Definition screen (Component)
7.2.2 Defining a field
Next, define a field. Click the cell of a field, and select the field from the displayed list.
Field
Reference designator (BOM)
Component name
Figure A-18 Component data field
Click here to display a list and select a field
from the list displayed by pulling down.
A-14
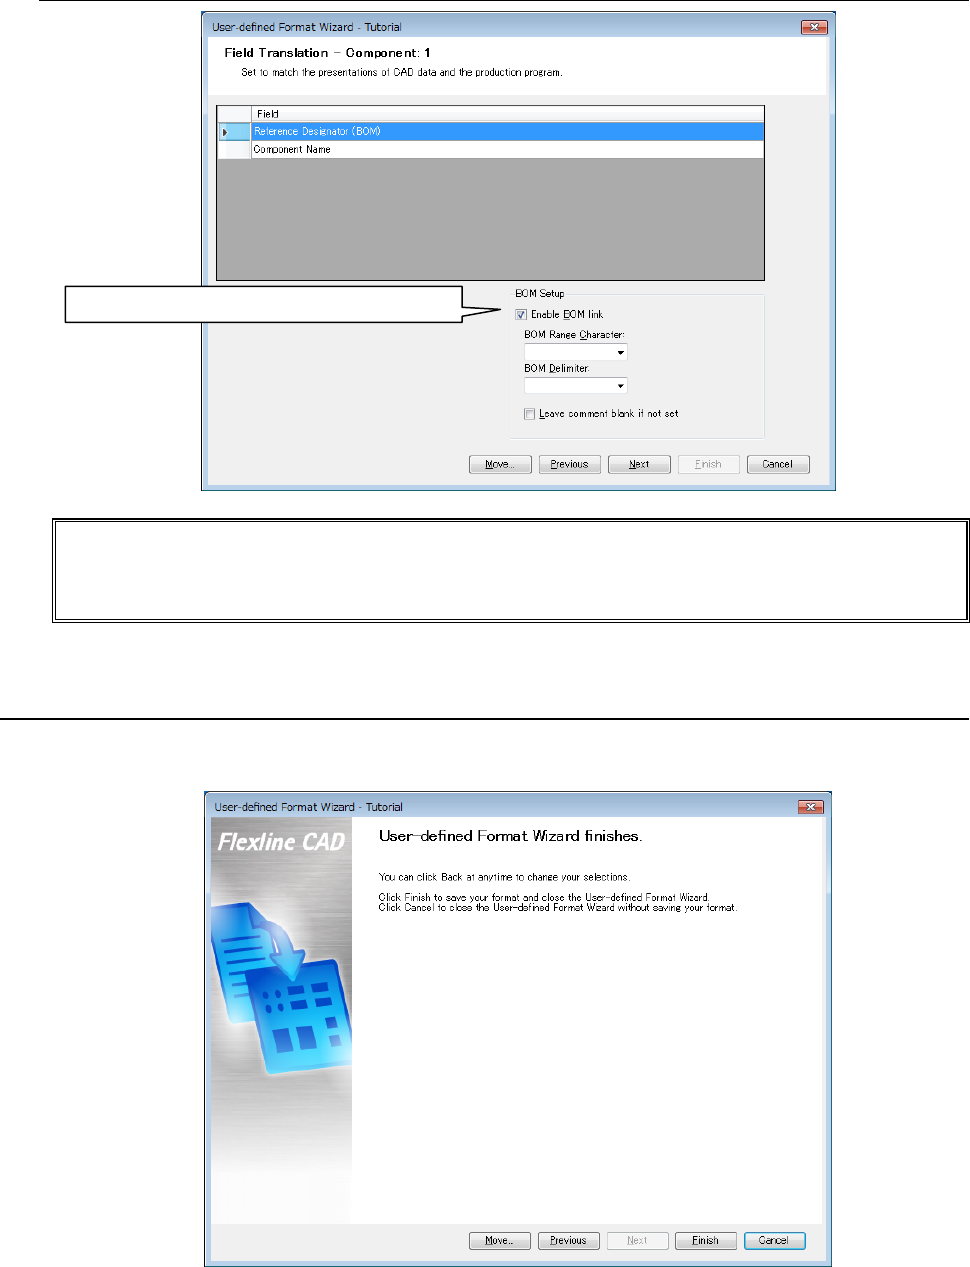
7.3 Field Translation screen
Figure A-19 Filed Translation screen (component)
* Leave "BOM range character" and "BOM delimiter" blank.
* "BOM" is a command to link "Reference designator (BOM)" with "Placement ID." (For
details, refer to 7.6.2.)
Click the "Next" button.
8. Finish screen
The following screen is displayed.
Click the "Finish" button to complete the definition.
Figure A-20 Finish screen for new creation
With this, a new user-defined format has been created for Tutorial.txt.
The created format is saved in the "{Flexline CAD install folder}\Formats" folder as a format file.
Place a check mark to "Enable BOM link."
A-15
9. Converting the file
Convert a file by using the created input format “Tutorial.”
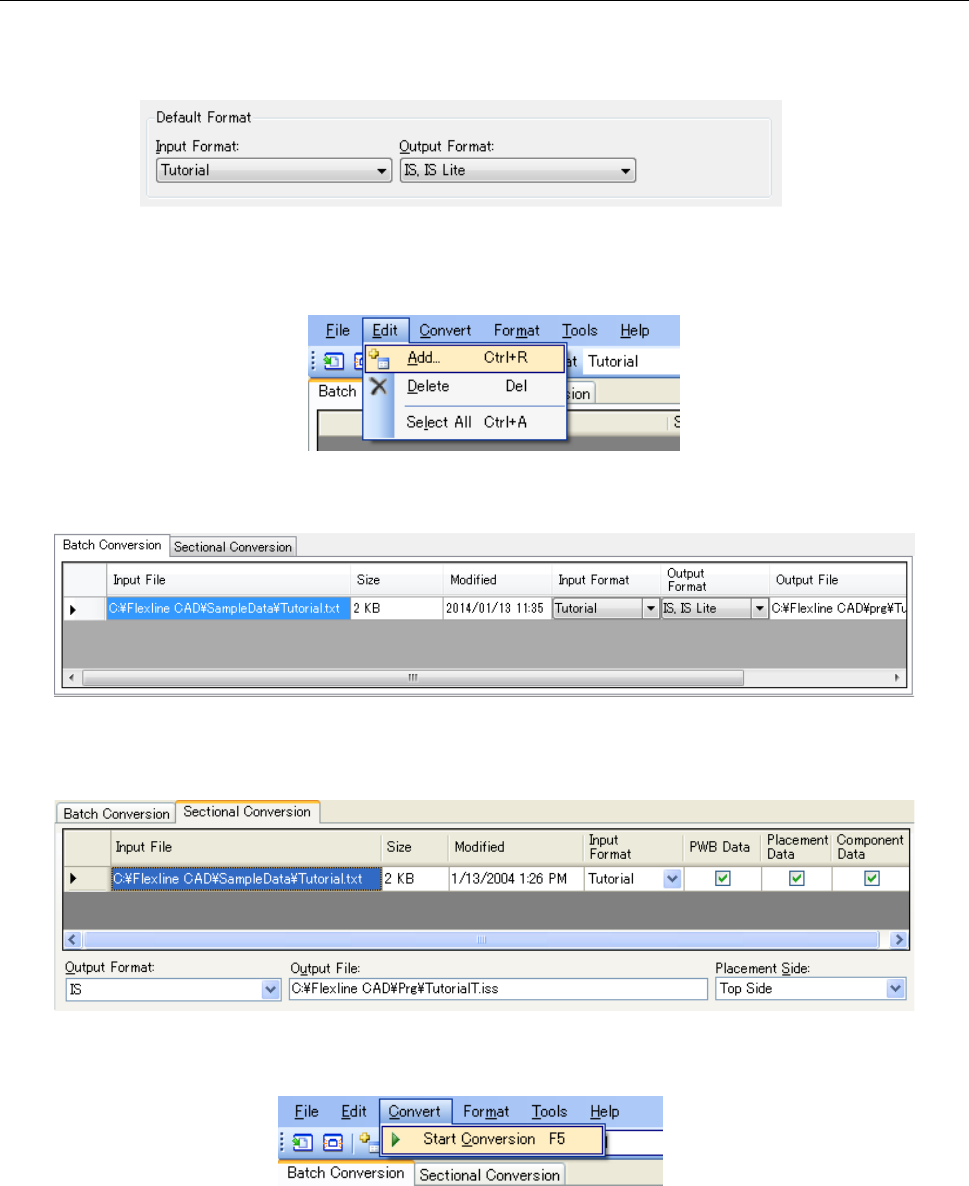
① On the “Default Format” screen of “Set Environments": select “Tutorial” for the “Input format",
and “IS,IS Lite” for the “Output format."
Figure A-21 Selection of formats
② Select the "Edit" - "Add" command or click the "Add" button of the tool bar to open the "Open"
dialog box.
Figure A-22 "Edit" - "Add" menu
③ In the "Open" dialog box, select the {Flexline CAD install folder}\SampleData\Tutorial.txt and
add the file to the file table.
Figure A-23 Batch conversion file table
* When the file table is the "Sectional conversion" screen, check off the "PWB," "Placement,"
and "Component."
Figure A-24 Sectional conversion file table
④ Select the "Convert" - "Start Conversion" command or click the "Start Conversion" button of
the tool bar to start the conversion.
Figure A-25 "Convert" - "Start Conversion" menu
⑤ The message "Conversion is completed" is displayed. This completes the conversion.
The converted files consist of two files: "TutorialT.iss" and "TutorialB.iss.”
"TutorialT.iss" → File created with the placement data of the top side of "Tutorial.txt"
TutorialB.iss" → File created with the placement data of the bottom side of "Tutorial.txt"