FLEXLINE-CAD_INM.pdf - 第142页
E-1 A ppendix E Patch T y pe Inst allation T ool What is the p a tch ty pe installati on tool? This t ool allows y ou to inst all t he softw are to which some minor changes have been made in the current Flexline CAD soft…
D-1
Appendix D Glossary and Troubleshooting
♦
Glossary for Flexline CAD
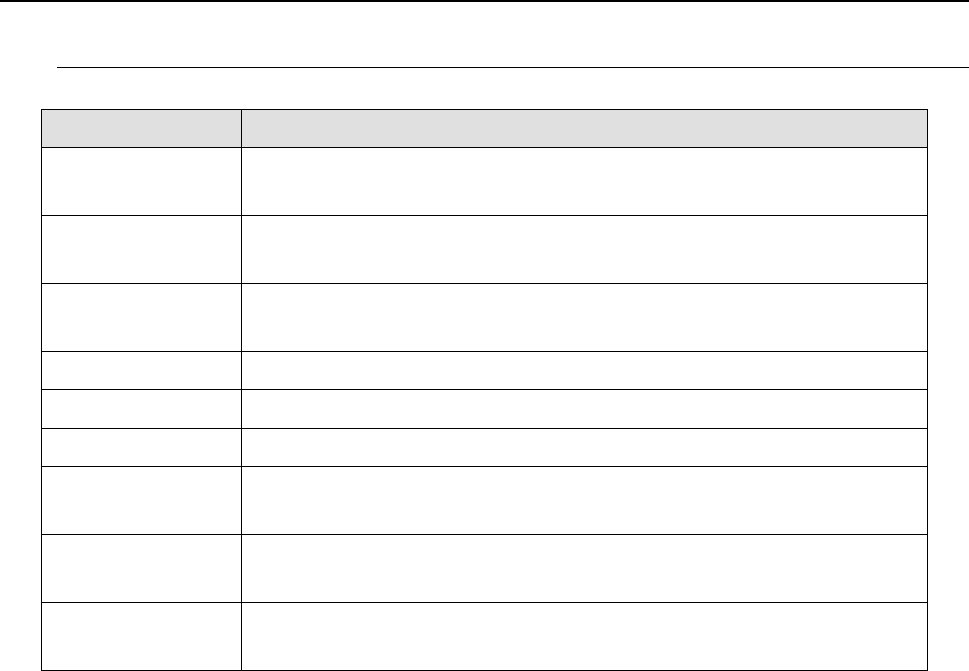
Term Meaning
Protect module A device that enables the Flexline CAD systems on the PC. It is to be attached to
the USB or parallel port on the PC that has installed Flexline CAD.
Batch conversion A mode that converts single or multiple CAD data files simultaneously. For one
CAD data, one production program is created.
Sectional conversion A mode that converts single or multiple CAD data files into one production
program.
Input file A CAD data file to be converted with the Flexline CAD systems.
Output file A production program file that was converted with the Flexline CAD systems.
Format A file that defines the structure of CAD data.
Standard format Ready-made format that is installed with the Flexline CAD system.
The user cannot delete the standard from the system or change the name.
User-defined format Format that is defined by the user using the user-defined wizard. The user can
delete it from the system or change the name.
BOM Abbreviation for Bill of Material. Component information which is peculiar to the
manufacture.
E-1
Appendix E Patch Type Installation Tool
What is the patch type installation tool?
This tool allows you to install the software to which some minor changes have been made in
the current Flexline CAD software.
1. Operations
1.1 Start-up and termination
How to start up: Double-click PatchInstaller.exe located immediately after the Flexline CAD
installation folder.
* Before starting the tool, close all application programs related to Flexline CAD except for the
language switching tool.
* This tool does not support real-time language switching performed with the language
switching tool. When you switch the language to the desired one before starting up
PatchInstaller, the tool starts up in the desired language.
How to terminate: Click the “Cancel” button or the close (
) button.
1.2 Patch type installation screen
Execute the patch type installation process on the following wizard screen.
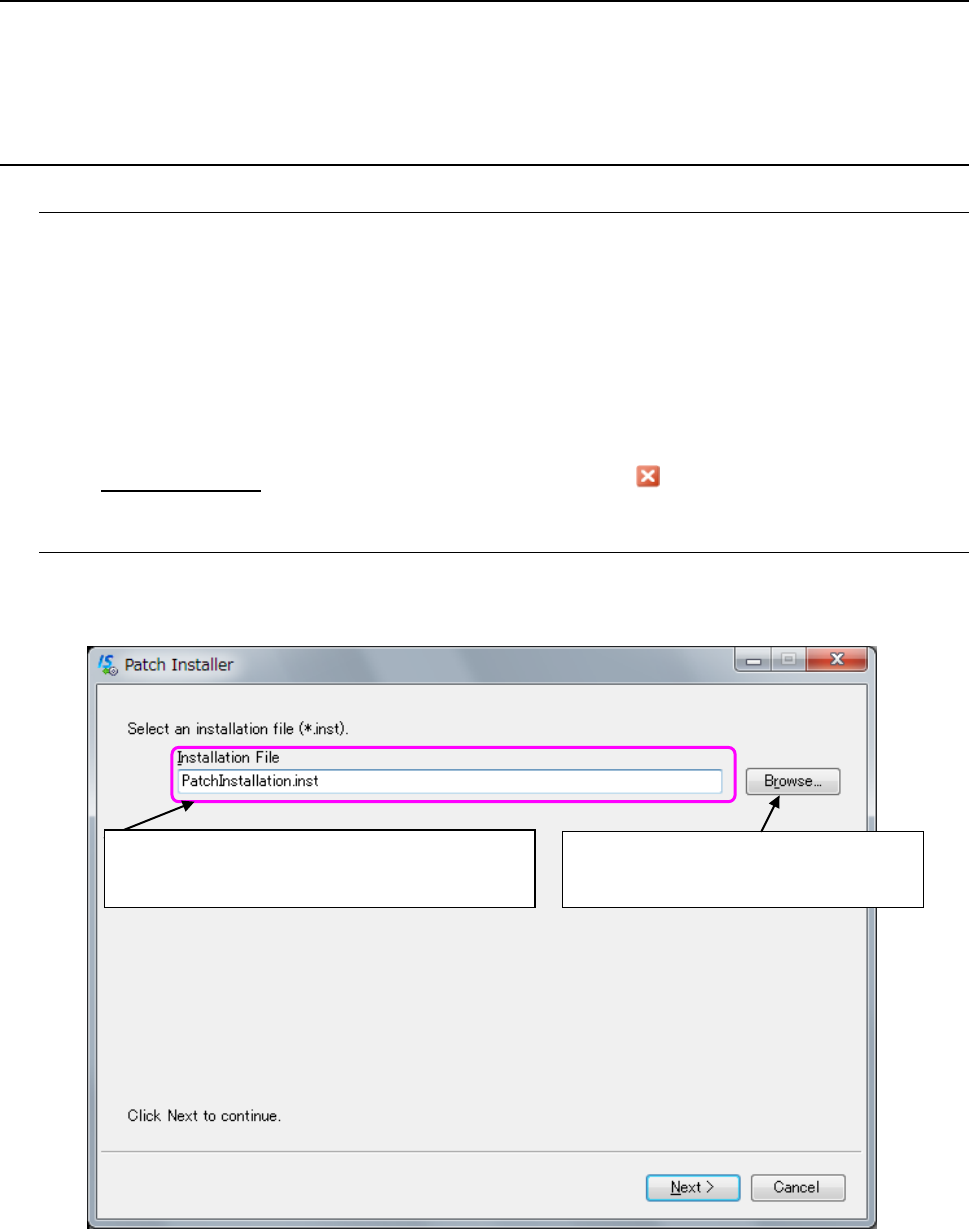
Select the desired installation file from the “Browse” button to perform the installation task.
Figure E-1 Screen for selecting an installation file
Browse: Starts up the dialog box for
selecting a file.
The name of the selected installation file is
displayed here.
E-2
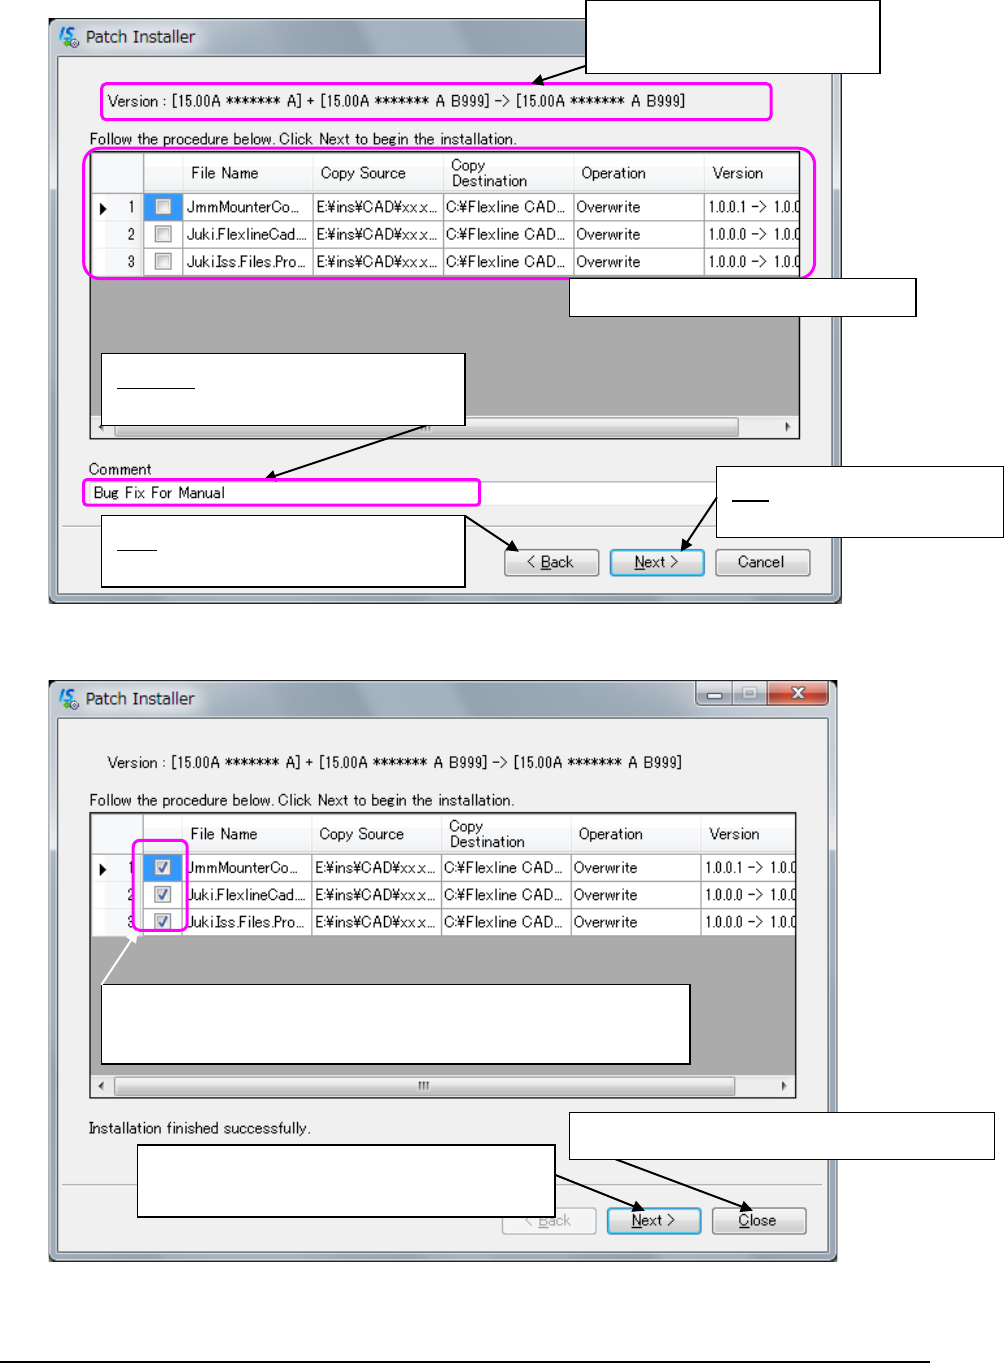
Figure E-2 Installation confirmation screen
Figure E-3 When installation finishes normally
1.3 Troubleshooting
If an error occurs while any patch is being installed, try to perform the following operation,
and then install the patch again.
- Delete the Install.xml file from the folder in which PatchInstaller.exe is located.
The system version changed
before or after installation is
displayed here.
Installation contents checking column
Back: Goes back to the dialog box for
selecting a file.
Next: Goes to the installation
screen.
Comment: automatically entered when
you select installation from the
Check mark ✓:
A check mark ✓is displayed for a file that has been installed
Close: Terminates the patch type installation
Next: Goes back to the installation file selecting
screen.