FLEXLINE-CAD_INM.pdf - 第97页
92 Layer Layer 1 Layer 2 Layer 3 Layer 4 Layer 5 Layer 6 Layer 7 Layer 8 Layer 9 Layer 10 Placement machine Auto selection Machine 1 Machine 2 Machine 3 Machine 4 Machine 5 Machine 6 Machine 7 Machine 8 Machine 9 Machine…
91
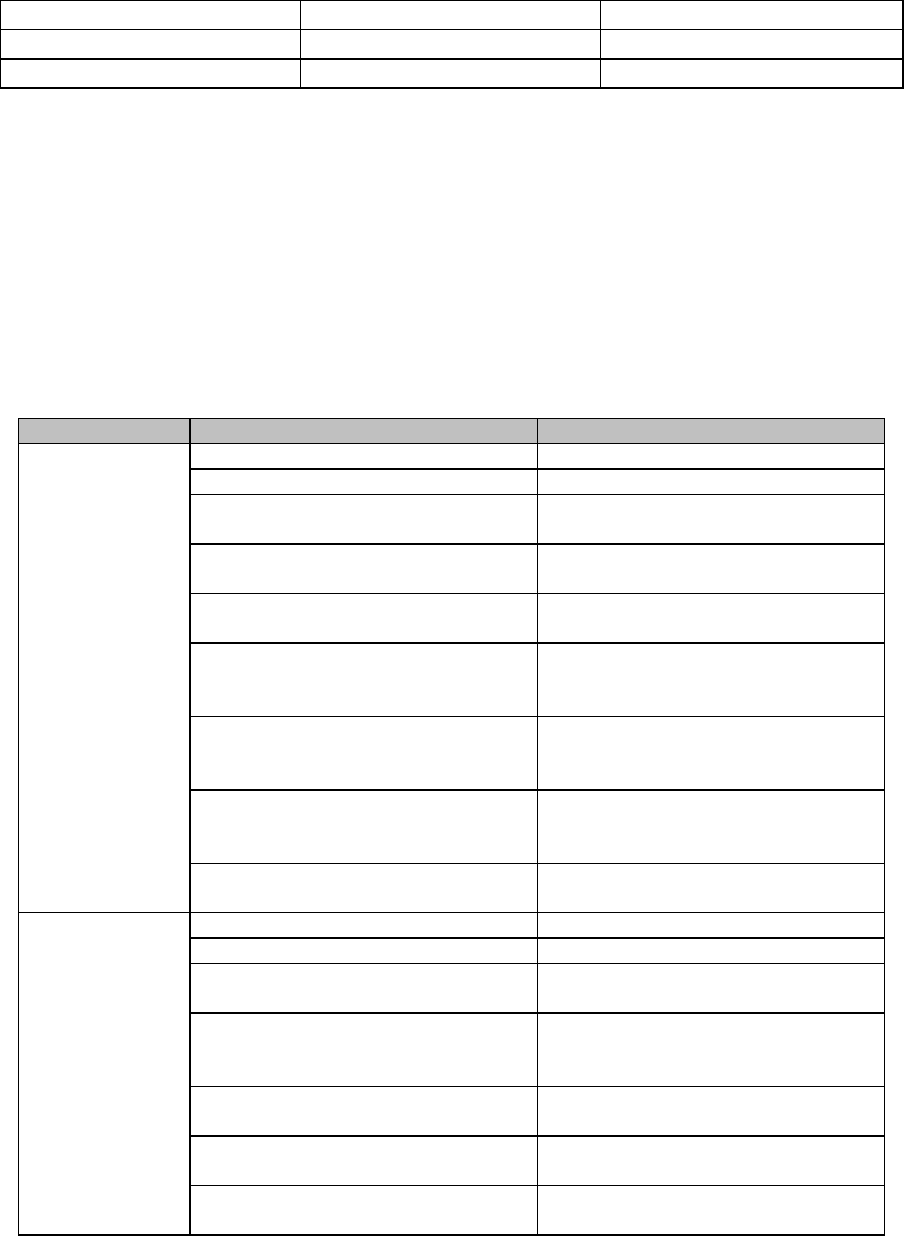
Table 10-5 Component fields
Tag
Valid
Invalid
Reference designator (BOM)
Component name *
Comment
Outer dimension, horizontal
Outer dimension, vertical
Outer dimension, height
* To give compatibility with other JUKI products (mounter, production support system etc.),
Flexline CAD restricts the lengths of these fields. In this case, the PWB ID and component
name fields become blank after conversion, and "######" is entered in the placement ID field
after conversion.
The fields and production program keywords requiring field conversion by the user-defined wizard
are as follows.
Table 10-6 Fields requiring field conversion
Section
Field
Production program keyword
PWB
Valid
Valid
Invalid
Invalid
Transport direction
Left to right
Right to left
Reference side Top
Bottom
Positioning method
Positioning hole reference
Shape reference
PWB configuration
Single-circuit
Multi-circuit matrix
Multi-circuit non-matrix
Bad mark type Do not use
Sensor light
Mark is dark
BOC type Do not use
PWB marks are used
Circuit marks are used
Mark recognition
Gray scale
Binary scale
Placement
Valid
Valid
Invalid
Invalid
Placement side Top side
Bottom side
Placement/dispensing
Placement only
Dispensing only
Placement/dispensing
IC mark type IC marks are used
IC marks are not used
Skip Skip
No skip
Test run
Test run
No test run
92
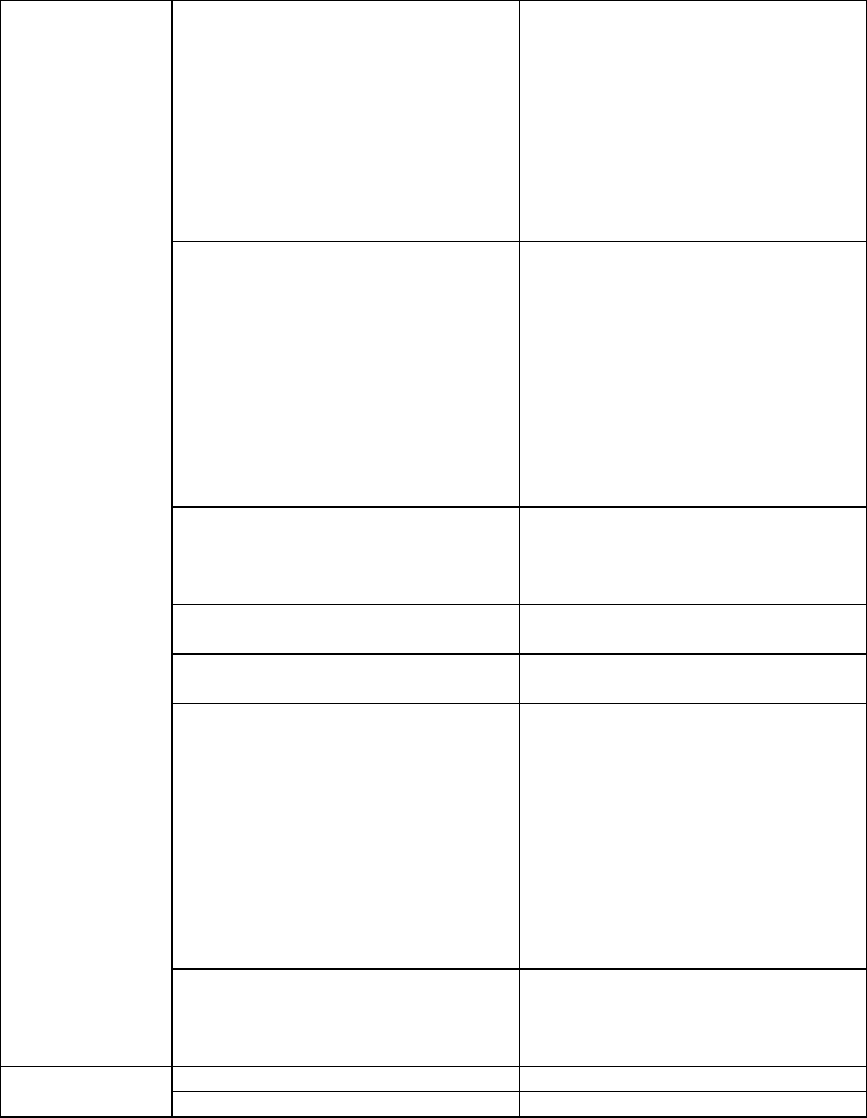
Layer Layer 1
Layer 2
Layer 3
Layer 4
Layer 5
Layer 6
Layer 7
Layer 8
Layer 9
Layer 10
Placement machine Auto selection
Machine 1
Machine 2
Machine 3
Machine 4
Machine 5
Machine 6
Machine 7
Machine 8
Machine 9
Machine 10
Placement head
Default head
Left head
Middle head
Right head
Dispensing skip Skip
No skip
Dispensing test run Dispensing by test run
No dispensing by test run
Dispensing machine
Auto selection
Machine 1
Machine 2
Machine 3
Machine 4
Machine 5
Machine 6
Machine 7
Machine 8
Machine 9
Machine 10
Dispensing head
Default head
Left head
Middle head
Right head
Component
Valid
Valid
Invalid
Invalid
A-1
Appendix A Practice: Creating an Input File by Using the
Attached File "Tutorial.txt"
Try to create an input format for converting the file "Tutorial.txt" that is attached to Flexline CAD
as the standard.
1. Looking into the Contents of "Tutorial.txt"
1.1 Looking at the contents of Tutorial.txt by using Explorer (For Windows)
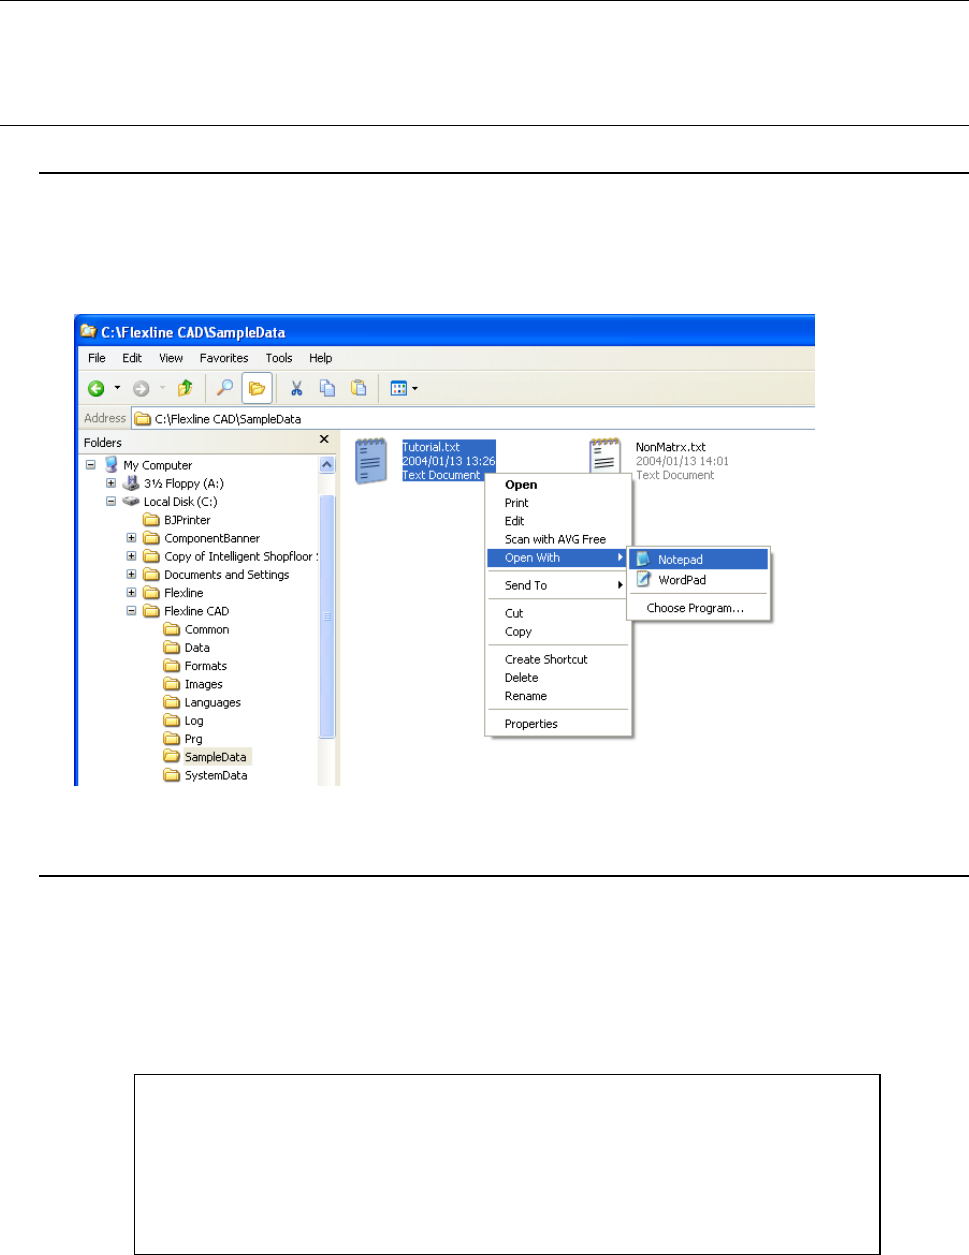
1) Start Explorer and select "{Flexline CAD install folder}\SampleData".
2) Select Turorial.txt and double-click it with the left mouse button or click it with the right
mouse button. Then, select "Notepad" command from the displayed menu.
Figure A-1 Tutorial.txt selection screen
1.2 Contents of Tutorial.txt
Tutorial.txt consists of PWB data, placement data, and component data.
• PWB data: This information contains PWB ID, outer dimension, PWB layout offset, and
BOC mark coordinates (2 points).
• Placement data: The section layout uses the tag (PLC) and the field layout uses the fixed
length.
• Component data: The placement ID and the component name are separated by ",".
Figure A-2 PWB dada of Tutorial.txt
!Flexline CAD Tutorial
Flexline CAD Tutorial PWB
150000 100000
150000 000000
10000 10000 145000 95000