FLEXLINE-CAD_INM.pdf - 第36页
31 Chapter 6 T ry ing to perfor m conv er sion *1 This chapter describes the conv erting procedure in the case w here an input format is already created. W hen the input format is defined, conversion is att ained by sele…

30
PART 2 OPERATION PART
Part 2 describes the basic operating procedures for Flexline CAD.
Chapter 6 Trying to perform conversion
Chapter 7 User-Defined Wizard
Chapter 8 Data modification dialog box
Chapter 9 Environment Setup
Chapter 10 Flexline CAD setting table
31
Chapter 6 Trying to perform conversion *1
This chapter describes the converting procedure in the case where an input format is already
created.
When the input format is defined, conversion is attained by selecting CAD data and executing
conversion. Now, the CAD data called "tutorial.txt" attached as standard is converted by using
the batch conversion mode as an example.
* If no input format is available, it is necessary to create an input format by using "User-defined
wizard". For the user-defined wizard, refer to "7. User-Defined Wizard".
*1.The screen displayed with the Version 5.10 or earlier is different from that with the Version 6.00
or later.
6.1 Setting the batch conversion mode
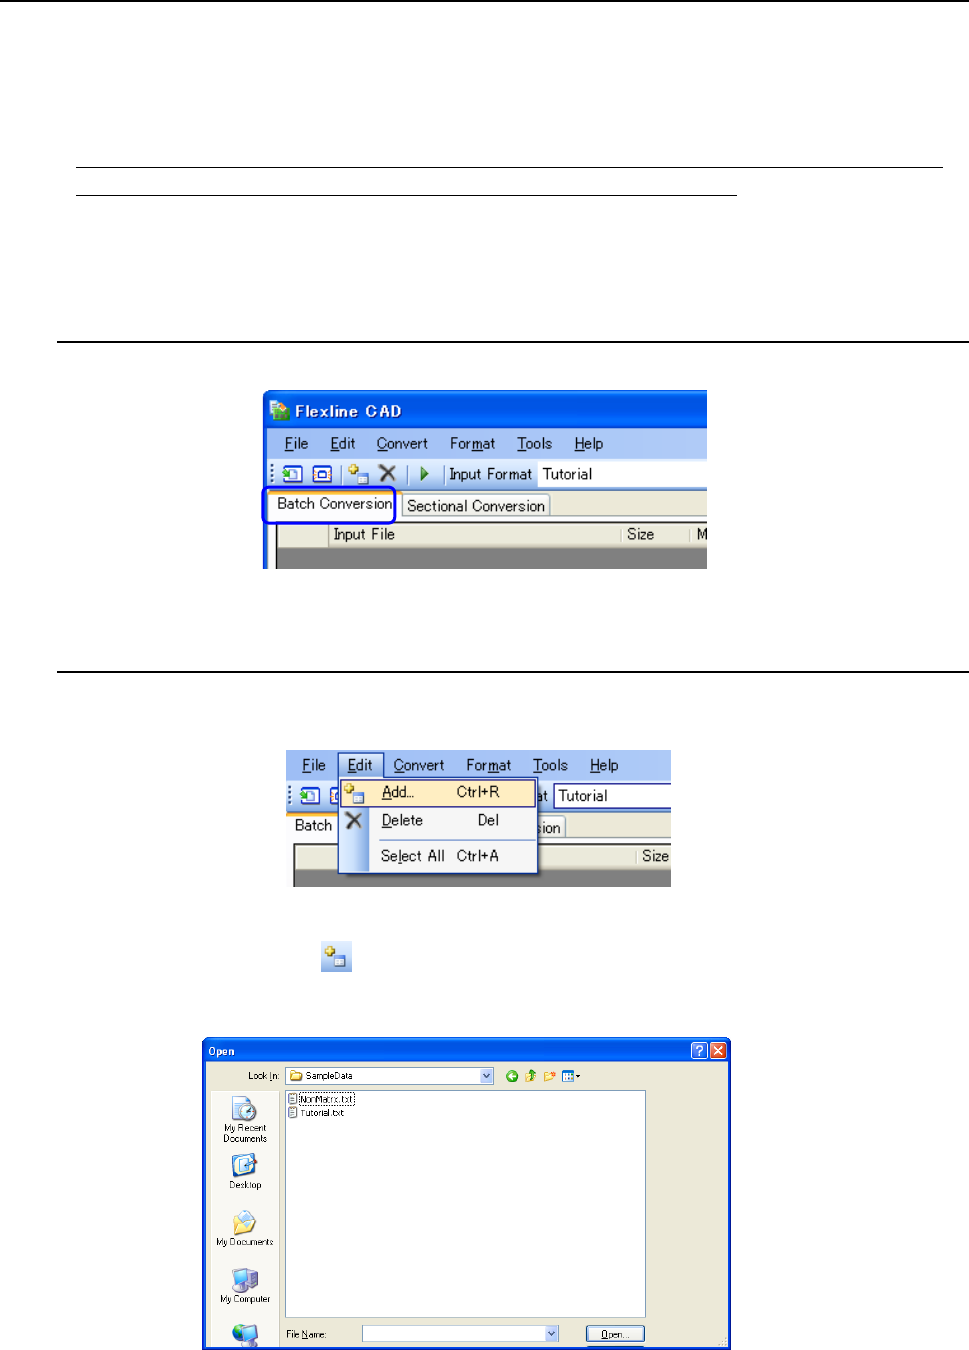
Select the "Batch conversion" tab on the main screen.
Figure 6.1-1 Selection of batch conversion mode
6.2 Adding an input file
Execute either one of the following operations of (1) and (2).
(1) Select the "Edit" - "Add" menu.
Figure 6.2-1 "Edit" - "Add" menu
(2) Click the [Add] button ( ) of the tool bar.
The "Open" dialog box is displayed. Select the target file for conversion and click the
[Open] button.
Figure 6.2-2 "One file" dialog box
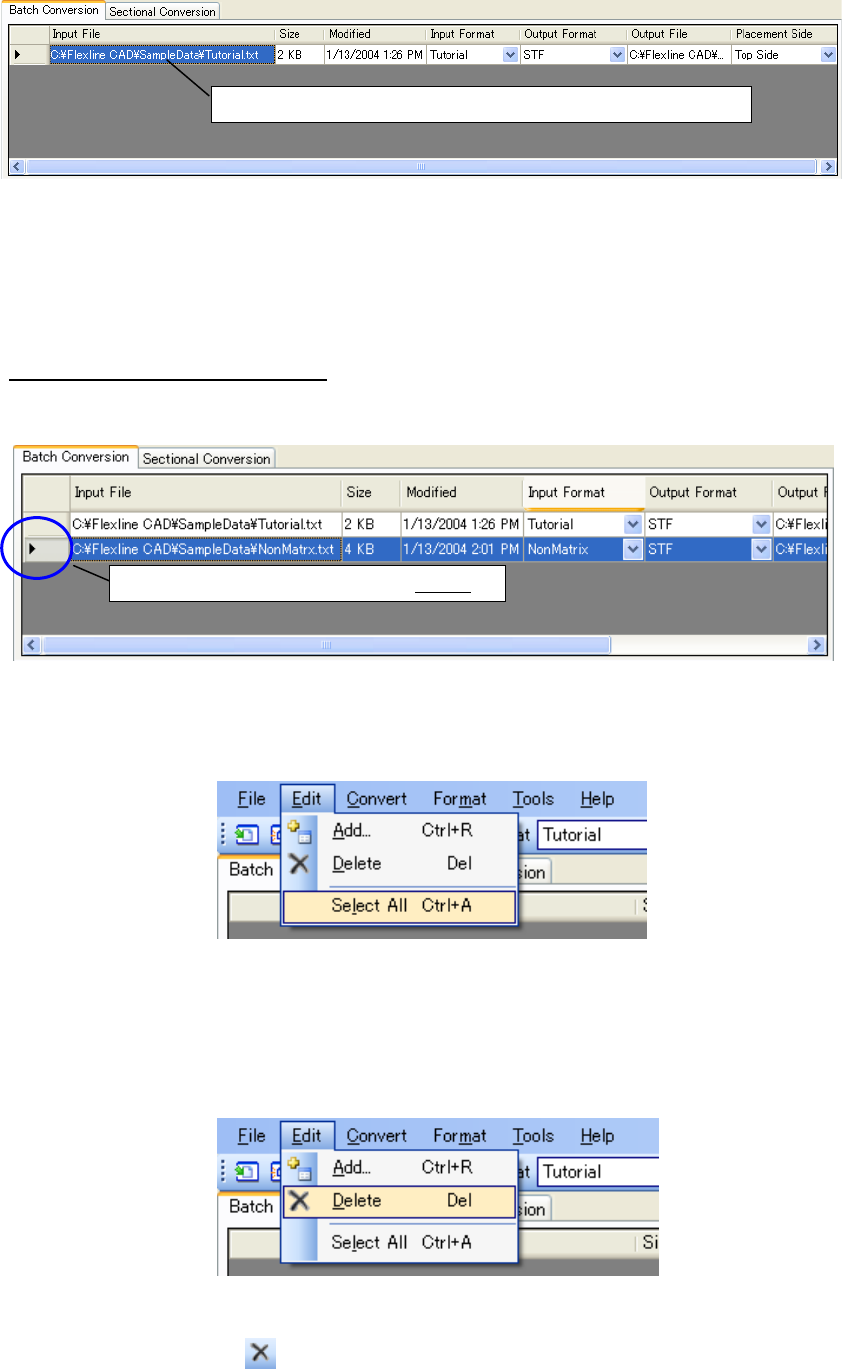
After selecting a file, the line indicating file information is added to the batch conversion table.
32
Figure 6.2-3 Batch conversion file table after an input file is added
* From Windows Explorer, drag and drop the file into the file table to add the input file to the file
table. (To drag and drop a file under Windows Vista or later OS, you have to prohibit Flexline
CAD from being executed with administrator’s privileges or execute Windows Explorer with
administrator’s privileges.)
Deleting a file from the file table
Select the line header of the line to be deleted in the file table. The selected line color is
reversed.
Figure 6.2-4 File selection
For deleting all the files from the file table, select all the lines of the file table by clicking the
"Edit" - "Select all" command.
Figure 6.2-5 "Edit" - "Select all" menu
After specifying the line to be deleted, execute either one of the following operations of (1) and
(2).
(1) Select the "Edit" - "Delete" menu.
Figure 6.2-6 "Edit" "Delete" menu
(2) Click the "Delete" ( ) of the tool bar.
A delete confirmation message is displayed. Then, click the [OK] button.
File information is added to the batch conversion file table.
Select the line to be deleted by this header