FLEXLINE-CAD_INM.pdf - 第68页
63 7.8 “M ove” dial og box 7.8.1 Ove rvi e w W hen you click the “ Move” button on each screen of the “User - def ined Form at W izard,” the “Move” dialog box appears on the screen. This “Move” dialog box allows you to m…
62
NOTES
- If you use the BOM link without specifying the "BOM Range Character," the system
recognizes all the applicable characters as the "BOM Range Character." When you do not
use the "BOM Range Character," specify the "NONE" from the choices. The same holds for
the "BOM Delimiter."
- Only when a component comment is defined by using the BOM link in the user-defined
wizard, it is possible to set the option "Leave comment blank if not set" from the field
translation screen of the component section. If this option is not checked off, the
component reference designator is written into the output file as a comment.
- When you perform data transformation by using the user-defined format using the BOM
link, the maximum number of characters that can be entered in the "Reference designator"
field of the component data is 2048 as the default.
- When more than 2048 characters are used in the "Reference designator" field of the CAD
data file, the data (such as the same component is placed repeatedly on the same PWB)
exceeding 2048 characters is truncated. Accordingly, if the "Reference designator"
exceeding 2048 characters is used, divide the "Reference designator" field in the CAD data
file into two or three fields.
- If BOM data and placement data cannot be linked at transformation, the message "Linking
placement data and component data failed. Continue processing?" is displayed. At "Yes",
the processing is continued. At "No", the processing is stopped.
BOM link
At transformation, the "Placement ID" or "Link ID" of the placement section is linked with the
"Reference designator (BOM) of the component section. Using the "Placement ID" or "Link
ID" of the placement section depends on the following conditions:
1. When the "Link ID" is not defined in the placement section, the "Placement ID" of the
placement section is linked with the "Reference designator (BOM)" of the component
section to perform BOM link.
2. When the "Link ID" is defined in the placement section, the "Link ID" is linked with the
"Reference designator" of the component section to perform BOM link regardless of
whether the "Placement ID" is defined.
After execution of BOM link, a component name which exists in the placement section is
overwritten on the component name linked from the component section. If no component
name is found in the placement section, a component name field is added.
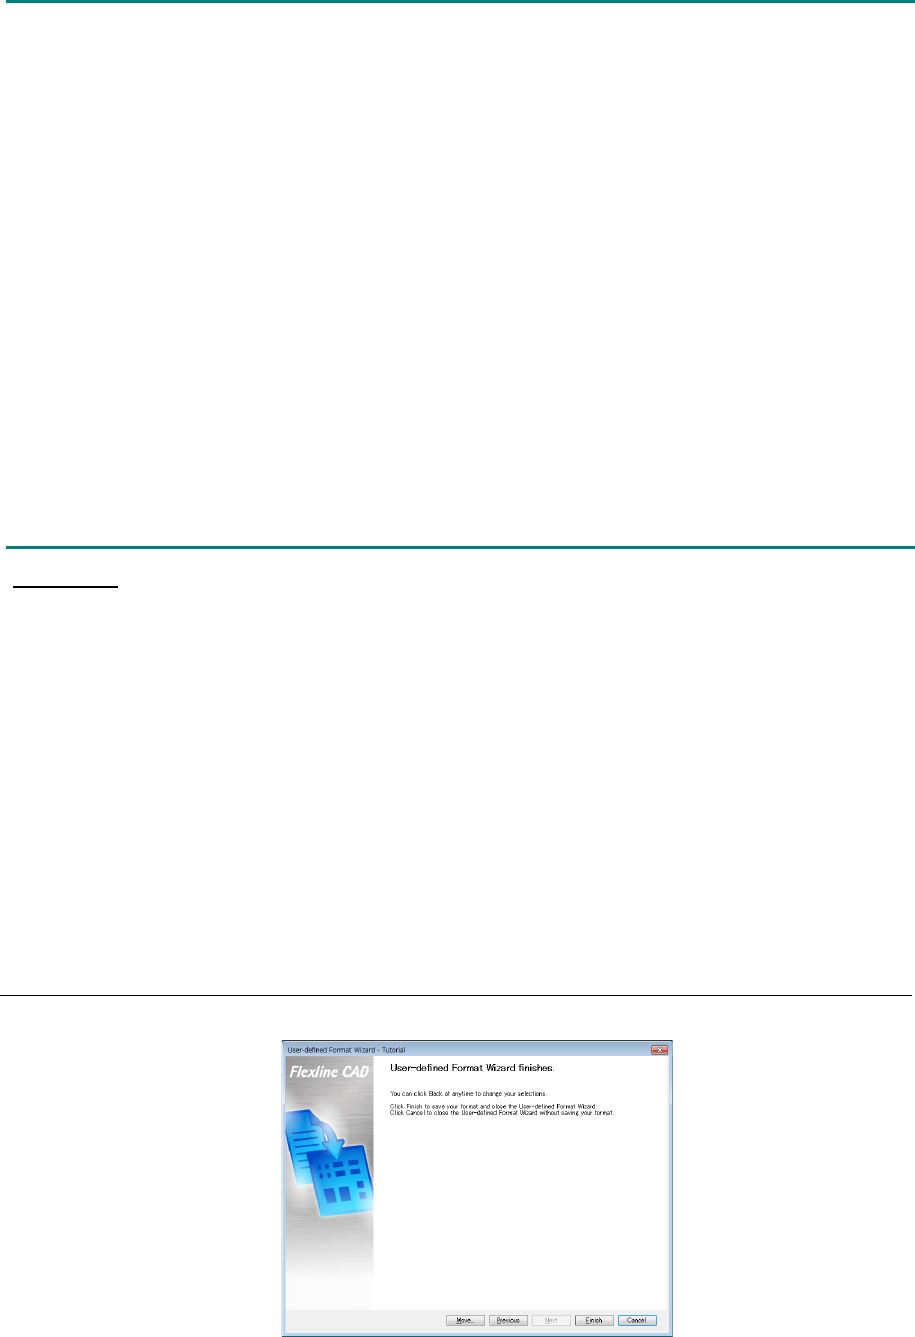
7.7 User-defined wizard finish screen
After all the settings are completed, the following screen is displayed.
Figure 7.7-1 Finish of user-defined wizard
63
7.8 “Move” dialog box
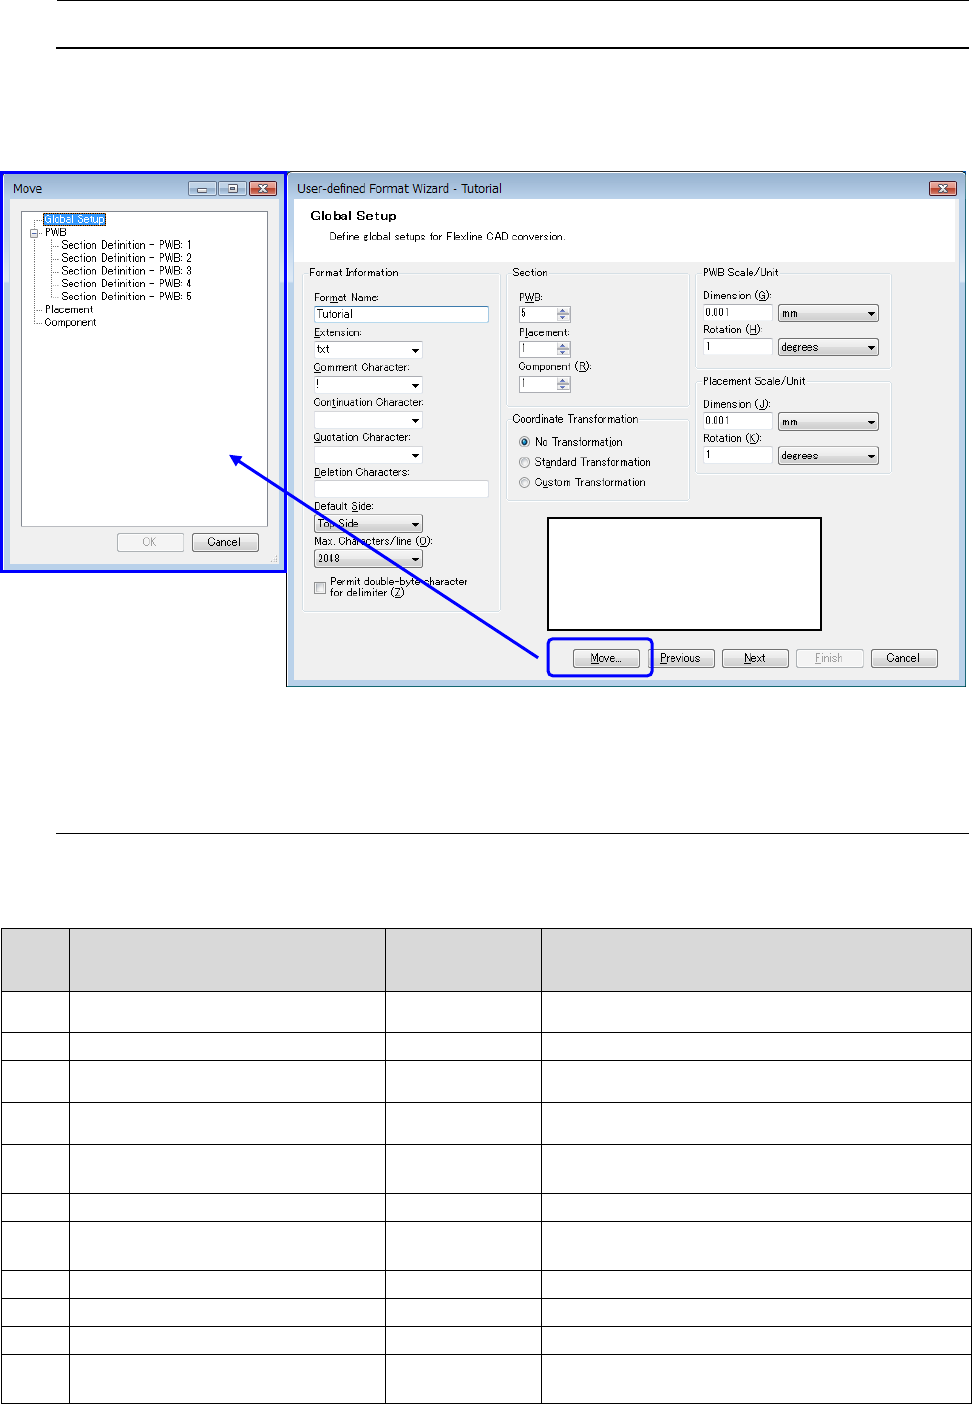
7.8.1 Overview
When you click the “Move” button on each screen of the “User-defined Format Wizard,” the “Move”
dialog box appears on the screen. This “Move” dialog box allows you to move (short-cut) to another screen
of the “User-defined Forma Wizard.”
Figure 7.8.1-1
“Move” dialog box
7.8.2 Screens you can move to
The screens to which you can move from the “Move” dialog box are shown below. Note that you cannot
move to any screen whose setting is not made completely although it is shown below. See the
“Requirement” column for details.
No. Screen name
Whether you
can move to the
screen or not
Requirement
1
User-defined Format Wizard start-up
screen
×
2 “Global Setup” screen ○ All settings have been made already.
3
“Standard Transformation Settings”
screen
-
4
“Custom Transformation Settings”
(PWB) screen
-
5
“Custom Transformation Settings”
(Placement)” screen
-
- PWB (n) - n = 1 to 30
6 “Section Definition” screen ○
All of section definition, field definition and field
translation of a “PWB (n)” have been completed.
7
“Field Definition” screen
×
8
“Field Translation” screen
×
-
Placement
9 “Section Definition” screen ○
All of section definition, field definition and field
translation of “Placement” have been completed.
* When you click the “Move”
button, the “Move” dialog box
appears on the screen.
64
10 “Field Definition” screen ×
11 “Field Translation” screen ×
- Component -
All of section definition, field definition and field
translation of “Component” have been completed.
12
“Section Definition” screen
○
13
“Field Definition” screen
×
14
“Field Translation” screen
×
15
“User-defined Format Wizard
finishes” screen
×
○
: You can move to this screen from the “Move” dialog box.
×: You cannot move to this screen from the “Move” dialog box.
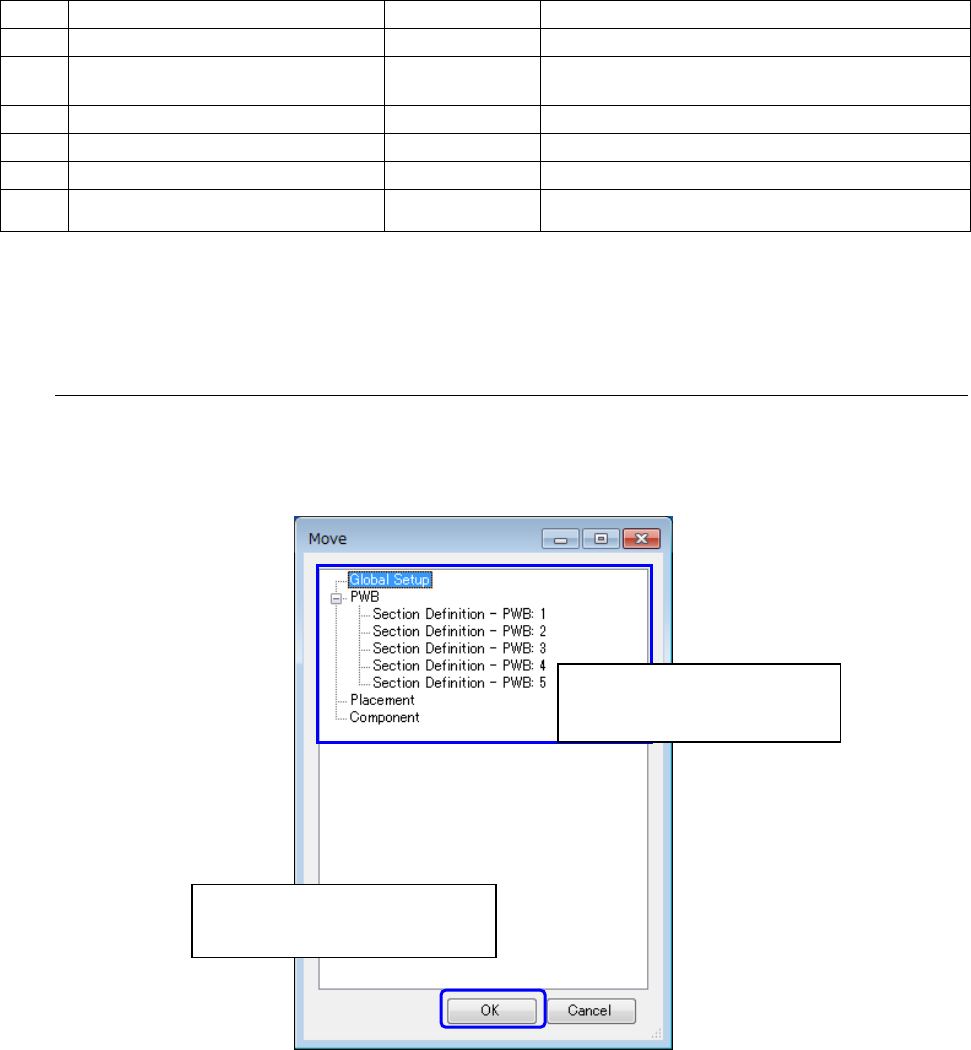
7.8.3 Operating the “Move” dialog box
When you select the screen to which you want to move on the “Move” dialog box and click the
“OK” button, you can move to the selected screen. If you do not move to the selected screen,
click the “Cancel” button.
Figure 7.8.3-1
Operating the “Move” dialog box
If any of the screens is not set up completely, you cannot move to the corresponding next
screen of the User-defined Format Wizard. For example, if you display the “Move” dialog box
after setting the PWBs “1 to 5” on the “Global Setup” screen and making settings of the PWBs
“1 to 4” completely, you cannot move to any of the following screens: “PWB 5,” “Placement”
and “Component.” In this case, the “Move” dialog box is displayed as shown in Figure 7-8-3-2
““Move” dialog box displayed if any of the screens is not set up completely.”
①
Select the screen to which you
want to move.
②
Select the screen to which you
want to move. Click the “OK”