FLEXLINE-CAD_INM.pdf - 第17页
12 7. Click the [Install] butt on to star t inst allation. Figure 3. 4 - 5 Checking inst allati on 8. The progress of installation is displayed. Figure 3. 4 - 6 Display of the progress of inst allation
11
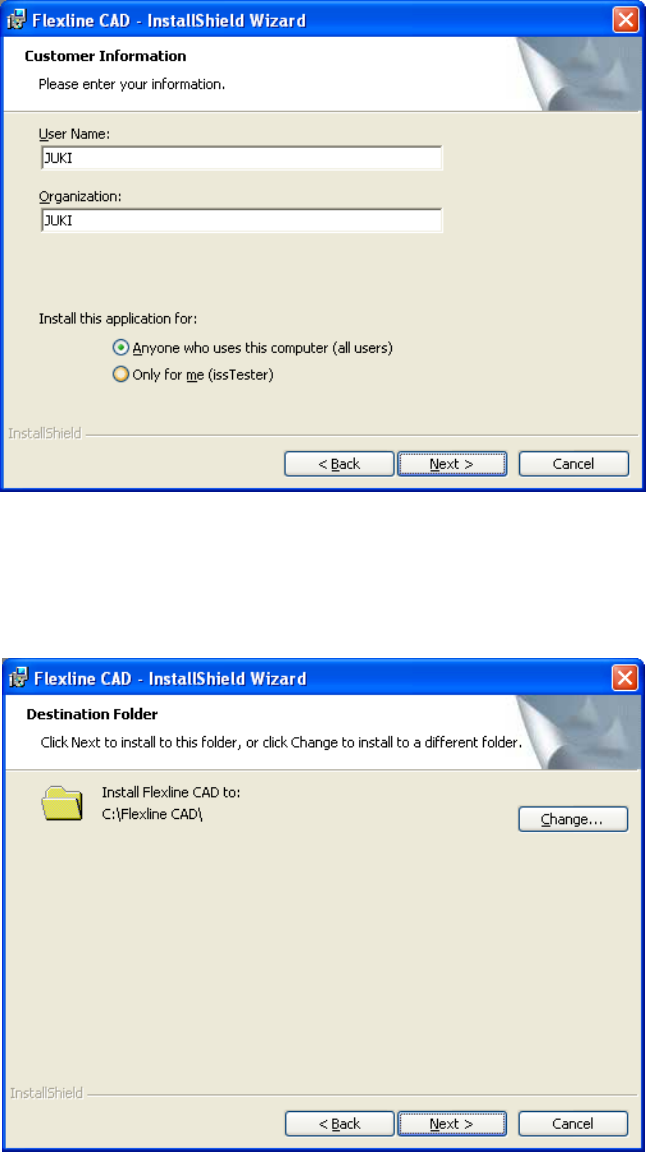
5. Enter or confirm the customer information, and click the [Next] button.
Fig. 3.4-3 Entering the customer information
6. Select an install destination of Flexline CAD and click the [Next] button. For changing
the install destination, click the [Change] button and then select another install
destination.
Figure 3.4-4 Selecting install destination
12
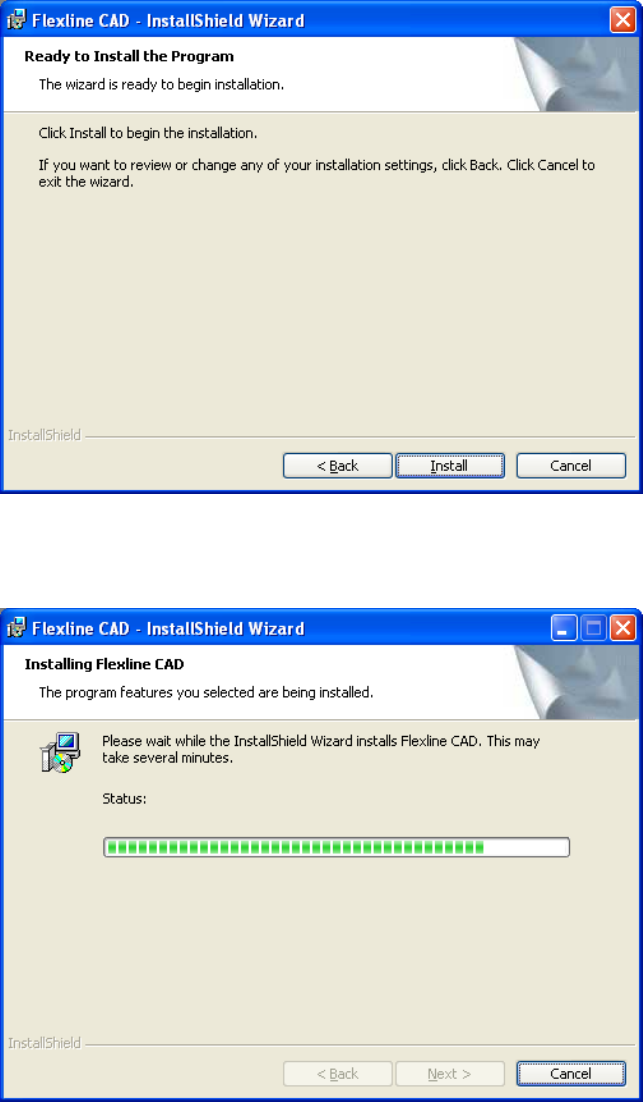
7. Click the [Install] button to start installation.
Figure 3.4-5 Checking installation
8. The progress of installation is displayed.
Figure 3.4-6 Display of the progress of installation
13
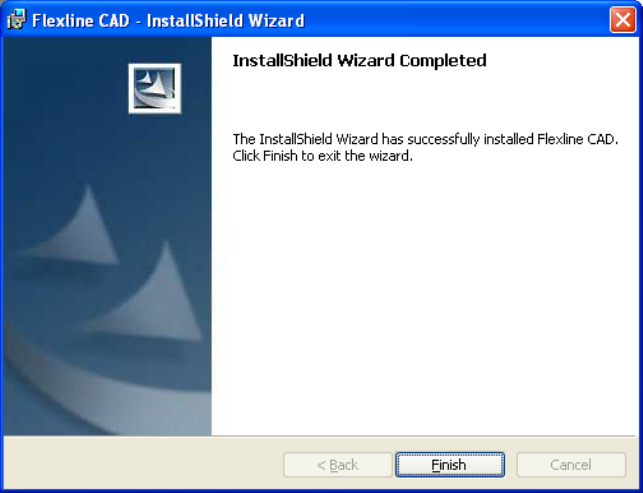
9. The install completion screen is displayed. This completes the installation of Flexline CAD.
Click the [Finish] button to exit the installer.
Figure 3.4-7 Finishing installation