FLEXLINE-CAD_INM.pdf - 第25页
20 5. W hen the operating syst em of the installing PC is W indows XP SP2 or later or W indows 2003 Server SP1 or later , the confirmation screen for W indows Firewall sett ing change is displ ayed. Then, click the [Y es…
19
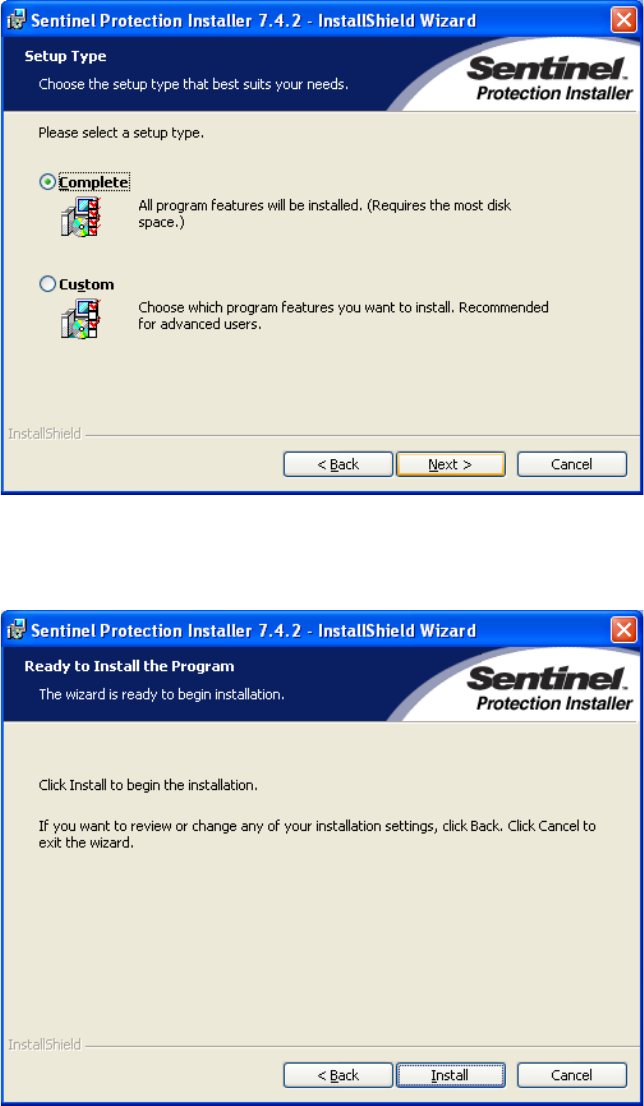
3. The setup type is displayed. Select "Complete" and then select the [Next] button.
Figure 3.4.7-3 Setup type
4. Click the [Install] button to begin installation.
Figure 3.4.7-4 Checking installation
20
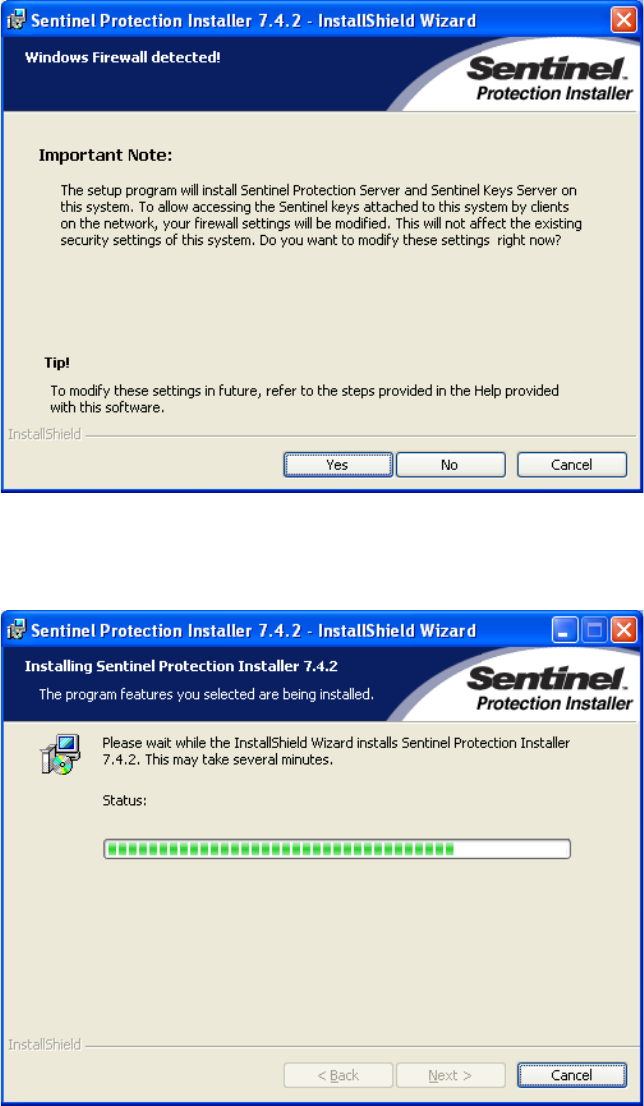
5. When the operating system of the installing PC is Windows XP SP2 or later or
Windows 2003 Server SP1 or later, the confirmation screen for Windows Firewall
setting change is displayed. Then, click the [Yes] button.
Figure 3.4.7-5 Checking for Firewall setting change
6. The progress of installation is displayed.
Figure 3.4.7-6 Display of the progress of installation
21
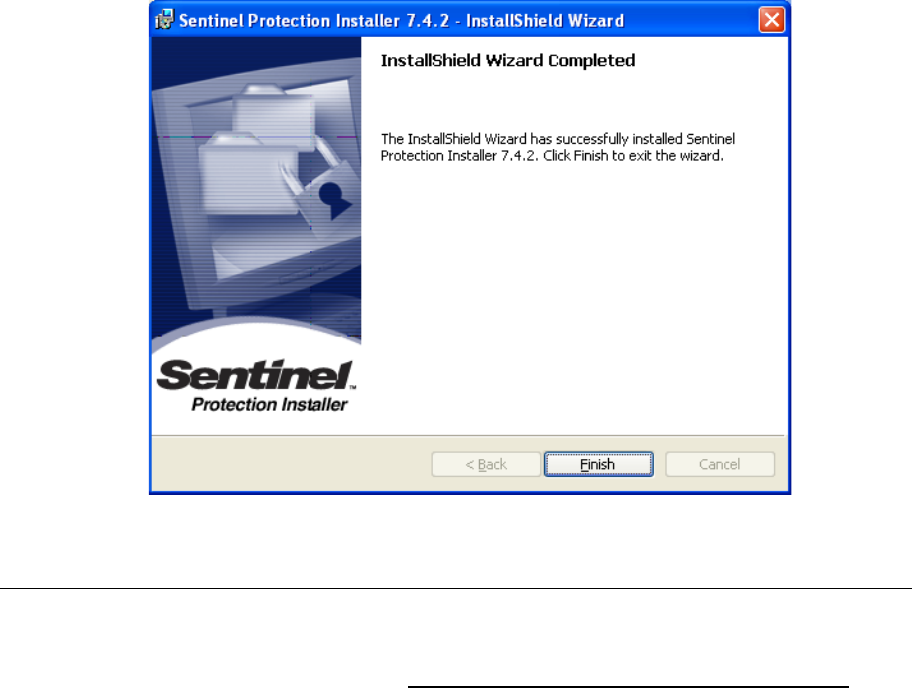
7. The install completion screen is displayed. This completes the installation of the driver
for the protect module. Click the [Finish] button.
Figure 3.4.7-7 Completion of installation
3.5 Installing Flexline CAD Version 5.10 or earlier *1
If the old version of Flexline CAD program is already installed on your personal computer (PC),
install the new one by overwriting the old version. You can install the new version after
uninstalling the old one. See Section 3.2 “Deleting (uninstalling) old version Flexline CAD” for
how to uninstall Flexline CAD.
● Software to be installed is provided in the 3.5-inch floppy disk.
● If you use a 3.5-inch floppy disk
1. Start up Windows.
2. Quit all of the unnecessary programs.
3. Set the first disk into the corresponding drive.
4. Execute the setup program in either one of the following two ways:
a) Open the folder of the corresponding drive, and then select the icon for setup.
b) Click the <Start> button, and then the [Run…] command to select the icon for setup.
5. The program for setting up Flexline CAD is loaded, and then installation starts. Follow
the instructions on the dialog box displayed with the installation program to load Flexline
CAD. The instruction for entering the name of the directory in which Flexline CAD is to
be loaded is displayed on the screen. Although the default directory is
C:\Flexline\FlexCAD, you can change it to another one. If the specified directory does not
exist, a new directory is created automatically.
6. The instruction for inserting the next disk is displayed on the screen. Follow the
displayed instructions to set up the system.
7. On the last screen, the question for displaying the README file and the instruction for
restarting the computer may be displayed.
*1 Enabled with the Version 5.10 or earlier.