FLEXLINE-CAD_INM.pdf - 第24页
19 3. The setup ty pe is displayed. Select "Complete" and then select the [Next ] button. Figure 3.4. 7- 3 Se tup ty pe 4. Click the [Install] butt on to begin installation. Figure 3.4. 7- 4 Checking inst allat…
18
3.4.7 Installing the driver for the protect module
When this driver is not yet installed, the following dialog box is displayed in the process of
installation.
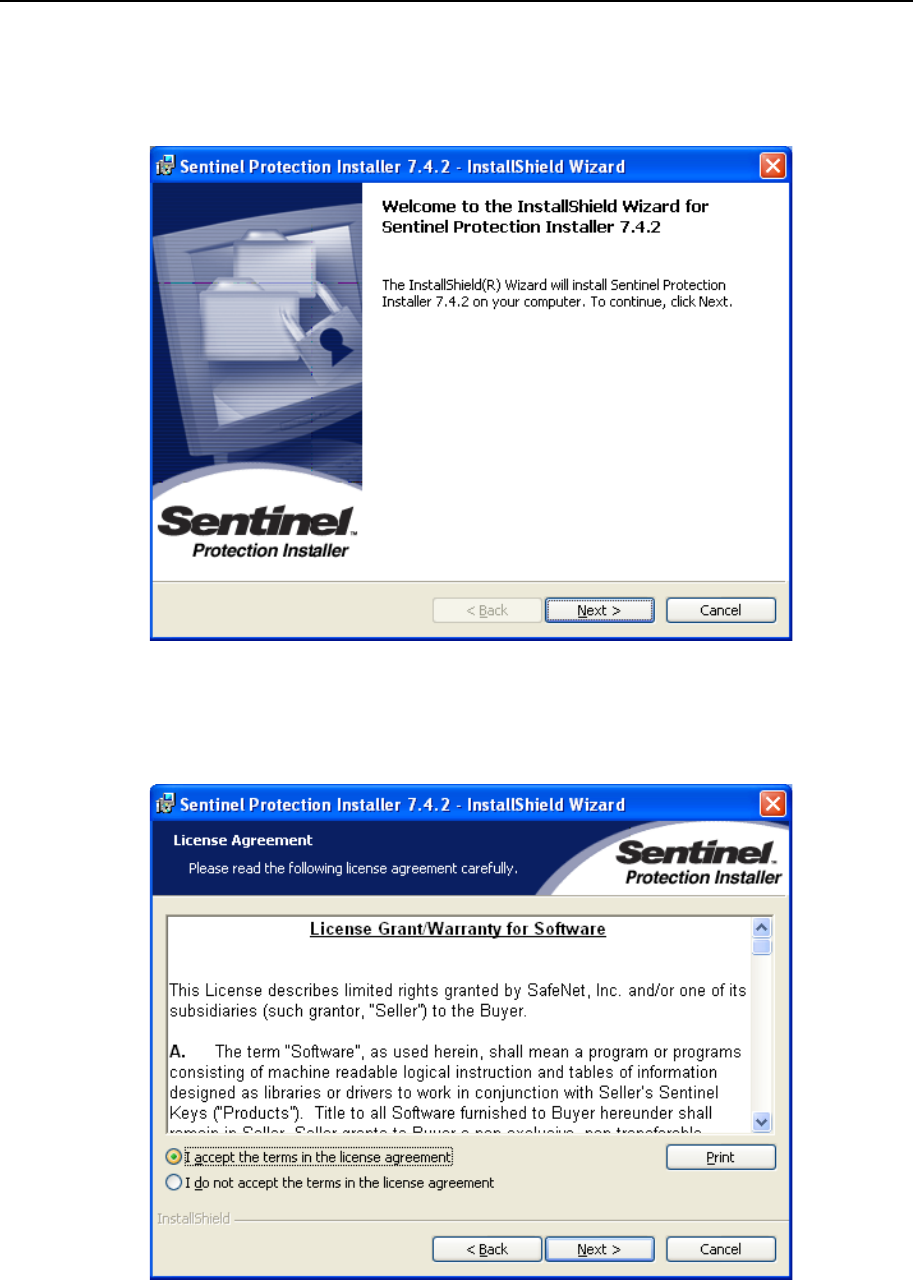
1. The install start screen of the driver for the protect module is displayed.
Click the [Next] button.
Figure 3.4.7-1 Start of installation
2. The license agreement is displayed. Select "I accept the terms in the license
agreement" and then click the [Next] button.
Figure 3.4.7-2 License agreement
19
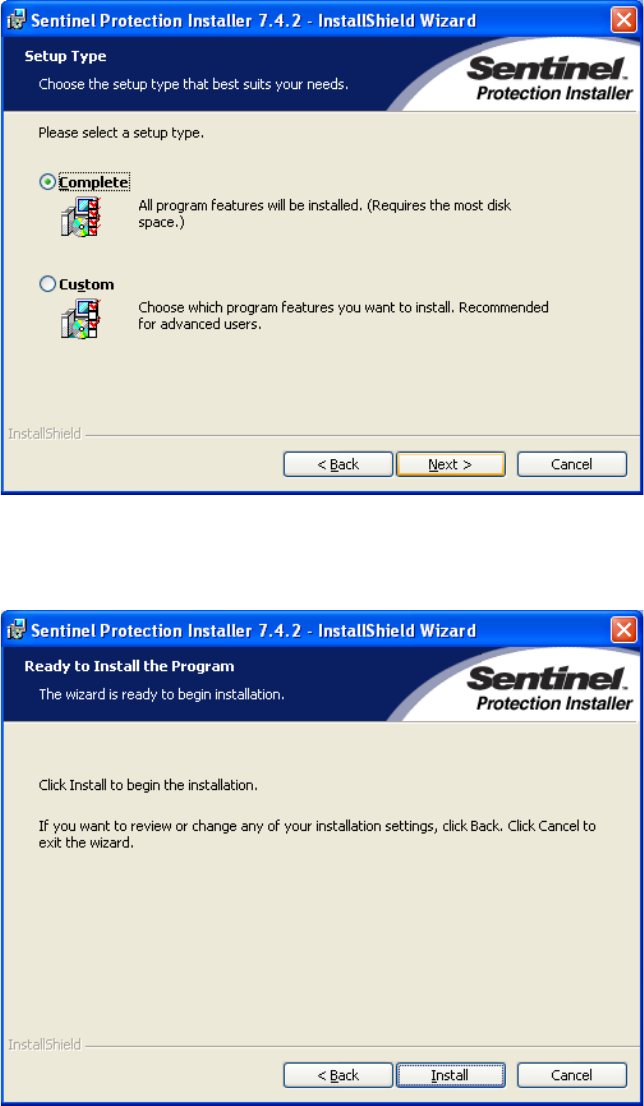
3. The setup type is displayed. Select "Complete" and then select the [Next] button.
Figure 3.4.7-3 Setup type
4. Click the [Install] button to begin installation.
Figure 3.4.7-4 Checking installation
20
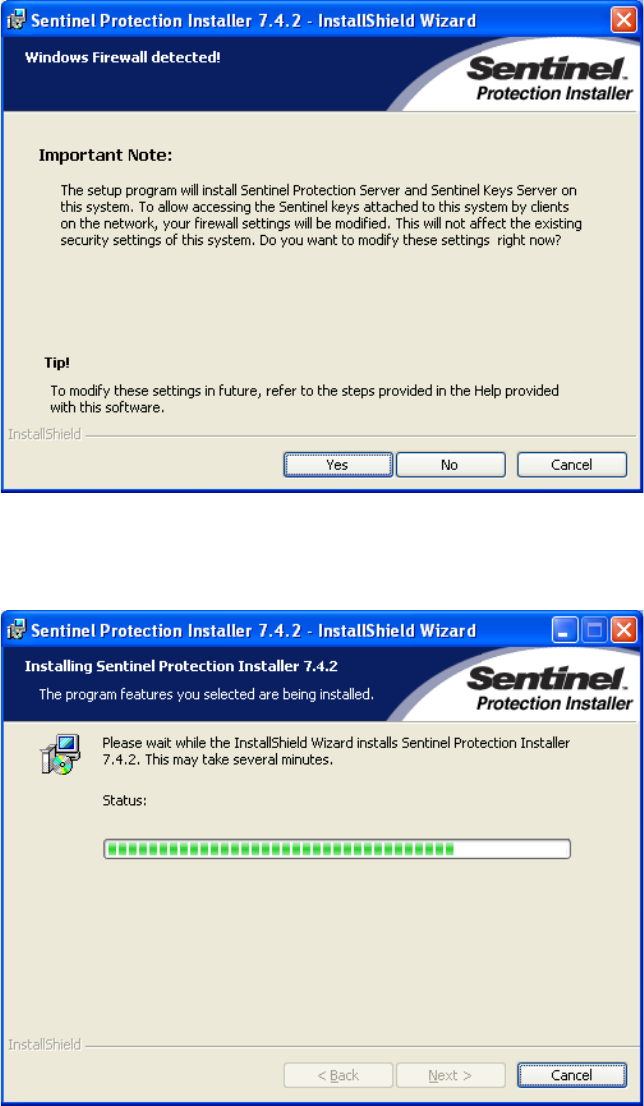
5. When the operating system of the installing PC is Windows XP SP2 or later or
Windows 2003 Server SP1 or later, the confirmation screen for Windows Firewall
setting change is displayed. Then, click the [Yes] button.
Figure 3.4.7-5 Checking for Firewall setting change
6. The progress of installation is displayed.
Figure 3.4.7-6 Display of the progress of installation