FLEXLINE-CAD_INM.pdf - 第35页
30 P ART 2 OPERA TION P ART Part 2 describes the basic operat ing procedures for Flexline CA D. Chapter 6 T rying to perform conversion Chapter 7 User - Defined W izard Chapter 8 Data modification dialog box Chapter 9 En…
29
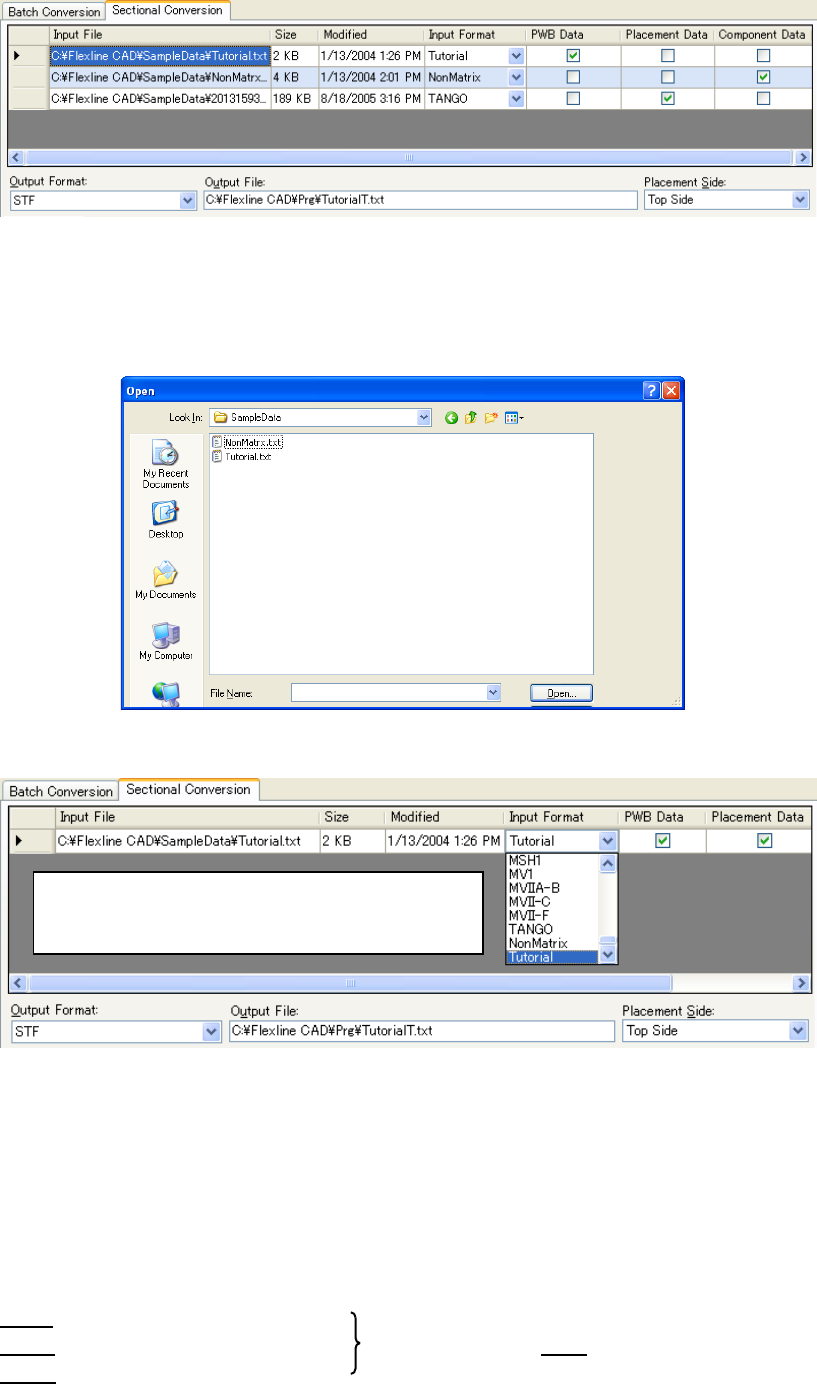
• Screen example where multiple files are selected:
Figure 5.2-3 Sectional conversion file table (for multiple files)
Regarding "Input file" or "Output file", double-click the cell or text box or select the cell or text
box and then press the "Enter" key. Then, the following dialog box is displayed to change the
file.
Figure 5.2-4 "Open file" dialog box
F
Figure 5.2-5 Setting change from the list
For "PWB data", "placement data", and "component data", only one can be checked off in each
column. If another cell is selected in the checked-off column, the later selected cell is checked
off.
In the sectional conversion mode, multiple partial files are converted into a single file.
Accordingly, even if multiple input files are added, they are always converted into a single file.
For example, conversion is performed as follows:
File A (file of PWB data only)
File B (file of placement data only) → Converted into file T
File C (file of component data only)
“Input format” ”Output format” “Placement side” are
appeared by clicking the cell. Then change the value
by selecting the list.

30
PART 2 OPERATION PART
Part 2 describes the basic operating procedures for Flexline CAD.
Chapter 6 Trying to perform conversion
Chapter 7 User-Defined Wizard
Chapter 8 Data modification dialog box
Chapter 9 Environment Setup
Chapter 10 Flexline CAD setting table
31
Chapter 6 Trying to perform conversion *1
This chapter describes the converting procedure in the case where an input format is already
created.
When the input format is defined, conversion is attained by selecting CAD data and executing
conversion. Now, the CAD data called "tutorial.txt" attached as standard is converted by using
the batch conversion mode as an example.
* If no input format is available, it is necessary to create an input format by using "User-defined
wizard". For the user-defined wizard, refer to "7. User-Defined Wizard".
*1.The screen displayed with the Version 5.10 or earlier is different from that with the Version 6.00
or later.
6.1 Setting the batch conversion mode
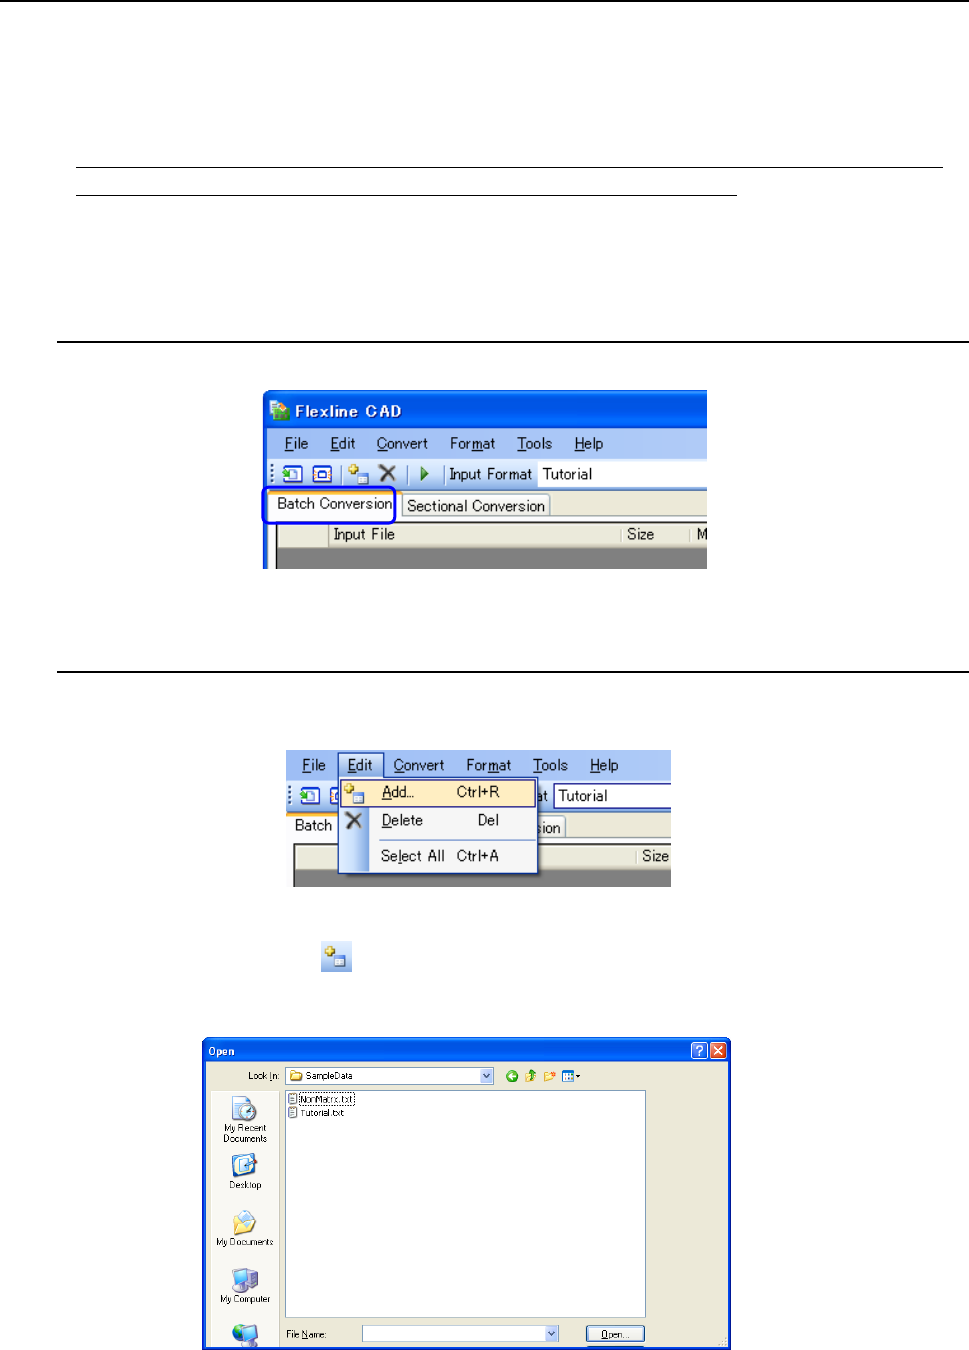
Select the "Batch conversion" tab on the main screen.
Figure 6.1-1 Selection of batch conversion mode
6.2 Adding an input file
Execute either one of the following operations of (1) and (2).
(1) Select the "Edit" - "Add" menu.
Figure 6.2-1 "Edit" - "Add" menu
(2) Click the [Add] button ( ) of the tool bar.
The "Open" dialog box is displayed. Select the target file for conversion and click the
[Open] button.
Figure 6.2-2 "One file" dialog box
After selecting a file, the line indicating file information is added to the batch conversion table.