YST15_Users_E.pdf - 第157页
3-7 3 Y early maintenance items 2. X-axis This section describes the maintenance related to X-axis. c Caution X-axis doesn't require to be applied grease on. Do not apply grease, which can cause the tooth jump, ratt…
3-6
3
Yearly maintenance items
1.4 Check the side door interlocks
n
NOTE
Check this item when the machine is turned on.
1
Check the operation status of the machine.
Comfirm machine power is on and no error happens.
2
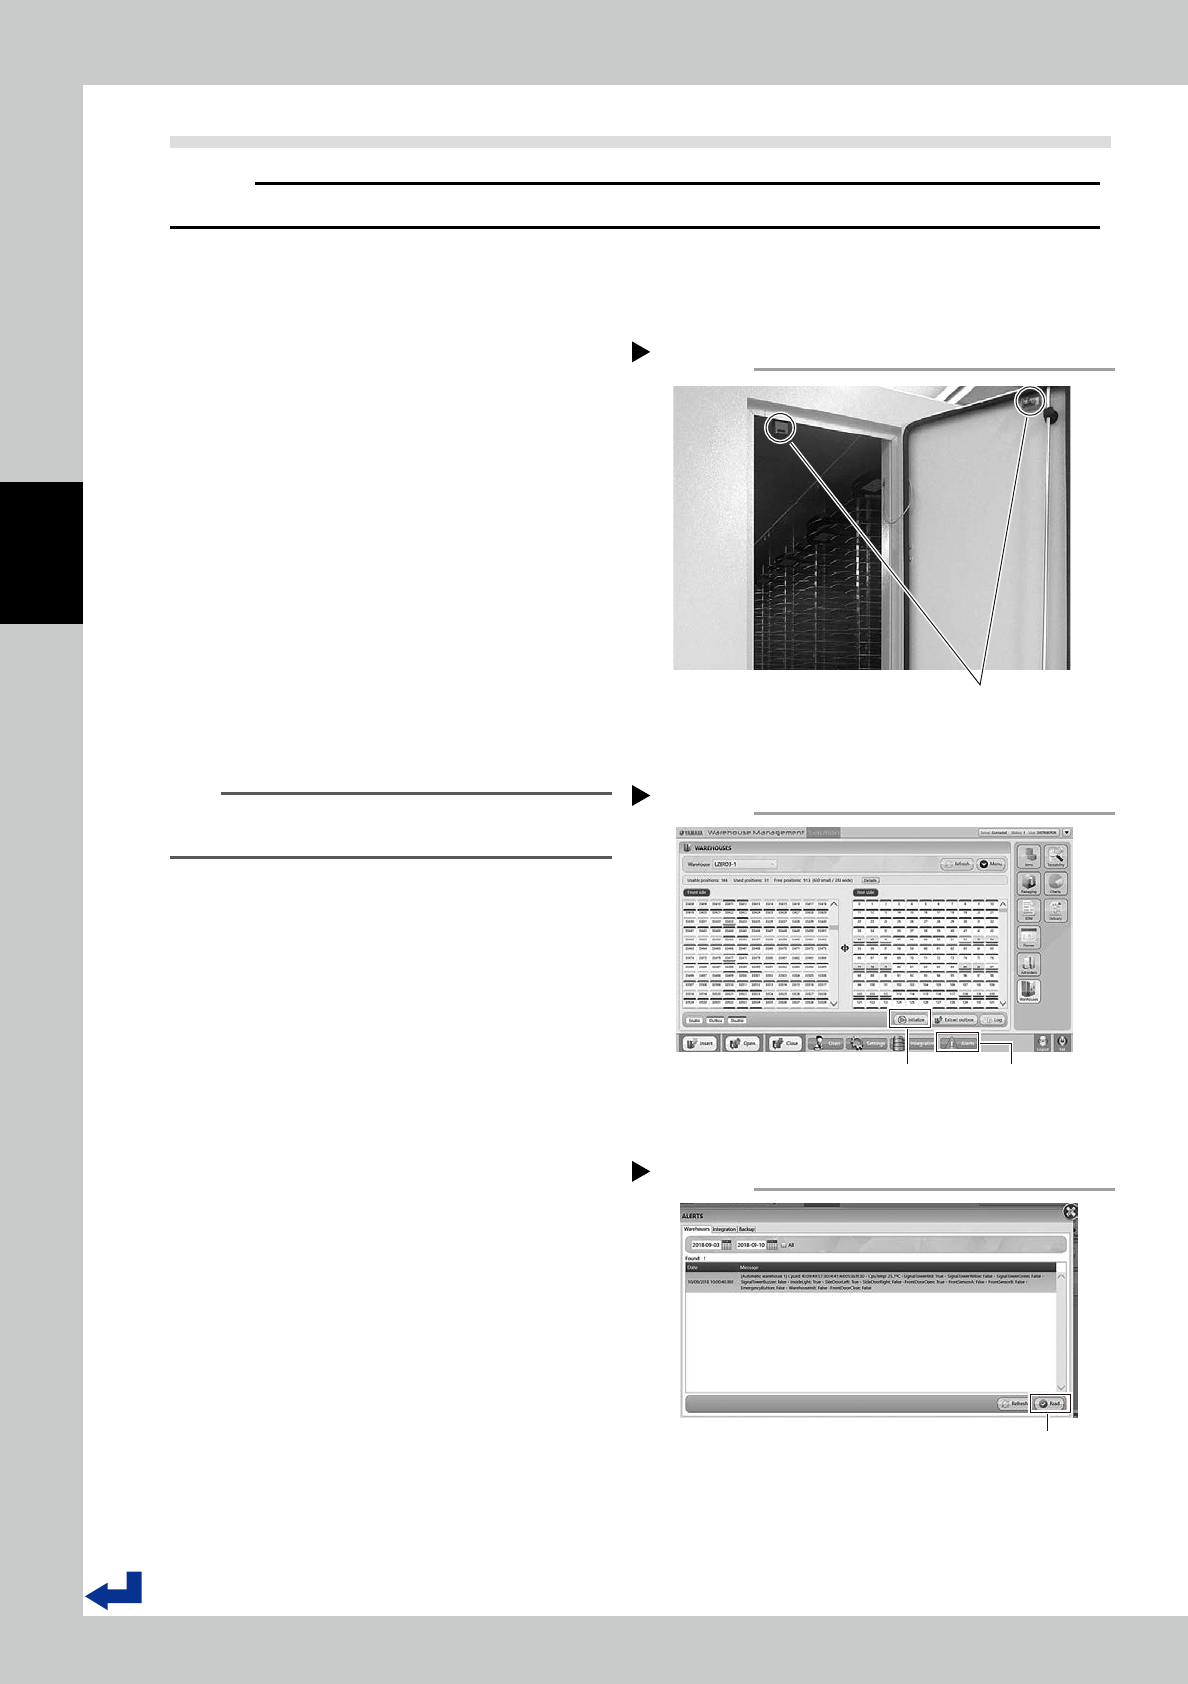
Check the side door interlock of
right side of the machine.
1. Open the side door on right side of the
machine.
2. Confirm Operation indicator turns off.
3. Press [Initialize] in bottom of "WAREHOUS-
ES" screen after confirming operation
indicator lights green.
4. Confirm an error occurs causing prevent
initialization.
5. Press [Alerts] in bottom of the screen to
open "ALERTS" screen.
6. Select the error which occurred here,
and press [Read] to reset the error.
7. Press [X] on top right of "ALERTS" screen
to close it.
8. Close the side door.
TIP
It takes five seconds to turn on Operation indicator
after turn on Operation switch.
3
Check the side door interlock of
left side of the machine.
1. Open the side door on left side of the
machine.
2. Turn Operation switch left, then turn it
right.
3. Press [Initialize] in bottom of "WAREHOUS-
ES" screen after confirming operation
indicator lights green.
4. Confirm an error occurs causing prevent
initialization.
5. Press [Alerts] in bottom of the screen to
open "ALERTS" screen.
6. Select the error which occurred here,
and press [Read] to reset the error.
7. Press [X] on top right of "ALERTS" screen
to close it.
8. Confirm the handler faces forward and it
is placed in center of X-axis and Y-axis as
"Initialization standby position".
9. Close the side door.
4
Perform initialization.
1. Turn Operation switch left, then turn it
right.
2. Press [Initialize] in bottom of "Warehouse"
screen after confirming operation
indicator lights green.
Door interlock
Step 2,3
Door interlock
53307-KMS-00
[Initialize] button
[Initialize] button
Step 2-4
[Alerts] button
54301-KMS-00
“ALERTS” screen
Step 2,3
[Read] button
54302-KMS-00
3-7
3
Yearly maintenance items
2. X-axis
This section describes the maintenance related to X-axis.
c
Caution
X-axis doesn't require to be applied grease on.
Do not apply grease, which can cause the tooth jump, rattling, and abnormal noise.
2.1 Cleaning the stainless rail of X-axis
1
Turn the machine off.
2
Move the handler to one end.
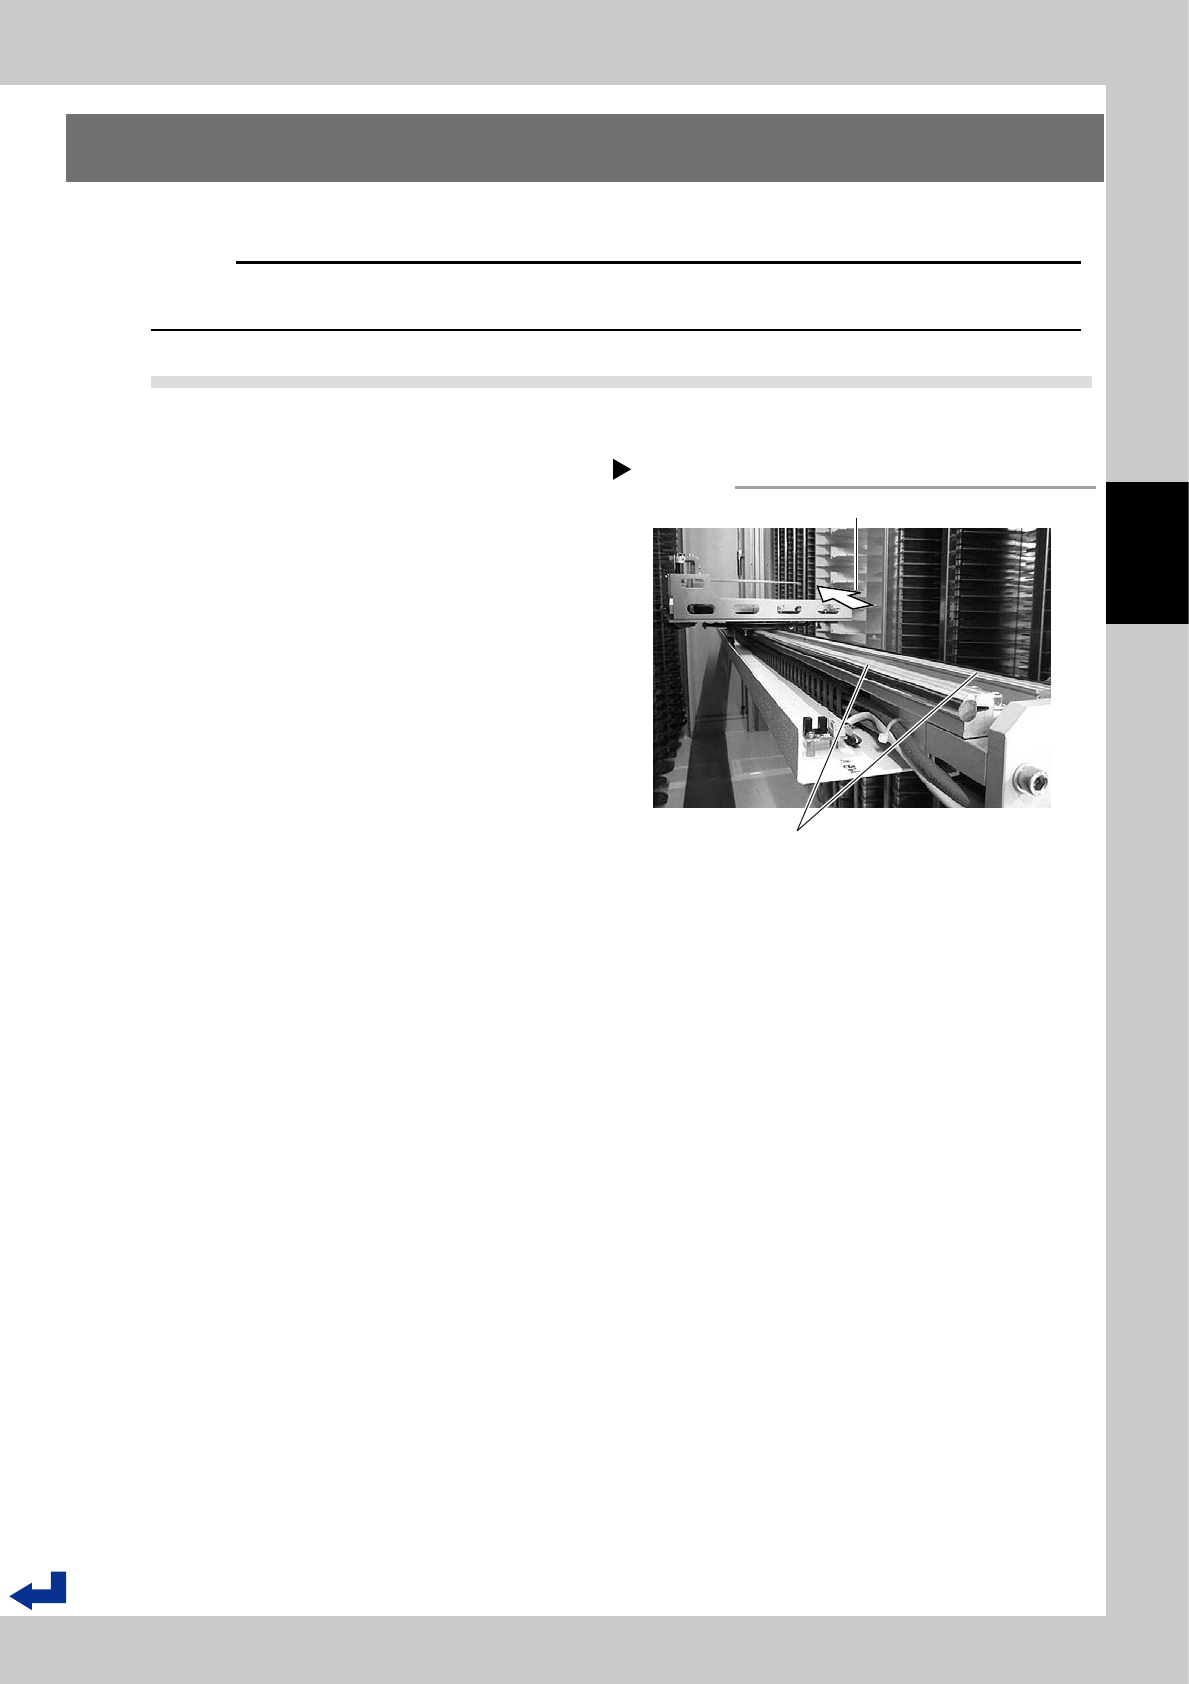
Open a side door, and move the handler to
either end on X-axis by hands.
3
Clean the stainless rail.
Use cleaning wiper with a little IPA to clean
the stainless rail of X-axis.
4
Move the handler to the other end.
Move the handler to the other end on X-axis
by hands.
5
Clean the remaining parts of the
stainless rail.
Use cleaning wiper with a little IPA to clean
the remaining parts in Step3.
6
Move the handler to Initialization
standby position.
Move the handler to Initialization standby
position by hands.
Move the handler
Step 2-5
Move the handler to either end on X-axis
Stainless rail
53308-KMS-00
3-8
3
Yearly maintenance items
2.2 Cleaning the carrier wheels of X-axis.
1
Turn the machine off.
2
Move the handler to the place
where it is easy to work.
Open a side door, and move the handler to
either end on X-axis by hands
3
Clean the carrier wheels of X-axis.
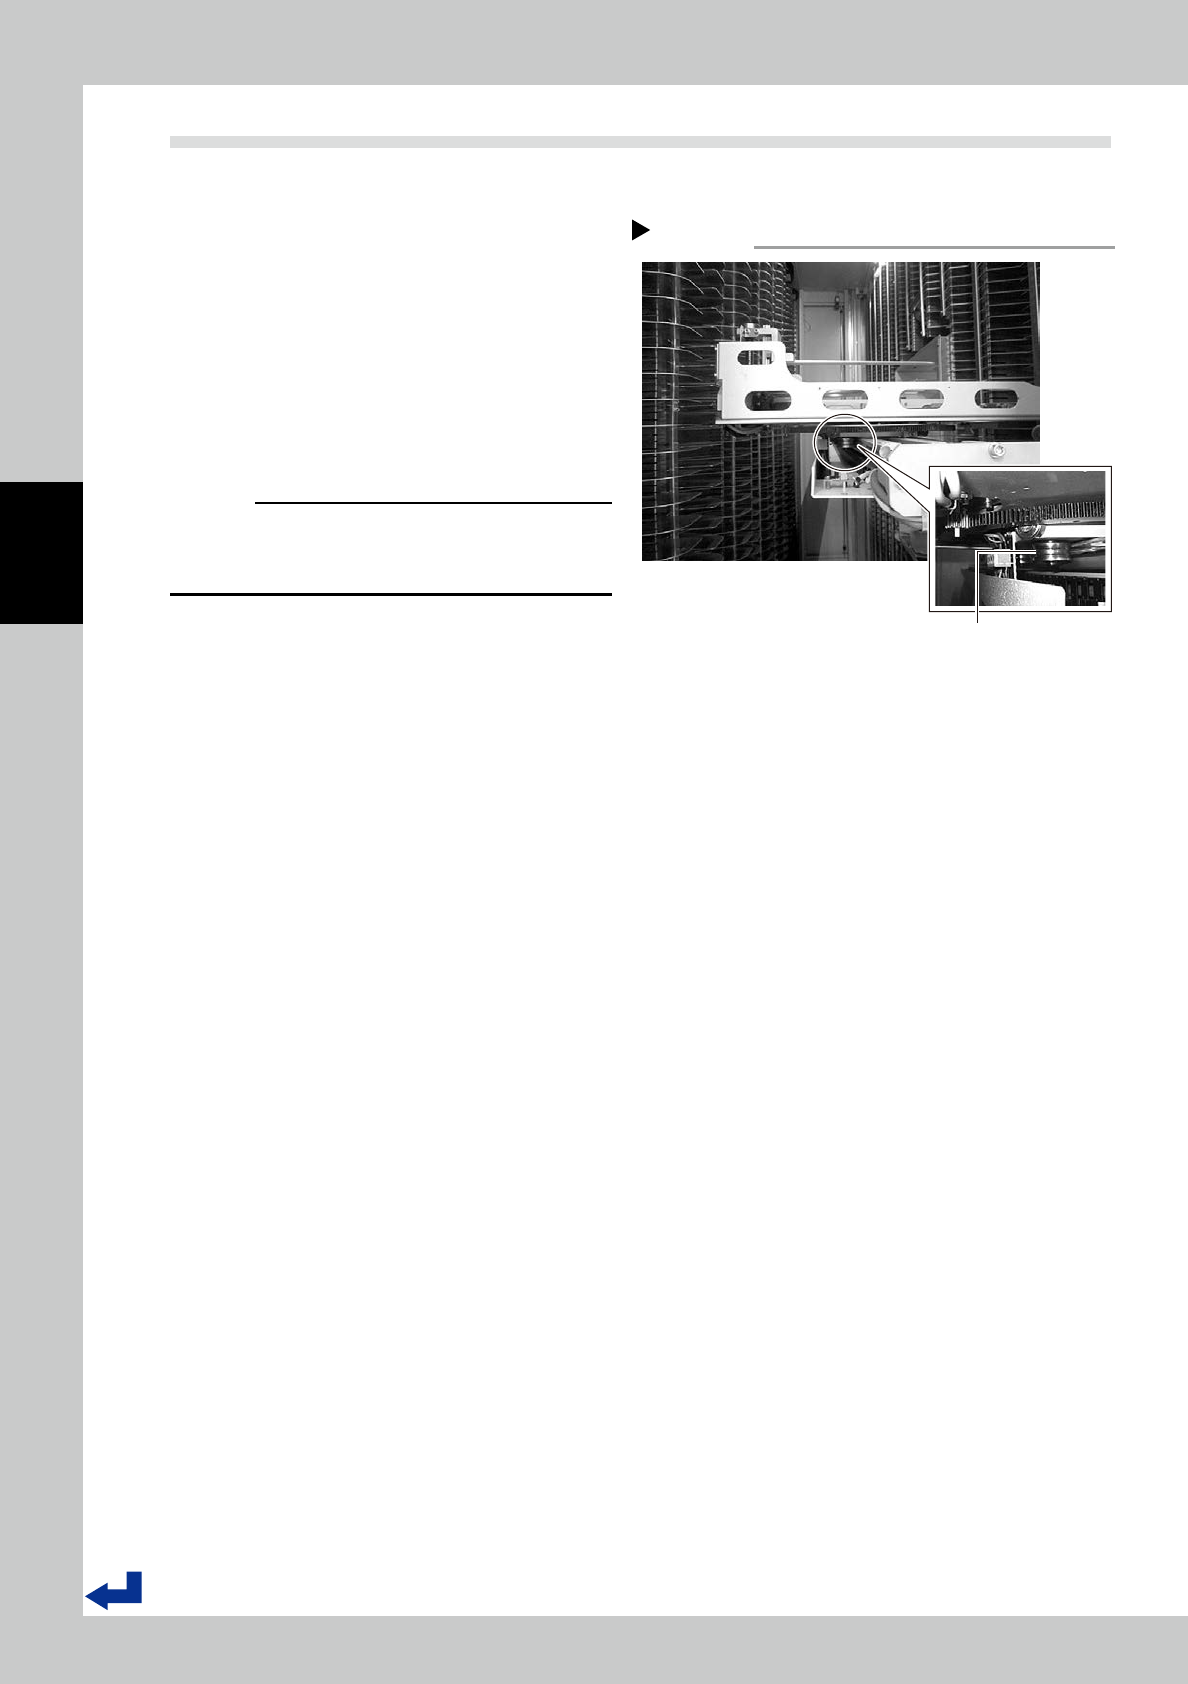
Use cleaning wiper with a little IPA to clean
the four carrier wheels.Clean whole circum-
ference of wheels with moving the handler
on X-axis
c
Caution
Clean only the parts of wheels which touch in the rail.
Be careful not to put alcohol on bearing parts of the
wheels.
4
Move the handler to Initialization
standby position.
Move the handler to Initialization standby
position by hands.
X-axis carrier wheels
Step 3
Four x-axis career wheels
53309-KMS-00