YST15_Users_E.pdf - 第179页
3-29 3 Y early maintenance items 4.8 Cleaning the reel sensors on the handler 1 T urn the machine off. 2 Mo ve the handler to the position where it is easy to work. 1. Open a side door , then move the handler a little up…
3-28
3
Yearly maintenance items
4.7 Check the drive gear of Rotation-axis
1
Turn the machine off.
2
Move the handler to the position
where it is easy to work.
1. Open a side door, then move the handler
a little upper from the middle on Y-axis so
that it is easy to work.
2. Move the handler to either end of X-axis
by hands.
3
Check if the drive gear is tighten
securely.
Use a hex wrench (2 mm) to check if two
setscrews fixing the motor and the drive
gear are tighten securely.
n
NOTE
Check two setscrews with rotating the handler a little
on Rotation-axis.
4
Move the handler to Initialization
standby position.
Move the handler to Initialization standby
position by hands.
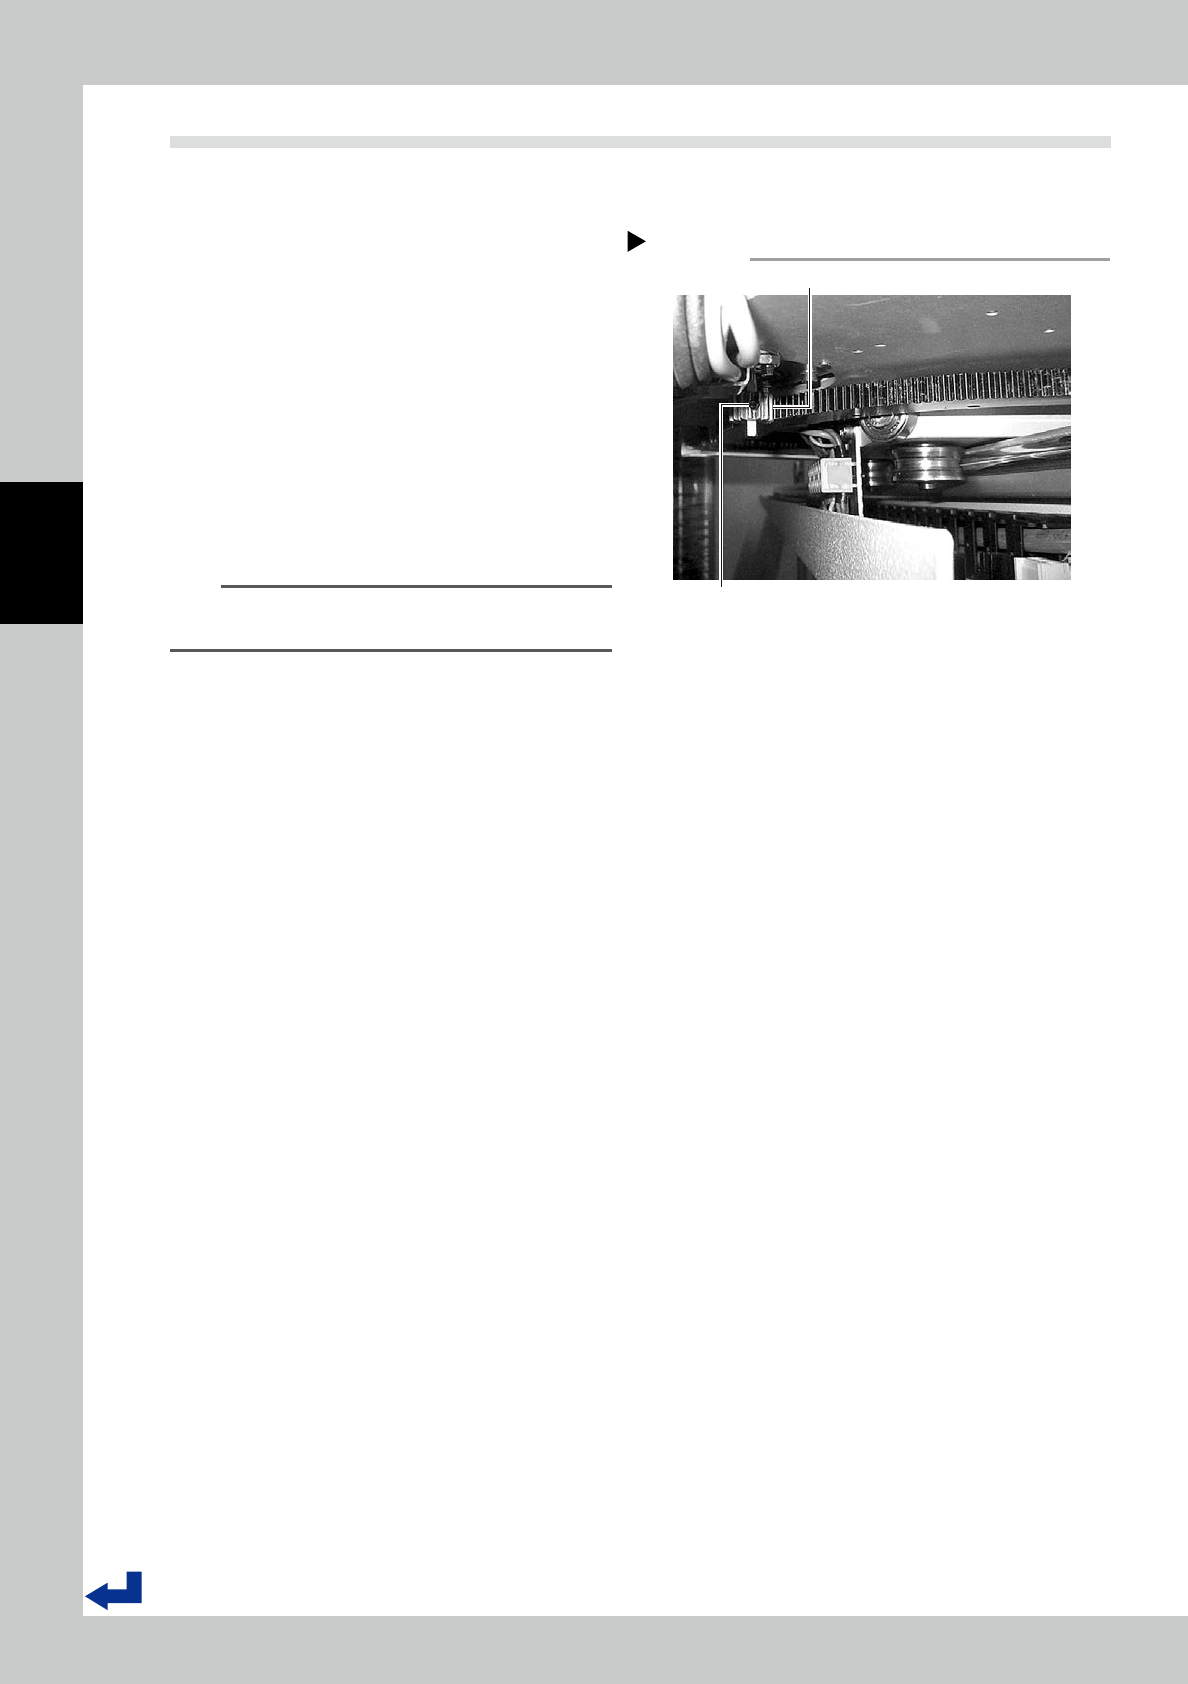
Setscrews for the drive gear of Rotation-axis.
Step 3
Two setscrews
Rotation-axis drive gear
53337-KMS-00
3-29
3
Yearly maintenance items
4.8 Cleaning the reel sensors on the handler
1
Turn the machine off.
2
Move the handler to the position
where it is easy to work.
1. Open a side door, then move the handler
a little upper from the middle on Y-axis so
that it is easy to work.
2. Move the handler to either end of X-axis
by hands.
3
Clean the reel sensors on the
handler.
Use dry soft cloth to clean the surfaces of
the reel sensors on the handler.
c
CAUTION
Do not use alcohol for cleaning sensors and reflectors.
Using alcohol may damage sensors and reflectors
4
Move the handler to Initialization
standby position.
Move the handler to Initialization standby
position by hands.
TIP
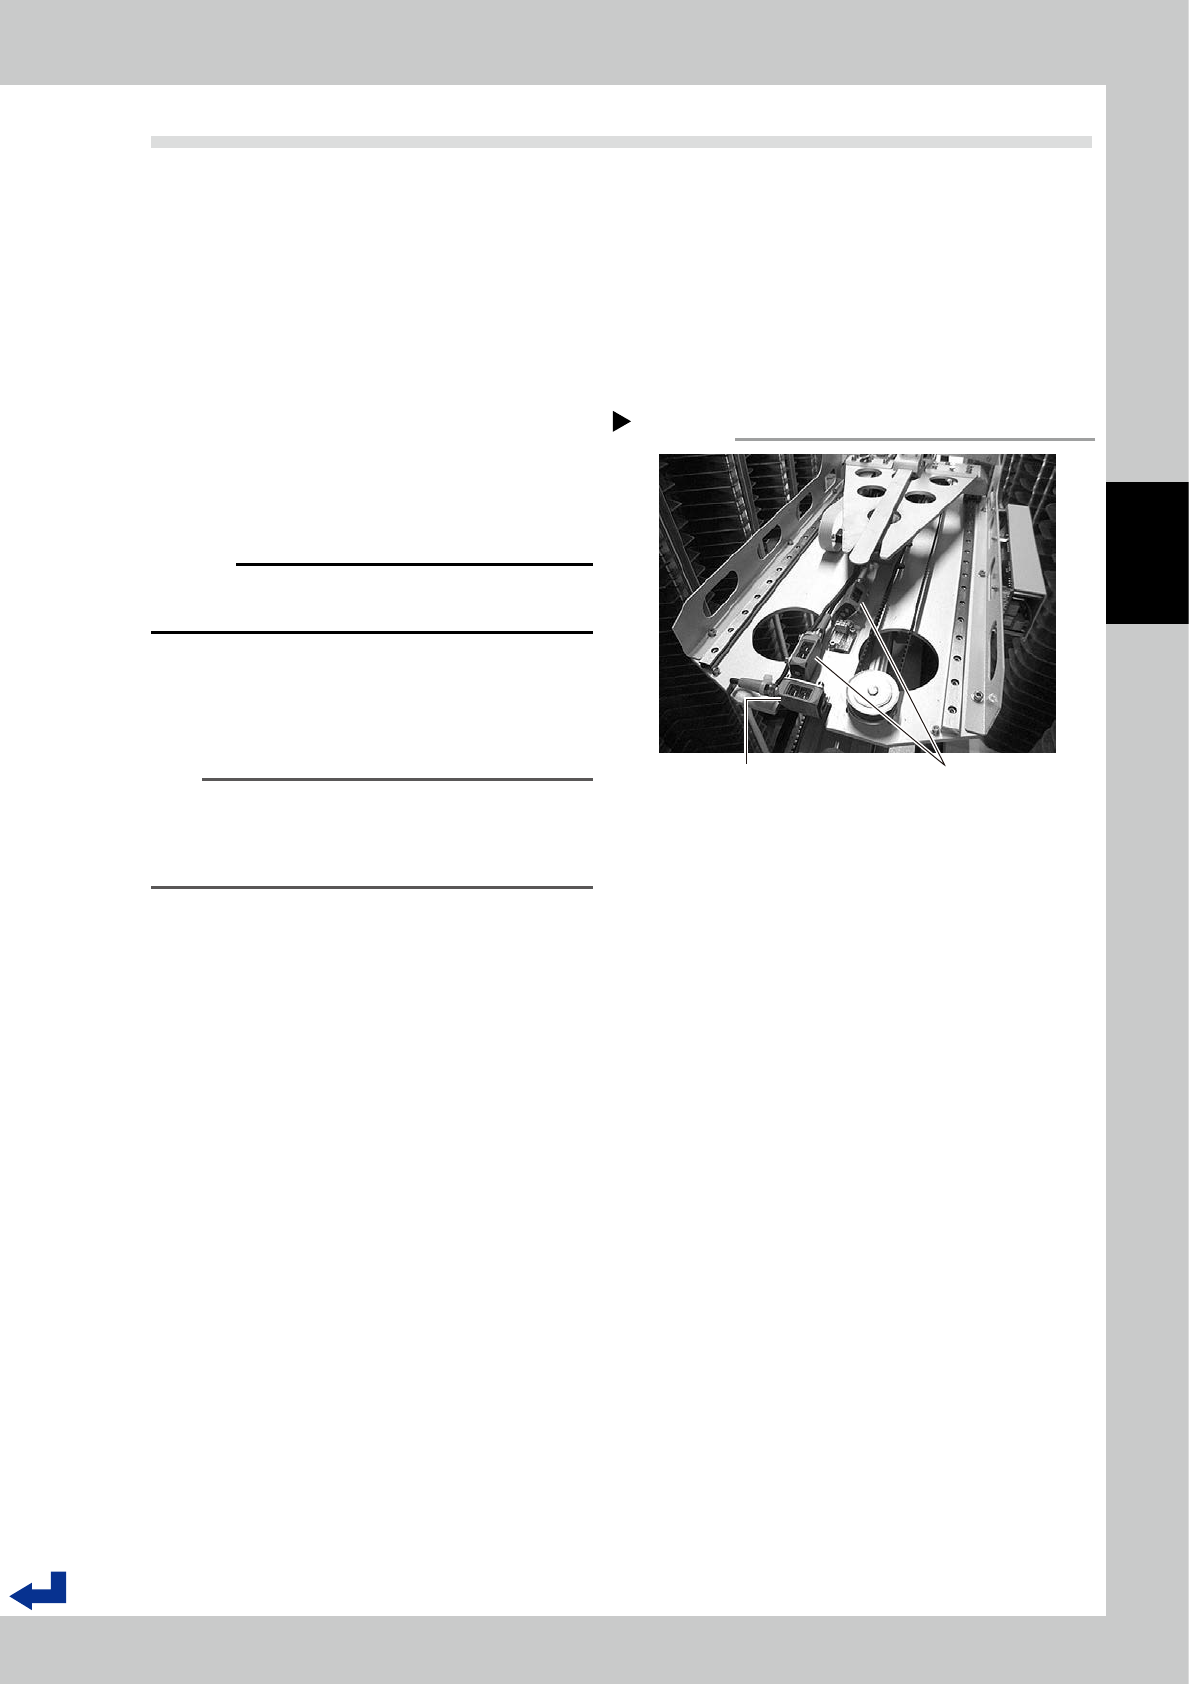
There are three reel sensors on the handler, two are for
7 inch, one is for 15 inch.
Since the sensor might miss-detect due to the slit of
reels, two sensors try to detect reels.
Reel sensors on the handler
Step 3
Reel sensor for 15 inch reels Reel sensor for 7 inch reels
53338-KMS-00
3-30
3
Yearly maintenance items
4.9 Cables of the handler control board
1
Turn the machine off.
2
Move the handler to the position
where it is easy to work.
1. Open a side door, then move the handler
a little upper from the middle on Y-axis so
that it is easy to work.
2. Move the handler to either end of X-axis
by hands.
3. Rotate the handler on Rotation-axis by
hands so that it is easy to see the handler
control board.
3
Detach the cover of the handler
control board.
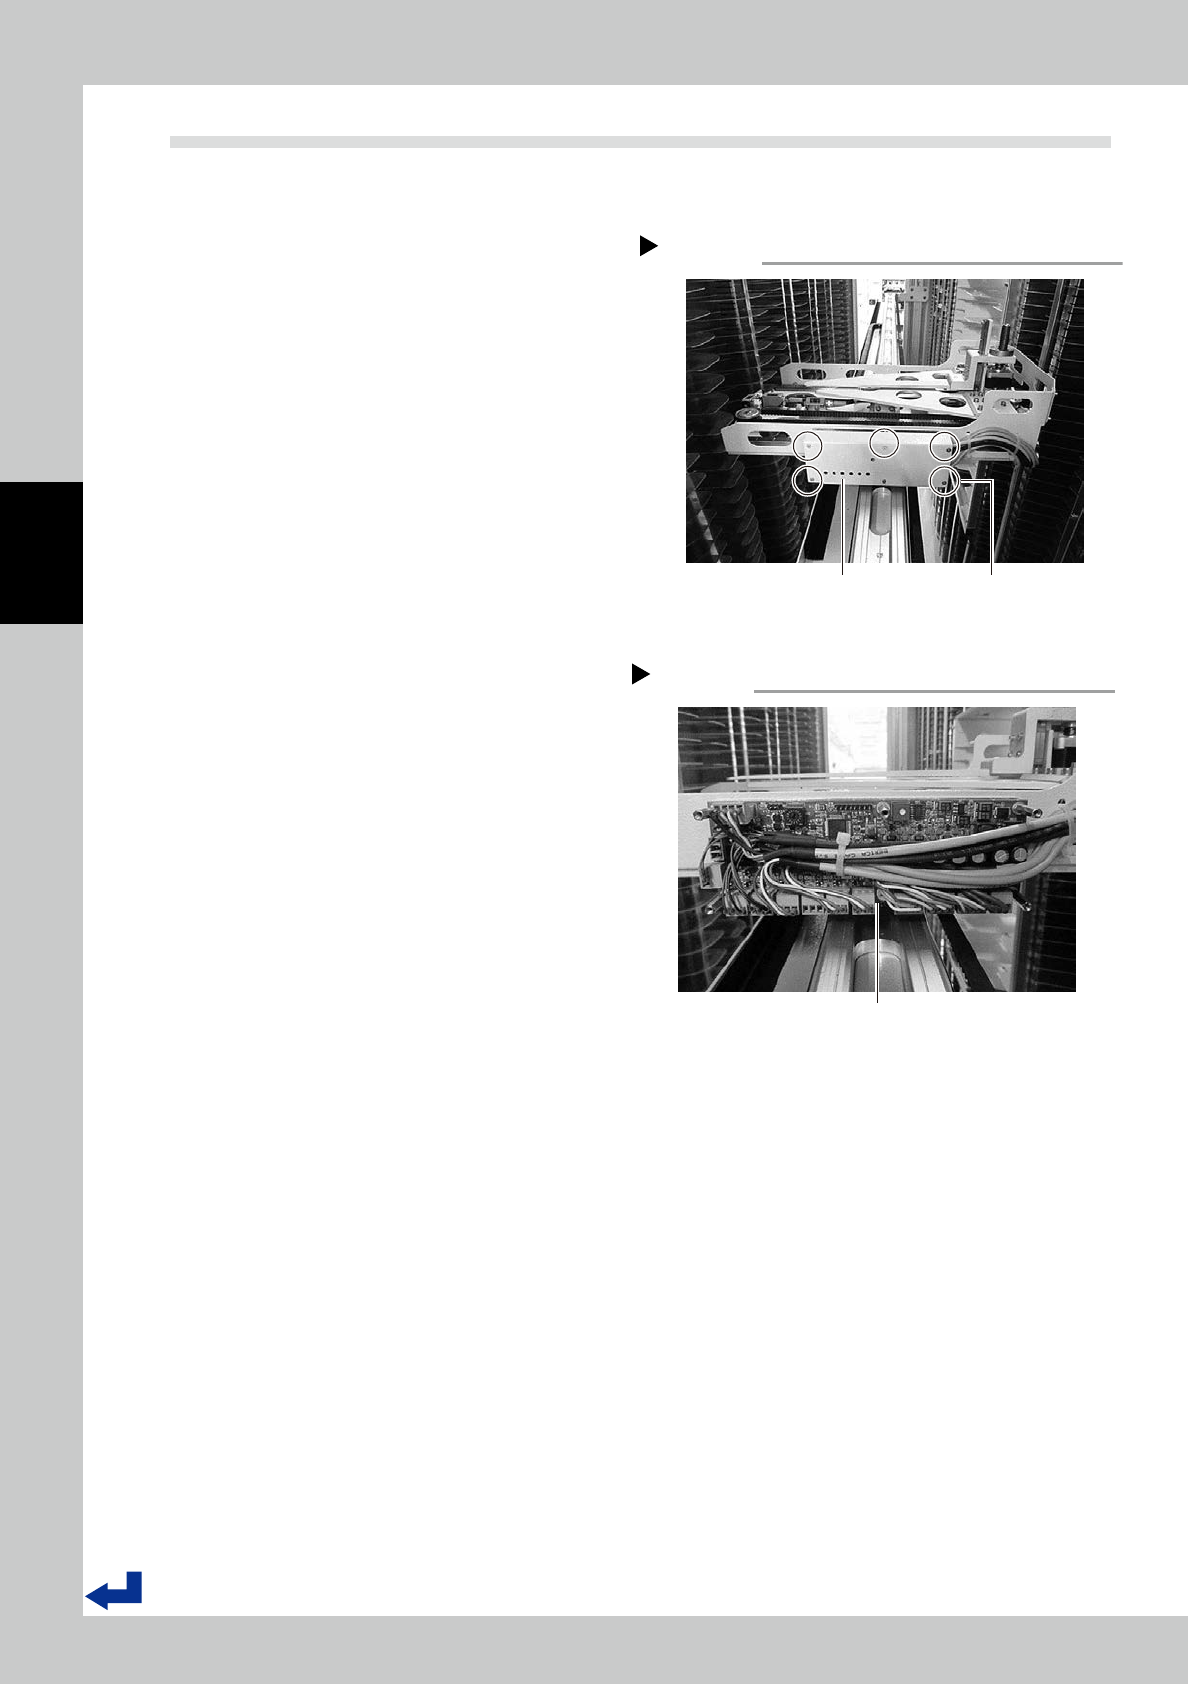
Use a hex wrench (2 mm) to remove five
bolts fixing the cover to detach it.
4
Check if all cables of the handler
control board are connected
properly.
5
Reattach the cover of the handler
control board.
6
Move the handler to Initialization
standby position.
Move the handler to Initialization standby
position by hands.
Handler control board
Step 4
Handler control board
53340-KMS-00
Cover for the handler control board
Step 3
Cover
Five bolts fixing cover
53339-KMS-10