LCX_UserManual_en_08_1.pdf - 第118页
Instrument functions R&S ® LCX Series 1 18 User Manual 1 179.2260.02 ─ 08 Executing a binning measurement A binning measurement requires that you configure the test signal and all settings nec- essary for your measur…
Instrument functions
R&S
®
LCX Series
117User Manual 1179.2260.02 ─ 08
Example: Binning configuration data for a resistor measurement
The example defines a binning measurement that returns the measurement results for
the resistance and impedance parameter pair (Rs-X), specified for 4 measurement cat-
egories. The R&S LCX returns the nominal value as an absolute value, and the devia-
tion in percent (NOMPCT).
#Signal,BOTH
#Measurement,Rs-X
#PrimaryFormat,NOMPCT
#SecondaryFormat,ABS
Pri0,Pri1
1e3,0.1
1e3,1
1e3,5
1e3,10
Loading the binning file
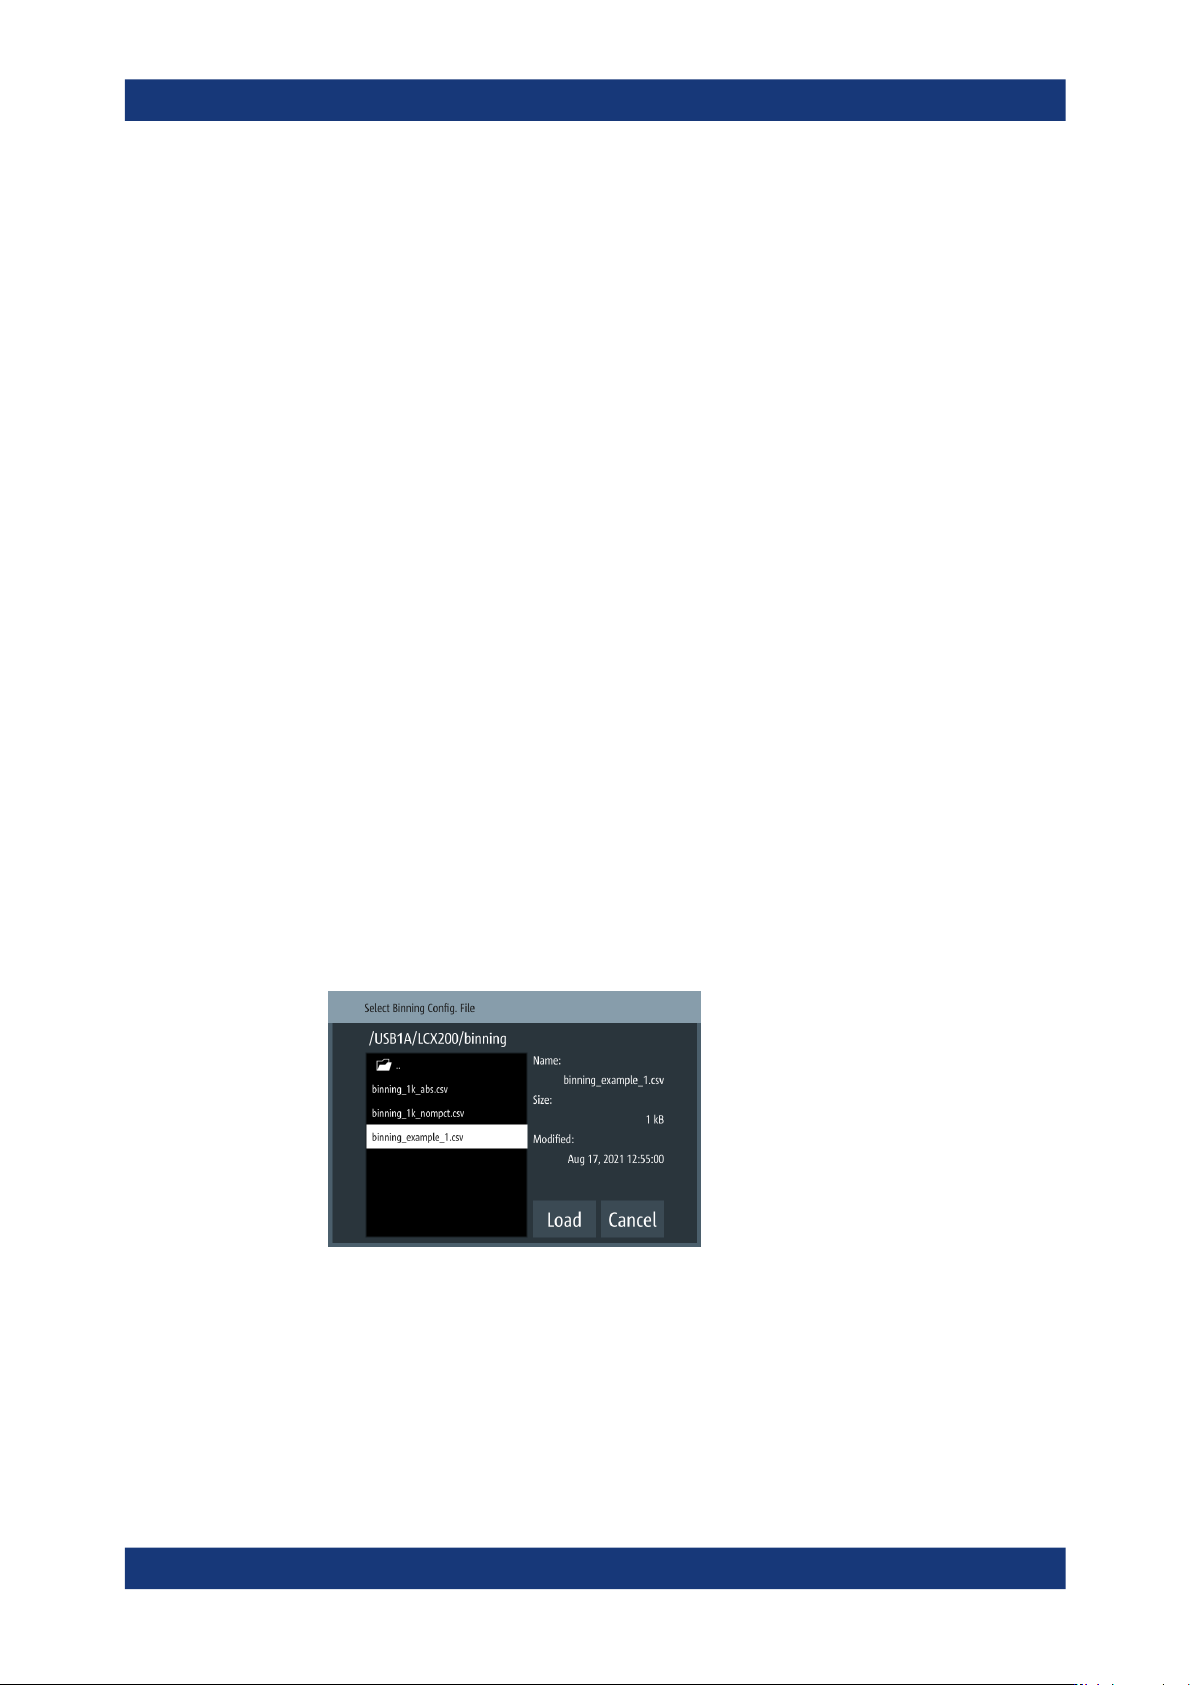
To upload the binning, proceed as follows:
1. Connect the USB flash drive to the USB B connector at the front panel of the
instrument.
2. To access the binning settings dialog, select [settings] > "Functions" > "Binning".
3. Select "Load from File".
4. Select the partition "USB1A".
If a binning folder exists on the memory stick, the R&S LCX leads you to this direc-
tory automatically.
5. Select the corresponding *.csv binning file.
The R&S LCX indicates the file properties of the selected file on the right.
6. Confirm your selection with "Load".
Returned to the "Binning" dialog, the instrument indicates the selected file and
memory location.
Specific instrument functions
Instrument functions
R&S
®
LCX Series
118User Manual 1179.2260.02 ─ 08
Executing a binning measurement
A binning measurement requires that you configure the test signal and all settings nec-
essary for your measurement before. You cannot change a parameter while the mea-
surement is running.
In addition, you need a trigger event that you can initiate manually with the [Trig.] key
at the front, or by a trigger signal assigned to the [Trigger Input] connector at the back.
This example assumes that you have set up the measurement and aligned the instru-
ment, see e.g., "Basic measurement steps" on page 34 and Section 7, "Performing
measurements", on page 65.
To start the measurement:
1. Create the binning file, see "Configuring a binning file" on page 116.
2. Load the binning file according to "Loading the binning file" on page 117.
3.
To activate the binning function, turn
"Enable".
4. Press the [home] key.
The R&S LCX switches to measurement mode "triggered" automatically. The
[Meas. Mode] key lights up.
5. Connect a sample component to the terminals of the test fixture.
6. Start the first measurement with a trigger signal, e.g., press the [Trig.] key.
7. Wait until the measurement is complete.
When completed, and you have enabled the end of the measurement control sig-
nal, the R&S LCX highlights the EOM bin.
8. Remove the sample component.
9. Repeat step 5 to step 8 until you have measured all components.
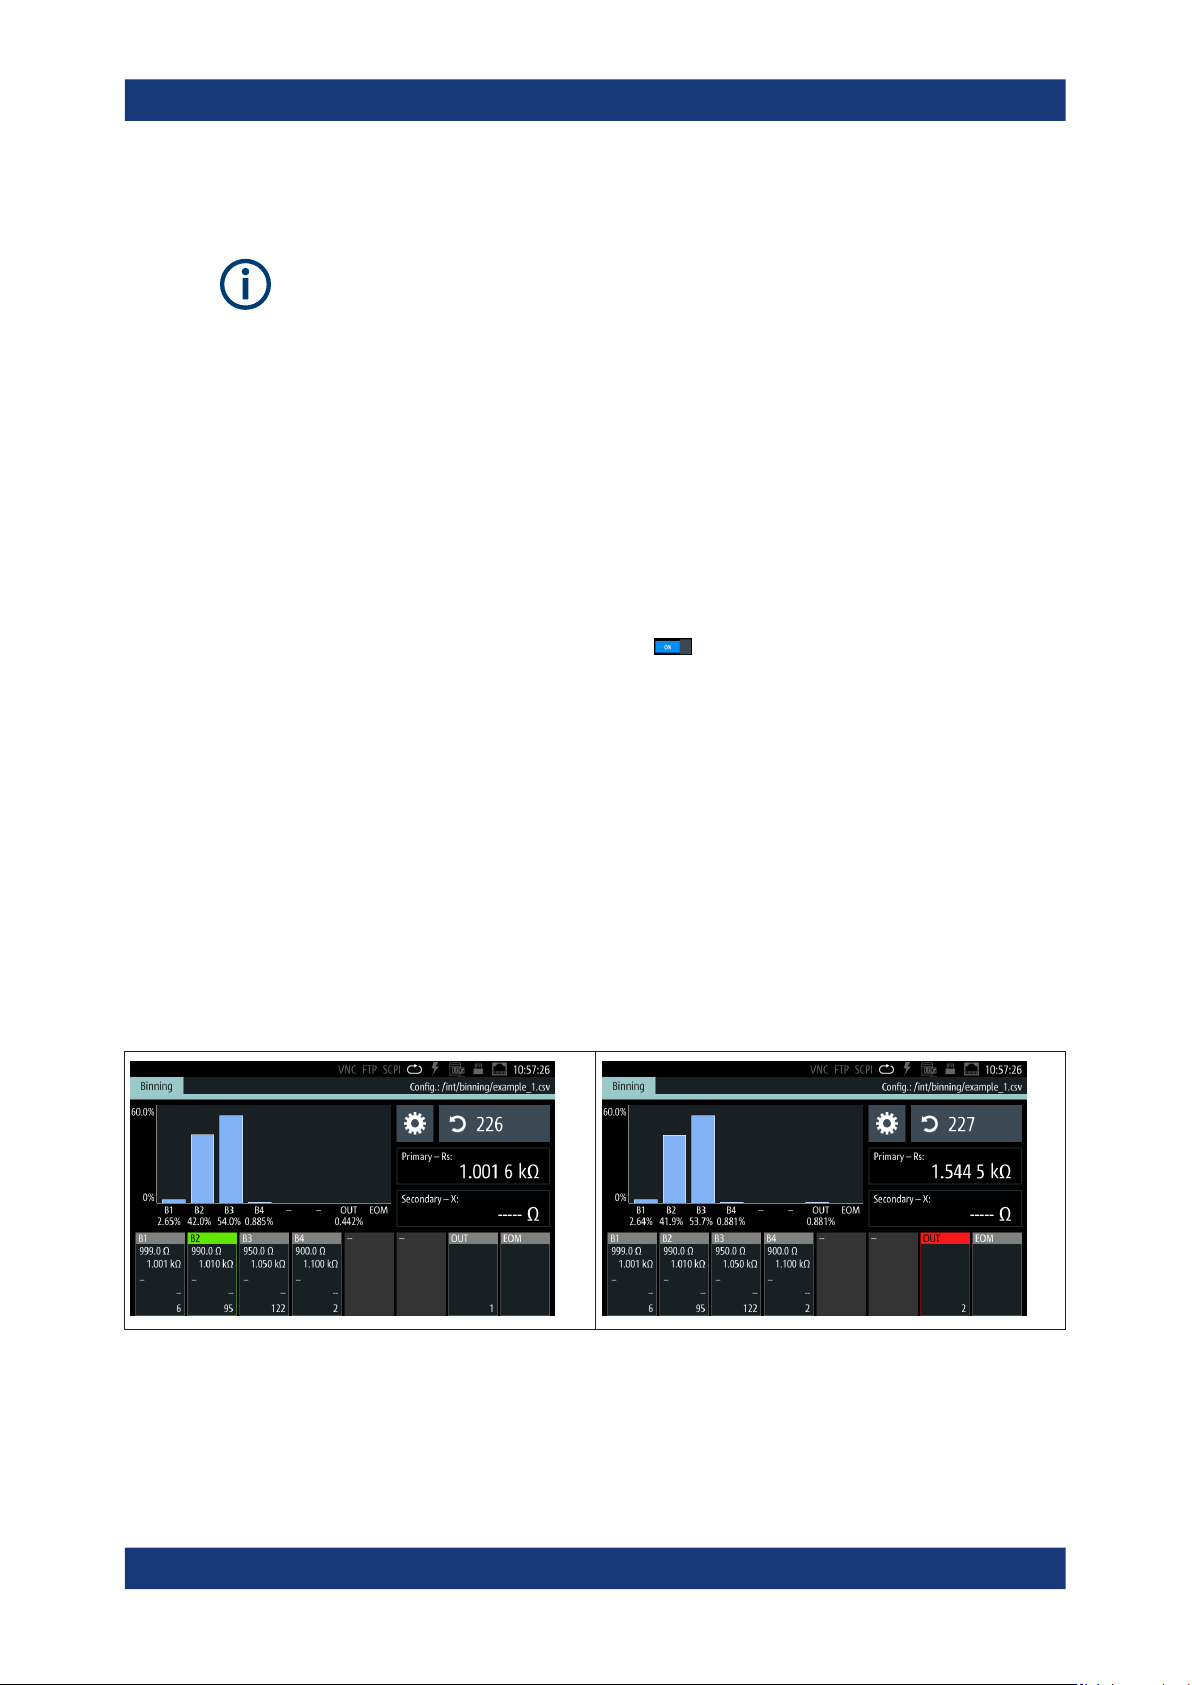
According to the reading, the R&S LCX sorts a component into the corresponding
bin and highlights it. In addition, it indicates the summed number of components
sorted into it, and displays the distribution graphically in the histogram.
Specific instrument functions
General instrument functions
R&S
®
LCX Series
119User Manual 1179.2260.02 ─ 08
9 General instrument functions
The general instrument settings include basic instrument functions, regardless of the
selected operating mode and measurement. Some of these settings like screen display
and peripherals are initially configured at the setup of the instrument, according to per-
sonal preferences and requirements. However, you can individually adjust the settings
at any time, for example, for specific applications.
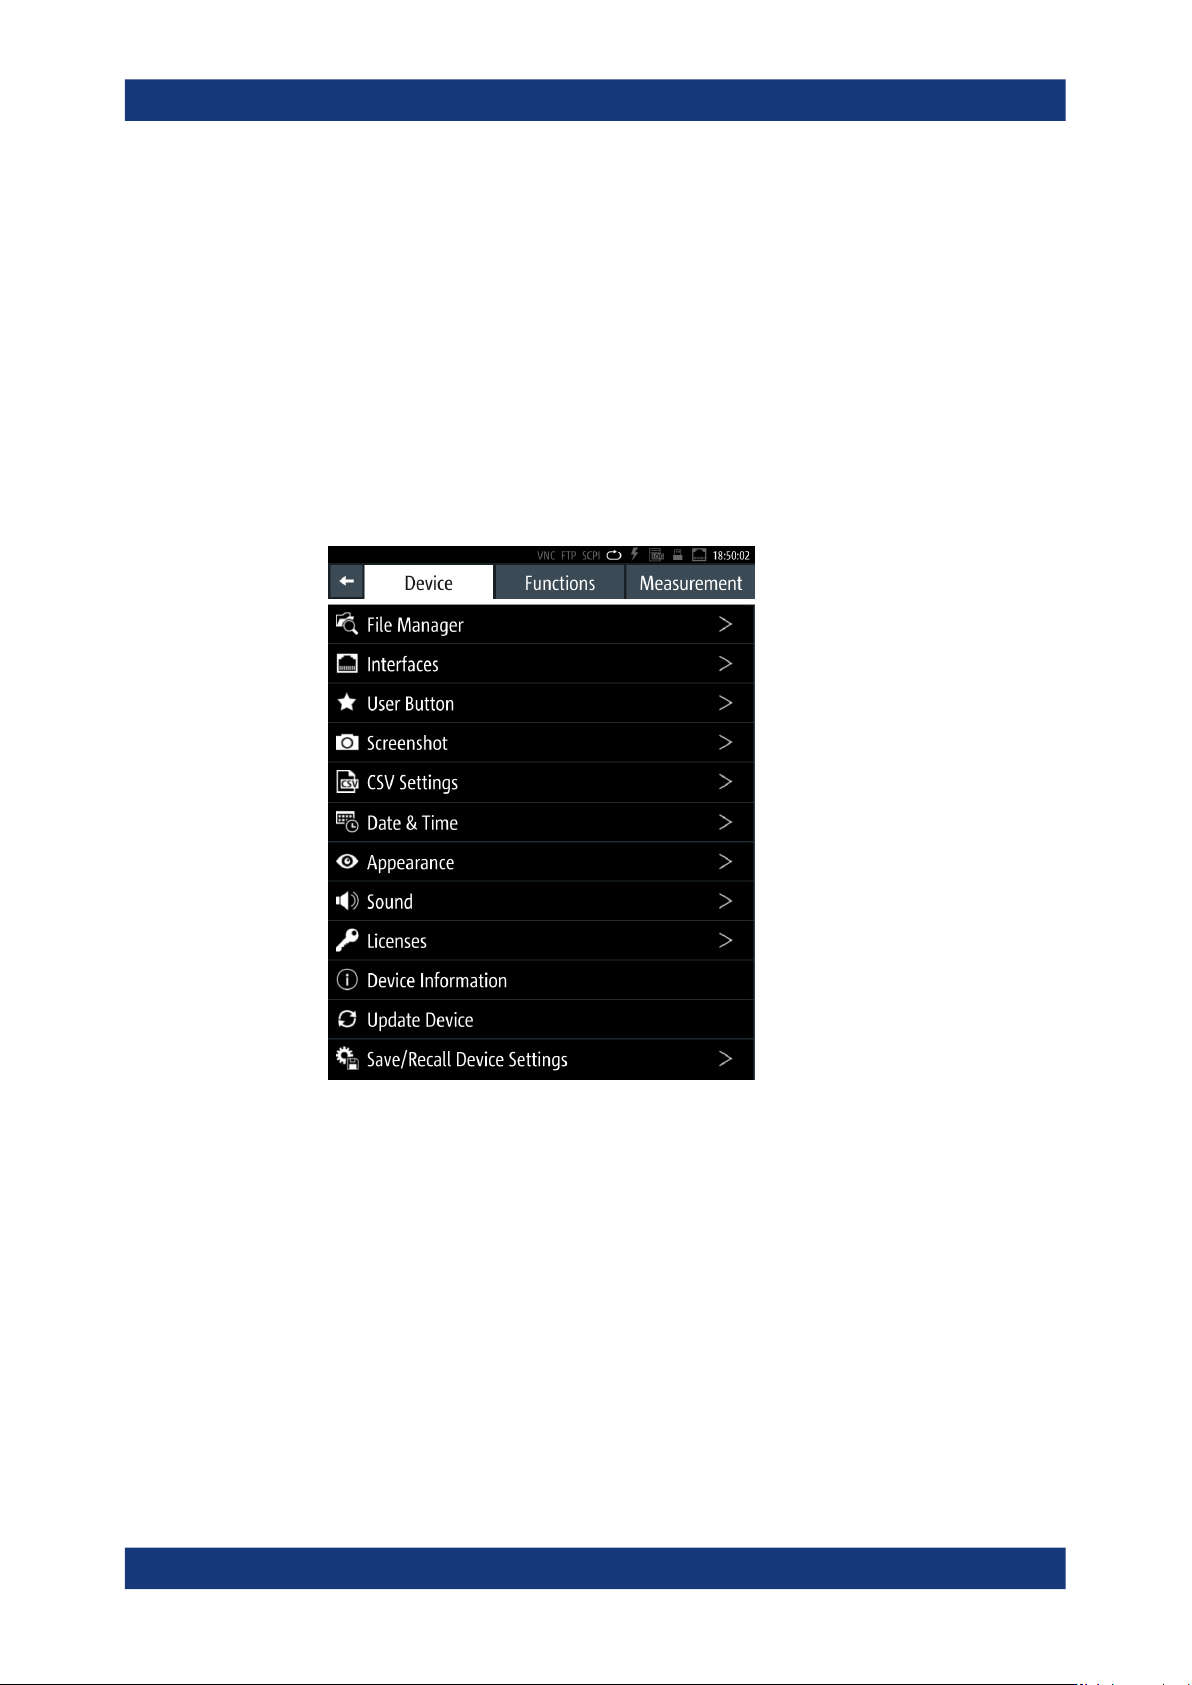
Access:
1. Press the [settings] key at the front panel.
2. Select the "Device" tab.
Figure 9-1: Device menu
3. Select the corresponding setting in the list.
The required remote commands are described in Section 11.18, "SYSTem subsystem",
on page 231.
● File and data management................................................................................... 120
● Interfaces.............................................................................................................. 125
● User button............................................................................................................127
● Screenshot............................................................................................................128
● CSV settings......................................................................................................... 131
● Date & time........................................................................................................... 132
● Appearance...........................................................................................................133
● Sound....................................................................................................................134