LCX_UserManual_en_08_1.pdf - 第29页
Getting started R&S ® LCX Series 29 User Manual 1 179.2260.02 ─ 08 Figure 4-5: T ouchscreen display For details on the screen display , see Section 4.4.2.1, "Understanding the display infor- mation" , on pa…
Getting started
R&S
®
LCX Series
28User Manual 1179.2260.02 ─ 08
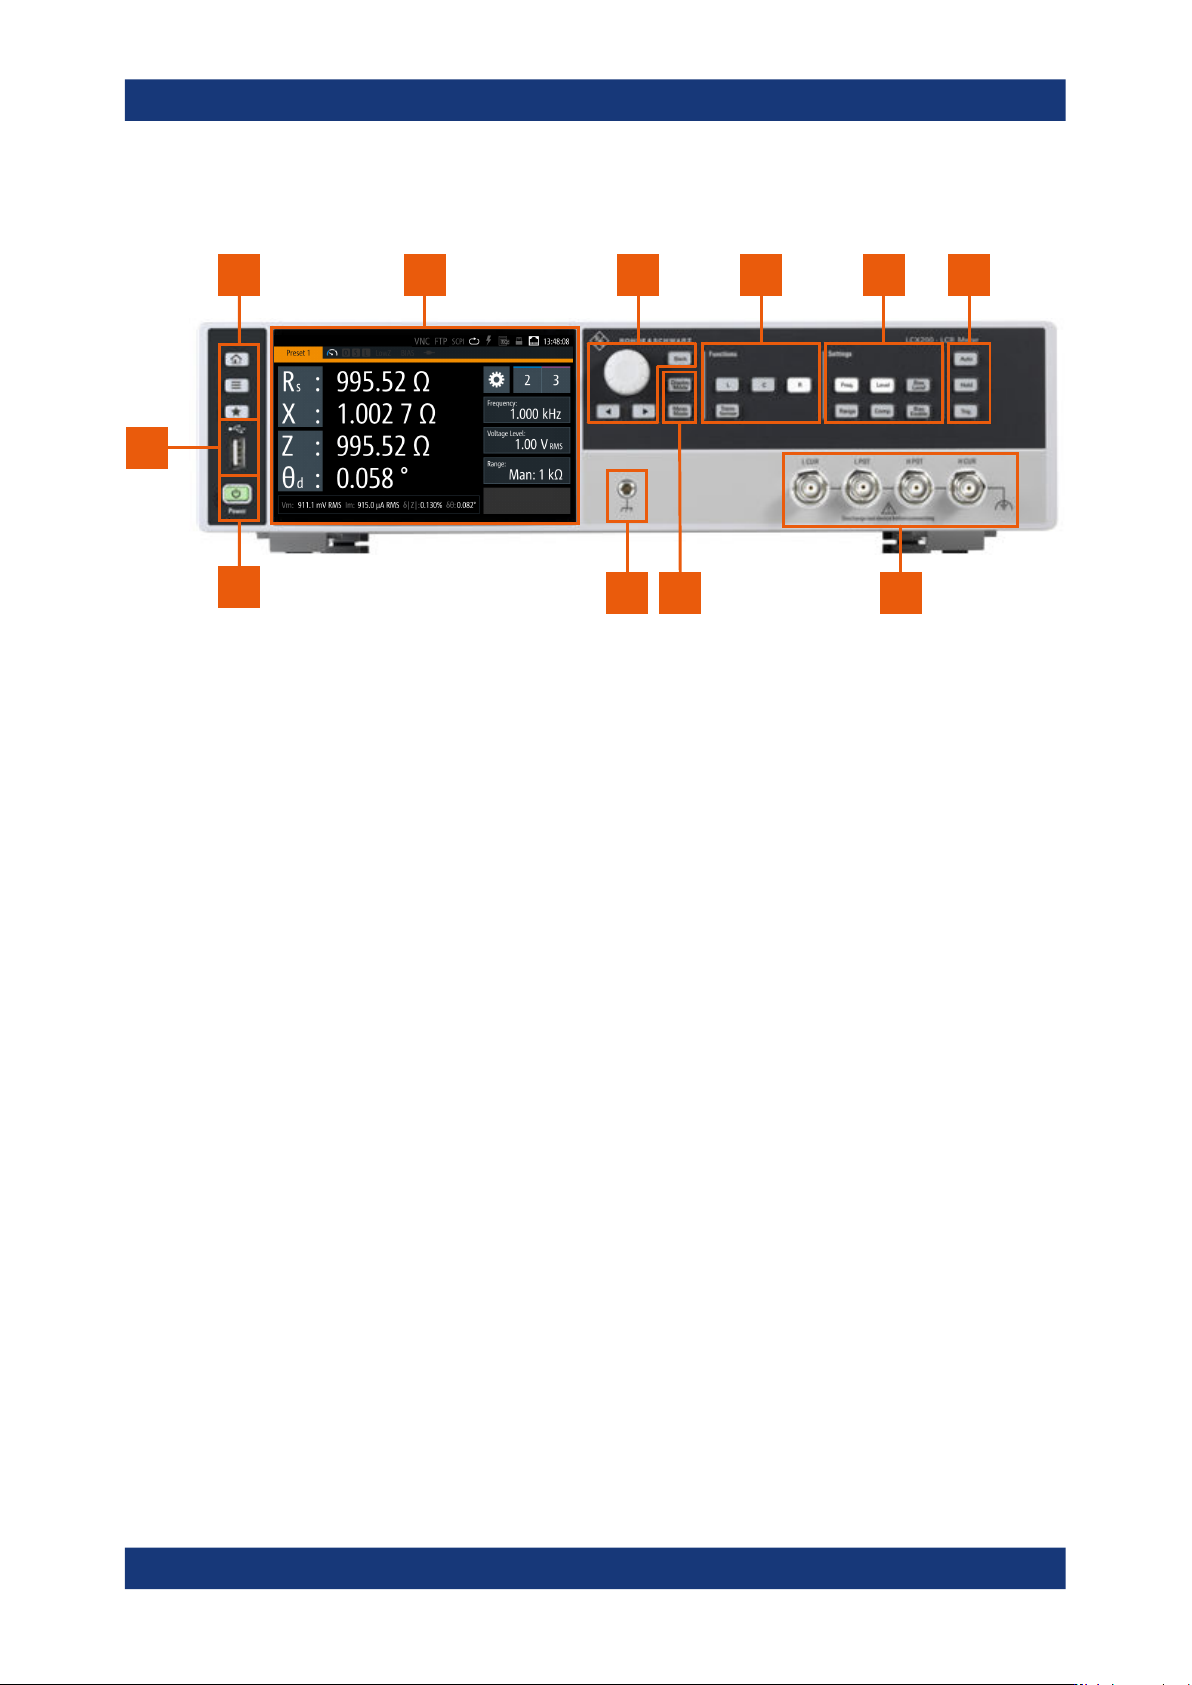
4.2.1 Front panel tour
1 2 3 4 5 6
79
10
11
8
Figure 4-4: R&S
LCX front panel
1 = Basic display keys, see "Basic display keys" on page 29
2 = Touchscreen display, see Section 4.2.1.1, "Touchscreen display", on page 28
3 = Navigation controls, see "Navigation controls" on page 29
4 = Function keys, see "Function keys" on page 30
5 = Setting keys, see "Settings keys" on page 30
6 = Measurement control keys, see "Measurement control keys" on page 30
7 = BNC measurement connectors, see "L CUR, L POT, H CUR, H POT" on page 31
8 = Measurement mode keys, see "Measurement mode keys" on page 30
9 = Ground connector, see "Ground socket" on page 31
10 = POWER key, see "POWER On/Standby key" on page 31
11 = USB host connector
4.2.1.1 Touchscreen display
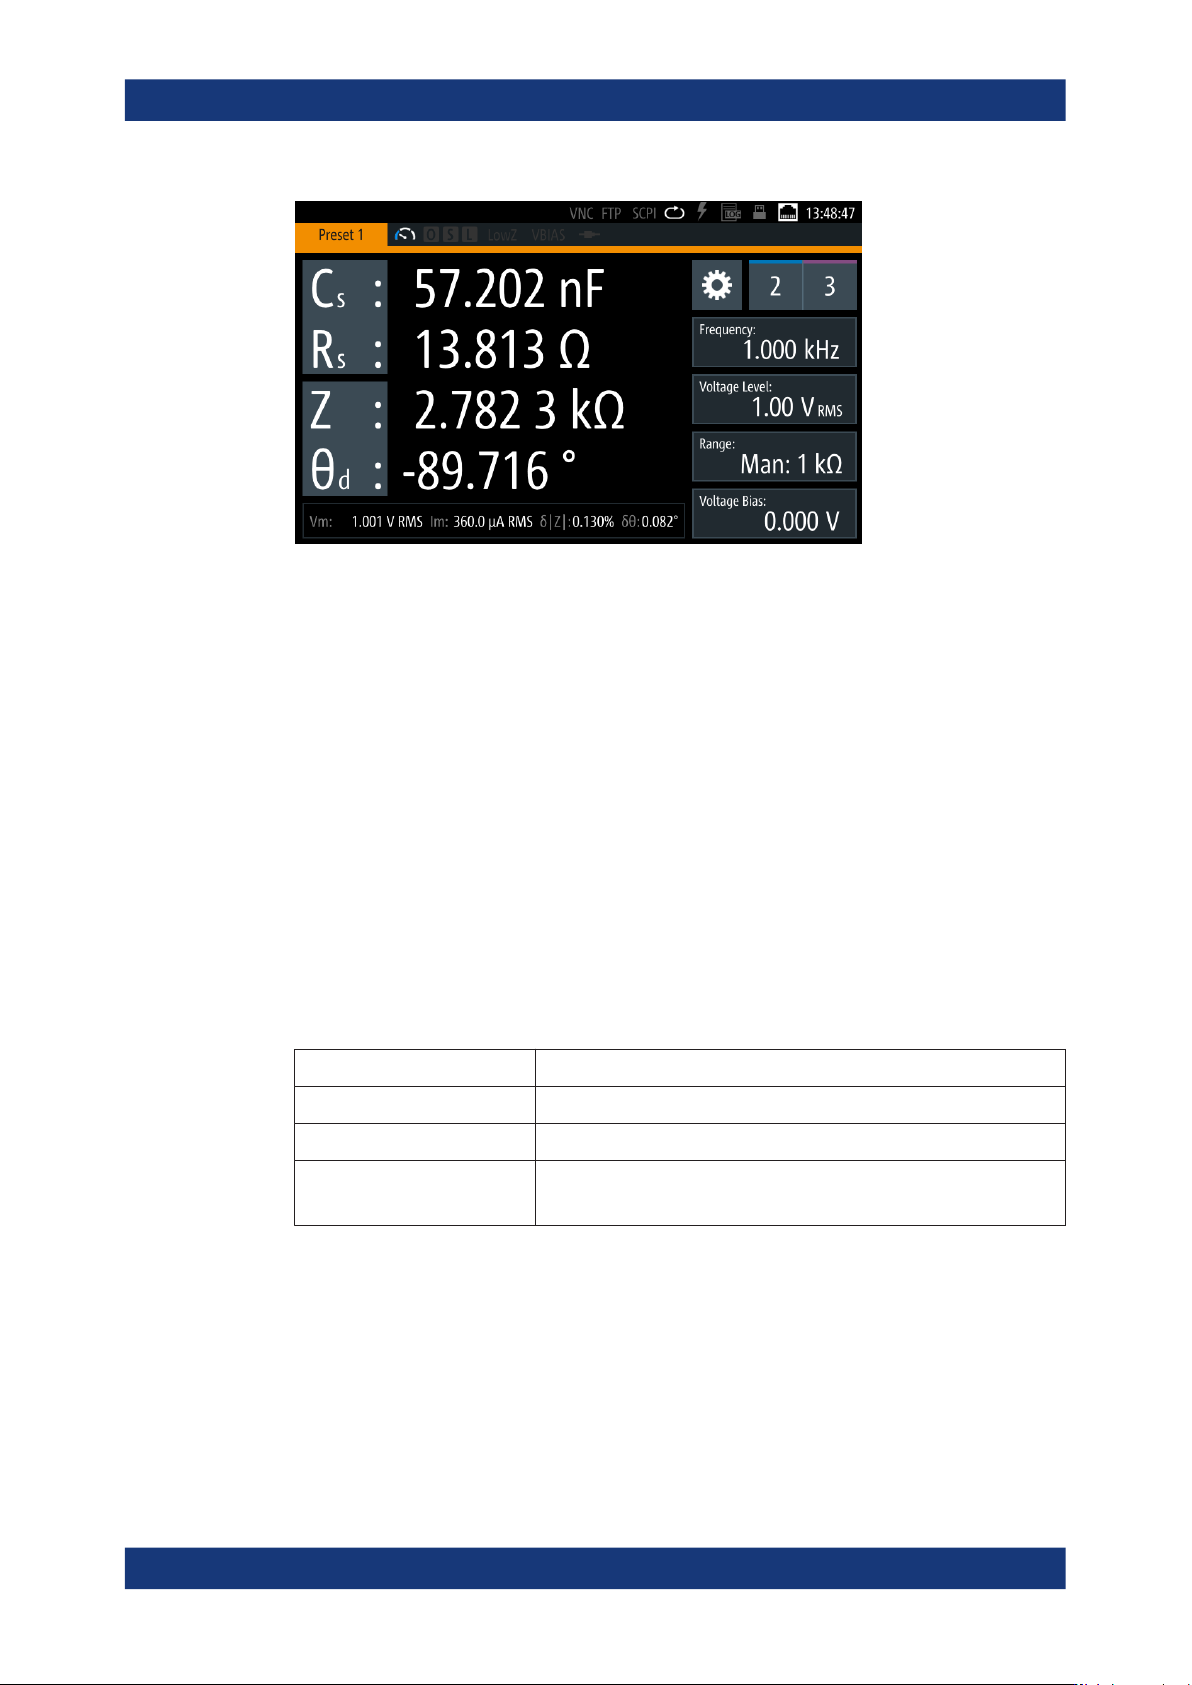
The color TFT touchscreen at the front panel is the graphical user interface. It shows
the measurement readings, status information and settings, and provides access to
settings dialogs.
Instrument tour
Getting started
R&S
®
LCX Series
29User Manual 1179.2260.02 ─ 08
Figure 4-5: Touchscreen display
For details on the screen display, see Section 4.4.2.1, "Understanding the display infor-
mation", on page 38.
The touch-sensitive panel provides an alternative means of user interaction for quick
and easy handling of the instrument, see Section 4.4.2, "Means of manual interaction",
on page 37.
4.2.1.2 Keys
This section introduces the functionality of the hardkeys at the front panel. These con-
trols lead you to menus and dialogs displayed on the screen. For information on how to
operate the instrument, see Section 4.4.2, "Means of manual interaction", on page 37.
Basic display keys
The utility keys arrange different windows on the display.
Table 4-1: Display keys
Display key Assigned functions
[home] Returns to the initial feature screen.
[settings] Opens the menu list with general instrument functions.
[★ (User)] Executes a previously assigned user action.
Press and hold opens the favorites menu for assigning a user action.
Navigation controls
The navigation controls include a rotary knob and navigation keys. They allow you to
navigate within the display or within dialogs, see Section 4.4.2, "Means of manual inter-
action", on page 37.
Instrument tour
Getting started
R&S
®
LCX Series
30User Manual 1179.2260.02 ─ 08
Table 4-2: Navigation controls
Key Assigned functions
[Rotary knob] Selects, enables or confirms settings.
[◀] / [▶] Moves the cursor in the entry fields.
[Back] Returns to a previous level in the menus, or closes a view.
Measurement mode keys
The measurement controls enable you to select the measurement mode and view of
the representation of the measurement readings.
Table 4-3: Measurement mode controls
Key Assigned functions
[Meas. Mode] Selects either continuous or triggered measurement mode.
[Display Mode] Selects the display of measurement readings.
Function keys
The keys in the function panel select the parameters for the measurement.
Table 4-4: Measurement function controls
Key Assigned functions
[L] Selects the function for measuring inductance.
[C] Selects the function for capacity measurement.
[R] Selects the measurement for a resistor.
[Transformer] Selects the transformer measurement.
Settings keys
The keys in the settings panel enable you to select measurement ranges and addi-
tional parameters for executing the measurement.
Table 4-5: Measurement function controls
Key Assigned functions
[Freq.] Sets the signal frequency.
[Range] Selects the impedance range.
[Level] Sets the level.
[Comp.] Opens the "Open/Short/Load Correction" dialog for quick access.
[Bias Level] Sets the bias voltage and current.
[Bias Enable] Enables internal or external bias.
Measurement control keys
These keys provide control during the measuring procedure.
Instrument tour