LCX_UserManual_en_08_1.pdf - 第138页
General instrument functions R&S ® LCX Series 138 User Manual 1 179.2260.02 ─ 08 9.10 Device information T o get an overview on the configuration of your instrument, you can retrieve informa- tion on the instrument m…
General instrument functions
R&S
®
LCX Series
137User Manual 1179.2260.02 ─ 08
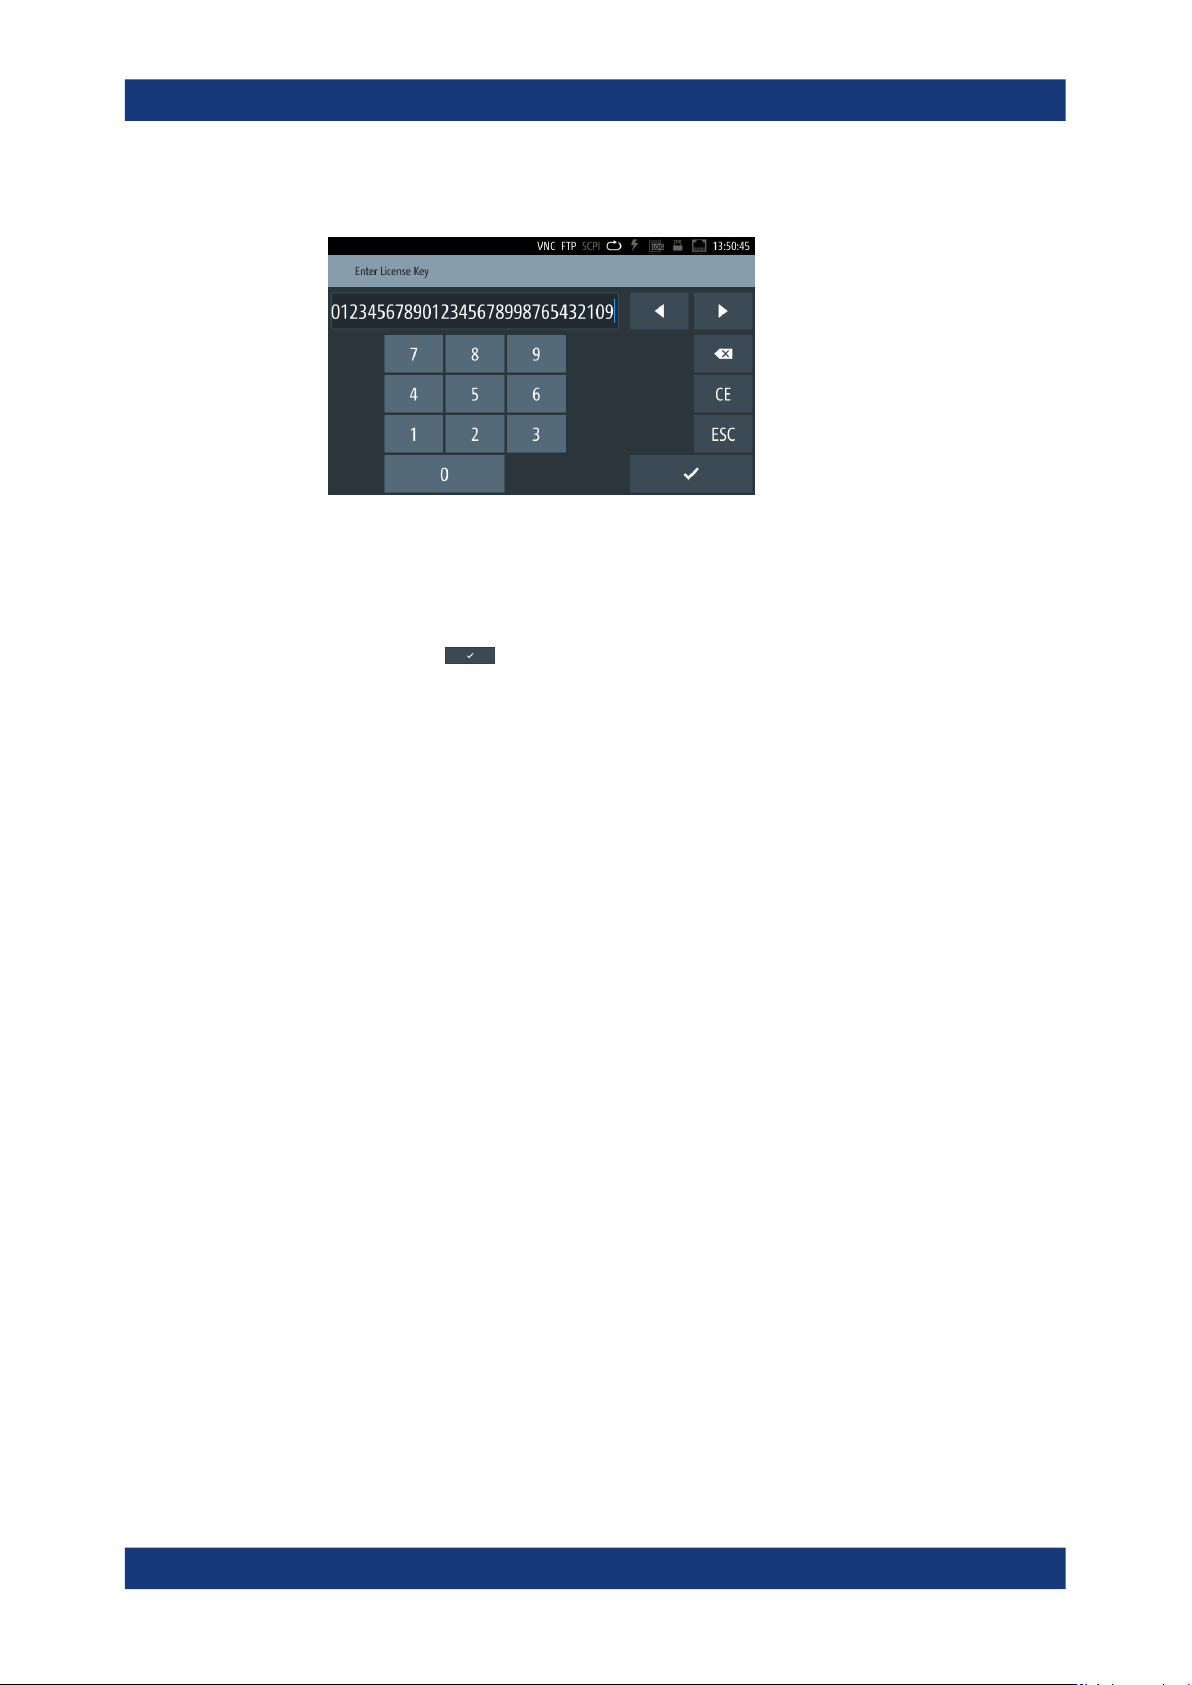
3. Select "Add" to open the "Enter License Key" keypad.
Figure 9-13: License key on-screen keypad
4. Enter the key (30-digits) of the option in the entry box.
5. Review your input carefully.
6.
Confirm with
.
The R&S LCX applies the license key. It displays a message "Devicekey is instal-
led".
Note: For the license to take effect, the R&S LCX must reboot.
7. Switch the instrument off and on again using the On/Standby key.
The instrument restarts and activates the option and its features. It lists the option
in the "Active" window.
Removing a license key
To remove a registered option, you must also enter the license key. You can load the
license key either from the *.xml file or enter it manually.
1. To upload the key from the *.xml file, proceed as described in "Loading the
license key from a file" on page 136.
2. To remove the option manually, select "Remove" in the license dialog.
The R&S LCX displays the "Enter Deactivation Key" on-screen keypad.
3. To enter the license key, proceed the same way as described in "Inserting the
license key manually" on page 136.
The instrument uninstalls the license and displays the message "Devicekey is
removed". It deactivates the option displays it in the "Deactivation" window.
4. For the deactivation to take effect, restart the R&S LCX.
The instrument restarts and lists the deactivated in the "Deactivation" window.
Licenses
General instrument functions
R&S
®
LCX Series
138User Manual 1179.2260.02 ─ 08
9.10 Device information
To get an overview on the configuration of your instrument, you can retrieve informa-
tion on the instrument model, its hardware components and interfaces using the device
information function.
9.10.1 Device information settings
Access:
1. Press the [settings] key at the front panel.
2. In the "Device" tab, select "Device Information".
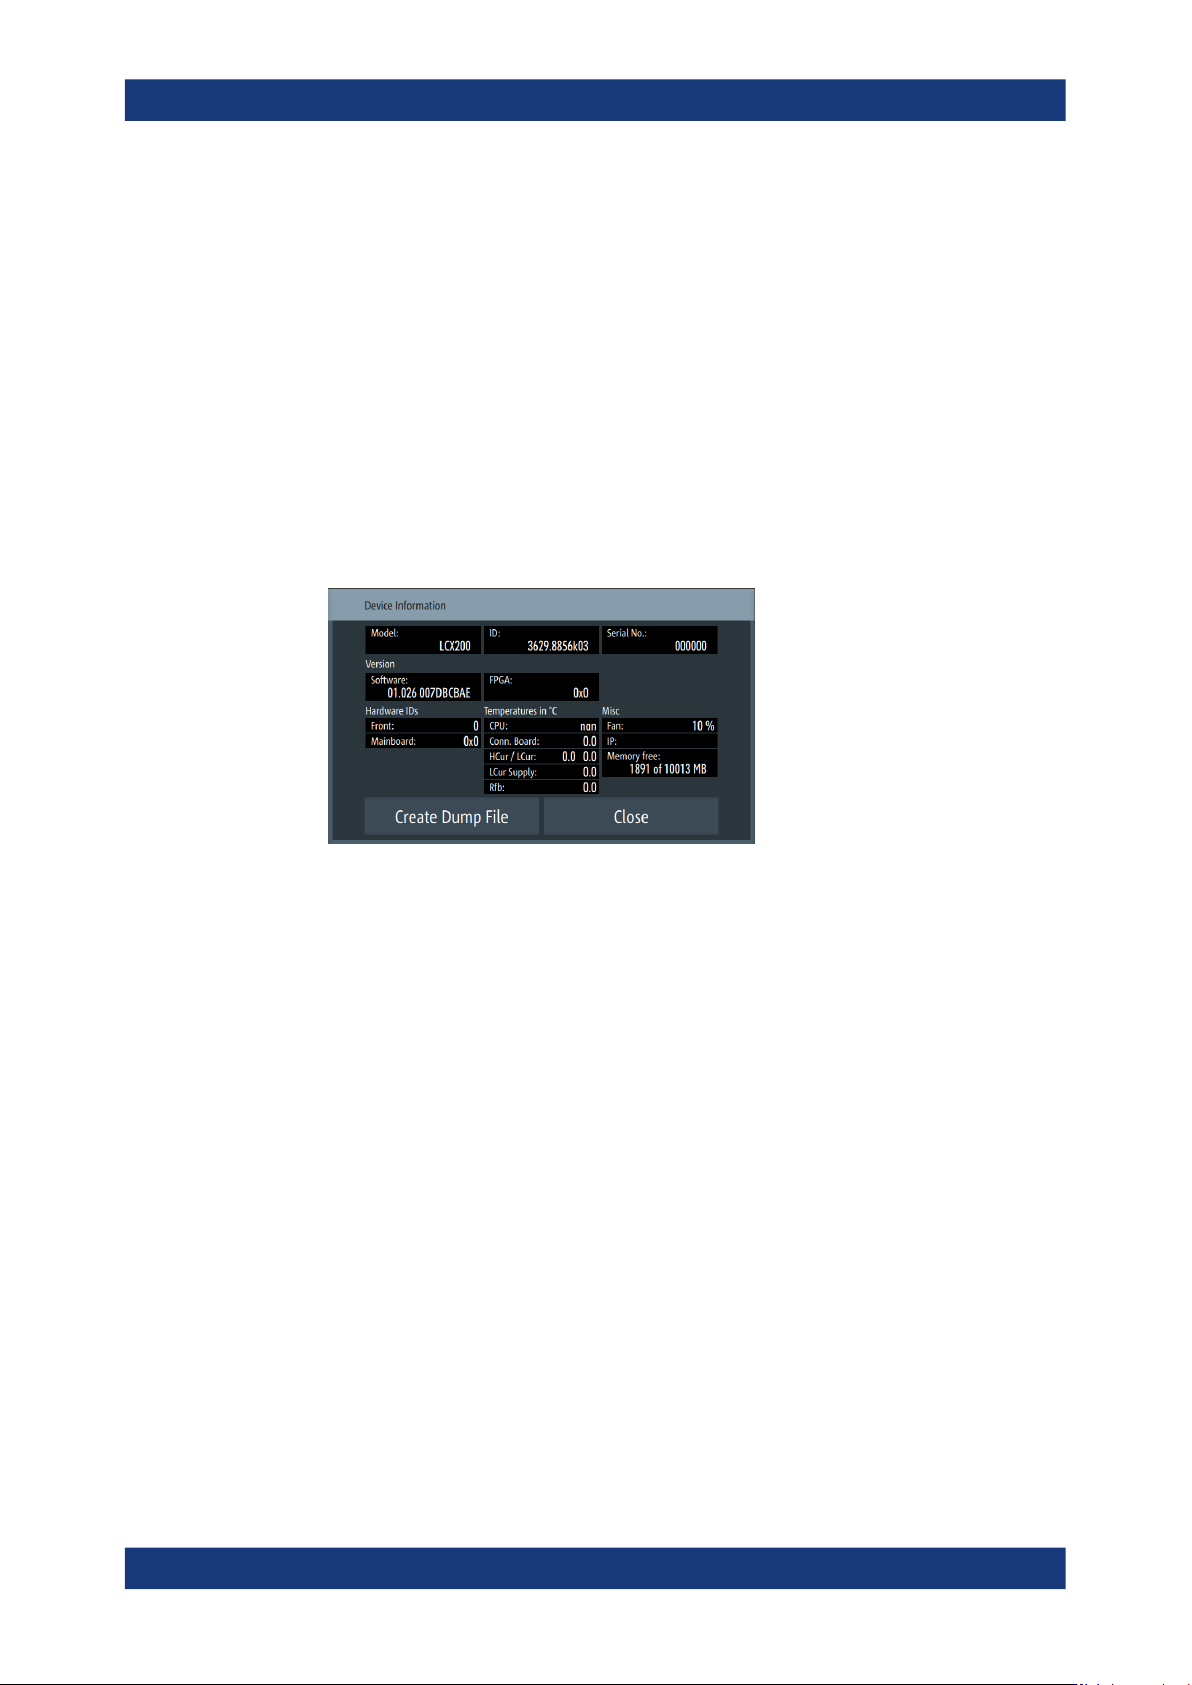
The "Device Information" window shows the characteristics of the instrument
assemblies. It also indicates the remaining available internal memory.
The required remote commands are described in Section 11.18, "SYSTem subsystem",
on page 231.
Device Information...................................................................................................... 138
Create Dump File........................................................................................................139
Device Information
Displays the main instrument information.
"Model"
Designation of the instrument.
"ID"
Part number of the instrument.
"Serial No.:"
Serial number of the instrument.
"Version"
Currently installed firmware version.
How to: see Section 9.11, "Update device", on page 140
"FPGA"
Version of the installed FPGA.
"Hardware IDs"
Unique serial number of the front and mainboard of the instrument.
Device information

General instrument functions
R&S
®
LCX Series
139User Manual 1179.2260.02 ─ 08
"Temperature in °C"
Note: If the temperature exceeds the specification, the R&S LCX dis-
plays a warning message.
Temperature of the CPU, connector board, H CUR and L CUR output
connectors, low current supply and Rfb (feedback resistor), indicated
in degrees.
"Misc"
Fan speed, IP address and memory capacity of the instrument.
Remote command:
SYSTem:HW:VERSion? on page 240
Create Dump File
Saves the device information in a file.
9.10.2 Using the dump file function
The dump file function allows you to save product-specific information in the file format
*.rsd. You can access and retrieve this device information file and forward it to the
service department, e.g. for analyzing or troubleshooting. Proceed as described in the
following examples.
To create a device information file
1. Press the [settings] key at the front panel.
2. Select "Device".
3. Select "Device Information".
4. Select "Create Dump File".
The R&S LCX generates a directory in the internal memory and saves the file
under /int/service/service.rsd.
Creating the file again, overwrites the existing file.
To export a device information file
1. Create a device information file.
How to: see "To create a device information file" on page 139.
2. Connect a USB memory device at the front panel USB A connector.
3. Press the [settings] key.
4. Select "Device" > "File Manager".
5. Copy the service.rsd file from the /int/service/ directory to the USB mem-
ory device.
Now you can upload and open the file to a PC.
How to: see "To open the device information file" on page 140.
For troubleshooting issues, send the file to your local service department.
Device information