YSi-SP_Ope_E.pdf - 第103页
2-66 2 Operation T he second fiducial mark is display ed. Follo w the procedure taken for the first mark. After correction of two marks is finished, click on the [>>] button. T he entered PCB data can be checked. A…
2-65
2
Operation
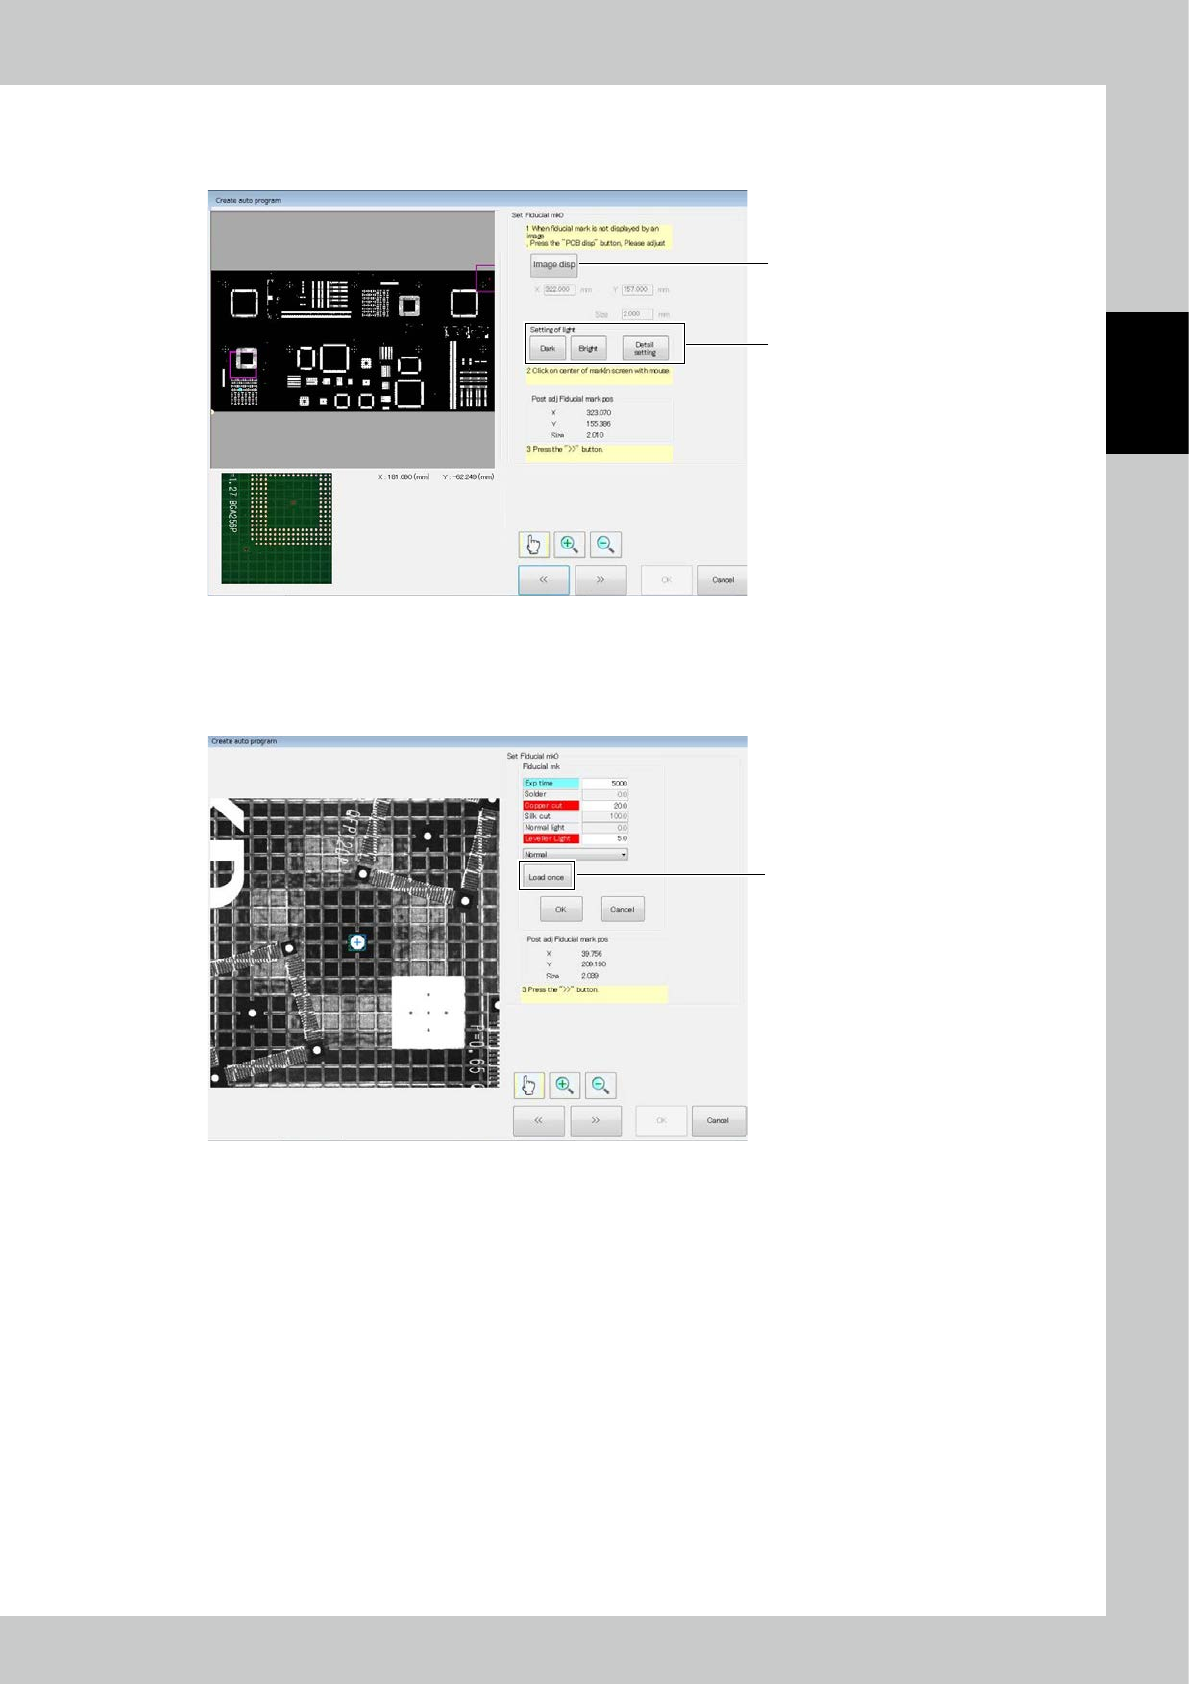
6. Press the [Image disp] button to change the position of the field of view.
Click on the PCB image. The field of view image is displayed below.
Adjust the position so that the fiducial mark is in the field of view.
6
7
24291-KMN-00
7. Press the [Detail setting] button to give detail settings for extracting the fiducial mark.
If the center is not successfully detected though the center of the mark is designated, change the extraction setting so
that the center is detected.
Press the [Load once] button to preview the image obtained with the new light intensity.
[Load once] button
24292-KMN-00
2-66
2
Operation
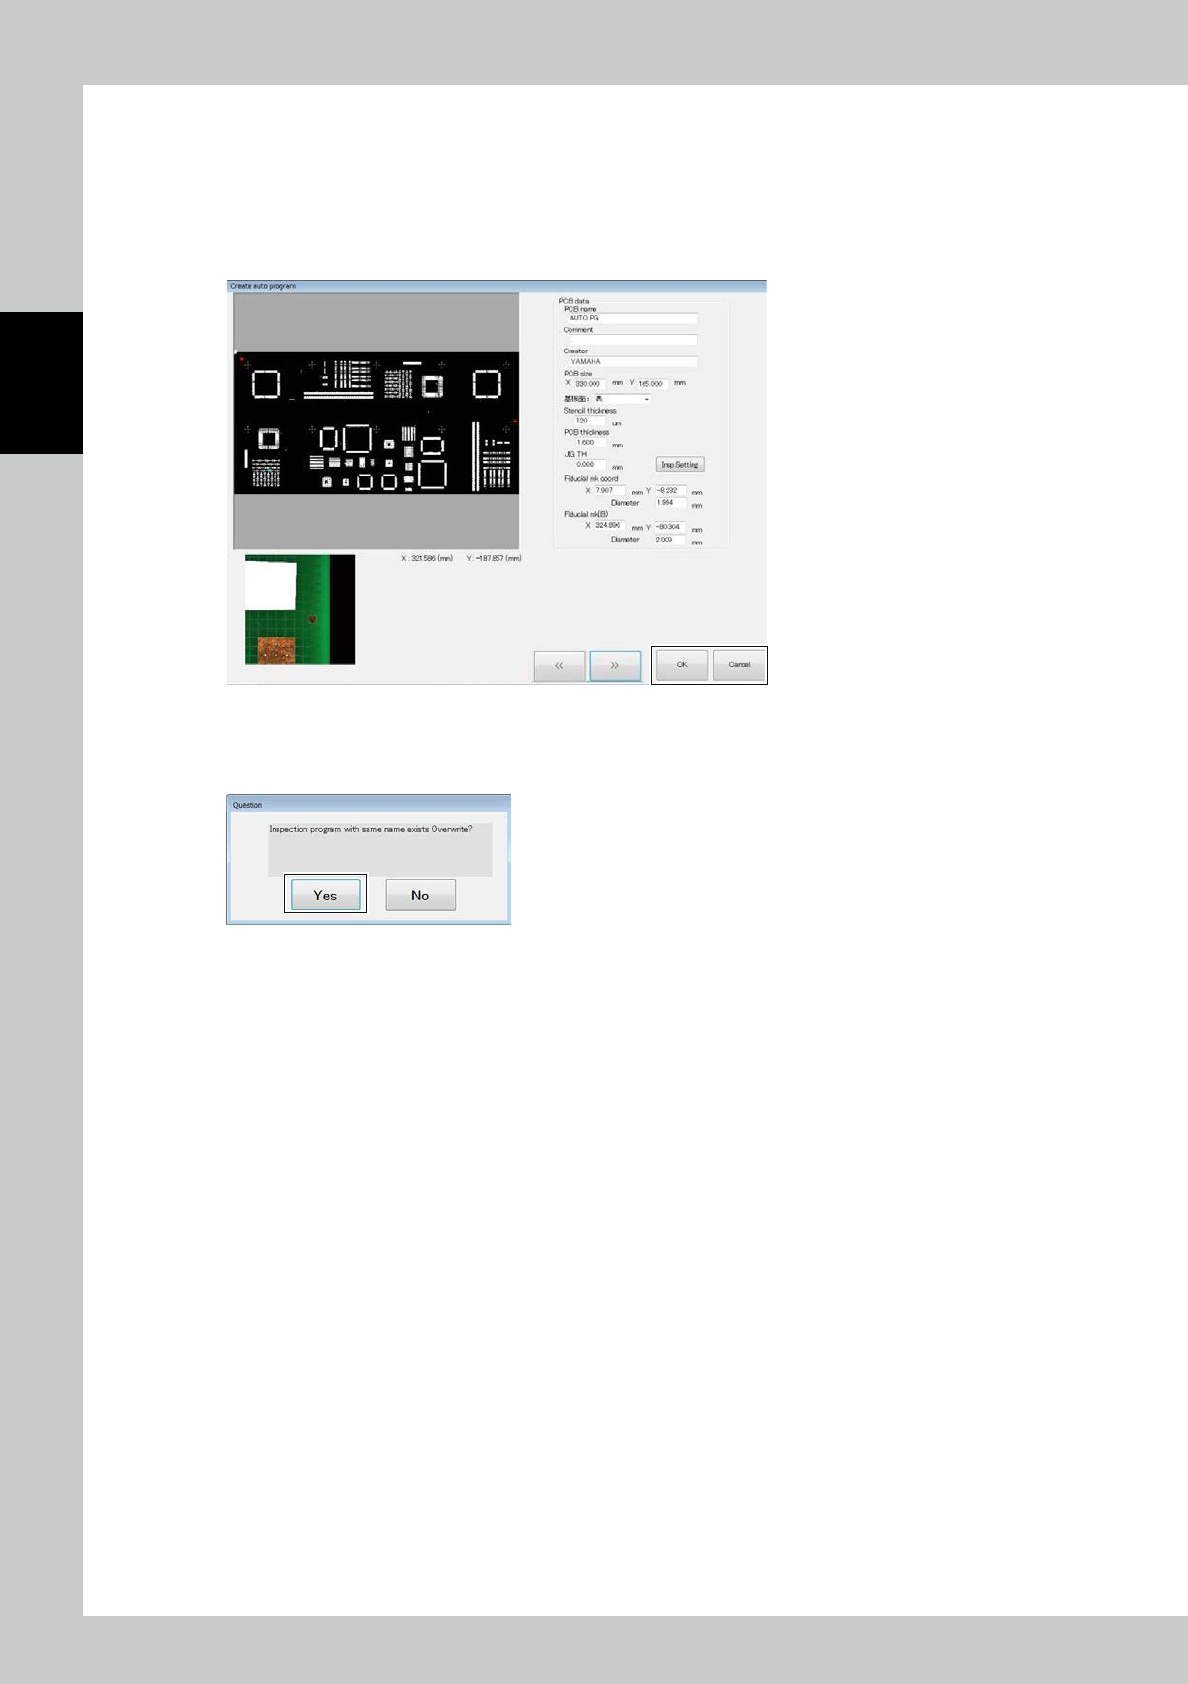
The second fiducial mark is displayed. Follow the procedure taken for the first mark.
After correction of two marks is finished, click on the [>>] button.
The entered PCB data can be checked.
After checking, click on the [OK] button to save the inspection program.
Or press the [Cancel] button to return to the menu without saving it.
24293-KMN-00
If another program of the same name is found, the following message is displayed.
Select [Yes] to save the program.
24294-KMN-00
2-67
2
Operation
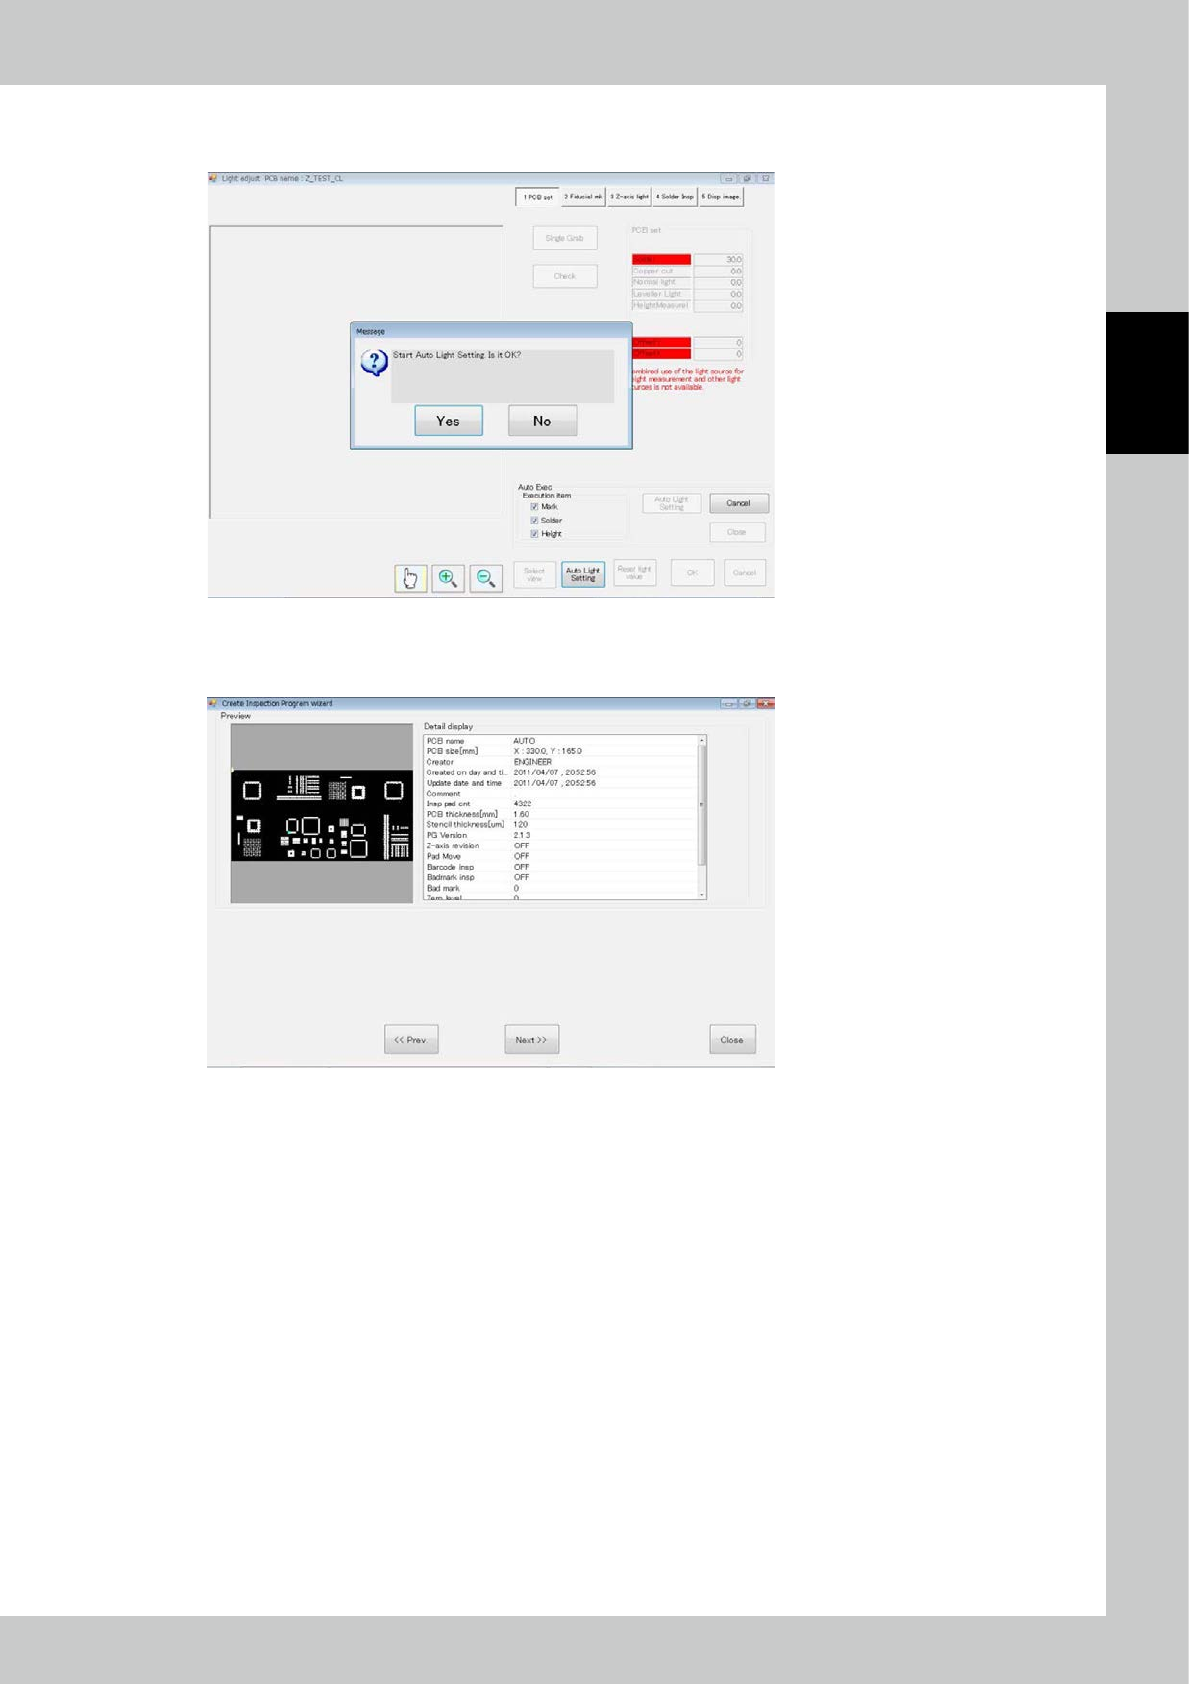
The light intensity adjustment screen is displayed and the above message is displayed.
To proceed automatic adjustment, select [Yes].
24295-KMN-00
If automatic adjustment is not successful, manually adjust.
After adjustment is finished, click on the [OK] button.
24296-KMN-00